YSi-SP_Ope_E.pdf - 第44页
2-7 2 Operation 2.4 PCB Change Select the PCB (inspection program) to be inspected. If there is alread y a PCB inside the inspection machine, remove it first. (F or the PCB removing method, refer to "2.5.2 Unloading…
2-6
2
Operation
2.3 Starting the Inspection Machine
Follow the procedure below to start the inspection machine.
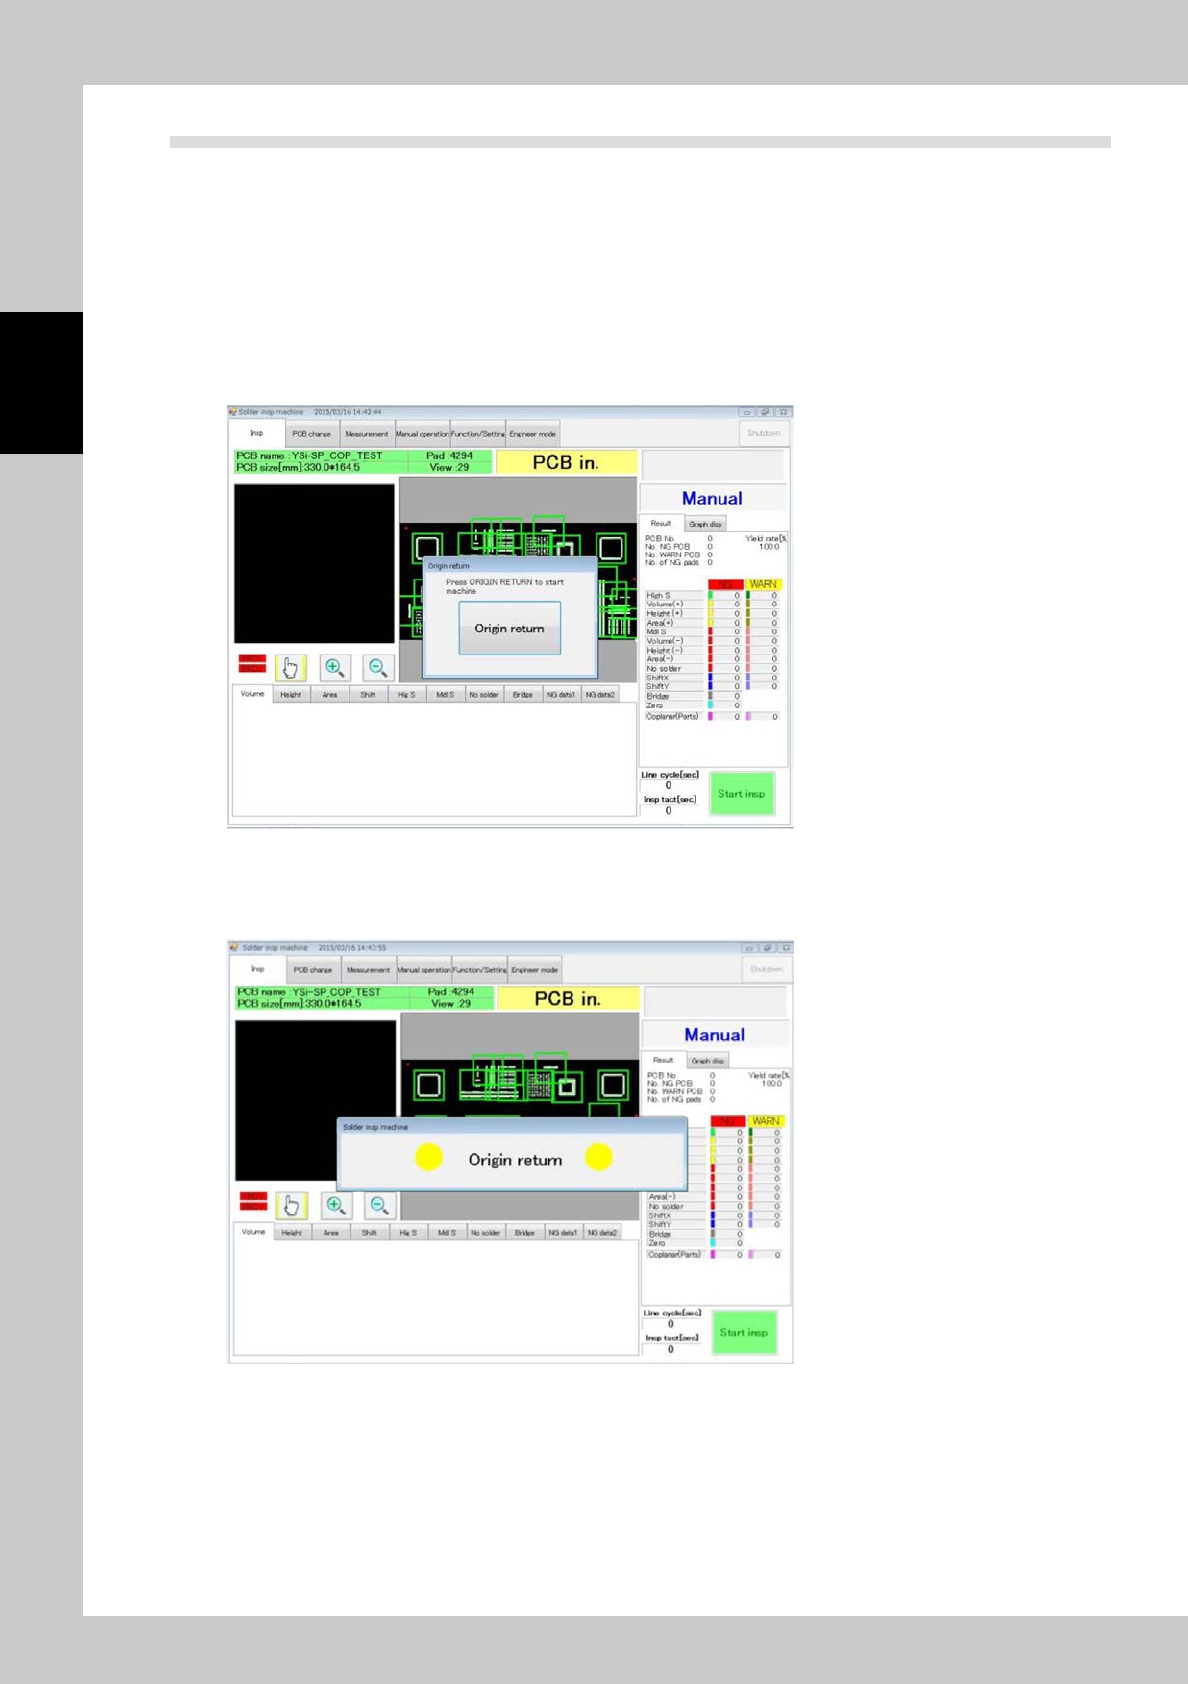
1
Turn the breaker on the machine face side to the right direction and turn the
control power on.
2
The user authentication window opens.
Select the user and enter the password. Touch the [OK] button.
3
The window shown below opens.
Touch the [Origin return] button.
24201-KMN-00
4
After the [Origin return] button is touched, the screen shown below is displayed,
and home return is executed.
24202-KMN-00
5
After home return is finished, the machine is ready to start inspection.
2-7
2
Operation
2.4 PCB Change
Select the PCB (inspection program) to be inspected. If there is already a PCB inside the inspection machine,
remove it first. (For the PCB removing method, refer to "2.5.2 Unloading the PCB".)
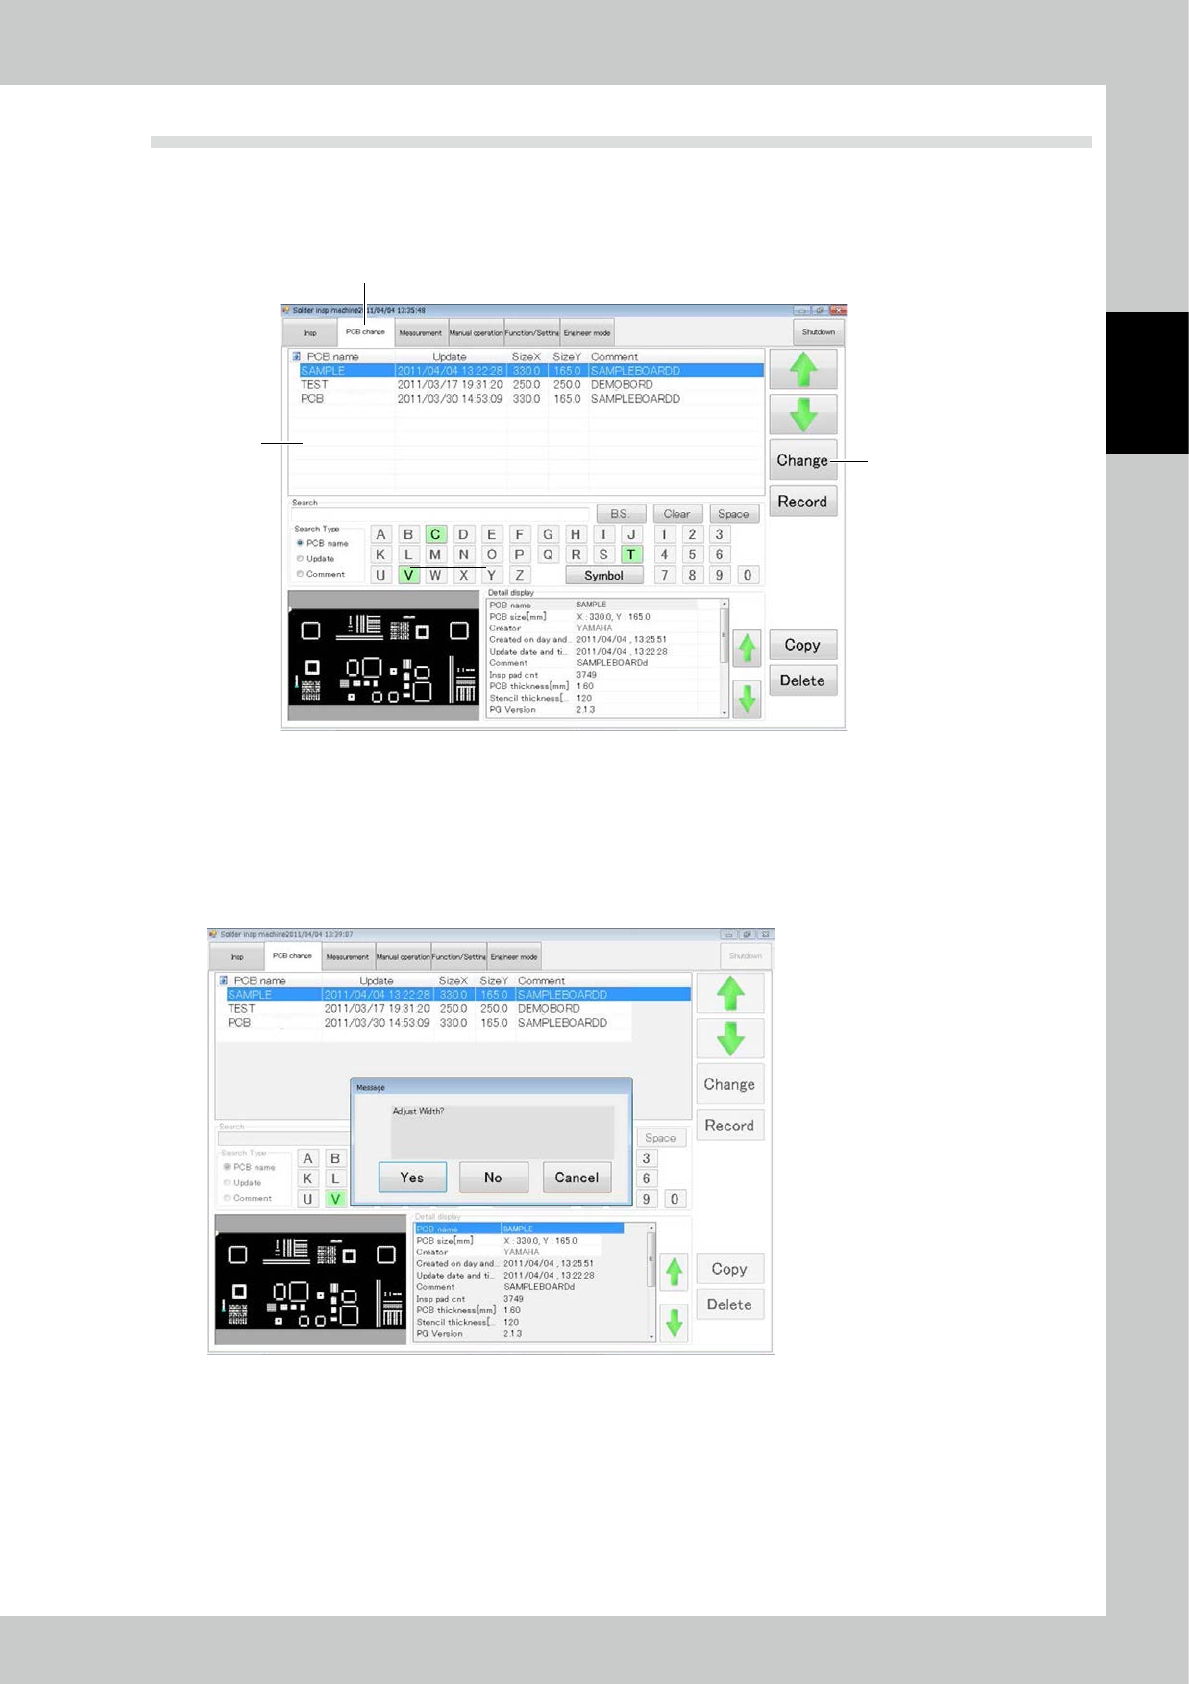
1
Touch the “PCB change” tab on the main menu screen.
3
2
1
24203-KMN-00
2
The screen shown above is displayed. Select the desired PCB from the list.
3
Touch the [Change] button to change to the selected PCB.
4
After the PCB is changed, the window shown below opens.
Specify whether or not to perform automatic width adjustment during PCB change.
24204-KMN-00
2-8
2
Operation
5
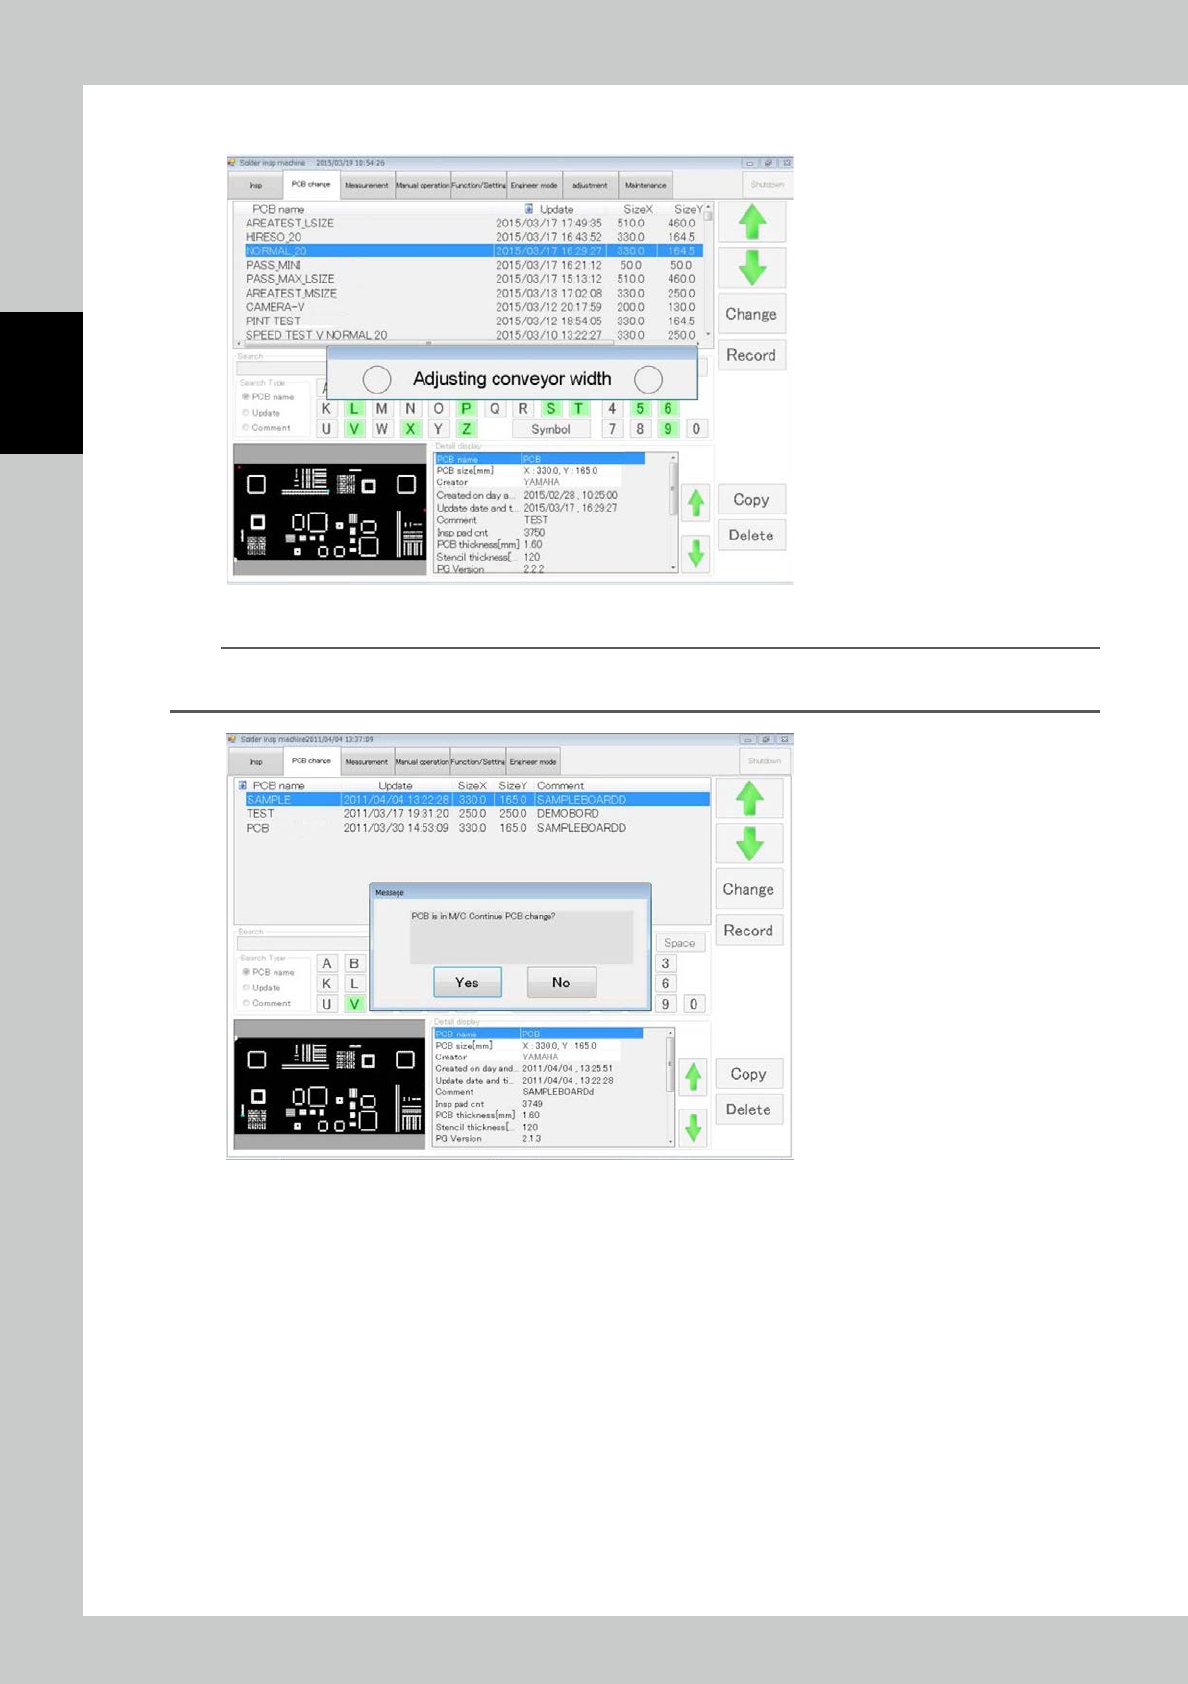
Touch [Yes] to open the window shown below. Adjustment is executed.
24205-KMN-00
n
NOTE
If there is another PCB inside the PCB when the PCB is being changed, the window shown below is displayed. Touch
[Yes] to execute PCB change only without width adjustment.
24206-KMN-00