YSi-SP_Ope_E.pdf - 第115页
2-78 2 Operation 2. Fiducial mark 2 4 1 3 5 242A9-KMN-00 1. T ouch the [Fiducial mk1] button. 2. When the [Chec k] button is touched, the screen shows the result of c heck. The reference fr ame is displayed in w hite, wh…
2-77
2
Operation
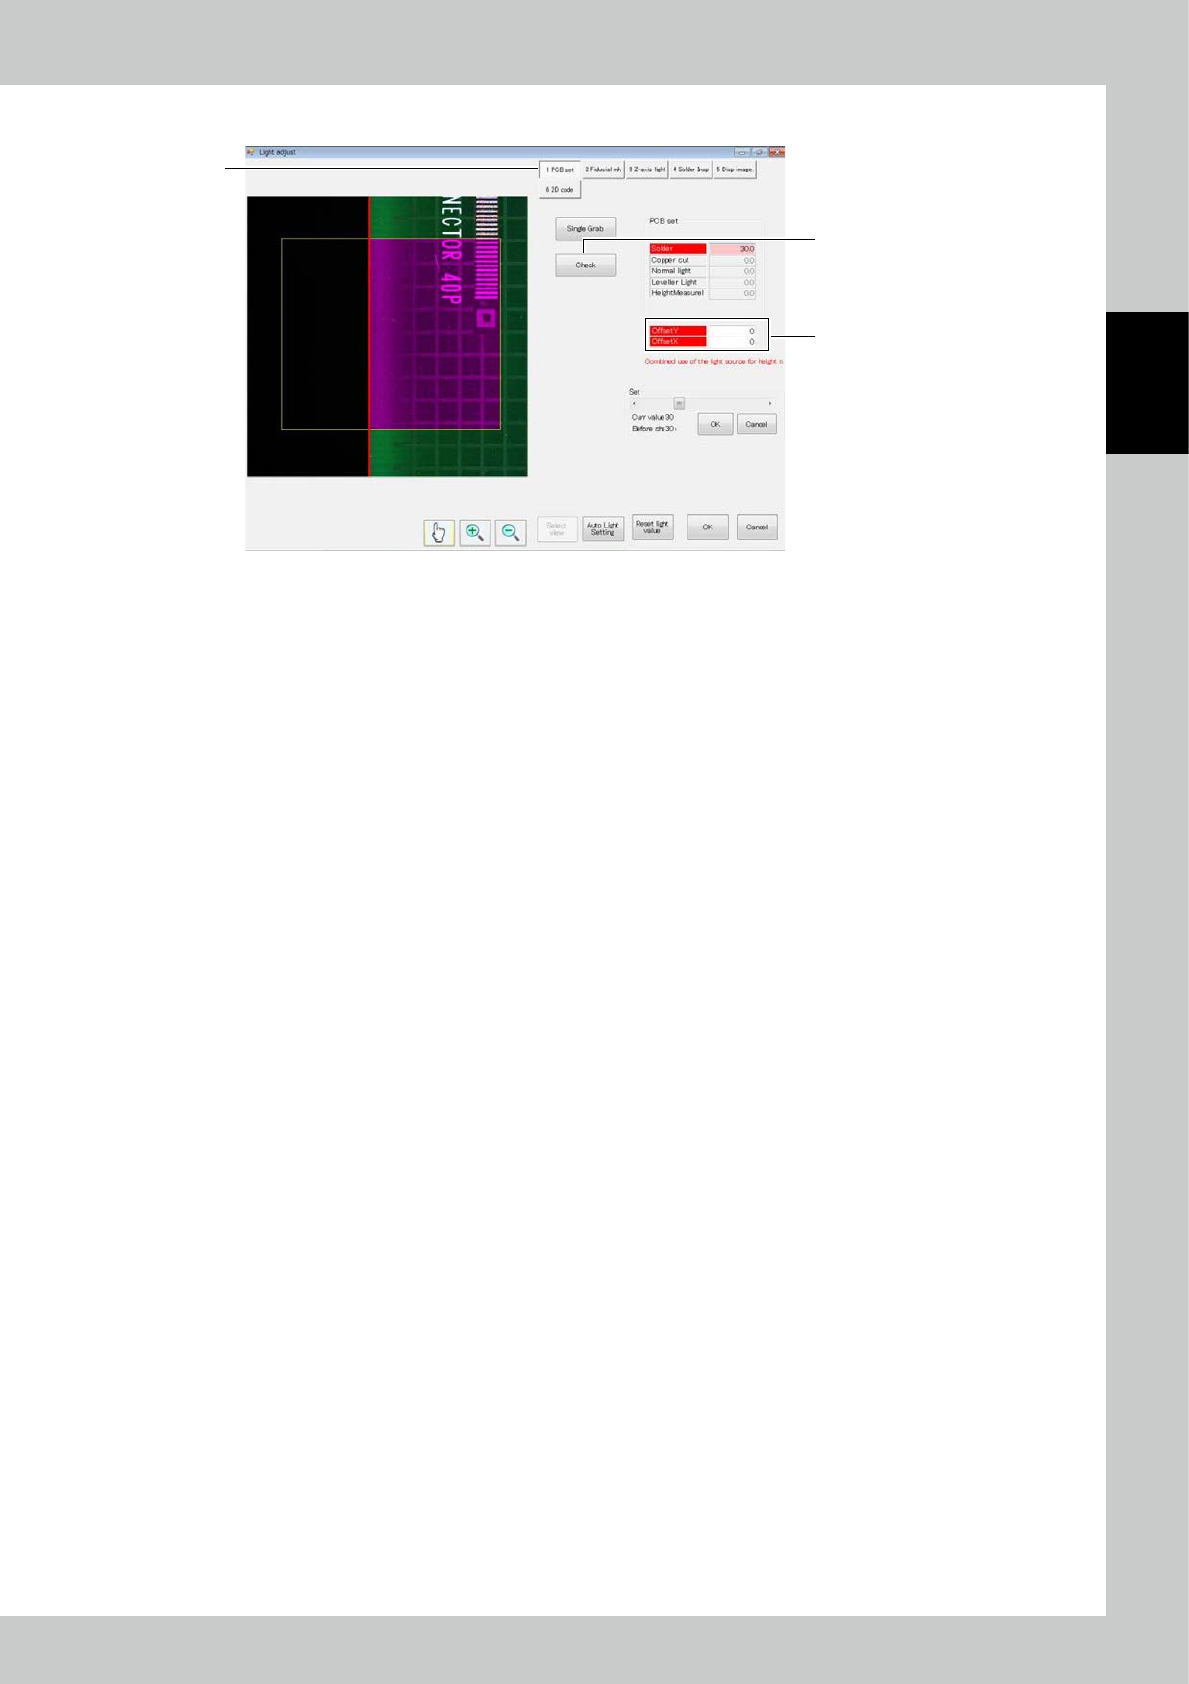
1. PCB set
2
1
3
242A8-KMN-00
1. Touch the [PCB set] button.
2. Touch the [Check] button to acquire the image and show the result on the screen.
Check that the end of the PCB is red line.”
3. Touch “Offset” to adjust the position.

2-78
2
Operation
2. Fiducial mark
2
41
3
5
242A9-KMN-00
1. Touch the [Fiducial mk1] button.
2. When the [Check] button is touched, the screen shows the result of check. The reference frame is displayed in white,
while the accurate frame is displayed in blue.
3. Touch the [<<] or [>>] button to switch between fiducial mark 1 and fiducial mark 2, and perform the similar
procedure to adjust.
■
Description of screen
No. Name Displayed data and function
4 Select fiducial mark Enter the setting of the selected fiducial mark.
5
Select judgment
method
Change the fiducial mark judgment method. According to the setting, the
silhouette displayed at the lower right of the screen changes.
2-79
2
Operation
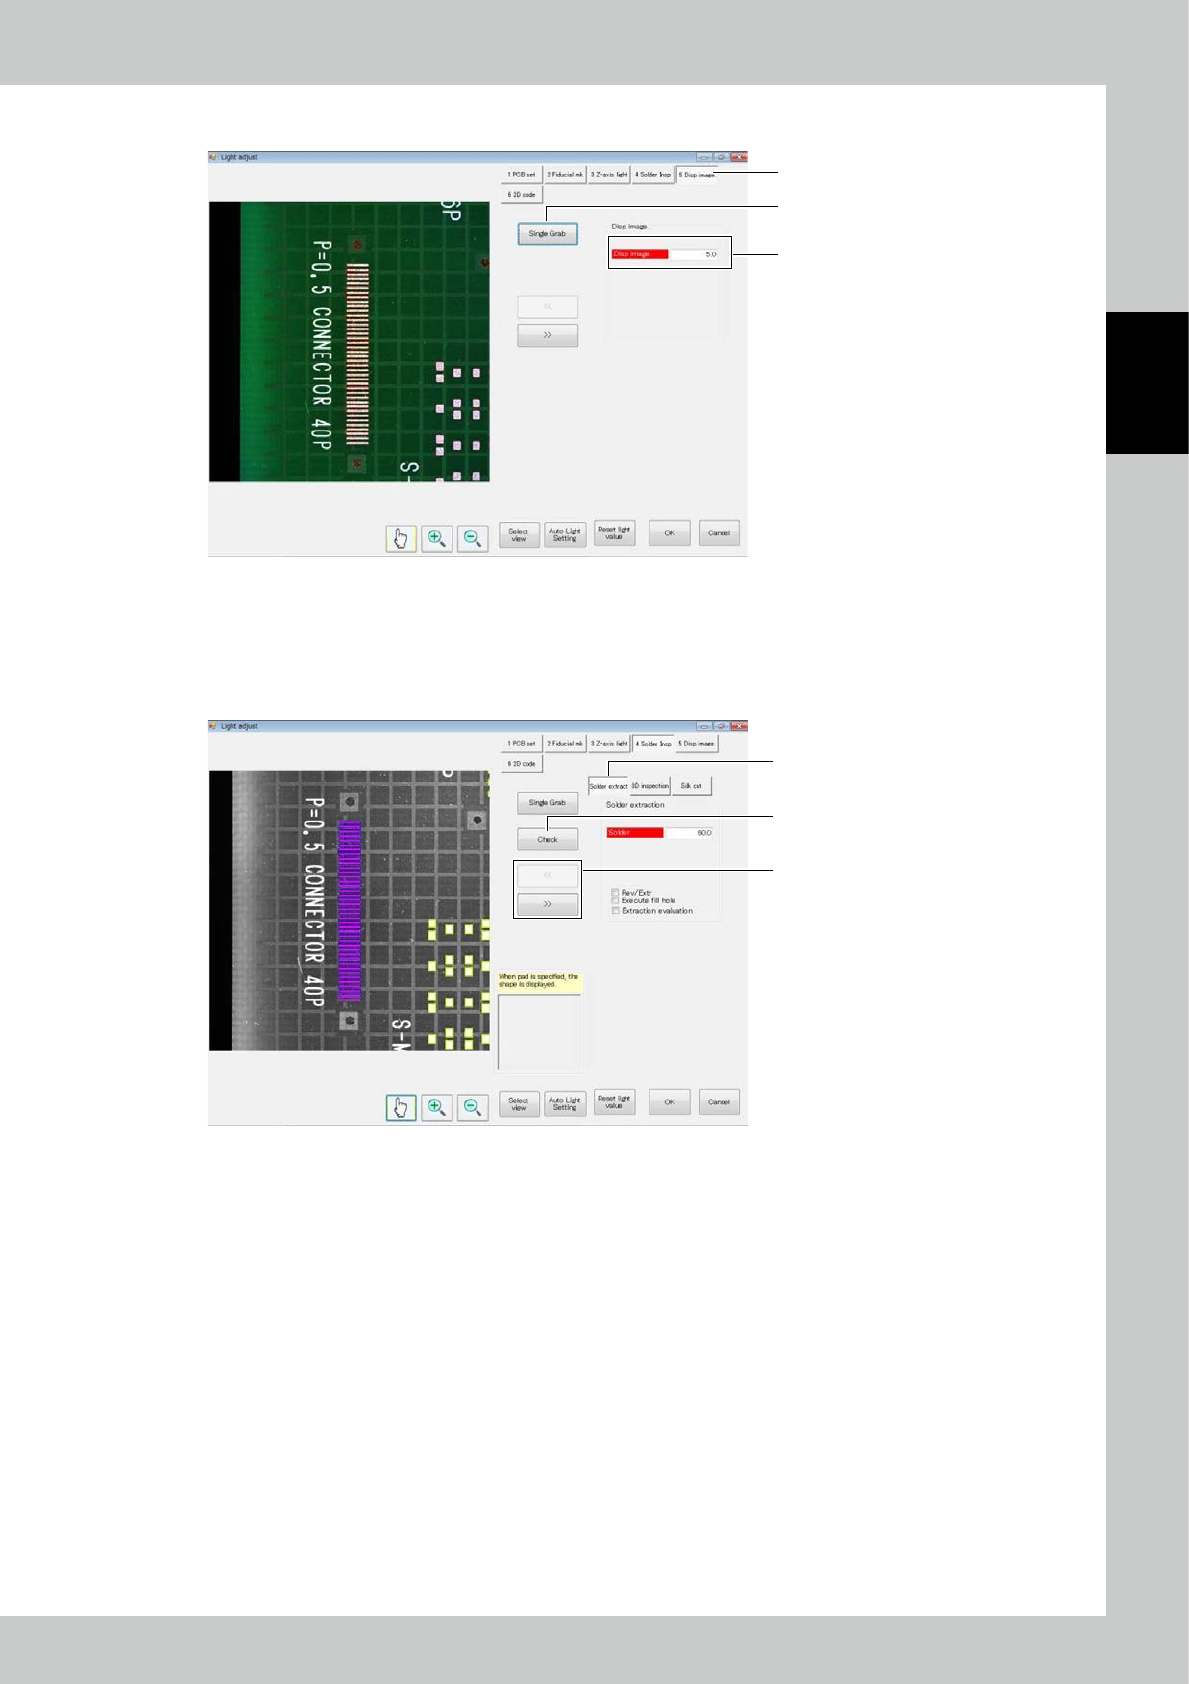
3. Normal image
2
1
3
242B0-KMN-00
1. Touch the [Dsp image] button.
2. Touch the [Single Grab] button to refresh the image.
3. Change the normal light source value to change the brightness of the image.
4. Solder extraction
1
3
2
242B1-KMN-00
1. Touch the [Solder Insp] button. Touch the [Solder extraction] button.
2. Touch the [<<] or [>> button to select the field of view.
3. Touch the [Check] button to display the results of check on the screen.