YSi-SP_Ope_E.pdf - 第73页
2-36 2 Operation 4 5 6 1 2 3 7 8 9 10 11 XY table screen 24244-KMN-00 No Name Description of displayed item and functions 1 Wide area travel screen The XY table traveling area is indicated with a blue screen. T ouch the …
2-35
2
Operation
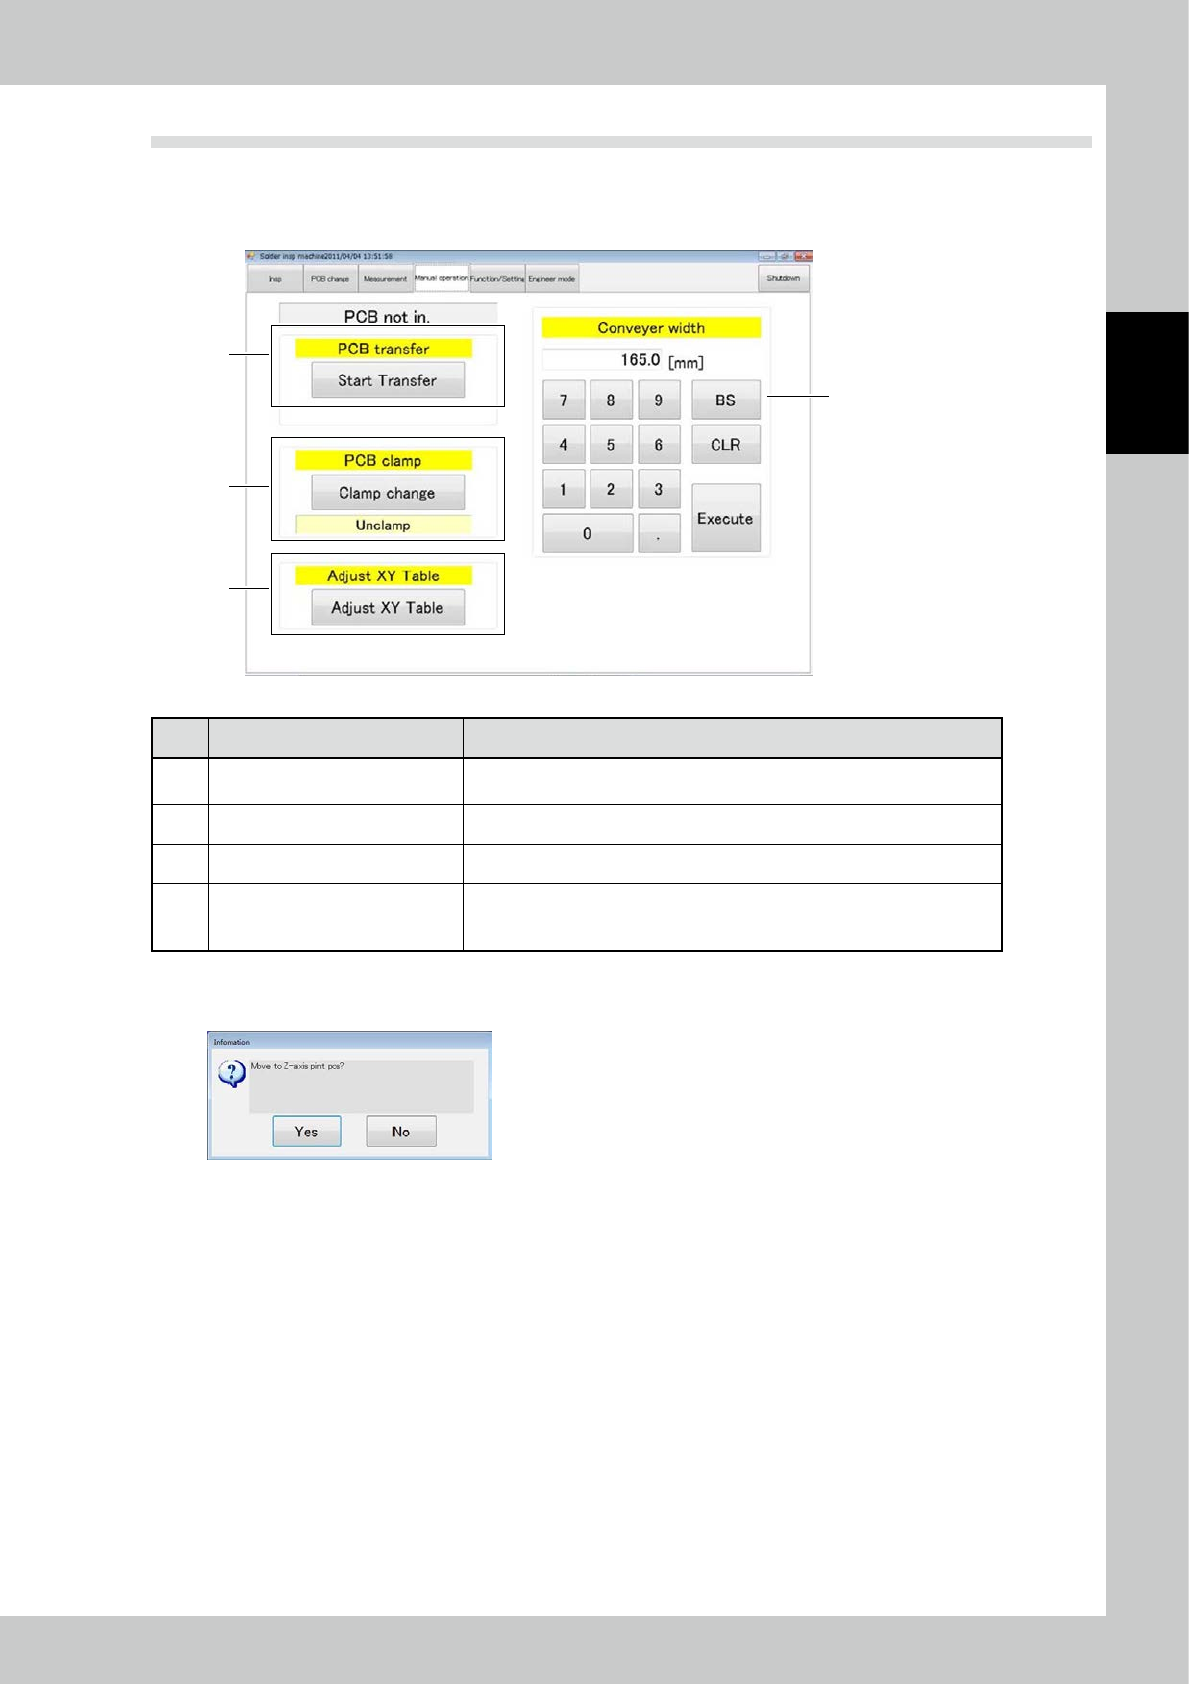
3.5 Manual Operation
Items displayed on the manual operation screen and functions are described. On the manual operation screen,
you can manually transfer the PCB or switch the PCB clamp. Touch the [XY table] button to open the XY table
screen.
3
1
4
2
24242-KMN-00
No. Name Description of displayed item and functions
1 PCB transfer
The PCB can be loaded or unloaded in the standalone inspection mode. For
the operation method, refer to "2.5 PCB Transfer".
2 PCB clamp Press the [Clamp change] button to alternate the PCB clamp state.
3 Adjust XY table The XY table can be adjusted.
4 Conveyor width
The conveyor width is adjusted to the designated value. Enter the desired
number at the ten-key pad and touch the [Execute] button. (Use this function
without a PCB inside the inspection machine.)
XY table screen
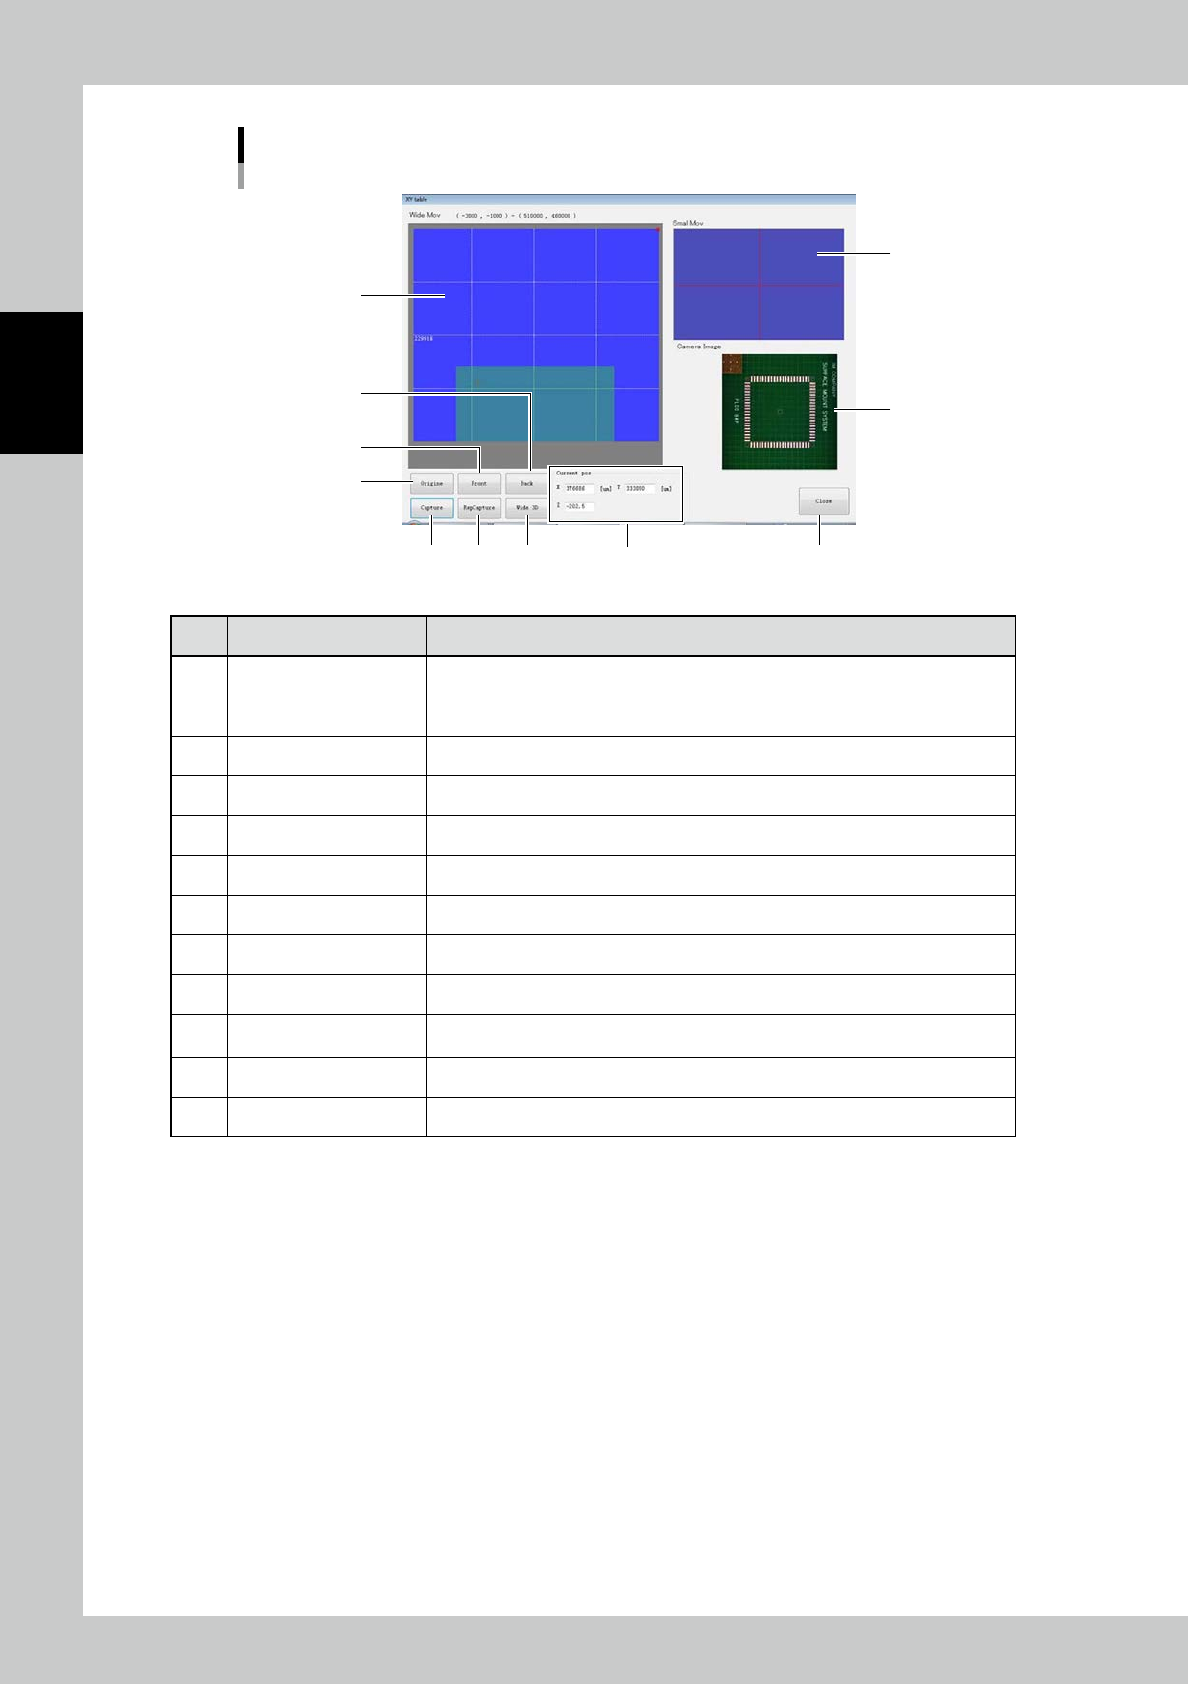
Touch the [XY table] button to open the screen shown below.
24243-KMN-00
Touch [Yes] to open the XY table screen shown on the next page.
2-36
2
Operation
4
5
6
1
2
3
7 8 9
10
11
XY table screen
24244-KMN-00
No Name Description of displayed item and functions
1 Wide area travel screen
The XY table traveling area is indicated with a blue screen. Touch the screen to
move the XY table to a desired position. The position of the XY table is indicated
with a pink cross. The bottom side of the screen corresponds to the nearer side of
the inspection machine.
2 Detail travel screen The machine moves similarly to 1); the XY table travels finely.
3 Camera image The camera image is displayed.
4 [Origin] button The XY table travels to the home position of the inspection machine.
5 [Front] button The XY table travels so that the camera unit is in the nearest position.
6 [Back] button The XY table travels so that the camera unit is in the farest position.
7 [Single Grab] button The image is acquired once.
8 [Continuous Grab] button Images are acquired continuously.
9 [Wide 3D] button
The wide area measurement screen opens. (Refer to "3.4.2 Wide Area Measurement
Screen".)
10 Current pos The X and Y coordinates are displayed. Enter desired values to move the XY table.
11 [Close] button Exit to return to the manual operation screen.
2-37
2
Operation
3.6 Function/Setting
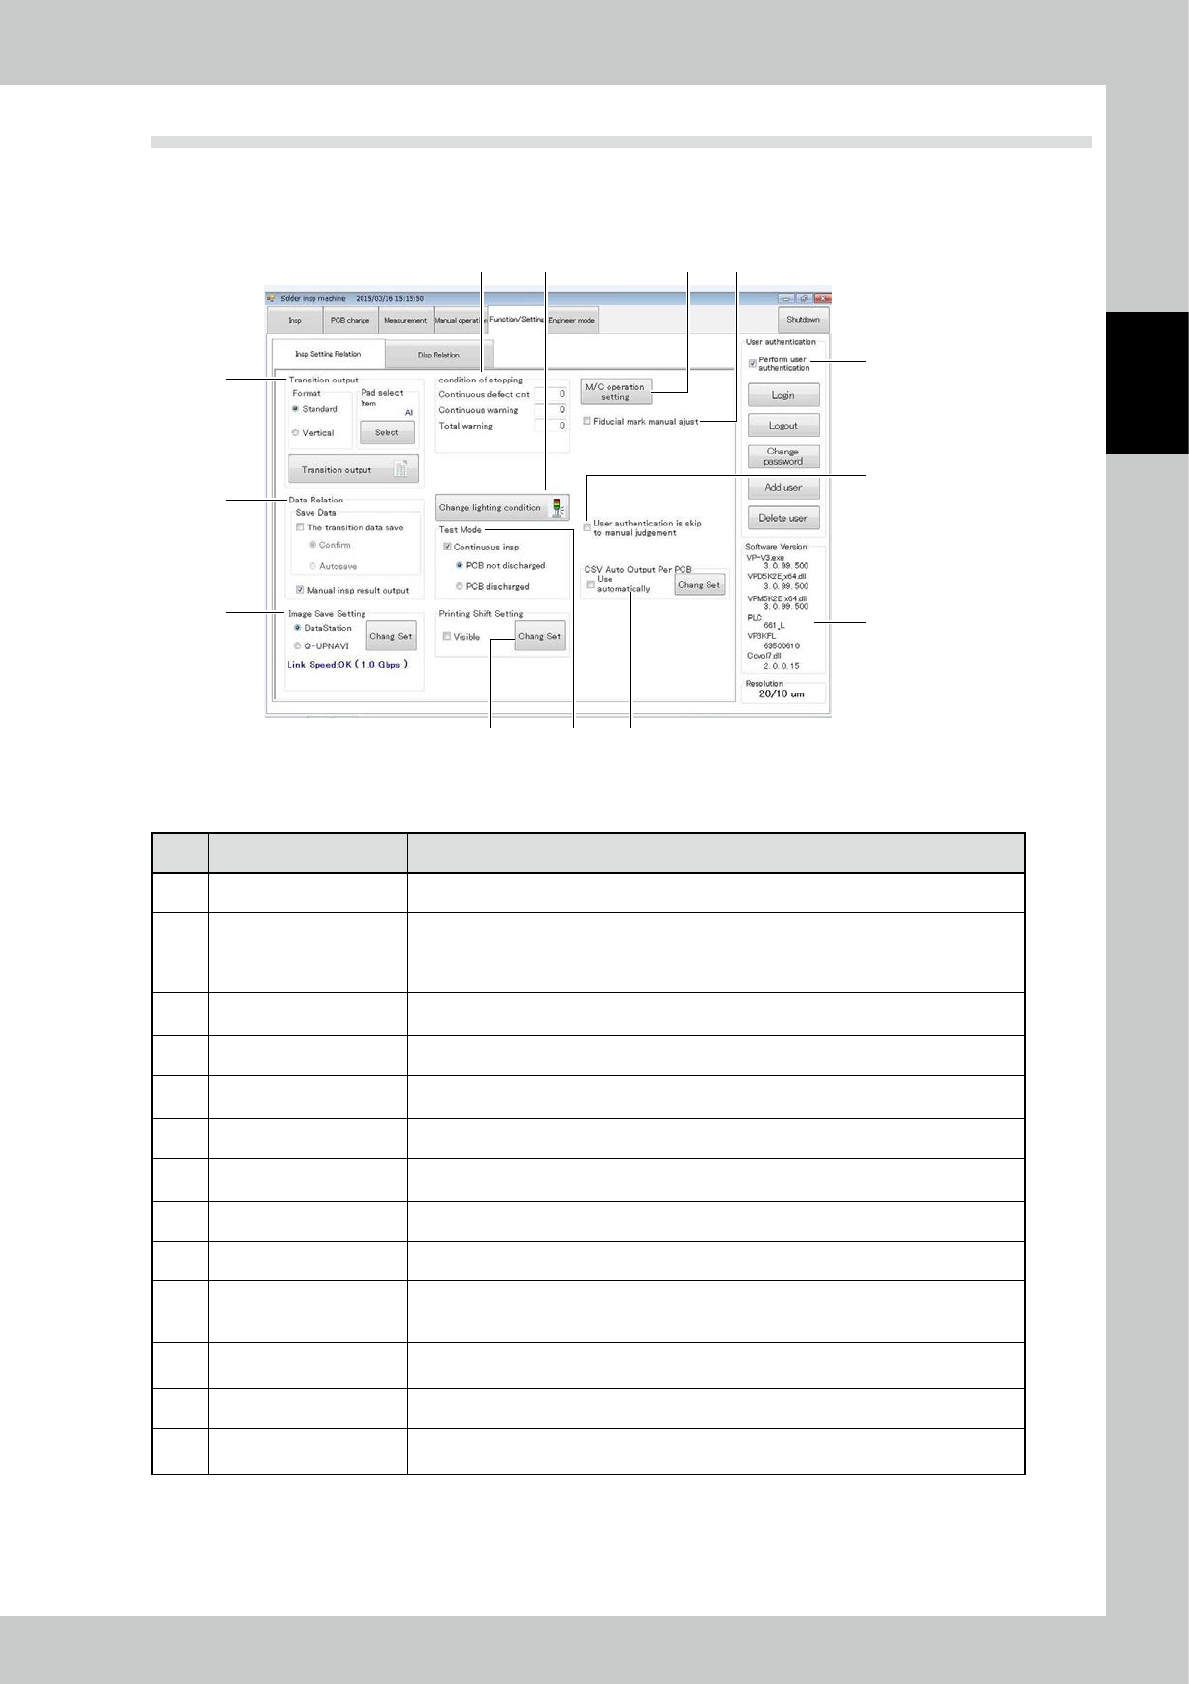
Items displayed on the function/setting screen and functions are described. You can configure the main body of
the inspection machine on this screen.
The setting screen includes insp setting relation and display relation.
4 5
6
1
2
3
7
8
9
10 11
12
13
24245-KMN-00
■
Insp Setting Relation
No Name Description of displayed item and functions
1 Transition output The inspection results are converted into a CSV file.
2 Data Relation
[The tradition data save] Save the inspection data upon PCB change.
[Confirm] Show a confirmation message when the data is stored.
[Autosave] Save the data without a message.
[Manual insp result output] Output the data even during inspection in the manual mode.
3 Image Save Setting
Enter settings for storing the measured image to an external PC.
(Refer to "3.6.2 Image Save Setting".)
4 Condition of stopping Enter conditions for stopping the machine during automatic operation.
5 Change Lighting condition
Change conditions for lighting the tower light of the equipment. (Refer to "3.6.4 Tower
Light Setting".)
6 Test Mode Mode for testing the PCB during automatic operation. The PCB is not discharged.
7 Print Gap Setting
Enter settings for displaying the result of print gap on the inspection screen.
(Refer to "3.6.6 Print Gap Setting".)
8 User authentication The "operator authentication screen" is displayed. (Refer to "3.6.3 User Authentication".)
9 Software version The version of the inspection machine control system is displayed.
10 M/C operation Setting
Change the loading and unloading speed of the conveyor of the main body.
Also, change the setting for obtaining the buffer when operating. (Refer to"3.6.7 M/C
operation setting".)
11
Fiducial mark manual
adjust
Manual registration can be made upon a mark recognition error. (Refer to "3.6.8 Fiducial
mark manual adjust")
12 Skip When manual inspection,skipping a user authentication.
13 CSV Output
After inspection every time has ended,data is output.(Refer to "3.6.13 CSV Auto Output
Per PCB")