YSi-SP_Ope_E.pdf - 第143页
3-8 3 Optional Functions [In case of manual entr y] 1. T ouch letters or numbers in area 1 to enter the 2D code manually . TIP Y ou can use the keyboard located in front of the main body to enter . An enlarged view of th…
3-7
3
Optional Functions
1.6 If There Is a 2D Code Read Error
A read error may be caused in the following cases.
• There is dust on the 2D code.
• The 2D code is chipped.
• The coordinates are wrong.
• The light amount is incorrect.
• The 2D code is not in the designated 2D code format.
[Remedy upon an error]
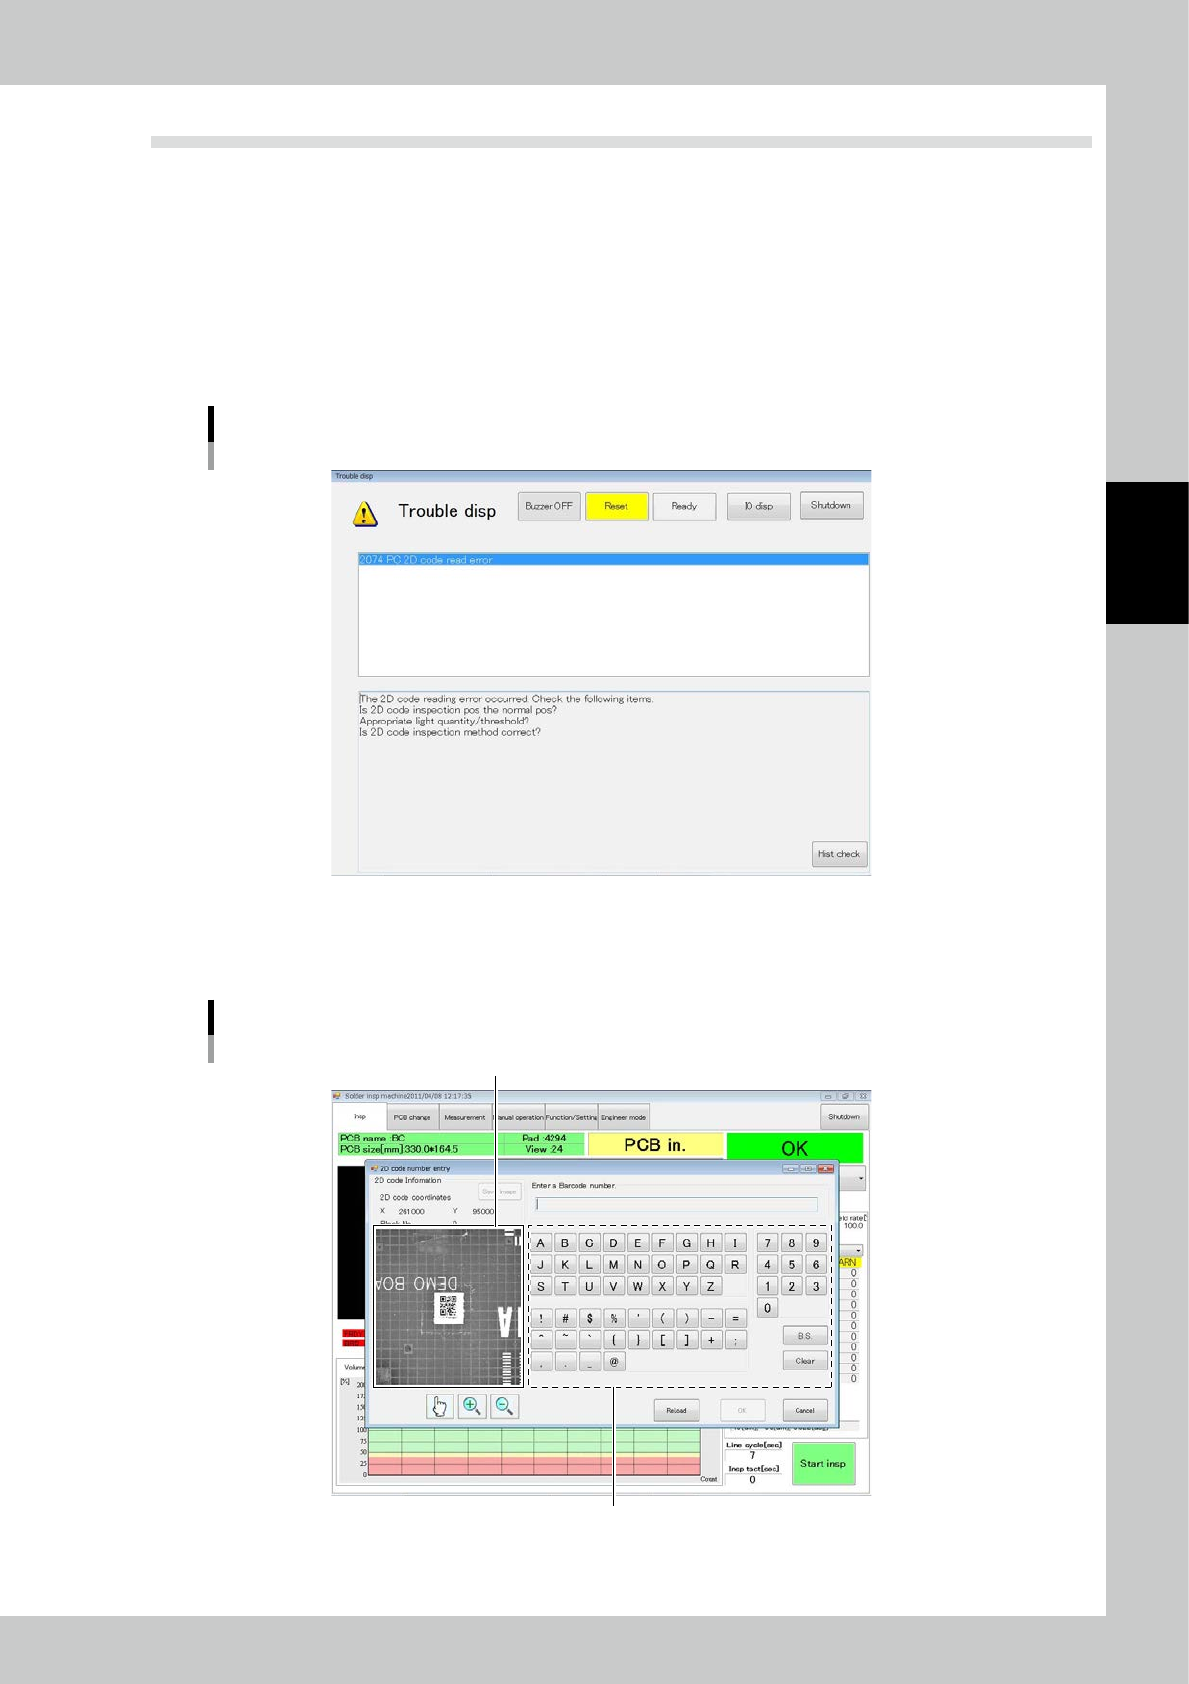
1. A buzzer sounds and the following error message is displayed and inspection is stopped.
2D code read error screen
24308-KMN-00
2. Touch the [RESET] button.
3. If the reading error does not improve after light intensity adjustment, adjust detail settings.
The reading characteristics can be improved.
Enlarged view of 2D code
Keypad for 2D code registration
Reset
24309-KMN-00

3-8
3
Optional Functions
[In case of manual entry]
1. Touch letters or numbers in area 1 to enter the 2D code manually.
TIP
You can use the keyboard located in front of the main body to enter.
An enlarged view of the 2D code is displayed on the right side pane of the screen (Fig. 24309-KMN-00). If the description
of the 2D code is written, enter the 2D code manually while looking at the raw image.
If the description of the 2D code is not written, imagine the 2D code according to the previous and following PCBs to
enter the 2D code.
6987 5 4
3
2
1
2D code manual entry form
24311-KMN-00
2. Touch [B.S.] 2 to delete the right most character of the entered 2D code.
3. Touch [Clear] 3 to delete all the entered 2D code.
4. Enter the 2D code 4 and touch [OK] to settle the entered data.
5. Touch [Reload] 5 to refrain from manual entry and inspect again. Light amount adjustment may be effective for
reloading.
6. Touch [Cancel] to cancel the process.
7 Cancel the zoom-in/out mode.
8 Start the zoom-in mode.
9 Start the zoom-out mode.
[To inspect again with the inspection machine]
Touch [Reload] on the manual entry screen (Fig.24311-KMN-00) to return to the regular inspection screen.
3-9
3
Optional Functions
2. Extension Conveyor unit
The visual inspection for board that is judged fail in auto inspection is enabled when selecting optional
extension conveyor unit.
2.1 Overview of extension conveyor unit
There are 2 types of extension conveyor unit: for entrance and for exit.
• Extension conveyor unit for entrance
When another board is already set in the inspection machine, a board stops in the extension conveyor unit for entrance.
• Extension conveyor unit for exit
The board judged fail in auto inspection stops in the extension conveyor unit for exit.The board can be removed
manually for visual inspection.
Additionally, when a board is in the extension conveyor unit for exit, the next auto inspection can be performed.
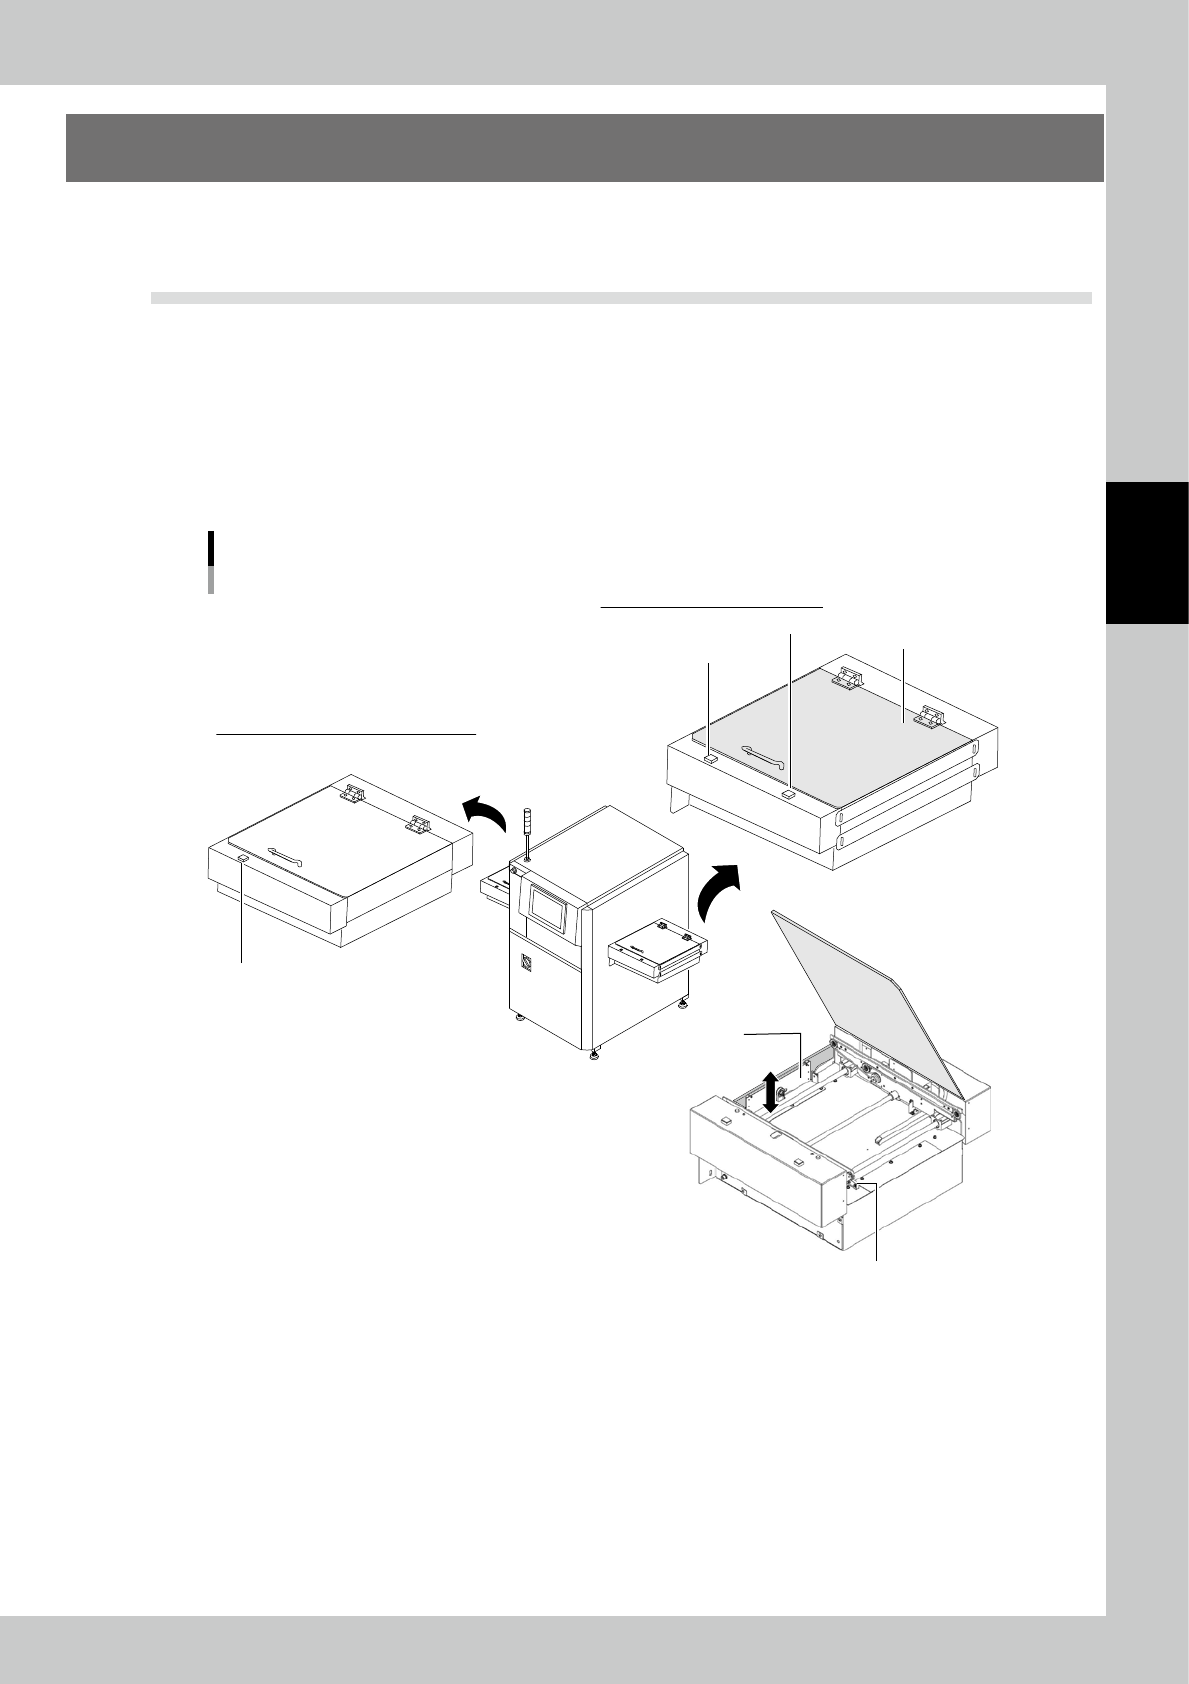
Names of parts
YSi-SP Extension conveyor unit (Example: transfer from left to right)
[Shutter Open/Close] switch
[Restart] switch
Shutter
Extension conveyor unit for entrance
[Shutter Open/Close] switch
Extension conveyor unit for exit
Conveyor cover
Extension conveyor exit sensor
23303KMN-00
• [Shutter Open/Close] switch / Shutter
The shutter between extension conveyor and inspection machine moves up by pressing the [Shutter Open/Close] switch.
Note that the [Shutter Open/Close] switch lights up while the shutter is moving up.
• Conveyor cover
The conveyor cover is lock type and it is closed and locked during automatic operation.
The lock is released when the machine is powered off or the shutter is moving up ([Shutter Open/Close] switch lights up)
and cover can be opened.
• [Restart] switch
It is on the extension conveyor unit for exit. When the board is returned in the extension conveyor after the visual
inspection,pressing this switch transfers the board to the downstream machine. Then the extension conveyor can accept
the inspected board.