YSi-SP_Ope_E.pdf - 第35页
1-19 1 Over view and maintenance of machine 6.4 T roubleshooting Mechanism No. Error Cause Measures Conveyor 1 Sliding or jamming of a board Wear of the belt Replacing the belt 2 Adherence of foreign materials such as oi…
1-18
1
Overview and maintenance of machine
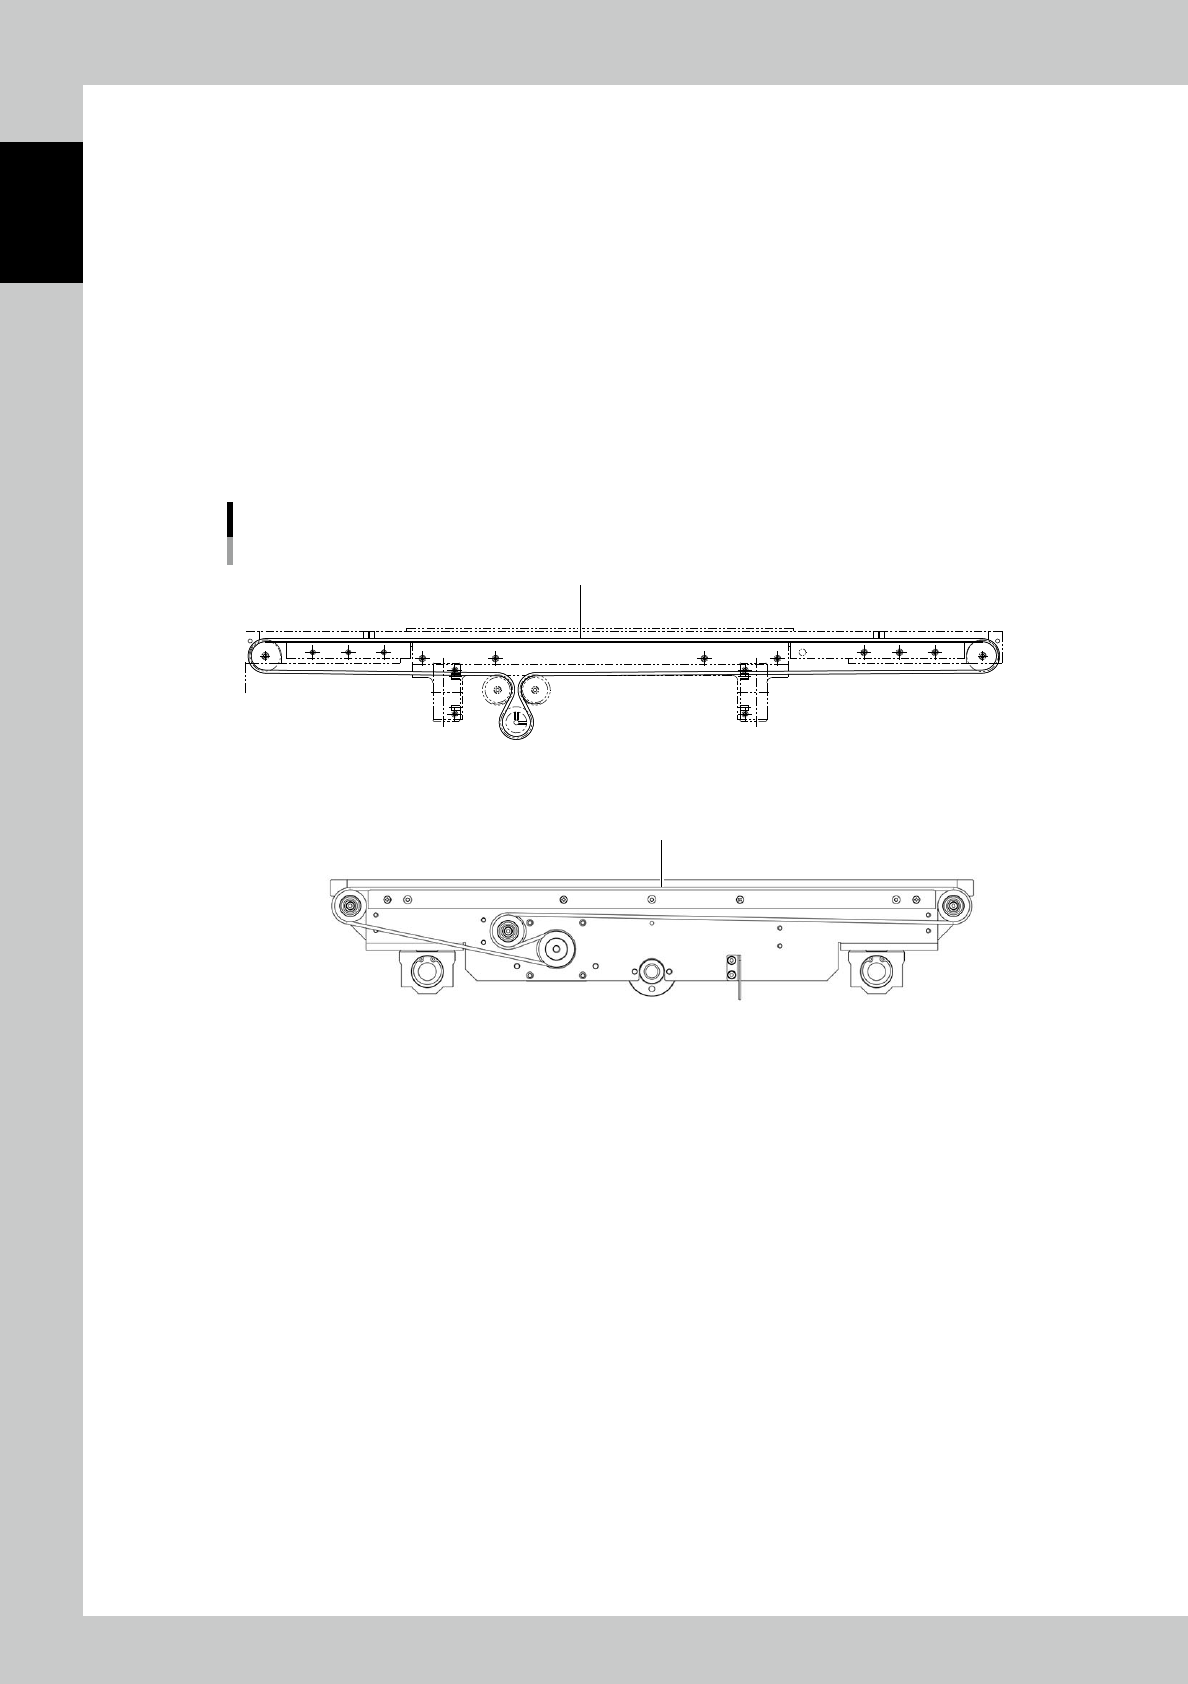
6.3.2 Replacement of the conveyor belt
The circumference of the belt for board conveyor provides the adequate tension when properly attached.
1
Move the head to the origin position.
To secure the workability, move the head to the origin point with the XY screen.
2
Change the conveyor width.
To secure the workability, set the conveyor width to approx. 150 mm.
3
Turn the power source OFF.
4
Remove the old belt.
5
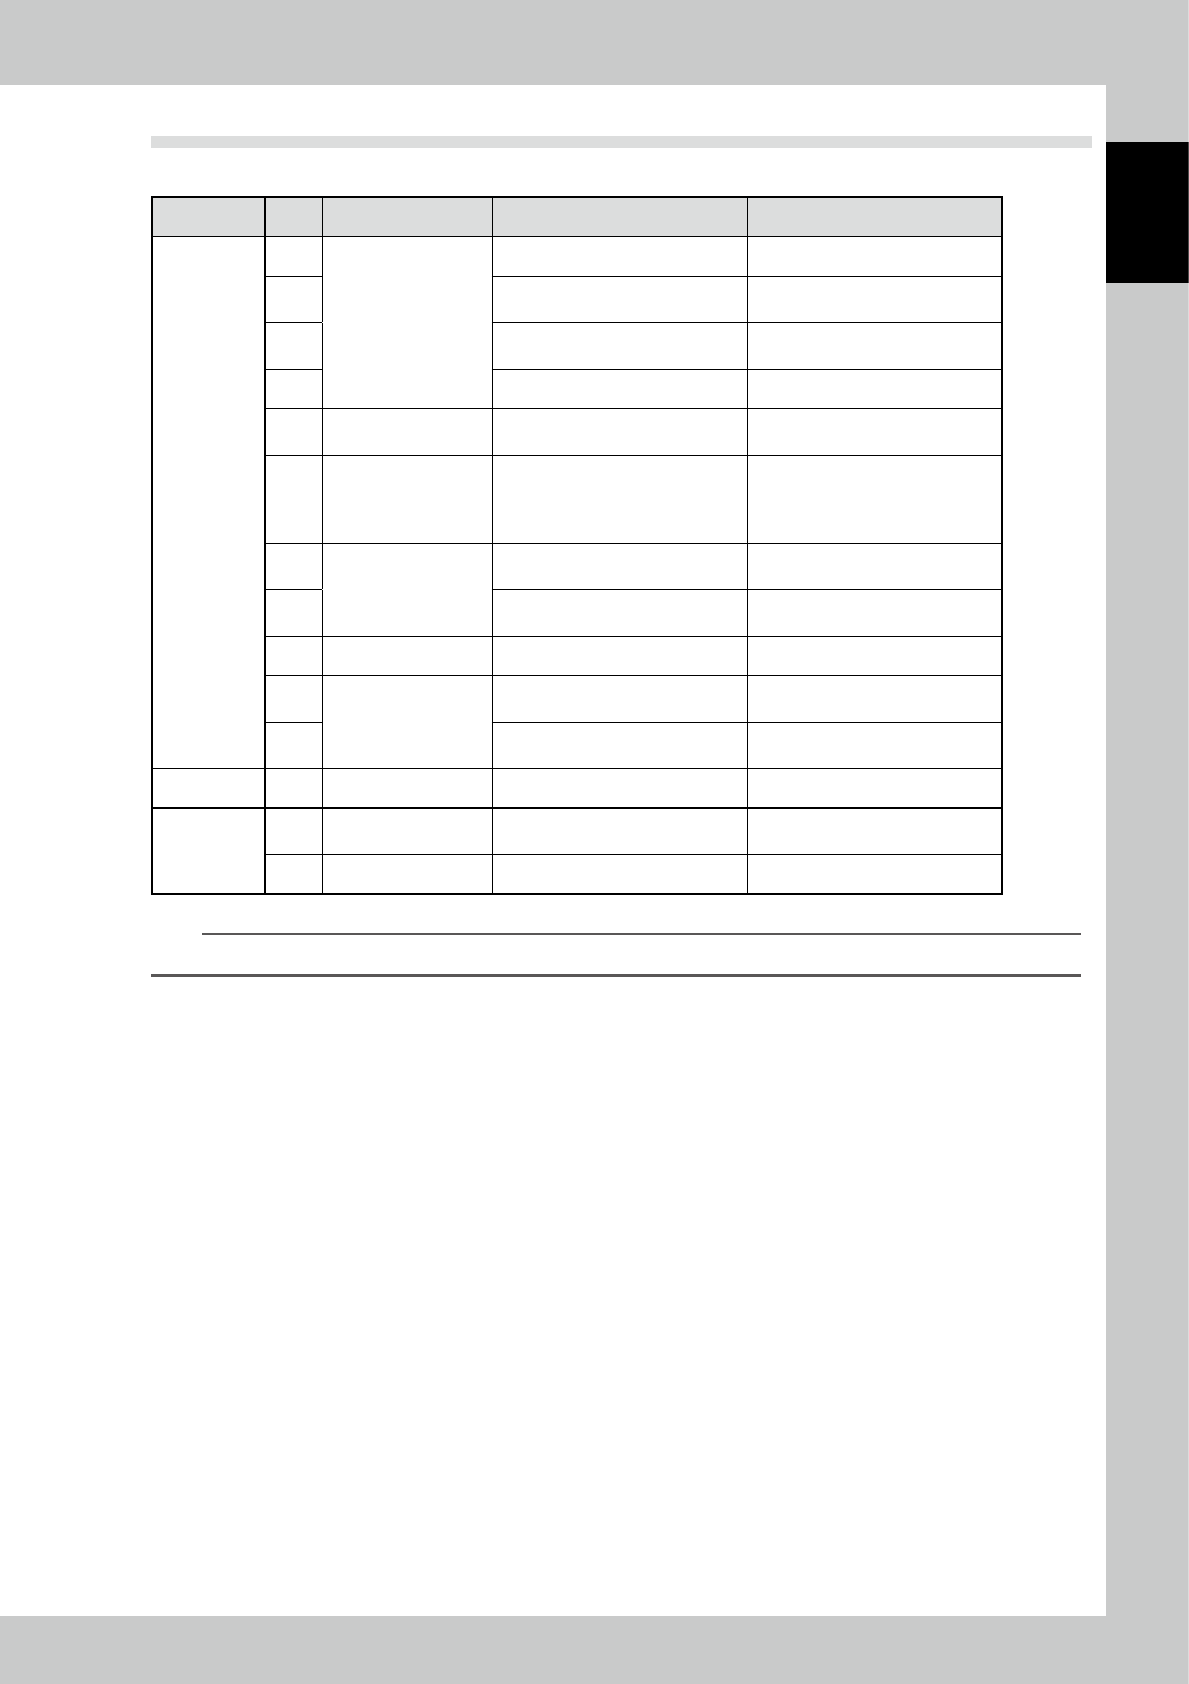
Attach the new belt.
Attach the new belt on the pulley. Referring to the figure below, pull the belt by being careful of the
belt’s route, and put on the end of the pulley to attach.
Replacement of the conveyor belt
■ Extension Conveyor unit (optrion)
Conveyor belt
Conveyor belt
23109- KMN-10
1-19
1
Overview and maintenance of machine
6.4 Troubleshooting
Mechanism No. Error Cause Measures
Conveyor
1
Sliding or jamming of
a board
Wear of the belt Replacing the belt
2
Adherence of foreign materials
such as oil
Cleaning the belt
3
Improper setting of the board
width
Resetting the board width
4 Rotation of the pulley is heavy. Replacing the pulley
5 Noise
Any foreign matter is involved in
the pulley.
Cleaning the pulley
6
No clamp or no
unclamp
Operation failure of the spring
mechanism
Operation failure of the electric
clamper
Replacing the spring
Replacing the clamper
Readjustment
7
Operation failure of
the conveyor
The sensor of the preceding
process is not turned ON.
Cleaning the sensor
8
The sensor on the exit side is not
turned ON.
Cleaning the sensor
9 Board position failure Dirt of the arrival sensor Cleaning the sensor
10
Operation failure of
the width adjustment
Foreign materials are involved in
the screw axis.
Removing foreign materials
11
The stroke sensor is not turned
OFF.
Cleaning the sensor
XY unit 12 Position shift Loose of the coupling Retightening the positioning
Z-axis offset
13
Operation failure of
Z-axis
The stroke sensor is not turned
OFF.
Cleaning the sensor
14 Position shift Loose of the sensor dog Retightening the positioning
n
NOTE
See the separate "YSi-SP maintenance parts list" for replaceable parts.

Chapter 2 Operation
Contents
1. Configuration 2-1
1.1 Overall View 2-1
1.2 System configuration 2-2
1.3 Tower Light Display 2-3
1.4 Emergency Stop 2-3
2. Operation Procedure 2-4
2.1 Flow of Inspection 2-4
2.2 Operation of One Cycle 2-5
2.3 Starting the Inspection Machine 2-6
2.4 PCB Change 2-7
2.5 PCB Transfer 2-9
2.5.1 Loading the PCB 2-9
2.5.2 Unloading the PCB 2-9
2.6 Inspection 2-10
2.6.1 Standalone Inspection 2-11
2.6.2 Automatic Inspection 2-15
2.6.3 Pass Mode 2-16
2.7 Shutdown of Inspection Machine 2-17
3. Screen Configuration and Each Function 2-18
3.1 Screen Configuration 2-18
3.2 Inspection 2-19
3.3 PCB Change 2-22
3.4 Measurement 2-24
3.4.1 Profile Screen 2-26
3.4.2 Wide Area Measurement Screen 2-28
3.4.3 NG PCB list 2-29
3.4.4 Alloc Disp 2-29
3.4.5 Pad info 2-30
3.4.6 PCB Warping Measuring Function 2-30
3.5 Manual Operation 2-35
3.6 Function/Setting 2-37
3.6.1 I/O Data Display Screen 2-39
3.6.2 Image Save Setting 2-39
3.6.3 User Authentication 2-40
3.6.4 Tower Light Setting 2-43
3.6.5 Chart Setting 2-44
3.6.6 Print Gap Setting 2-44