2OM-1733-005w_F8.pdf - 第309页
2OM-1733 6-6-1 6. "PCB XFER" Window 6.1 "Local" T ab Sheet Using this function, the PCB on each block on the conveyor can be moved to the next block. [3] [4] [1] [2] [5] Fig. 2F6-1 [1] Local/Line Swit…
2OM-1733
6-5-6
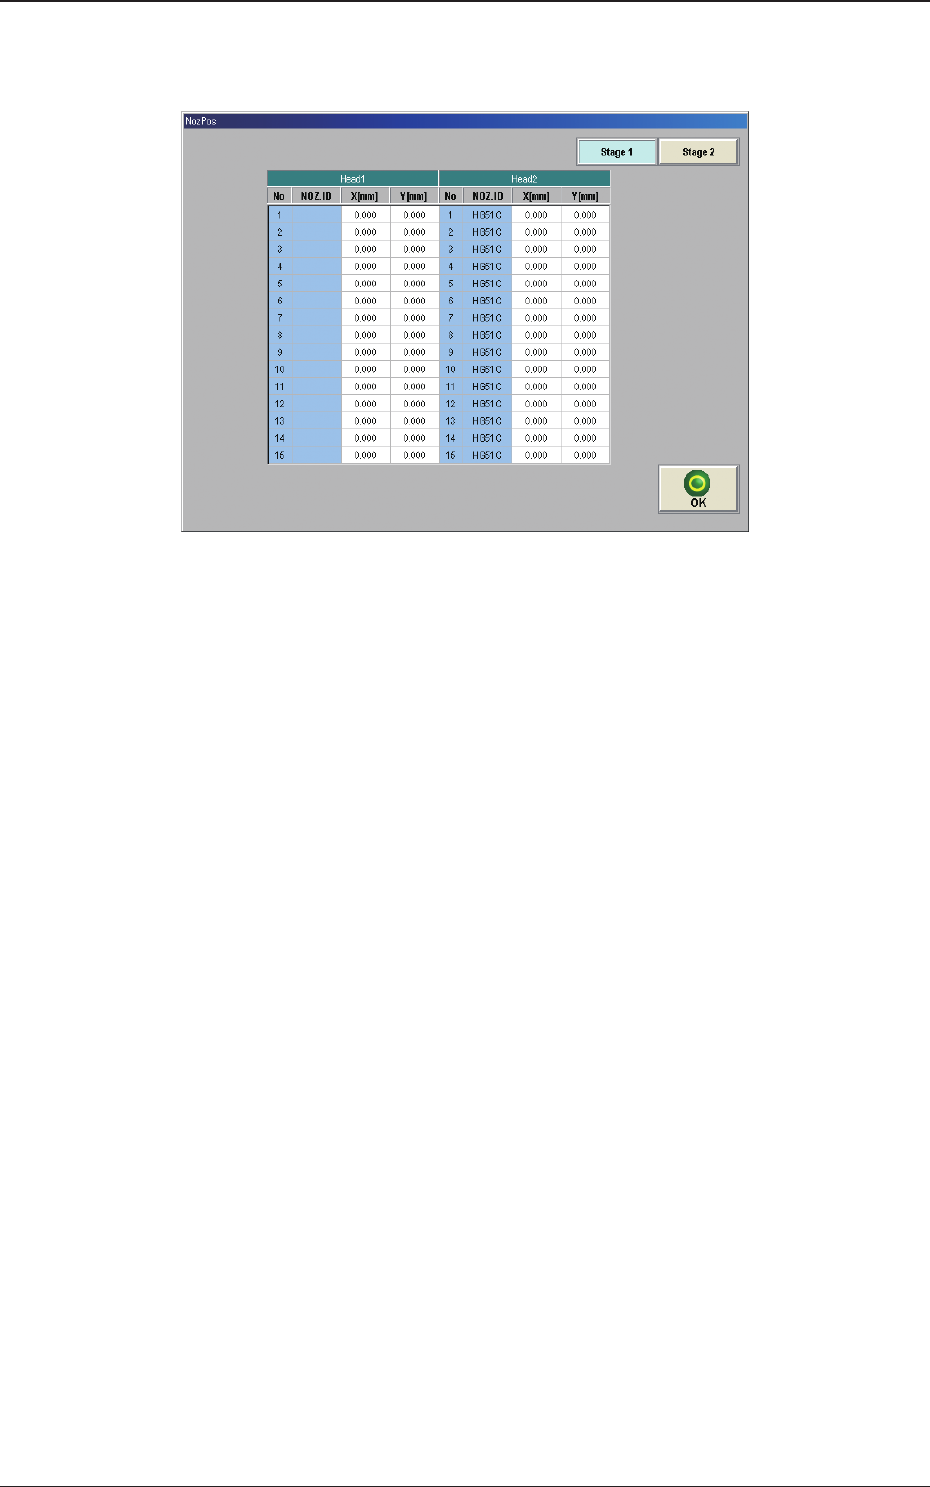
[10] [Noz Pos Teaching Rslt] Button
When pressed, the teaching results for each nozzle position are displayed.
Fig. 2F5-6
1212-002
5. "NOZ.CHG." Window

2OM-1733
6-6-1
6. "PCB XFER" Window
6.1 "Local" Tab Sheet
Using this function, the PCB on each block on the conveyor can be moved to the
next block.
[3]
[4]
[1]
[2]
[5]
Fig. 2F6-1
[1] Local/Line Switch Button
This button switches the "Local" tab sheet and "Line" tab sheet.
[2] [MNL XFER] Button
When pressed, the PCB positioning is performed manually.
[3] Transfer Buttons
Each block in the graphic image of the conveyor is provided with a button
function.
When the [START] button on the operation panel is pressed in 10 seconds
after a conveyor block button, the PCB is transferred to the block position.
[4] PCB LOCATE (PCB LOCATE L, R)
The PCB locating operation is performed.
When the [START] button on the operation panel is pressed in 10 seconds
after the [Execute] button, the backup base of the selected stage moves up
and the PCB is positioned.
When the [START] button on the operation panel is pressed in 10 seconds
after the [Release] button, the backup base moves down and the PCB
positioning is released.
Graphic
Development
1212-002
6. "PCB XFER" Window
2OM-1733
6-6-2
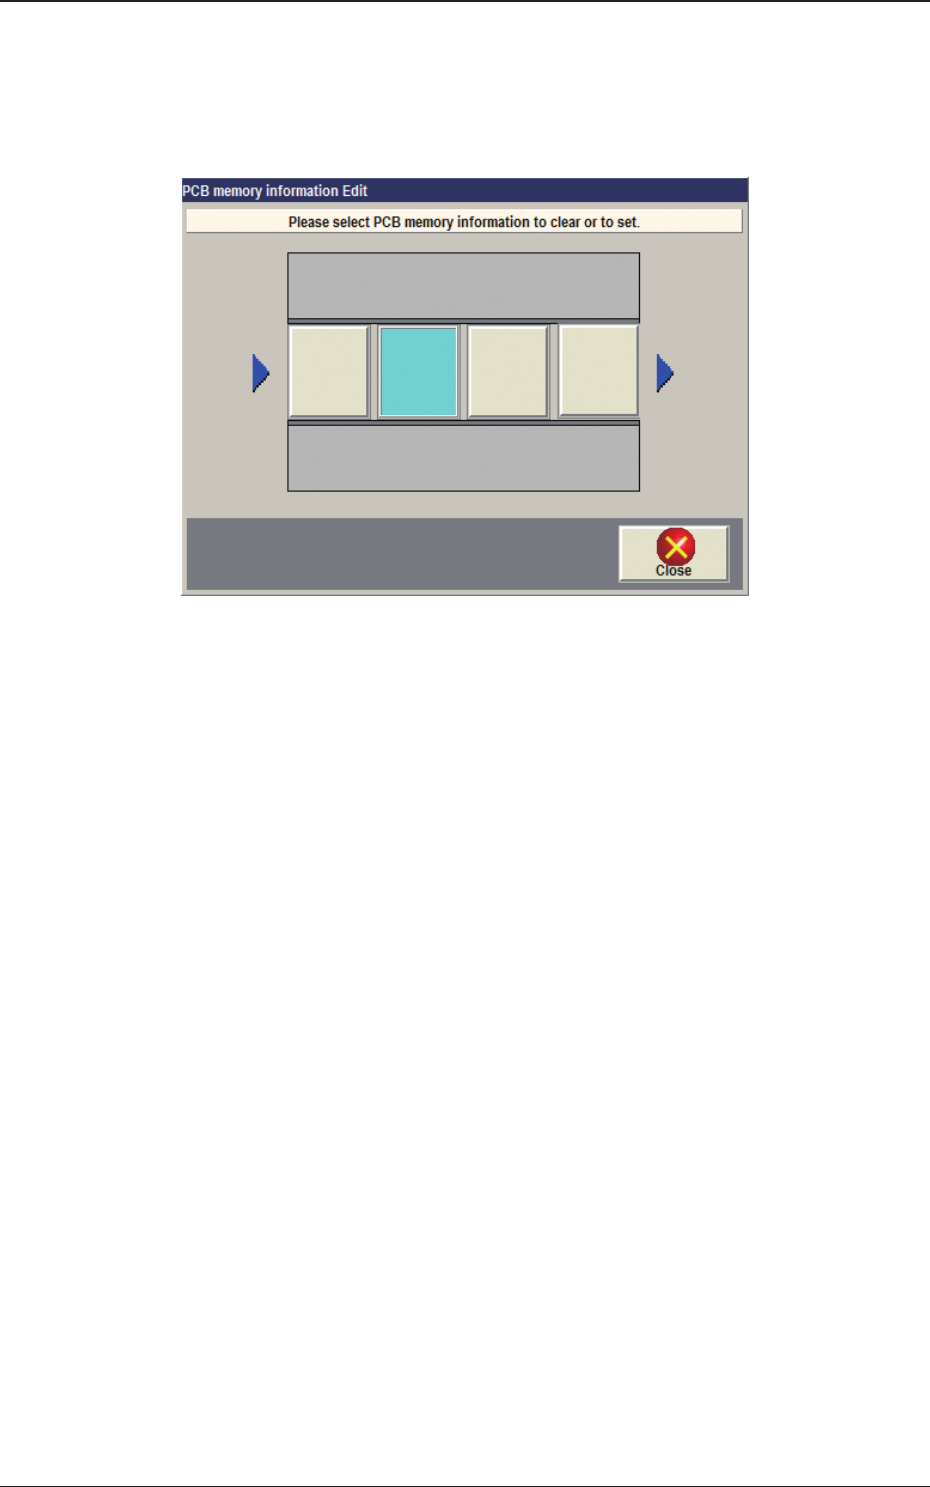
[5] [PCB Mem. Info.] Button
In the case that PCB presence/absence does not agree with the memory due
to the removal of the PCB, the PCB presence/absence data can be setup
using the window operation.
Fig. 2F6-2
Light Blue
: PCB Presence Status
Gray
: PCB Absence Status
1212-002
6.1 "Local" Tab Sheet