2OM-1733-005w_F8.pdf - 第352页
2OM-1733 6-7-34 1212-001

2OM-1733
6-7-331212-001
7.5 "Noz Lv./Pos." Window
•
Nozzle Position Teaching Procedure
Procedure
(1) Select the head and nozzle for which the nozzle level offset teaching is
performed.
(2) Press the [Teach Start] button.
(The designated head is moved to the specied position and the nozzle
position offset teaching is executed.)
•
When the teaching is started, the start conditions are checked.
•
The teaching results are displayed in the "After" section in the "Noz Pos
Offset" Display Area.
•
During this temporary stop mode, the selection of any other menu item is
unavailable.
When the teaching is completed, the designated head is returned to the home
position automatically.
(3) Press the [Save] button.
(When this button is pressed, the teaching results are saved.)
•
Error Condition
When a nozzle recognition error occurs during the nozzle position offset
teaching, the machine is not stopped, but the teaching is continued to the end.
The nozzle where an error occurred, is skipped.
The error existence can be conrmed in the "Recall" function.

2OM-1733
6-7-341212-001
2OM-1733
6-8-11212-001
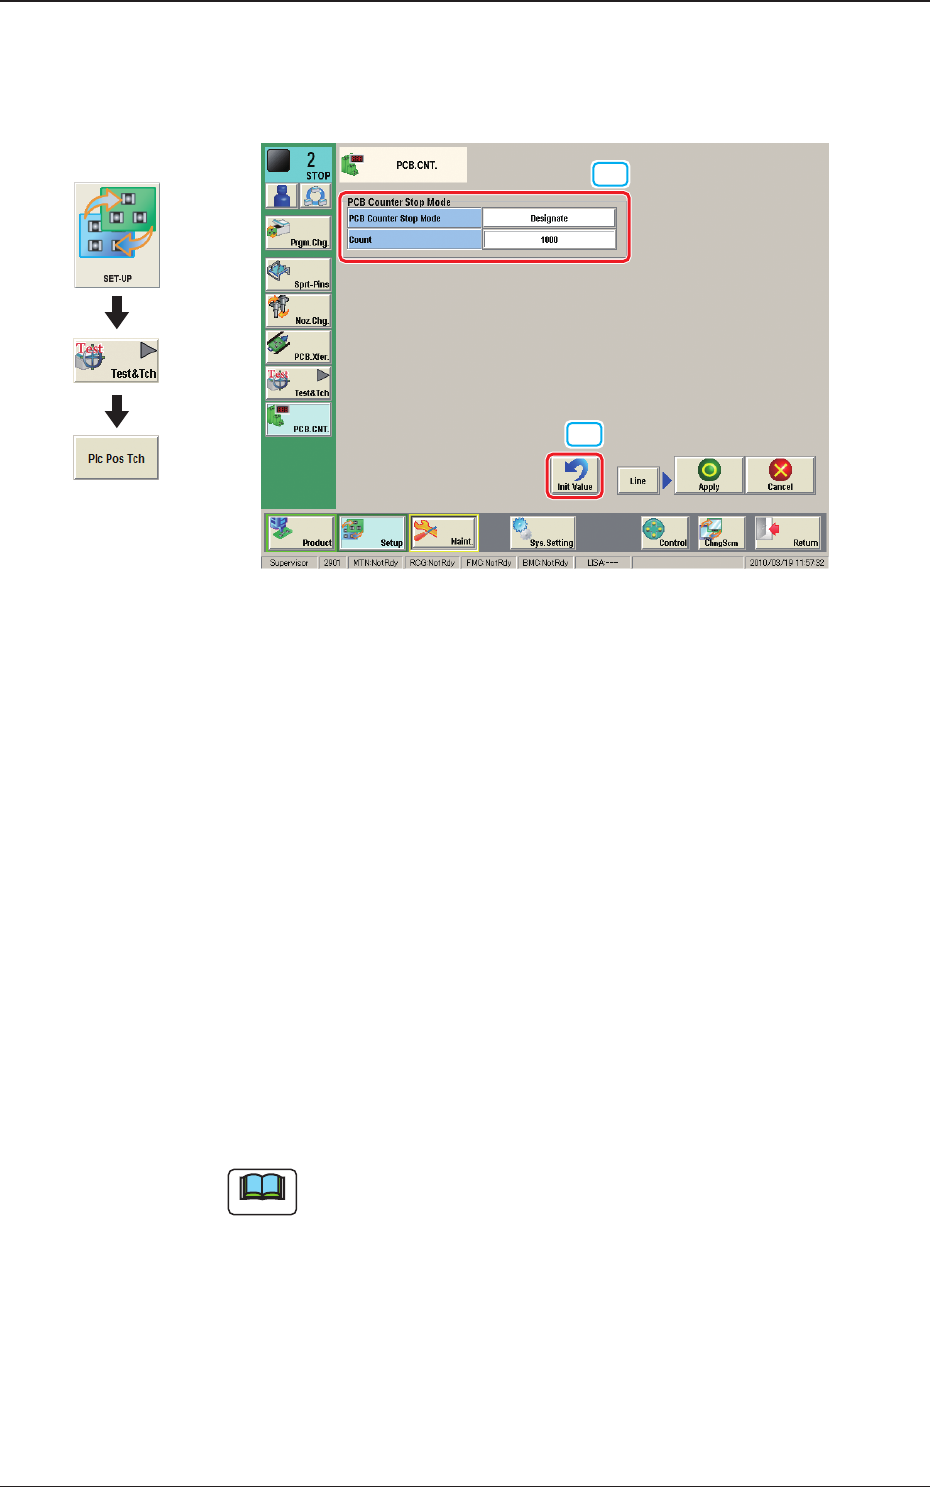
8. "PCB.CNT." Window
8. "PCB.CNT." Window
This window enables the operator to set the number of PCBs to be produced.
[2]
[1]
Fig. 2F8-1
[1] PCB Counter Stop Mode
PCB Counter Stop Mode
[Designate] Button
: When this button is selected and the
produced PCBs reach the value set in
"Count" text box, the PCB intake is stopped
and after all the PCBs in the machine are
discharged, the machine is automatically
stopped.
[No Designate] Button
: When this button is selected, the PCB
counter stop mode is not used.
Count
The number of produced PCBs for each lane for stopping the machine using
the PCB Counter Stop Mode, is set in this group box.
Note
The set count is displayed in the "Count" data box in the "AUTO. OPN"
window.
[2] [Init Value] Button
When this button is pressed, the set value for the "PCB Counter Stop Mode"
is returned to the initial value.
Graphic
Development