2OM-1733-005w_F8.pdf - 第322页
2OM-1733 6-7-4 (6) Press the [Eye Match] button. (Start the manual alignment operation from the position shown using an arrow). Fig. 2F7-4 (7) Press the [ ] button if necessary . (Check the nozzle pick-up position). Fig.…
2OM-1733
6-7-3
7.1.1
Fdr Pick-up Tch
Procedure
(1) Press the head selection button.
(2) Press the [Block Sel] button.
(Select the appropriate block and select the tape feeder where the teaching is
performed).
(3) Press the [Activate] button.
(The window is changed to the manual alignment window for the selected
tape feeder.)
Fig. 2F7-3
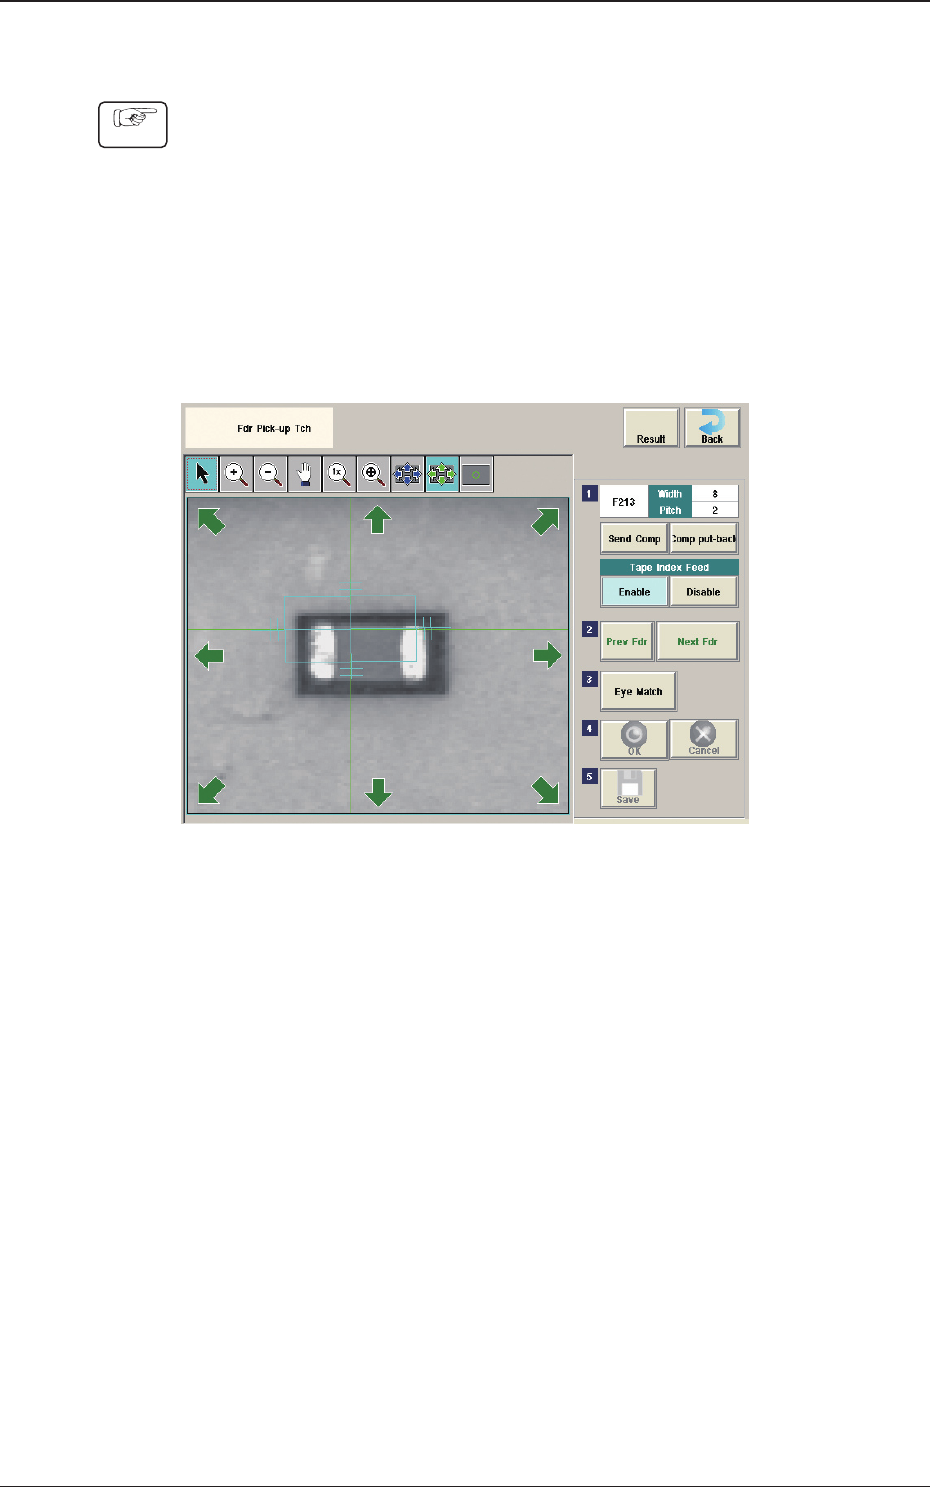
(4) Press the [Send Comp] button.
(Find the place necessary on the tape).
(5)
When the manual alignment is not required :
Press the [Prev Fdr.] or [Next Fdr.] button to perform the manual alignment
for the other tape feeder.
When the manual alignment is required :
Follow the steps (5) and later.
1212-001
7.1 "Fdr Pick-up Tch" Window
2OM-1733
6-7-4
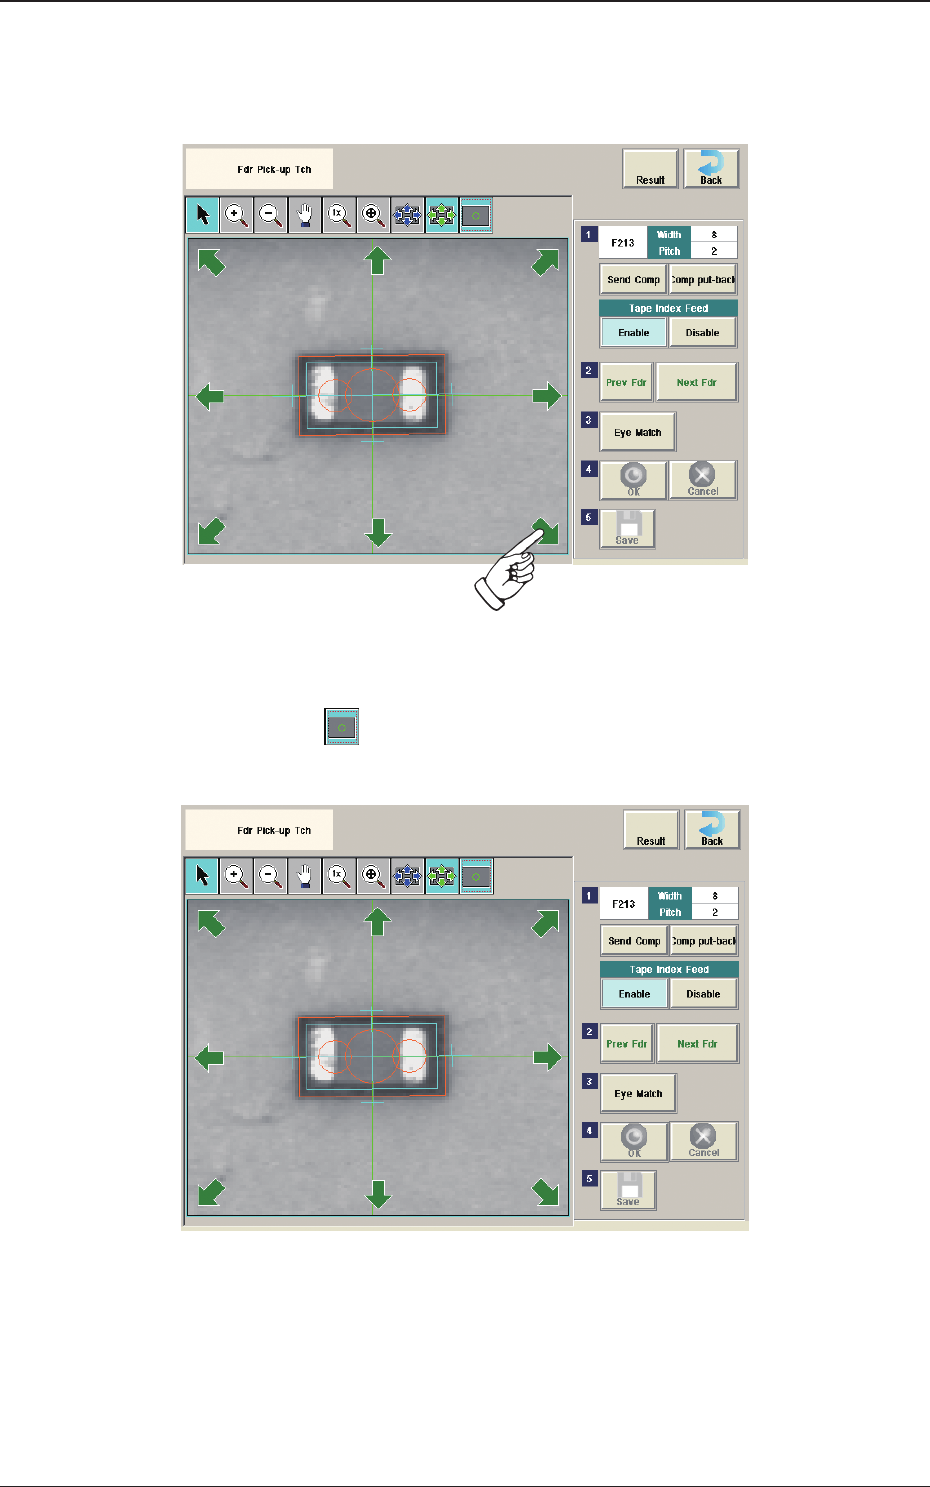
(6) Press the [Eye Match] button.
(Start the manual alignment operation from the position shown using an
arrow).
Fig. 2F7-4
(7) Press the [
] button if necessary.
(Check the nozzle pick-up position).
Fig. 2F7-5
(8) When the manual alignment operation is completed, press the [OK] button.
(In the case that the performed manual alignment is cancelled, press the
[Cancel] button.)
(9) Press the [Save] button to save the manual alignment results.
1212-001
7.1 "Fdr Pick-up Tch" Window
2OM-1733
6-7-5
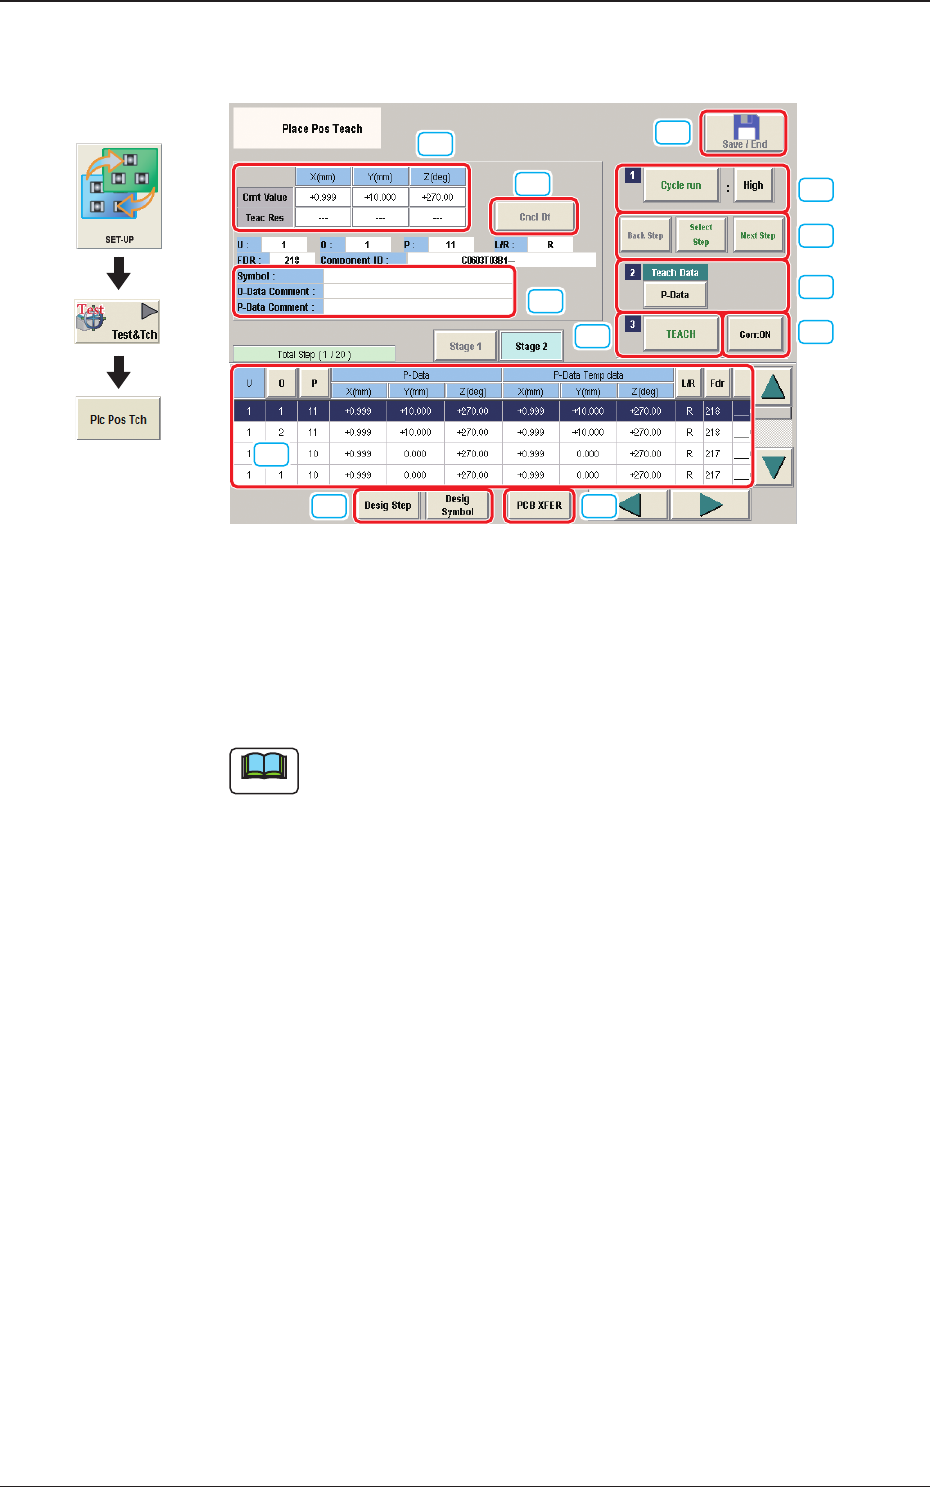
7.2 "Place Pos Teach" Window
[1]
[2] [3]
[5]
[4]
[12]
[6]
[7]
[8]
[9]
[10]
[11]
Fig. 2F7-6
[1] "Step No."Display Section
The step data selected in the "Desig Step"(Designate Step) operation, is
displayed.
Note
Normally, the Item are displayed in the order of component placement.
However, pressing the [Desig Symbol] button can arrange them in
ascending order.
Graphic
Development
1212-002
7.2 "Place Pos Teach" Window