OM-1068-001.pdf - 第112页
6. Start Procedure of Automatic Operation • The tray feeders are not equipped with any [ST AR T] button to start the automatic operation. The [ST AR T] button of the main machine is commonly used for the feeders. Refer t…
5. Preparation and Confirmation before Operation
Tg0252-PM-SO
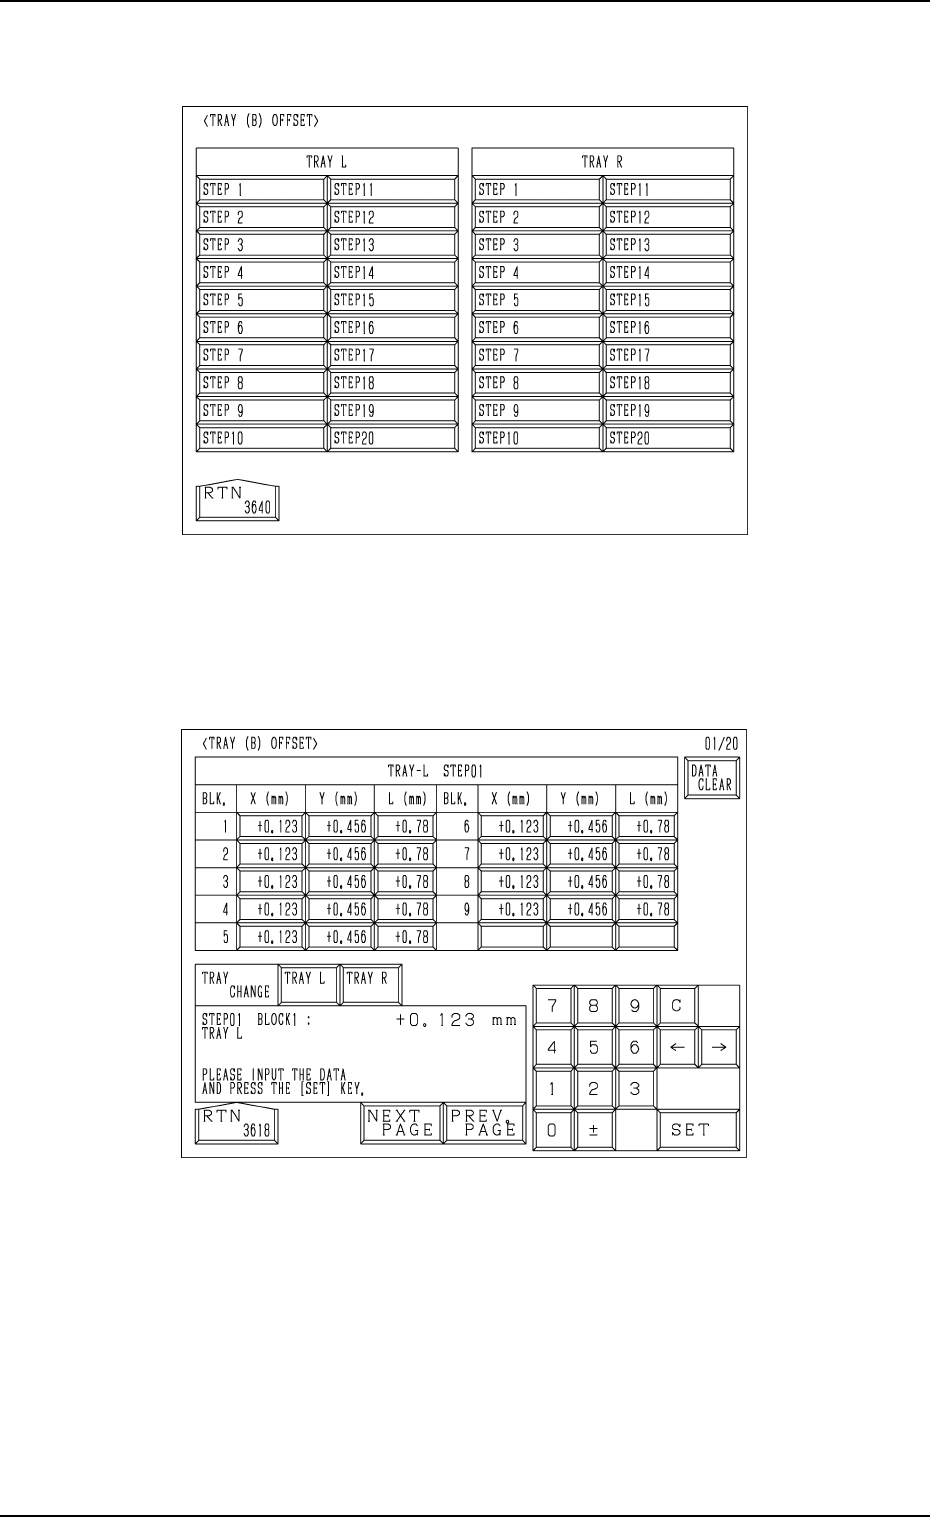
(2) Press the [TRAY] key at the “FEEDER (B) OFFSET” display (Fig. 1.36).
The display (Fig. 1.37) appears on the screen.
Fig. 1.38
(3) Press the [STEP X] key. ([STEP 1] to [STEP 20])
The display (Fig. 1.38) appears on the screen.
(4) Enter various offset parameters.
Fig. 1.37
0005-002 Chapter 1 2-28

6. Start Procedure of Automatic Operation
• The tray feeders are not equipped with any [START] button to start the
automatic operation.
The [START] button of the main machine is commonly used for the feeders.
Refer to “6. Starting, Emergency Stop, and Temporary Stop (Pause) Opera-
tions for Automatic Operation (“PLACE” Mode) of Section 2 in Volume 1”
in the main machine instruction manual for details.
6.1 General Start Procedure
(1) Perform the following operations.
• Preparation of Pattern Program
(Refer to “5.1 Preparation (Outline) for Pattern Program of Section 2
in Chapter 1” for details.)
• Program Change Operation
(Refer to “5.2 Program Change of Section 2 in Chapter 1” for details.)
(2) Confirm that the upper and lower doors are closed.
(3) Confirm that the LEDs (-HD503 and -HD504) of the [U READY] and [L
READY] are “ON”.
If the LEDs are “OFF”, press the [READY] button.
(4) Check the surroundings of the machine and confirm safety before start-
ing the automatic operation.
CAUTION
Check carefully that there is no person around
the moving mechanisms of the machine.
(Especially, the other side of machine opera-
tion)
Make sure that no objects remain within the
moving mechanisms of the machine.
(Tools and Parts)
(5) Press the [START] button of the main machine.
CAUTION
To stop the machine immediately in an emer-
gency, press one of the [EMERGENCY STOP]
buttons.
Refer to “6.8.3 Emergency Stop Procedure of
Section 2 in Volume 1” in the main machine
instruction manual for details.
Refer to “6.7.2 Reset and Start Procedure from
Emergency Stop of Section 2 in Volume 1” in
the main machine instruction manual for de-
tails.
6. Start Procedure of Automatic Operation
9911-001 Chapter 1 2-29 Tg0252-PM-SO

6.2 Temporary Stop Procedure
Press the “PAUSE” button on the main machine.
After the machine runs in its minimum cycle (single operating unit), it stops
running.
Note: “PAUSE” mode does not mean that the machine is completely stopped.
Take ample care when the machine is set in the “PAUSE” mode.
The machine starts running all of a sudden right after it receives a start
signal (a start signal is sent out when the [START] or the [MOVE]
button is pressed).
6.3 Start Procedure from “PAUSE” Mode
Press the [START] or the [MOVE] button on the main machine while the
“AUTO OPN. MODE <PLACEMENT>” display is active on the main ma-
chine side.
• When the [START] button is pressed, the machine starts automatic opera-
tion (“PLACE” Mode) from the step No. which is displayed on the screen of
the main machine.
When the automatic operation (component placement) starts, all origin marks
“” disappear and the LED (-HD01) of the [START] button and the tower
light (green) illuminates.
• When the [MOVE] button is pressed, the machine places the components
related to the step Nos. on the screen of the main machine and is set again in
the “PAUSE” mode.
Every time the [MOVE] button is pressed, the machine places components
one by one in the order of step Nos.
While the machine is activated, the LED (-HD02) of the [MOVE] button
illuminates.
6. Start Procedure of Automatic Operation
0010-002 Chapter 1 2-30 Tg0252-PM-SO