YV180X_Mainte_E.pdf - 第149页
6 -11 SED8013110 Service Manual Chapter 6 6 Conveyor unit and air supply unit adjustment 1.5 Y -axis (A/B table) initial position For smooth PCB transfer , the carry-in conv eyor , A/B tables and carry-out con ve yor mus…
6
-10
Service Manual
Chapter 6
SED8013110
6
Conveyor unit and air supply unit adjustment
1.4 Adjusting the W-axis initial position
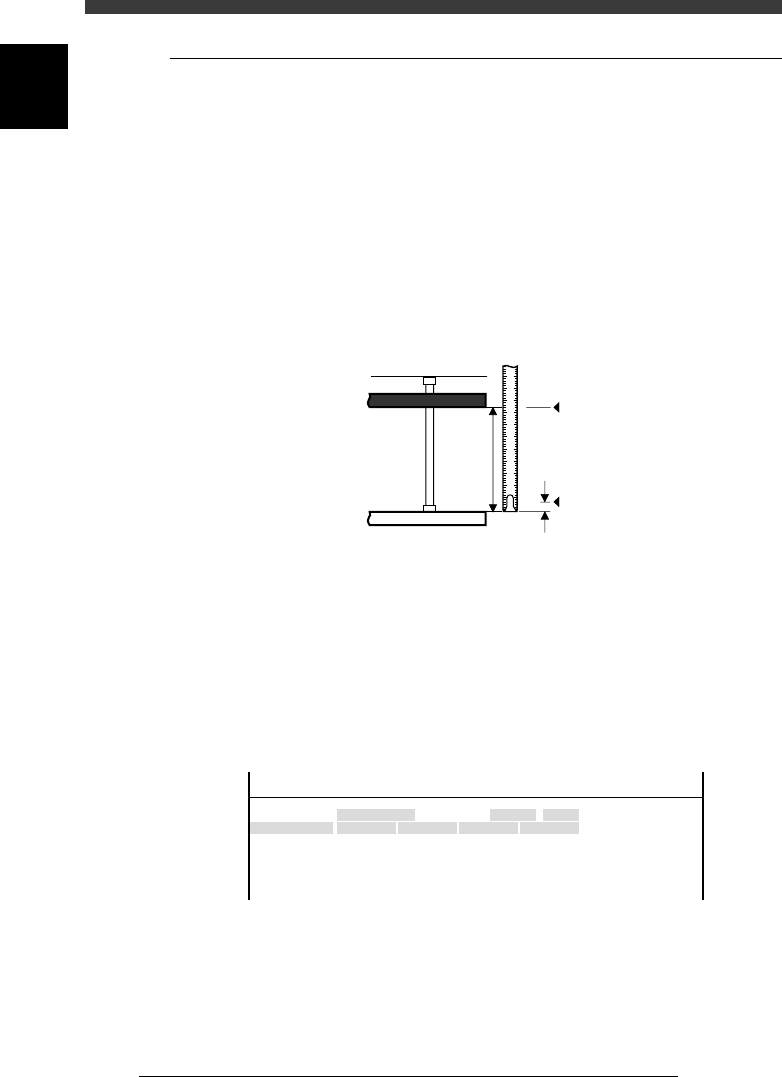
The W-axis initial position is the distance expressed as a minus value
between the conveyor rails when the W-axis is in the return-to-origin
position. To set the W-axis initial position, follow these steps.
1 Perform return-to-origin.
e
2 Press the emergency stop button and determine the initial
position.
Measure the conveyor width W (distance between the fixed rail and the
movable rail). Subtract 0.5mm from the width W as a clearance margin,
and then prefix a “minus” sign to this value. This value is the W-axis initial
position.
Conveyor width measurement and initial position
43604-D8-00
1 2 3 4 5
0.5
W
Origin
Fixed conveyor rail
Movable conveyor rail
Initial position = - (W - 0.5
)
3 Open the software limit screen and enter the initial
position.
1. Select <3/3/B1 ADJUST TARGET> − ”Soft. Limit” and press the [ENTER]
key.
2. Use the arrow keys to line up the cursor with “Init.Pos” of the conveyor
whose width you measured in Step 2 (for example, W1).
3. Use the number keys to enter the initial position value obtained in Step
2.
W-axis initial position setting screen
47604-D8-00
Axis
W1/RIGHT
W2/A-TBL
W3/B-TBL
W4/LEFT
+direct.
11.323
13.753
11.993
7.113
OBJECT
Software Limit
TCH.UNIT SPEED
- - - - - - - -
-direct.
-277.973
-272.227
-274.202
-283.200
Inir.Pos
-323.600
-321.790
-323.650
-328.650
Init.Mov
<<<APPLICATION>>> 3/MAINTE/M
<<MODE>> 3/MCH_ADJUST
4 Adjust the initial positions of other conveyor widths in the
same way.
5 Save the settings.
Press the [ESC] key, then select <B2 SAVE DATA> or <B0 SAVE & QUIT>
and press the [ENTER] key. (To quit without saving, select <B3 RECOVER
ADJUST> or <B7 QUIT> and press the [ENTER] key.
6
-11
SED8013110
Service Manual
Chapter 6
6
Conveyor unit and air supply unit adjustment
1.5 Y-axis (A/B table) initial position
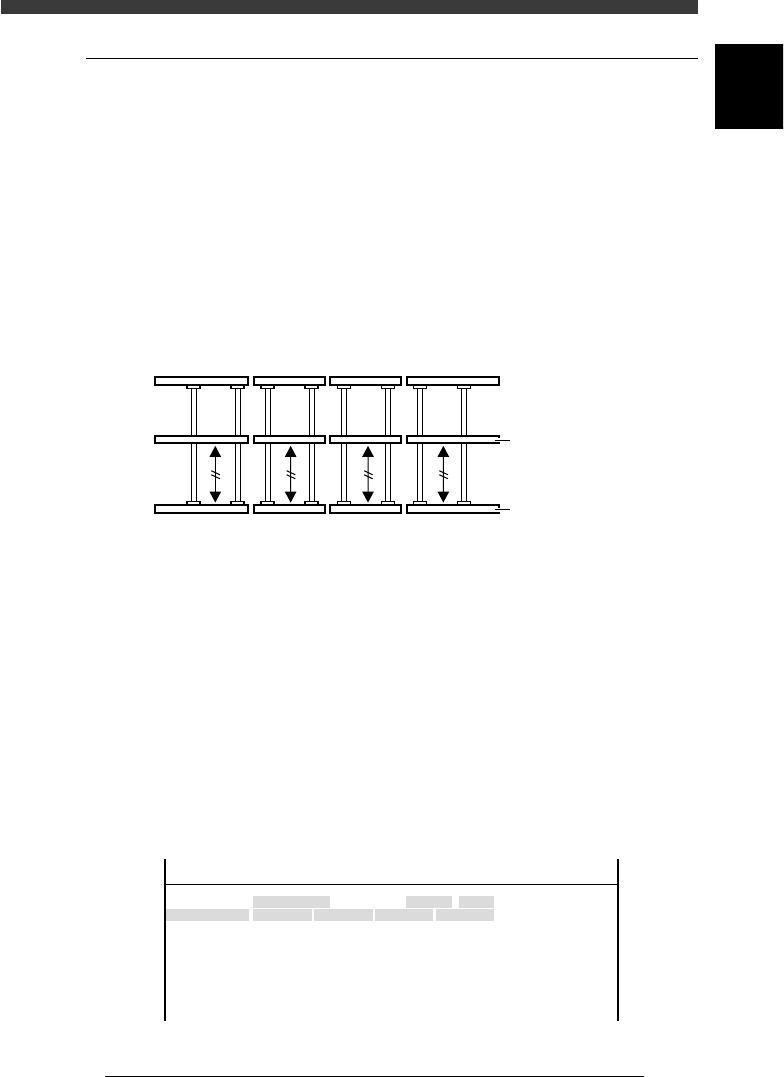
For smooth PCB transfer, the carry-in conveyor, A/B tables and carry-out
conveyor must be aligned straight. To ensure this, the initial position of the
Y-axis (A/B tables) is specified on the Soft Limit screen. If resetting
becomes necessary, use the following procedure.
1 Perform return-to-origin.
e
2 Press the emergency stop button.
3 Align the conveyor rails.
Move the A and B tables by hand to align them with the carry-in and
carry-out conveyors, so that the fixed conveyor rails are all lined up
straight.
Conveyor rails during PCB transfer
43609-D8-00
Movable conveyor rai
l
Fixed conveyor rail
4 Open the software limit screen.
Select <3/3/B1 ADJUST TARGET> - ”Soft. Limit” and press the [ENTER]
key.
5 Enter the Y-axis initial positions.
1. Use the arrow keys to line up the cursor with “Init.Pos” in the “Y1/A-
TBL” row.
2. Press the [F10] key and set the teaching conditions.
Select any teaching unit and speed in this case.
3. Press the [F10] key twice to enter the Y1-axis initial position.
4. Next, move the cursor to “Init.Pos” in the “Y1/B-TBL” row and press the
[F10] key twice to enter the Y2-axis initial position.
Y-axis initial position setting
47607-D8-00
Axis
Y1/A-TBL
Y2/B-TBL
+direct.
452.790
449.199
OBJECT
Software Limit
TCH.UNIT SPEED
- - - - - - - -
-direct.
-26.815
-36.140
Inir.Pos
-25.815
448.199
Init.Mov
<<<APPLICATION>>> 3/MAINTE/M
<<MODE>> 3/MCH_ADJUST

6
-12
Service Manual
Chapter 6
SED8013110
6
Conveyor unit and air supply unit adjustment
6 Save the settings.
Press the [ESC] key, then select <B2 SAVE DATA> or <B0 SAVE & QUIT>
and press the [ENTER] key. (To quit without saving, select <B3 RECOVER
ADJUST> or <B7 QUIT> and press the [ENTER] key.