YCP10 Users_E.pdf - 第106页
4-10 4 Daily operation 5 Install a new plate. Next, install a plate suitable for the roll sheet width to be used. 63408-N1-00 6 Insert the shaft holders into the roll on the feed side (upper side). Insert the shaft holde…
4-9
4
Daily operation
5.2 Changing the roll size
If the roll size needs to be changed during the setup work, it is necessary to use a special cleaner width change
unit (option).
n
Cleaner width change unit
Part No. Part name Notes
KHT-M36C0-00X ROLL UNIT 530 Shaft holder 2 sets, roll core, plate (for 530 mm)
KHT-M36C0-A0X ROLL UNIT 440 Shaft holder 2 sets, roll core, plate (for 440 mm)
KHT-M36C0-B0X ROLL UNIT 360 Shaft holder 2 sets, roll core, plate (for 360 mm)
KHT-M36C0-C0X ROLL UNIT 260 Shaft holder 2 sets, roll core, plate (for 260 mm)
e
1
Press the emergency stop button
and open the front panel.
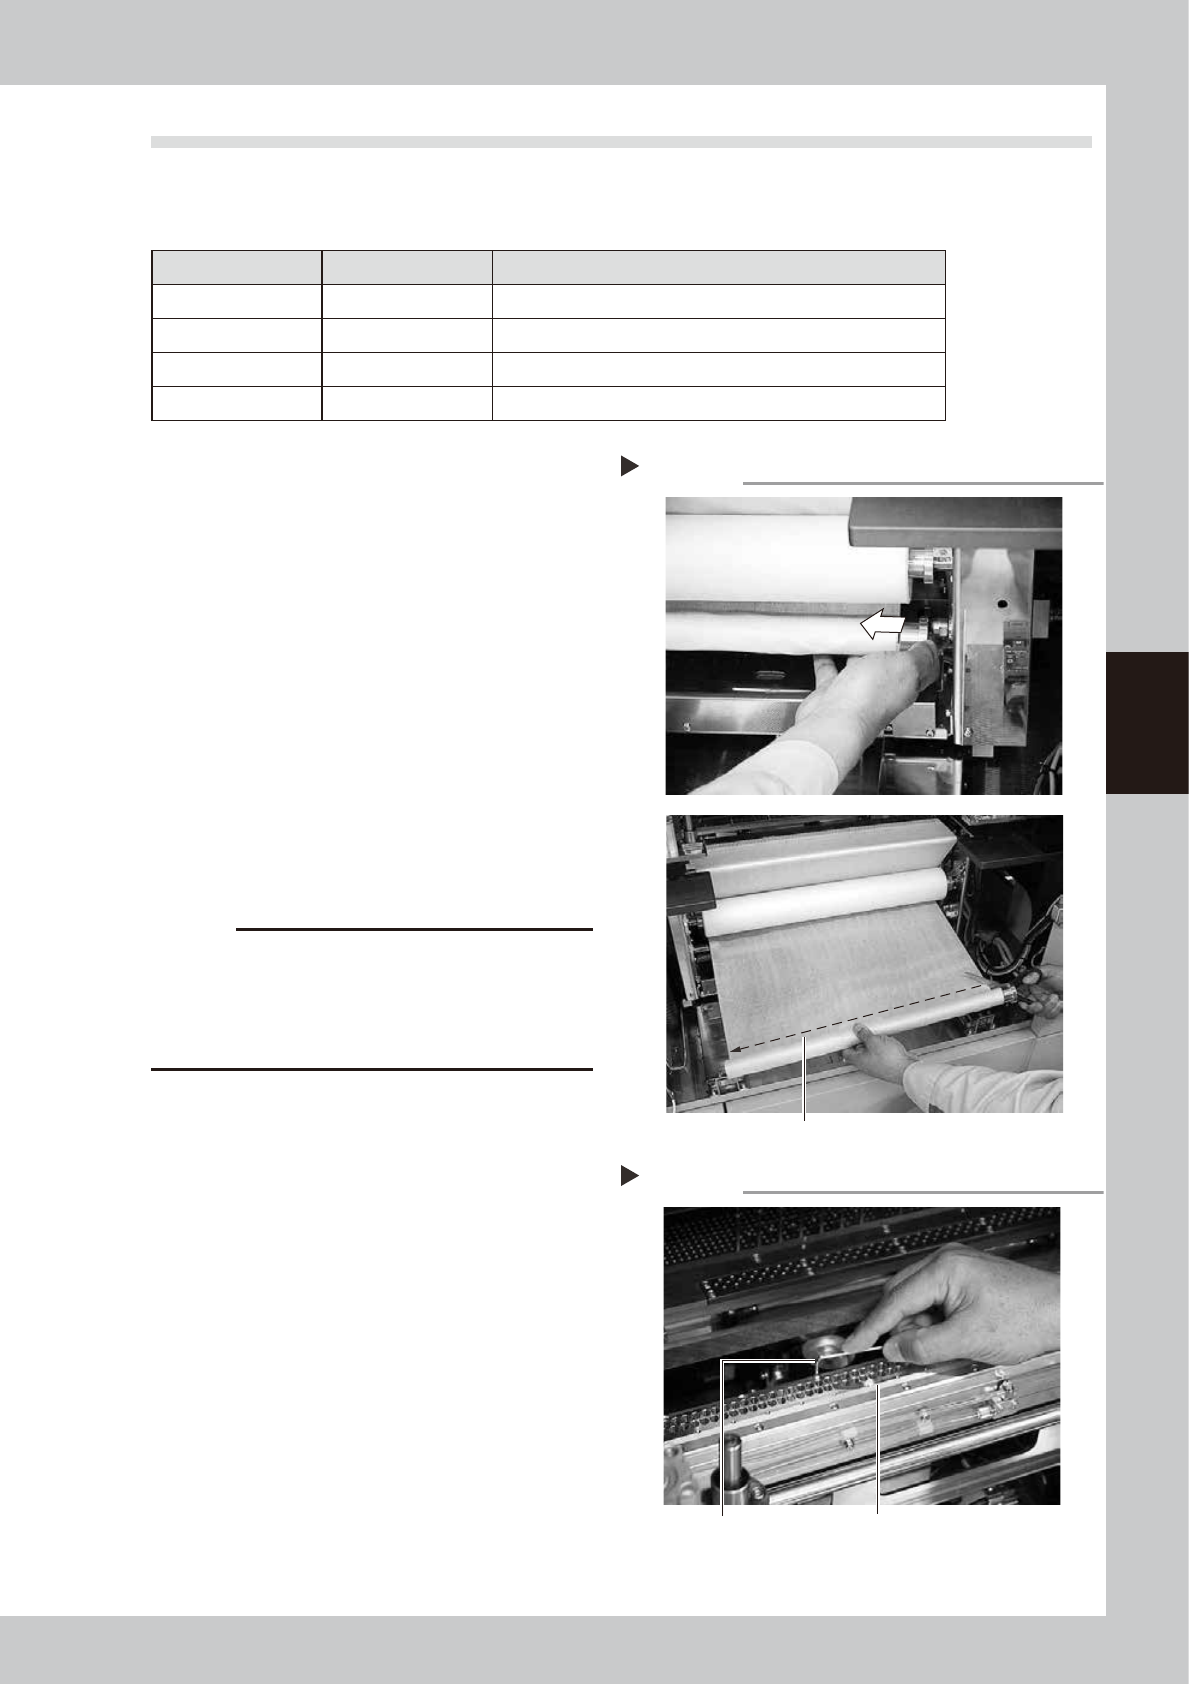
2
Cut the roll sheet.
Remove the roll from the wind-up side (lower
side) and cut the roll sheet.
63406-N1-00
3
Remove also the roll from the feed
side (upper side).
Remove the roll from the feed side
completely in the same manner as
described for the wind-up side.
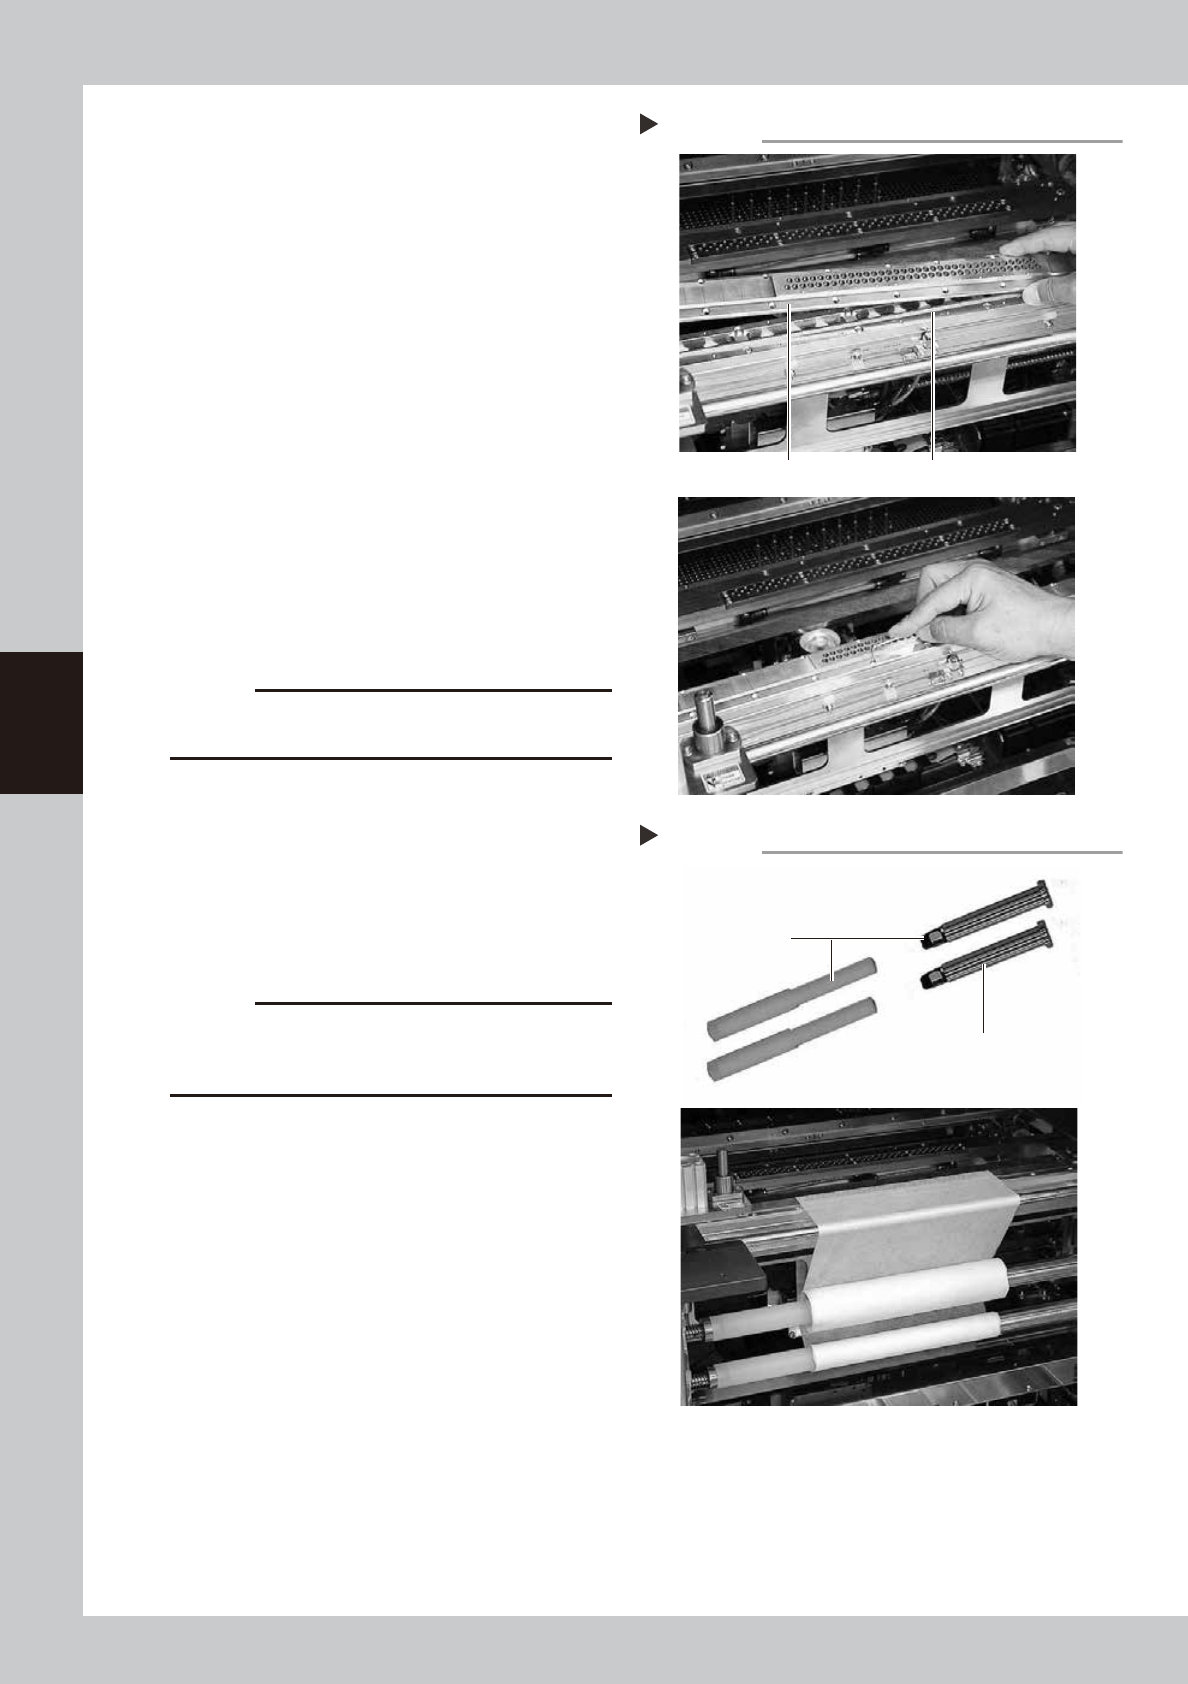
4
Remove the plate.
Use an Allen wrench to remove the plate
that becomes the cleaning solvent blow out
port.
63407-N1-00
c
CAUTION
If a roll having a different size is used without
replacement of the plate, this may cause the solvent to
flow out or the cleaning effect to lower.
Always replace the plate with a one having an
appropriate size.
Removing the roll sheet.
Step 2
Cut the roll sheet.
Removing the plate.
Step 4
Plate
Allen wrench
4-10
4
Daily operation
5
Install a new plate.
Next, install a plate suitable for the roll sheet
width to be used.
63408-N1-00
6
Insert the shaft holders into the roll
on the feed side (upper side).
Insert the shaft holders into both sides while
carefully checking the direction of the roll
sheet.
7
Install the roll on the take-up side
(lower side).
Insert the shaft holders onto the roll core in
the same manner as described for the feed
side and install the roll at the set position.
63409-N1-00
8
Feed the gauze roll through the
guides.
Feed the gauze roll through the guides while
keeping the parallelism between the left
and right.
c
CAUTION
Do not attempt to use the backside of the used up
gauze roll.
9
Attach the top end of the new
gauze roll onto the roll core
inserted onto the take-up shaft.
Fasten the top end of the new gauze roll
with an adhesive tape or similar item so that
both ends feed in parallel with each other.
After that, turn the take-up shaft 2 or 3
rotations to wind up the gauze roll.
c
CAUTION
Make sure to wind up the gauze roll. If the gauze roll is
loosen and operate the machine, it will interfere with
each part and the machine may be damaged.
0
Close the front panel and cancel
the emergency stop.
Mounting a new plate.
Step 5
Plate (for replacement) Portion where the solvent accumulates.
Mounting the adaptor (shaft holder).
Step 7
Roll adaptor on drive side
(Shaft holder)
Insert this part onto
the roll core.
4-11
4
Daily operation
n
Machine setting when replacing the cleaner width change unit (option)
When replacing the cleaner width change unit (option), "Cleaner Width" of the machine setting needs to be changed.
c
CAUTION
· To change the machine setting, the administrator authority is required.
· Do not change any parameter as each parameter of the machine setting has been set at shipment (or at installation).
· When changing the cleaner width, refer to the descriptions shown below.
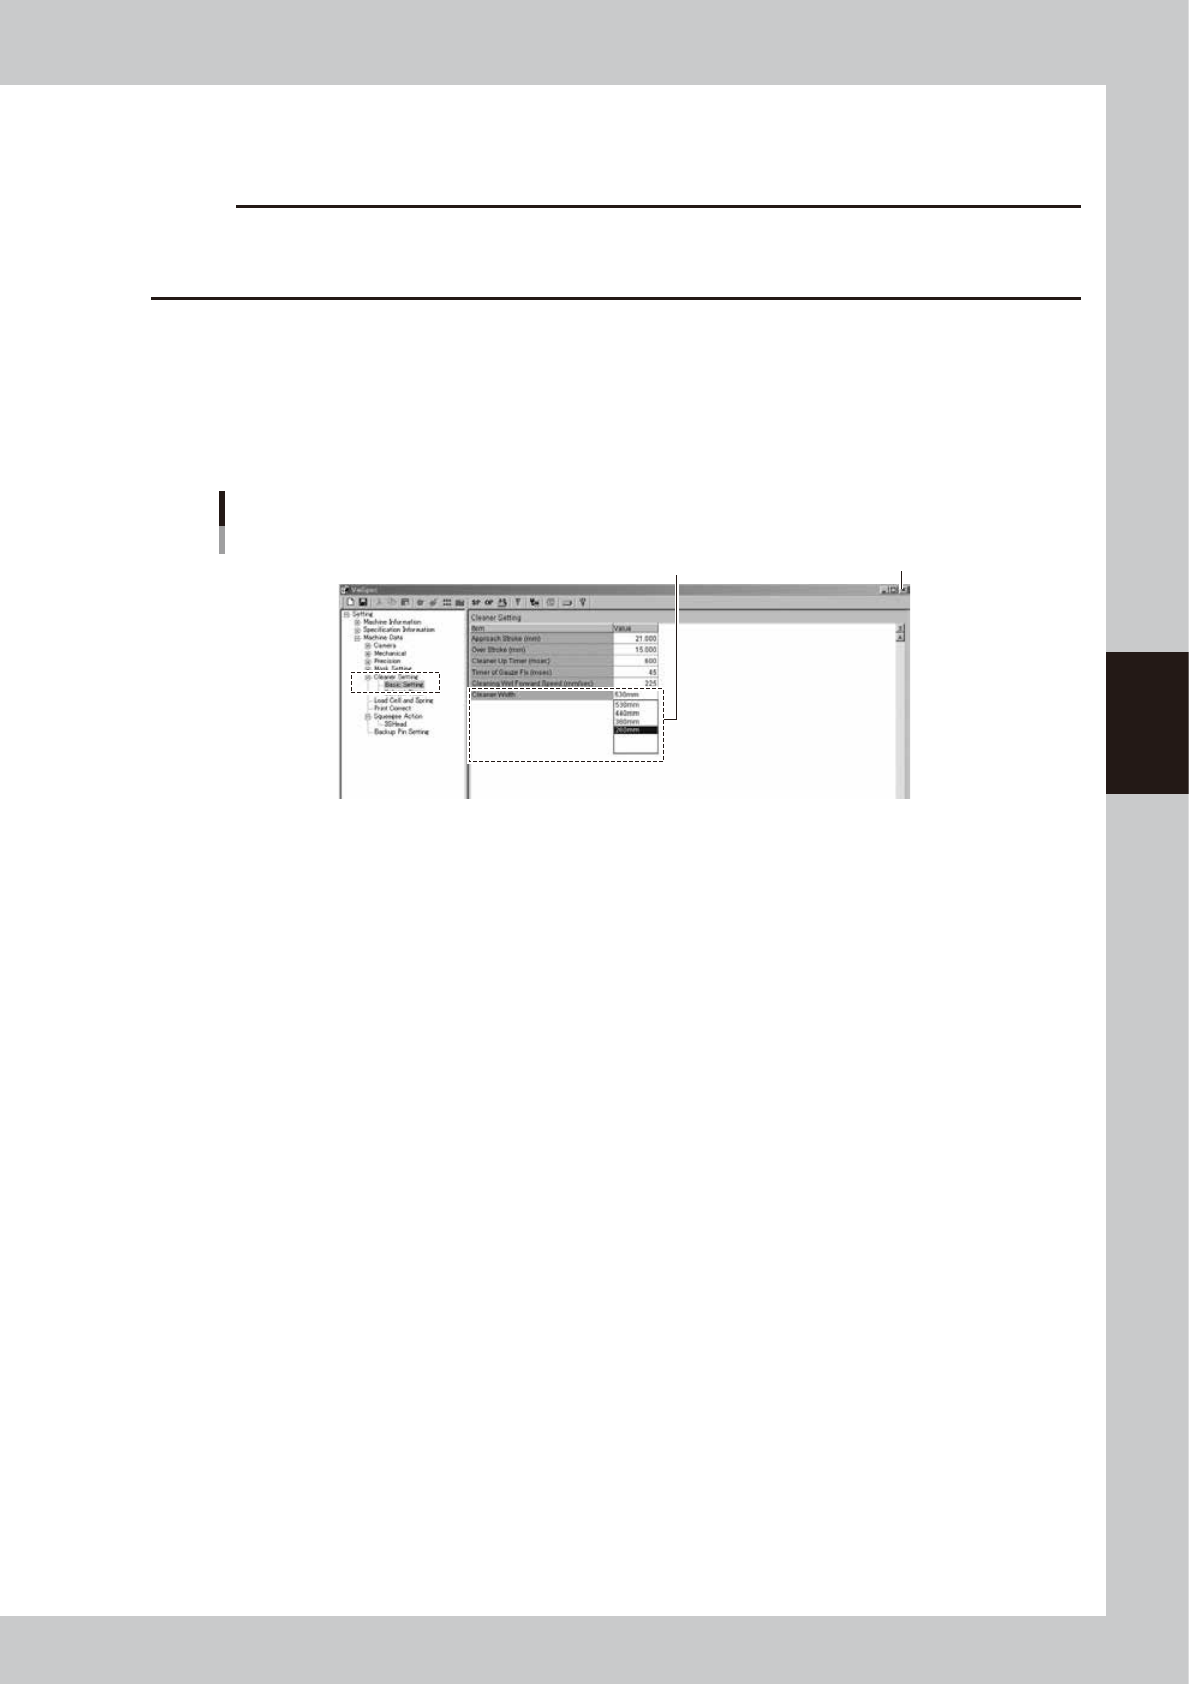
1. Press the [Machine] button on the operation screen to open the "VmSpec" window.
2. Click [Setting] - [Machine Data] - [Cleaner Setting] - [Basic Setting].
3. Set "Cleaner Width".
Select a size of the replaced cleaner width change unit from the drop down list.
4. Click the close button at the upper right corner of the screen to exit the setting.
When you have changed the data, click [Yes] on the "Exit" screen.
"VmSpec" window
[Cleaner Setting] [Basic Setting] [Cleaner Width]
Close button
Select a size and set it.
64423-N1-00
5. When you have changed any value, load the board data again.
As the board data is loaded again, the changes are then enabled.