YCP10 Users_E.pdf - 第225页
7-15 7 Other functions 2.2 Using the pattern matching P attern matching can be used in the same wa y as the fiducial marks. In this case, specify the pattern mark No. in the data list on the [Print]-[Board] tab or [Print…
7-14
7
Other functions
t
Perform the vision test.
Press the [Test] button and check to see if the pattern is correctly recognized. Repeat this test several
times. When no error occurs, the pattern data is appropriate.
If the recognition error occurs, check the "Mark Threshold" value or "Search Area" value of the vision
parameter (see "7.5 Mark Adjust mode" in Chapter 5) is correct.
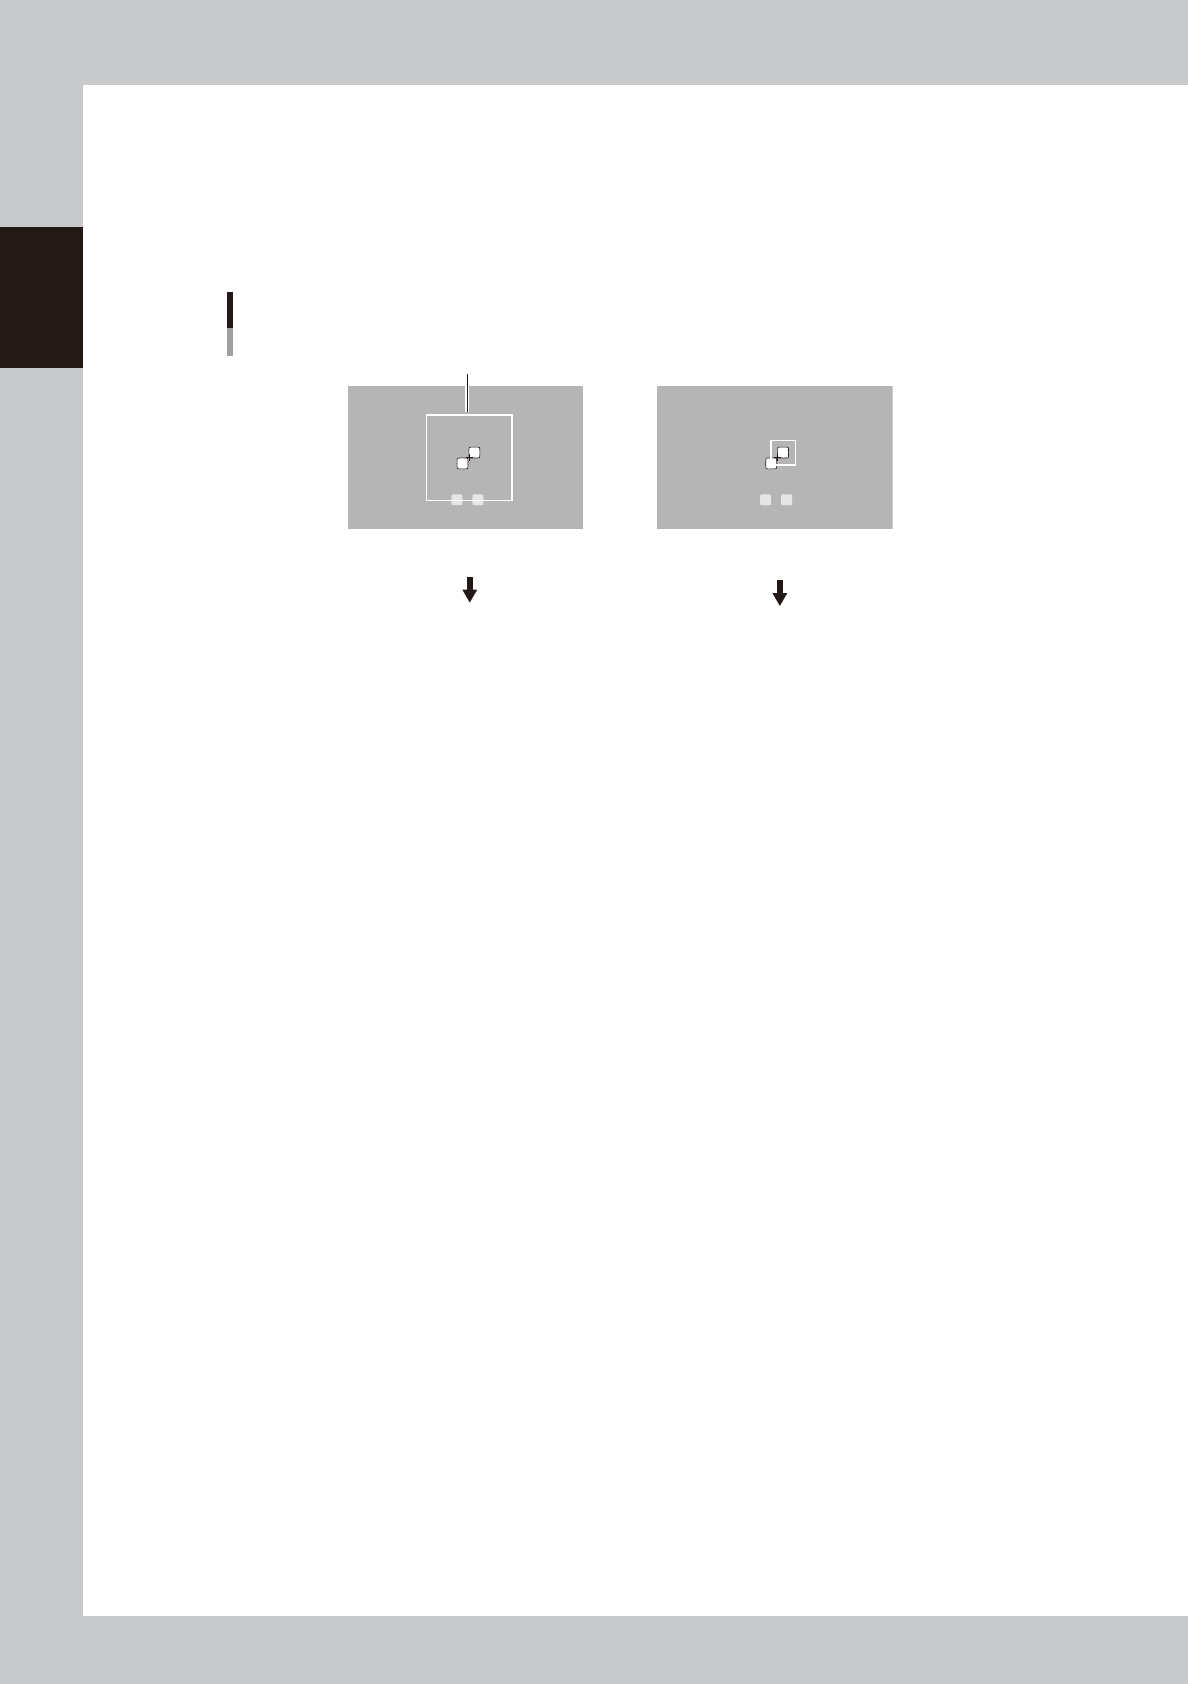
If the search area is too large and other mark enters the search area as shown on the left of the figure
below, reduce it. Conversely, if the search area is too small as shown on the right, enlarge it.
Search area adjustment
Search area
Search area is too large, so
other marks are recognized.
Reduce the search area
Search area is too small,
so the target pattern is not
inside the search area.
Enlarge the search area.
63706-N1-00
y
Press the [OK] button to save the data.
The Mark Adjust screen closes and returns to the Mark screen.
7-15
7
Other functions
2.2 Using the pattern matching
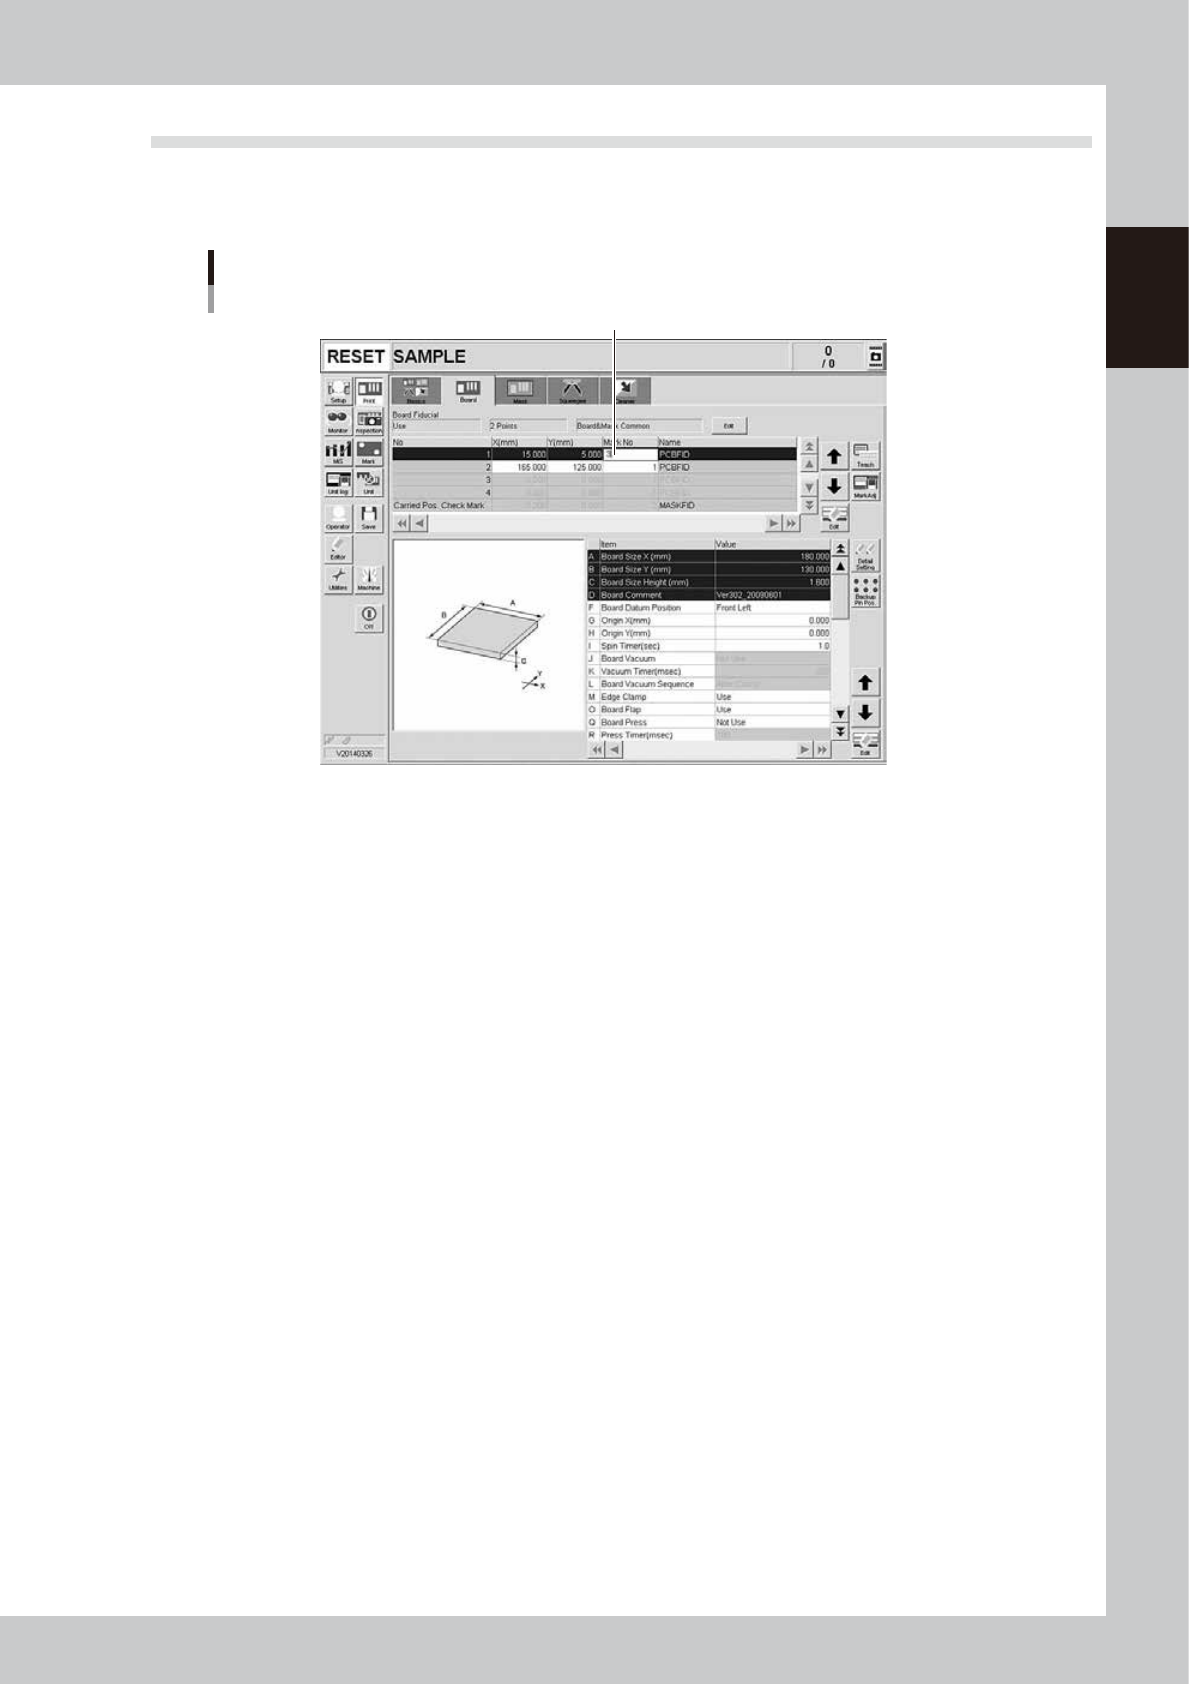
Pattern matching can be used in the same way as the fiducial marks. In this case, specify the pattern mark No.
in the data list on the [Print]-[Board] tab or [Print]-[Mask] tab. (The figure below shows an example when using
pattern matching as board fiducial marks.
Example of using pattern matching
Specify the mark No. registered as pattern.
64614-N1-10
7-16
7
Other functions
3. Matrix pin arrangement
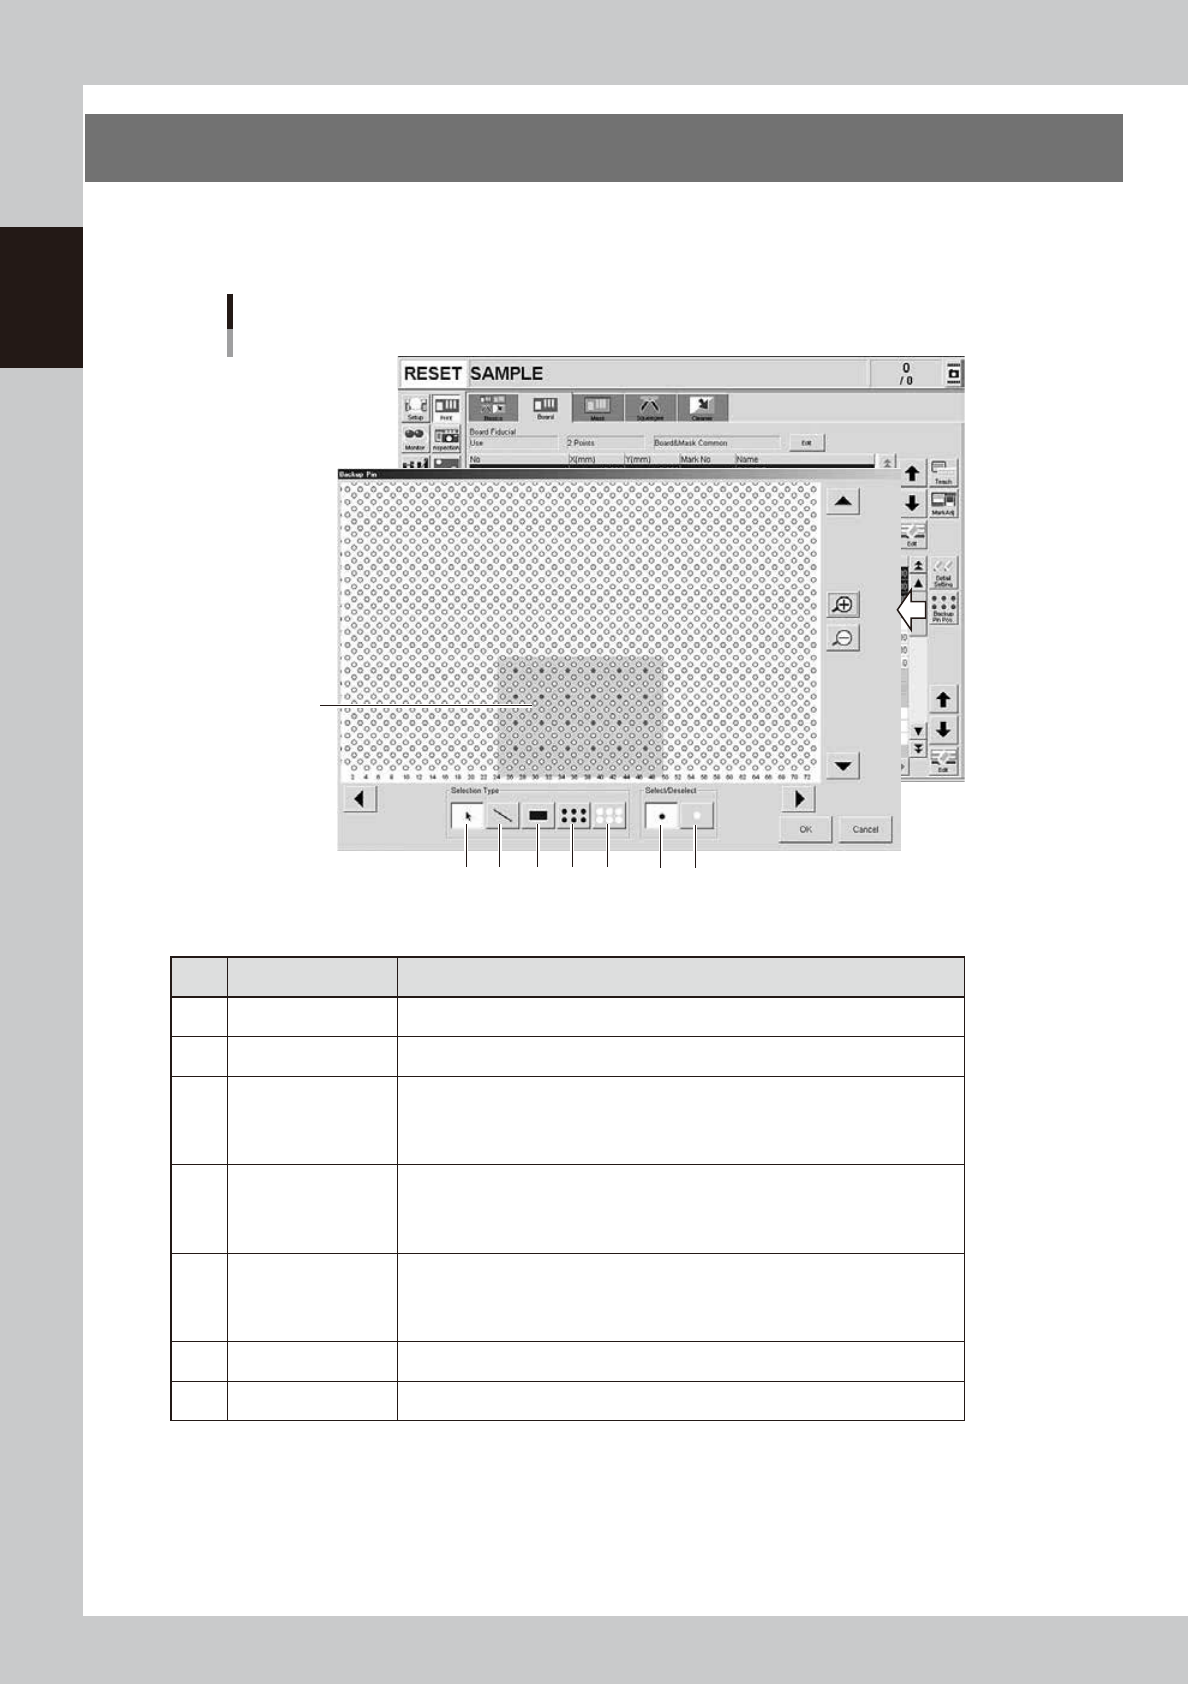
When you press the [Backup Pin Pos.] button on the [Print]-[Board] tab screen, the "Backup Pin" screen
appears. On the graphic view in this screen, you can register the matrix pin arrangement according to the
board size.
"Backup Pin" screen
Shaded area
shows board
size.
23 4 5 6 7 1
64715-N1-00
n
Operation buttons
Button name Function
1 Select Press this button when selecting pins on the graphic view.
2 Deselect Press this button when canceling the pin selection made on the graphic view.
3 Pointer
By pressing this button with the [Select] button depressed, you can select pins
by clicking or dragging the mouse.
By pressing this button with the [Deselect] button depressed, you can cancel the
pin selection by clicking or dragging the mouse.
4 Draw Line
By pressing this button with the [Select] button depressed, you can select pins
by drawing a line (dragging the mouse).
By pressing this button with the [Deselect] button depressed, you can cancel the
pin selection by drawing a line (dragging the mouse).
5 Draw Rectangle
By pressing this button with the [Select] button depressed, you can select pins
by drawing a rectangle (dragging the mouse).
By pressing this button with the [Deselect] button depressed, you can cancel the
pin selection by drawing a rectangle (dragging the mouse).
6 Select All Pins Click this button to select all pins on the graphic view.
7 Deselect All Pin Click this button to cancel all pins you selected on the graphic view.