YCP10 Users_E.pdf - 第131页
Chapter 5 Creating and setting the data T his chapter describes how to create new data necessary for solder printing and how to edit the data and parameters, as well as the definitions of parameters. Contents 1. Creating…
4-34
4
Daily operation
7
Quit the software.
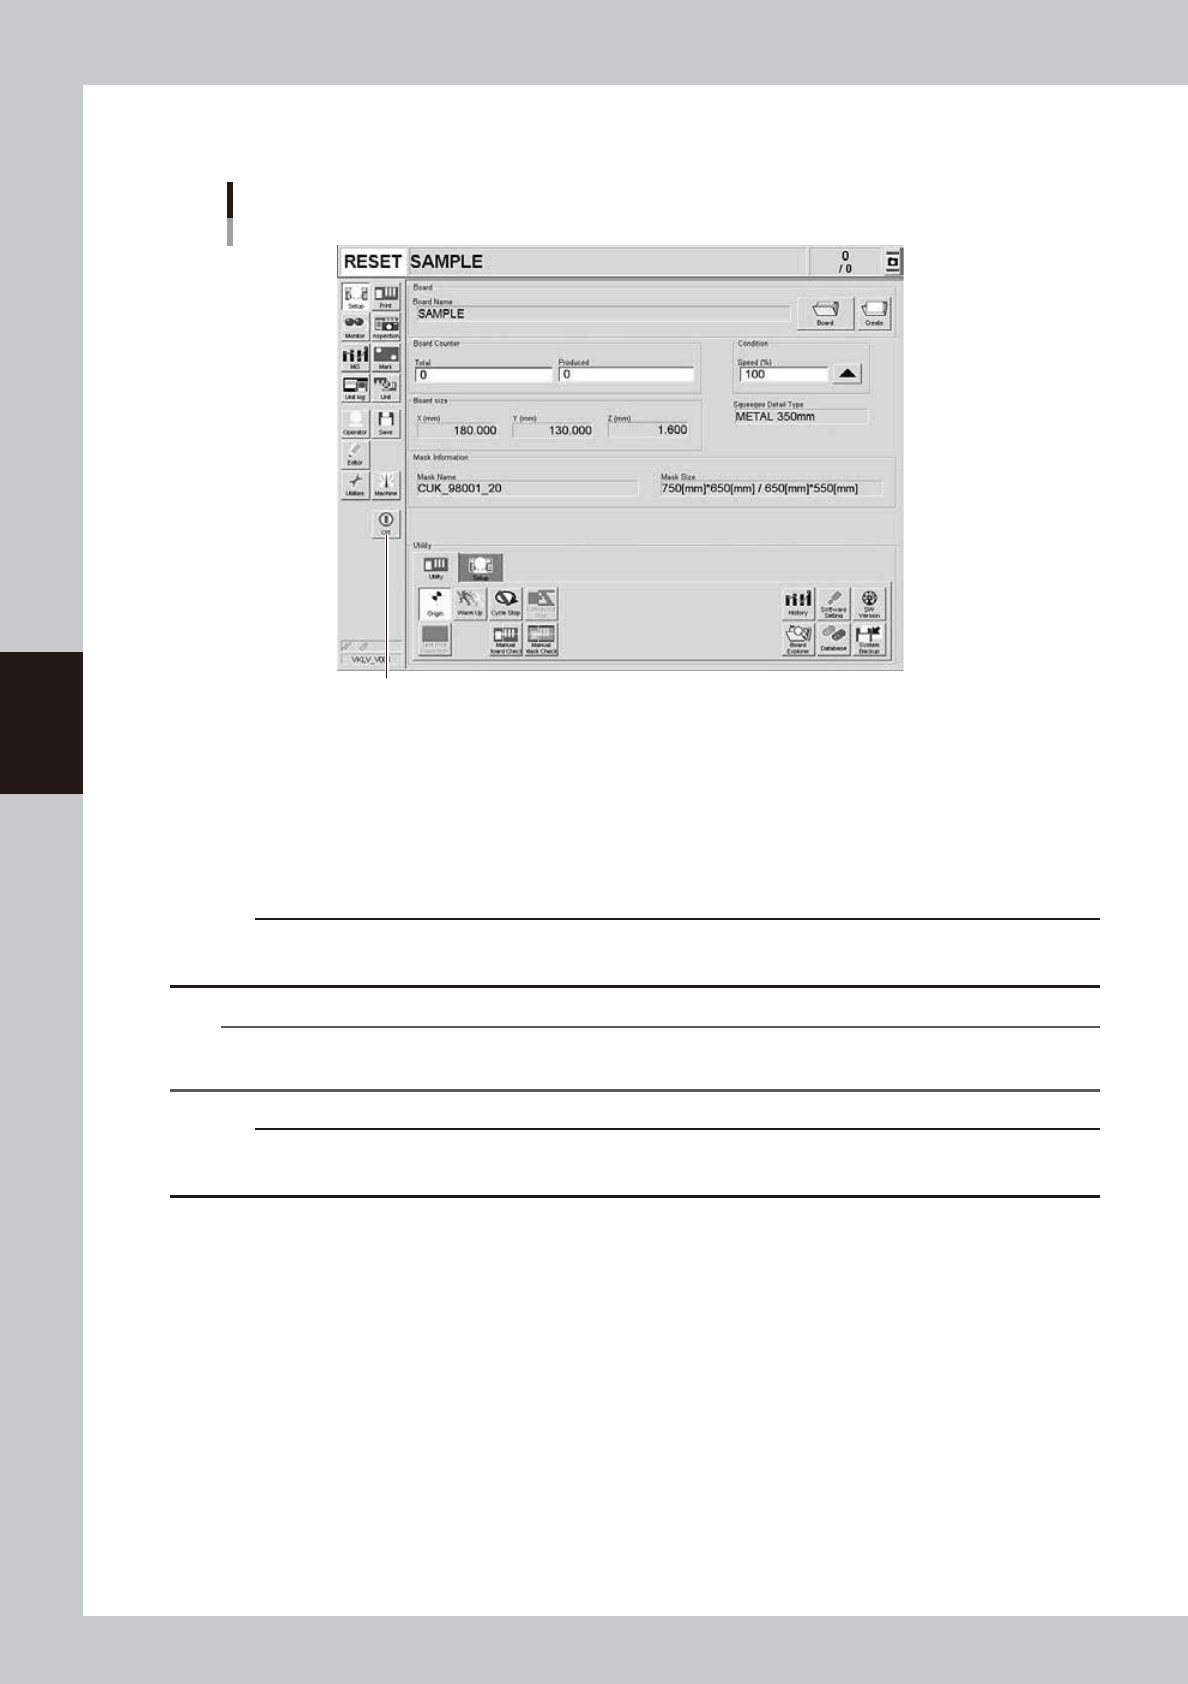
Press the [Off] button on the operation display and follows the message that appears on the screen.
[Off] button
[Off] button
64422-N1-10
8
Turn off the power switch on the front right of the machine.
See "2.3 Powering off the machine" in Chapter 2.
9
Clean the squeegees and mask.
After detaching the squeegees and mask, clean them with the appropriate cleaner and
wiper(available as option) to wipe way the remaining solder and flux.
c
CAUTION
Take precautions when handling solvents. See "1.9 Handling solvents (including solder and adhesive)" in Safety
instructions.
n
NOTE
To find how to correctly handle the mask and solder, refer to the instruction manual of the mask or solder
manufacturer.
c
CAUTION
How well you clean the mask you detached after use will greatly affect the production yield the next time that same
mask is used. Also handle the squeegee and mask carefully to avoid dents and scratches.

Chapter 5 Creating and setting the data
This chapter describes how to create new data necessary for solder printing and how to edit the data and parameters, as well
as the definitions of parameters.
Contents
1. Creating new data 5-1
2. Basic data setting 5-3
2.1 Configuration of [Basics] tab screen 5-3
3. Board data setting 5-5
3.1 Board marks and parameter setting 5-5
3.2 Board data detail setting 5-11
4. Mask data setting 5-15
4.1 Mask marks and parameter setting 5-15
4.2 Mask data detail setting 5-19
5. Squeegee data setting 5-21
5.1 Squeegee detail setting 5-26
6. Cleaner data setting 5-29
7. Creating the mark data 5-33
7.1 Creating procedure 5-34
7.2 Basic parameters 5-35
7.3 Shape parameters 5-36
7.4 Vision parameters 5-38
7.5 Mark Adjust mode 5-40
8. Graphic alignment 5-43
9. Making a test print 5-47
5-1
5
Creating and setting the data
1. Creating new data
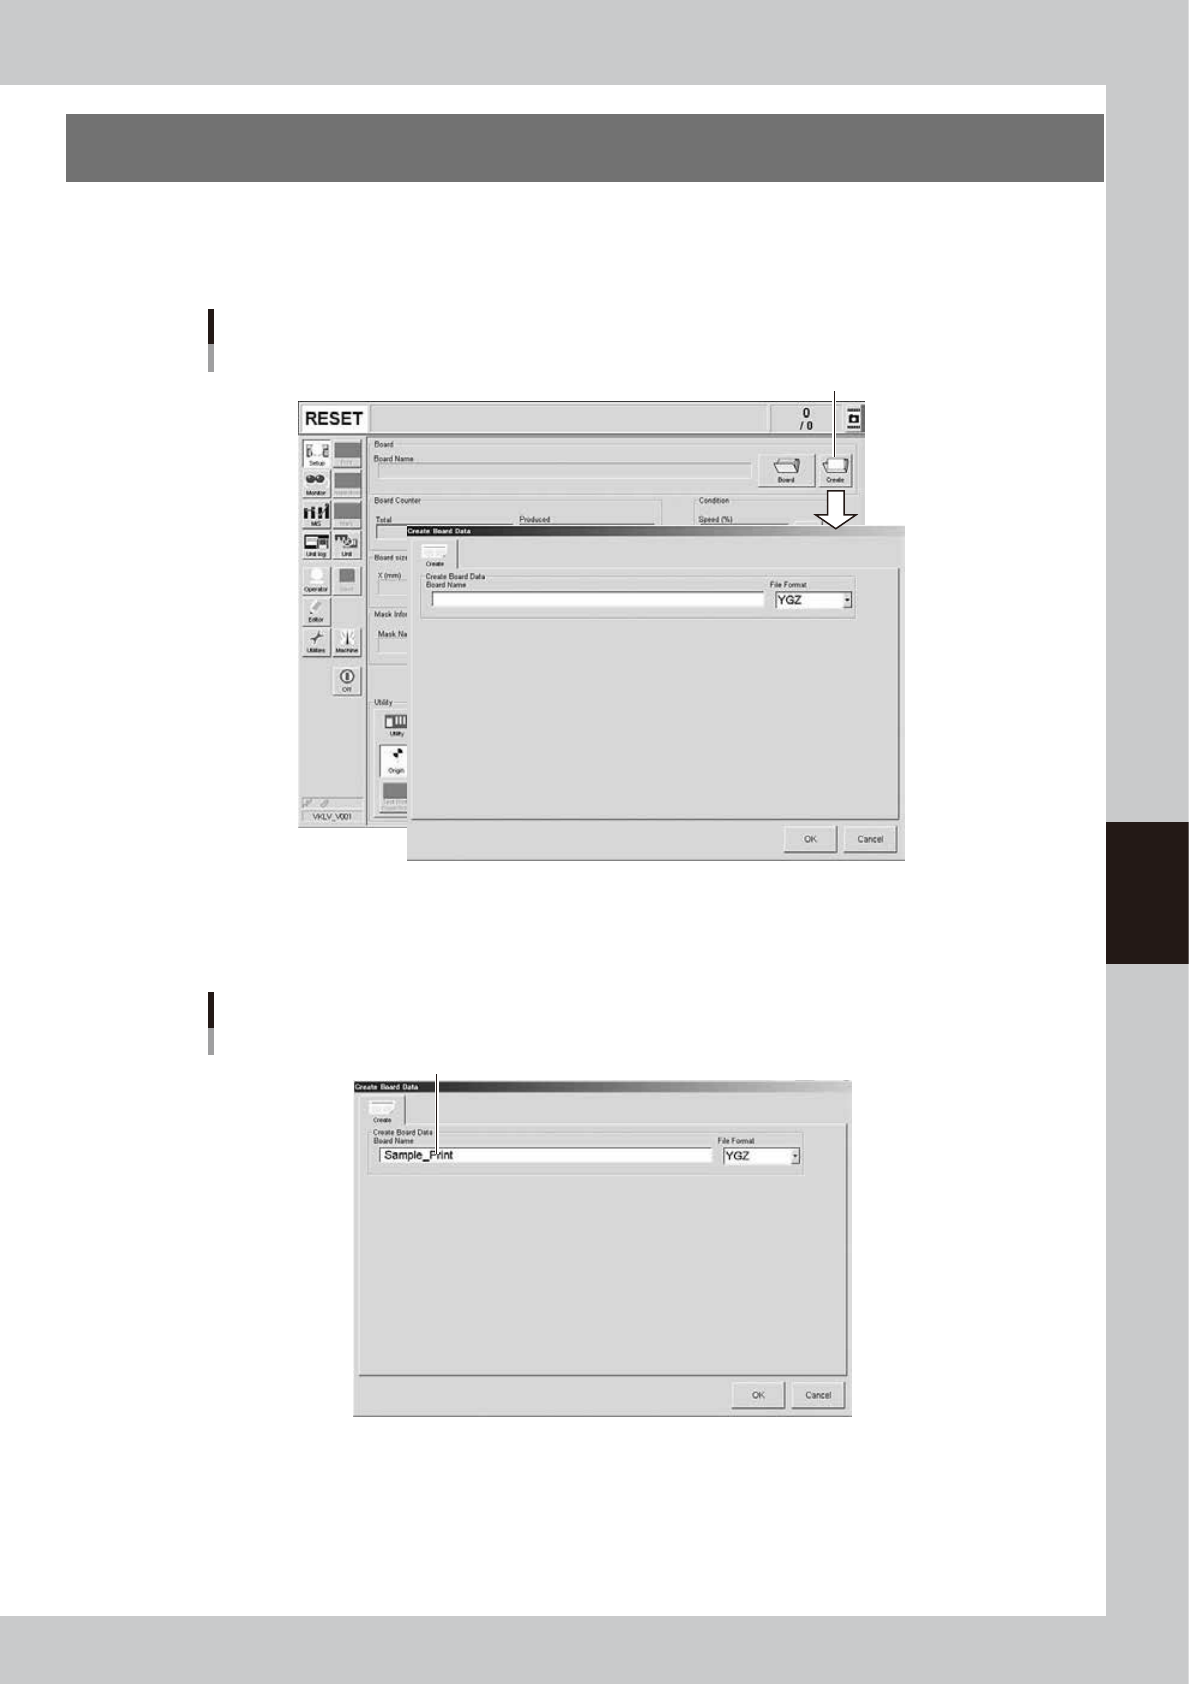
First, you must register a new board name to create new data. Register a new board name as follows.
1
Press the [Create] button on the Setup screen.
The "Create Board Data" screen appears as shown below.
[Create] button
“Create Board Data” screen
64501-N1-10
2
Enter a board name in the "File name" box.
Enter a board name within 20 alphanumeric characters from the keyboard.
Do not use spaces and symbols other than underbars ( _ ) .
Entering a board name
Enter the board name and press [OK].
64502-N1-00