YCP10 Users_E.pdf - 第196页
6-14 6 Managing the data 3 Restore the s ystem data. When the “VgosSystemFullBackup” screen appears, check that the backup data is for the machine where you want to restore and click the [Next] button. The “ FLASH DISK” …
6-13
6
Managing the data
1.3.2 Restoring a system full backup
To restore the system full backup data, use the dedicated software installed on a PC.
The following steps describe how to restore system data into a flash disk using the system full backup data
stored in a USB flash drive.
n
Required components and devices
• Flash disk (parts No. and name: KHL-M4255-00 FLASH DISK)
• Data acquired by system full backup
• PC (Windows XP or later)
• Card reader or memory card adapter
c
CAUTION
Always use a YAMAHA genuine flash disk. U sing other flash disks may cause malfunction.
n
NOTE
Use a PC with any of the following OS: Windows XP Professional (32 bits) / Windows Vista (32 bits) / Windows 7 (32 bits /
64 bits)
n
Restoring onto a flash disk
1
Connect the USB flash drive to the PC.
1. Insert the USB flash drive containing the system full backup data into the USB port of the PC.
2. A screen appears asking you to select what you want Windows to do. Select “Using Windows
Explorer to open a folder to display a file” and click the [OK] button. The “REMOVABLE” screen then
appears.
TIP
If the data acquired by system full backup is stored on the network, select the folder containing the system full backup
data you want to restore.
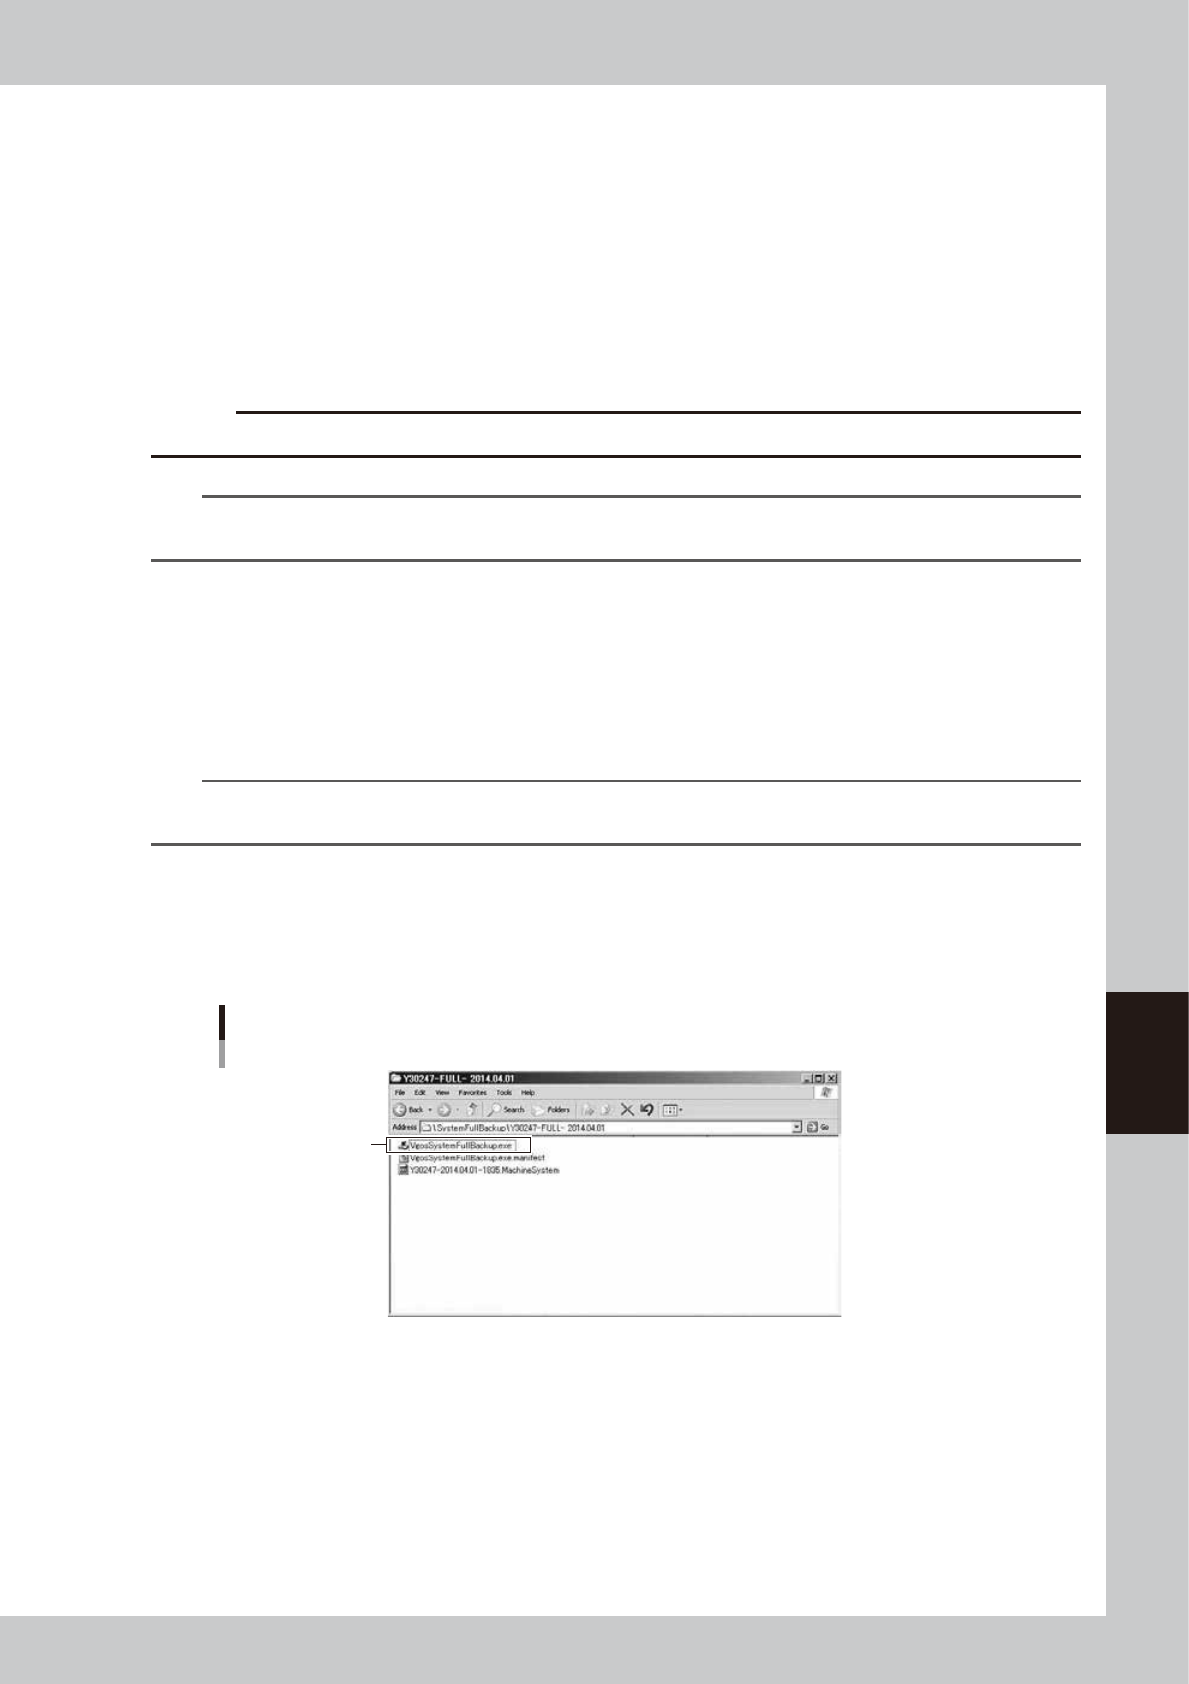
2
Start the restore software.
1. Double-click the folder that was created by system full backup.
2. The folder contains three files. Double-click the “VgosSystemFullBackup.exe” file, and the restore
software starts up.
Starting the restore software
Double-click this file.
64617-N1-00
6-14
6
Managing the data
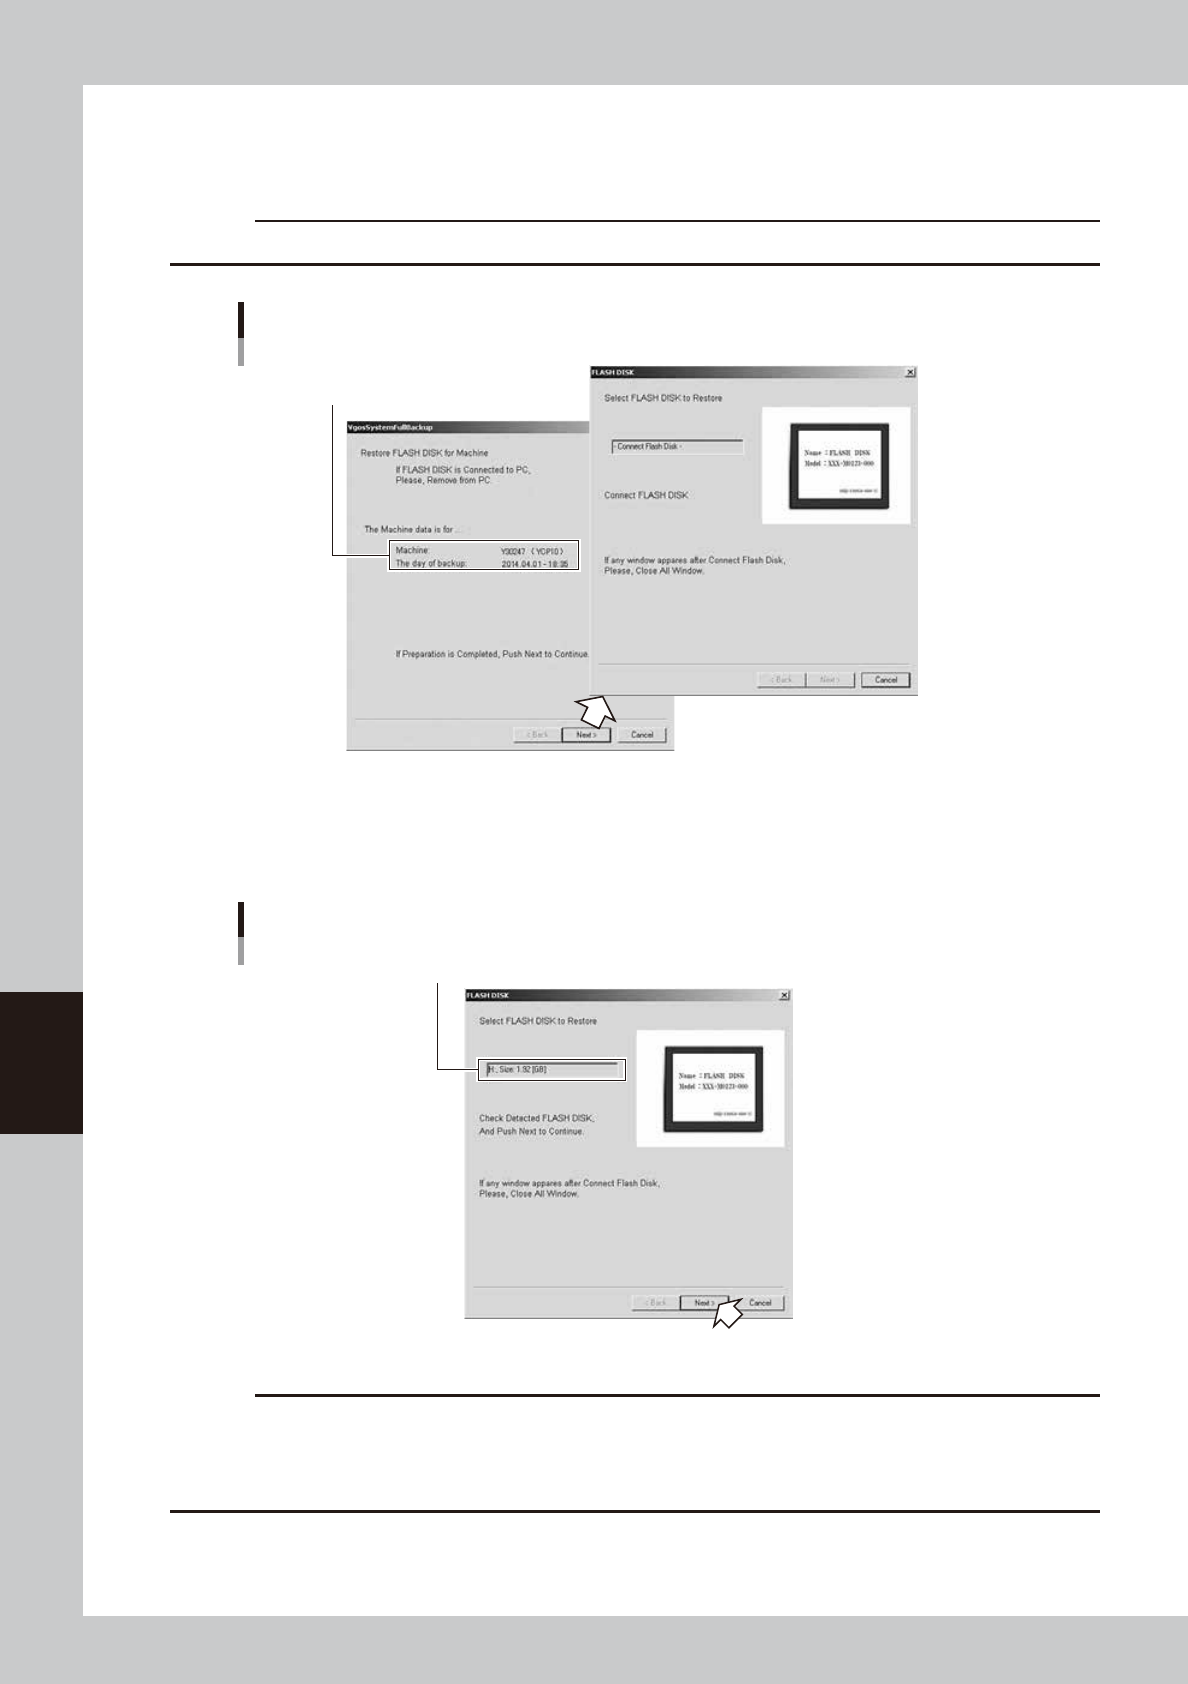
3
Restore the system data.
When the “VgosSystemFullBackup” screen appears, check that the backup data is for the machine
where you want to restore and click the [Next] button. The “FLASH DISK” screen then appears.
c
CAUTION
If a flash disk is connected to the PC , remove it and then click the [Next] button.
Checking the machine
Check here.
64618-N1-00
4
Connect the flash disk.
When the flash disk is connected to the PC, it is detected by the PC and displayed in the screen.
The [Next] button becomes active, and click it to continue.
When flash disk is connected
Detected flash disk
64619-N1-00
c
CAUTION
• Windows Explorer may automatically start when a flash disk is connected to the PC.
If any application automatically starts, quit it.
• If the flash disk is not detected even after connecting it to the PC , remove the flash disk and then reconnect it again.
• Restoring will write the system full backup data over the data in the flash disk.
6-15
6
Managing the data
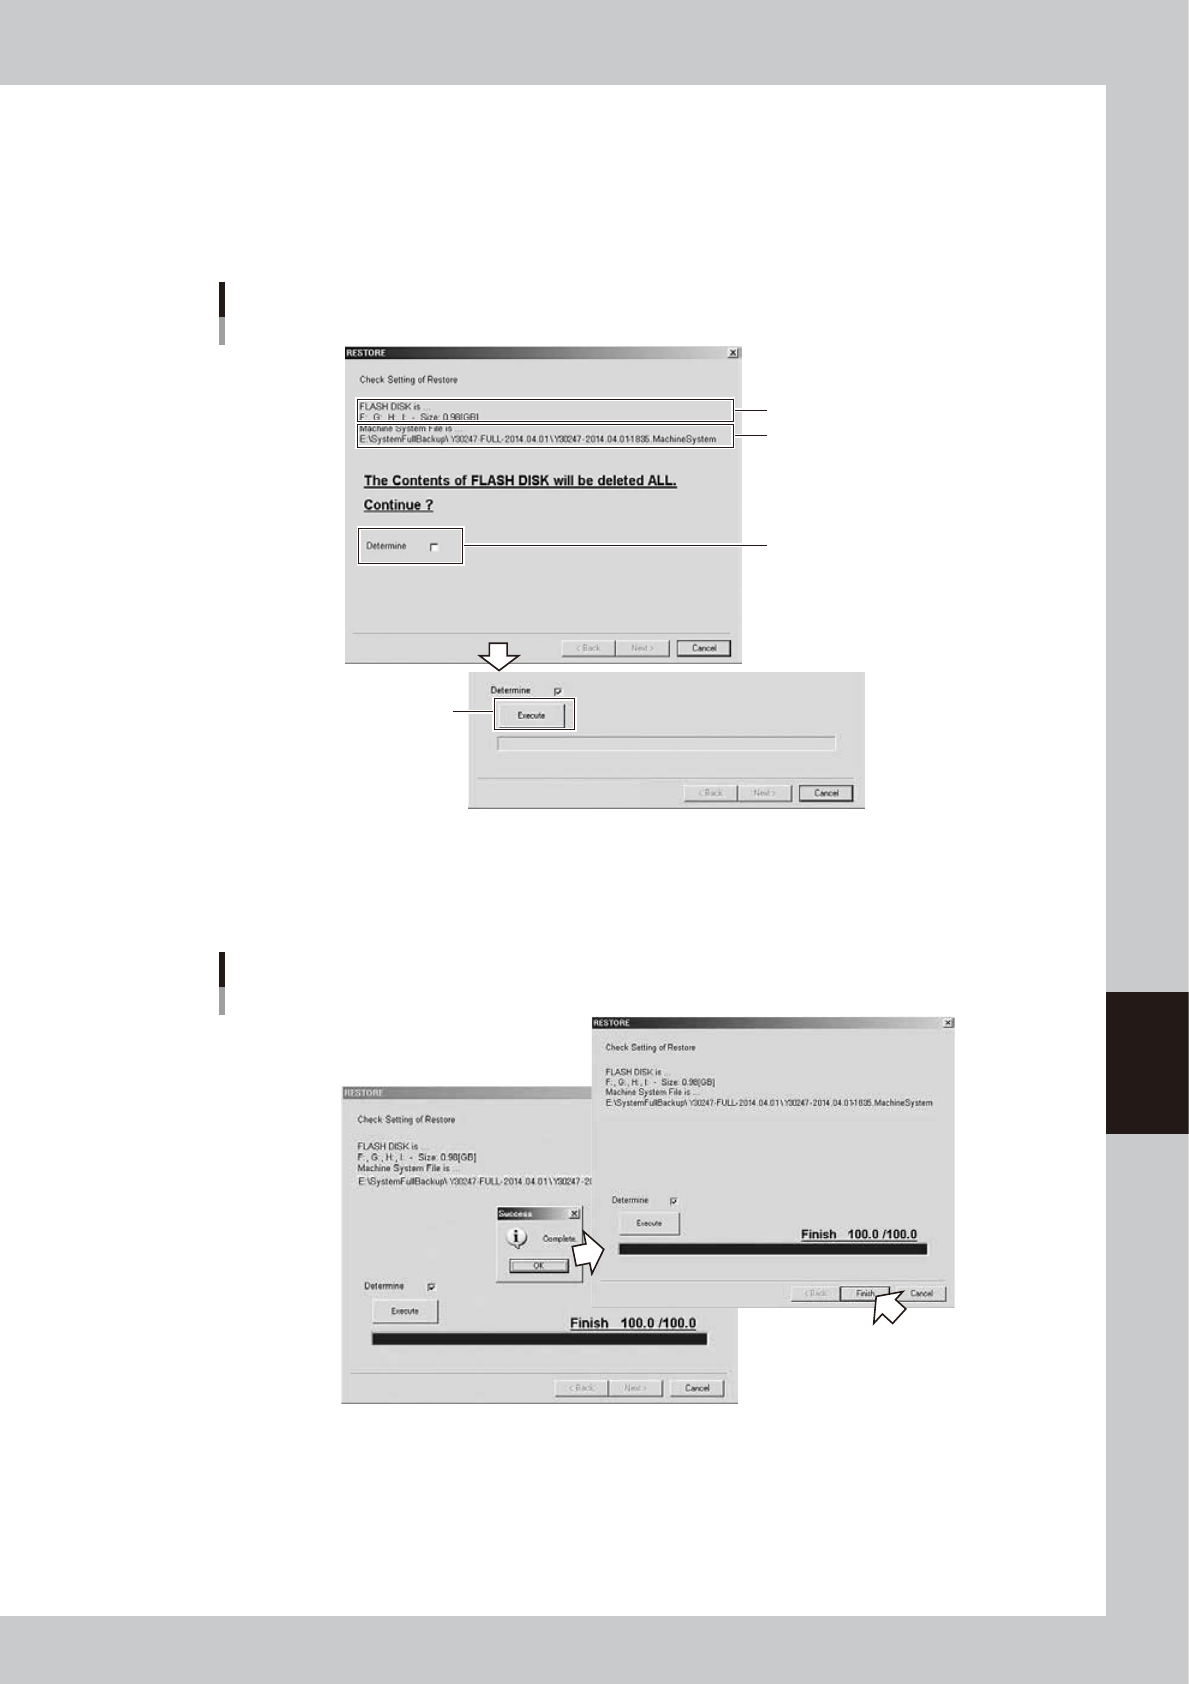
5
Check the settings for restore and start restoring the backup data.
1. When the “RESTORE” screen appears, check the flash disk drive and the path to the system full
backup data.
2. After checking, select the “Determine” check box, and the [Execute] button appears.
3. Click the [Execute] button to start the restore process.
Checking the restore settings and executing restore
Flash disk drive
Path to the system full backup data
“Determine” check box
[Execute] button
64620-N1-00
4. When finished restoring the system data, the “Success” screen appears. Click the [OK] button, and
the [Next] button in the “RESTORE” screen changed to the [Finish] button.
5. Click the [Finish] button to finish the restore process.
Restore process is complete
64621-N1-00
6
Install the flash disk into the machine.
Install the new flash disk containing the restored system data into the machine.
Restoring the system full backup data is now complete.