YCP10 Users_E.pdf - 第227页
7-17 7 Other functions 4. Manual operation When you press the [Unit] button, the following screen appears. This screen is divided by several tabs such as [Conveyor], [Mask], [Squeegee] and [Cleaner] to allow manually ope…
7-16
7
Other functions
3. Matrix pin arrangement
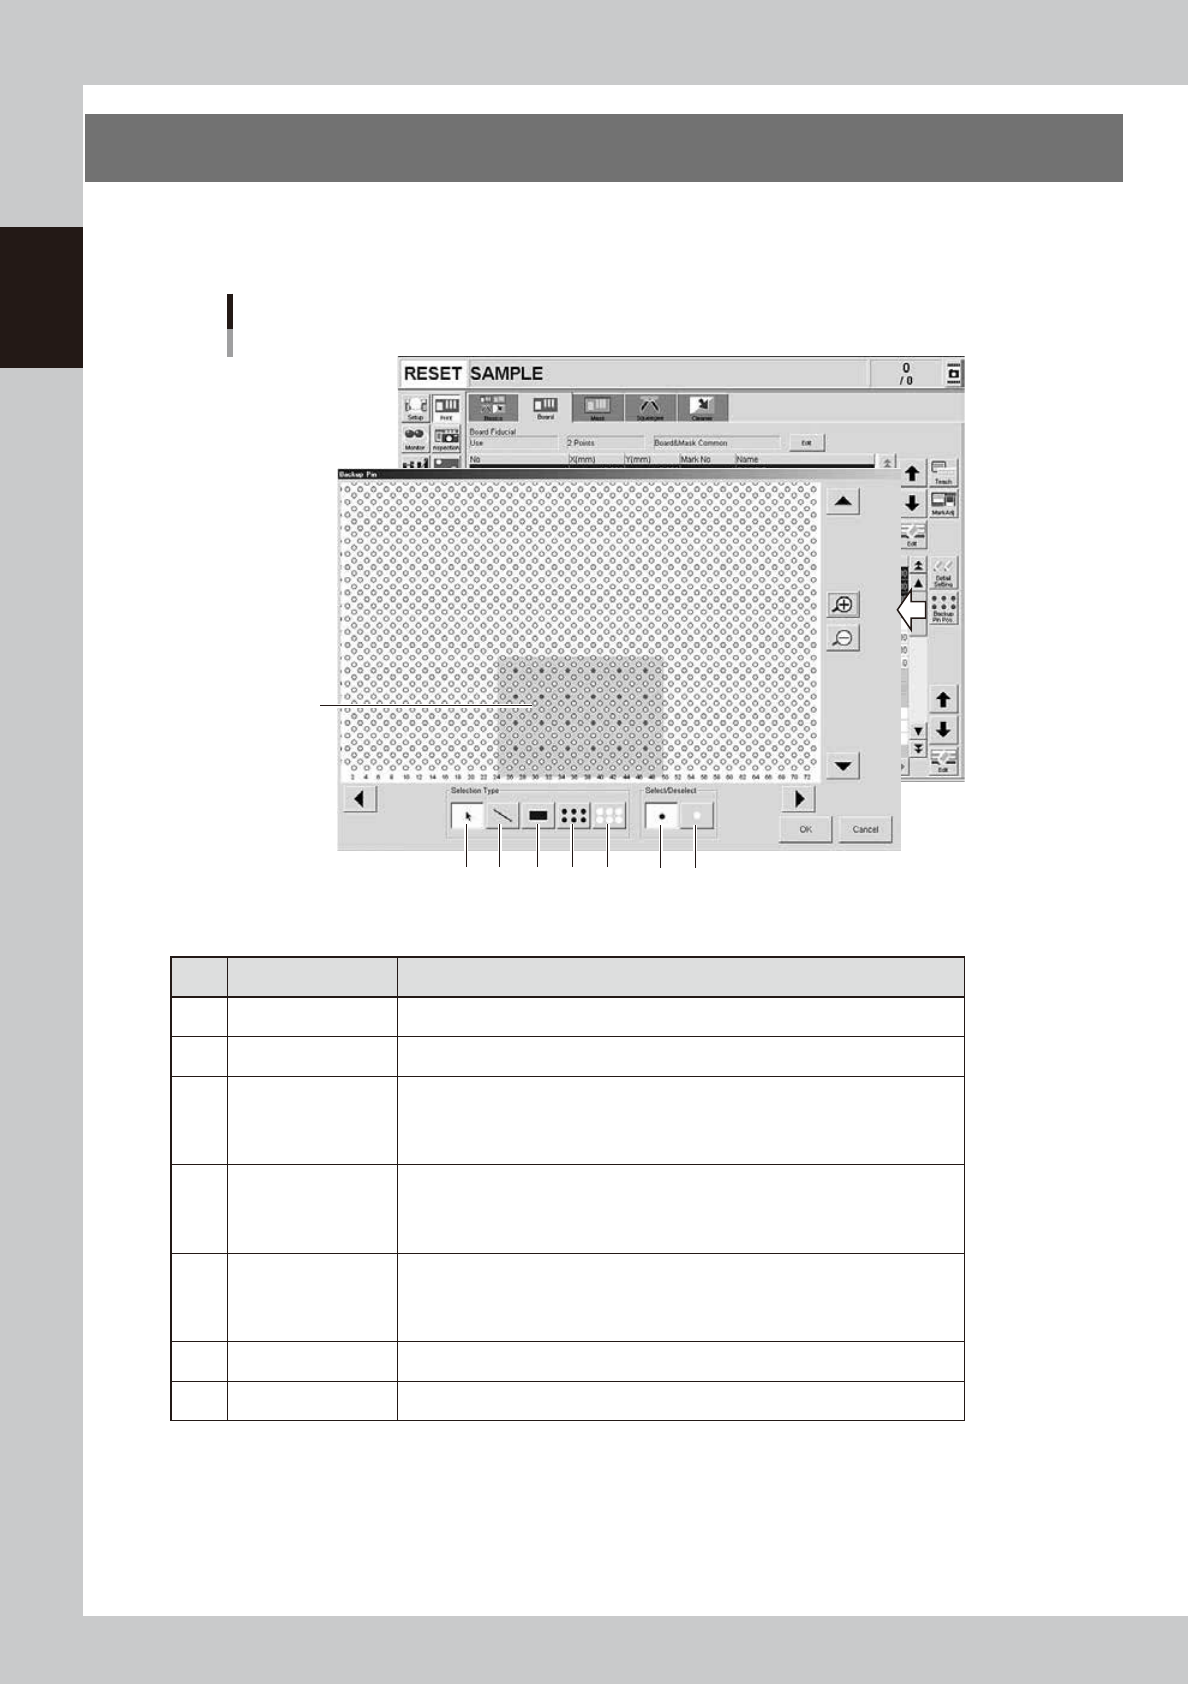
When you press the [Backup Pin Pos.] button on the [Print]-[Board] tab screen, the "Backup Pin" screen
appears. On the graphic view in this screen, you can register the matrix pin arrangement according to the
board size.
"Backup Pin" screen
Shaded area
shows board
size.
23 4 5 6 7 1
64715-N1-00
n
Operation buttons
Button name Function
1 Select Press this button when selecting pins on the graphic view.
2 Deselect Press this button when canceling the pin selection made on the graphic view.
3 Pointer
By pressing this button with the [Select] button depressed, you can select pins
by clicking or dragging the mouse.
By pressing this button with the [Deselect] button depressed, you can cancel the
pin selection by clicking or dragging the mouse.
4 Draw Line
By pressing this button with the [Select] button depressed, you can select pins
by drawing a line (dragging the mouse).
By pressing this button with the [Deselect] button depressed, you can cancel the
pin selection by drawing a line (dragging the mouse).
5 Draw Rectangle
By pressing this button with the [Select] button depressed, you can select pins
by drawing a rectangle (dragging the mouse).
By pressing this button with the [Deselect] button depressed, you can cancel the
pin selection by drawing a rectangle (dragging the mouse).
6 Select All Pins Click this button to select all pins on the graphic view.
7 Deselect All Pin Click this button to cancel all pins you selected on the graphic view.

7-17
7
Other functions
4. Manual operation
When you press the [Unit] button, the following screen appears. This screen is divided by several tabs such
as [Conveyor], [Mask], [Squeegee] and [Cleaner] to allow manually operating the servo-controlled units. You
can also check the status of each sensor and I/O signal on the [I/O] tab screen.
Unit screen
Selection tab
64716-N1-10
7-18
7
Other functions
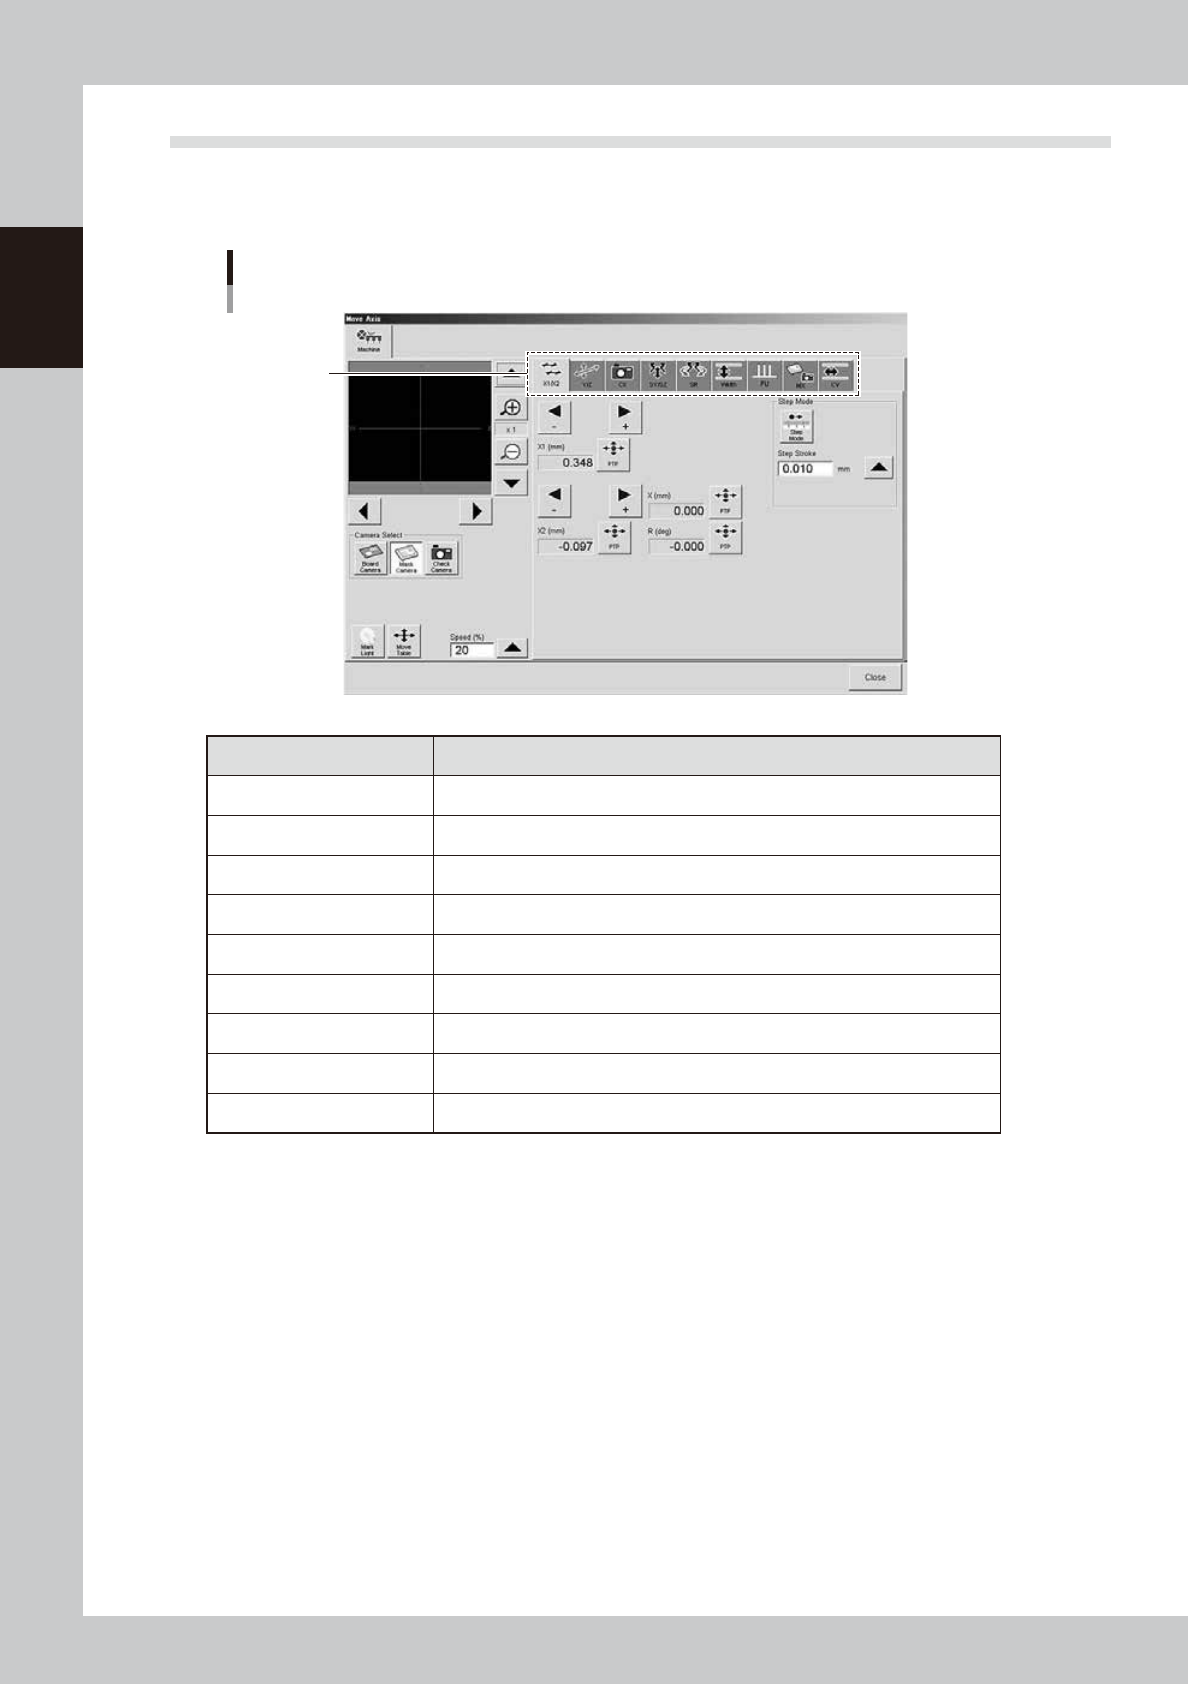
4.1 "Move Axis" screen
Pressing the [Axis] button on the Unit screen opens the "Move Axis" screen as shown below. The selecting tabs
"X1/X2", "Y/Z", "CX", "SY/SZ", and "SR",etc. are on the screen. The each axis can be operated manually with the
tabs.
"Move Axis" screen
Selection tab
64717-N1-00
Selection tab Function
X1/X2 Moves the board clamp table in the X direction.
Z/Y Moves the board clamp table in the Z (up/down) or Y direction.
CX Moves the board (print inspection) camera unit in the X direction.
SY/SZ Moves the squeegee head in the Y direction or moves it vertically.
SR Adjusts the 3S squeegee scraper angle. (3S squeegee only)
Width Adjusts the conveyor width.
PU Raises and lower the push-up plate.
MX Moves the mask camera along the board table in the X-direction.
CV Convey boards on the conveyor.