YCP10 Users_E.pdf - 第86页
3-10 3 Printing guide 3. T he message screen appears. Follow the instructions to set the board at the carry-in port, and then press the [OK] button. After the board has been transferred to the board clamp position, the b…
3-9
3
Printing guide
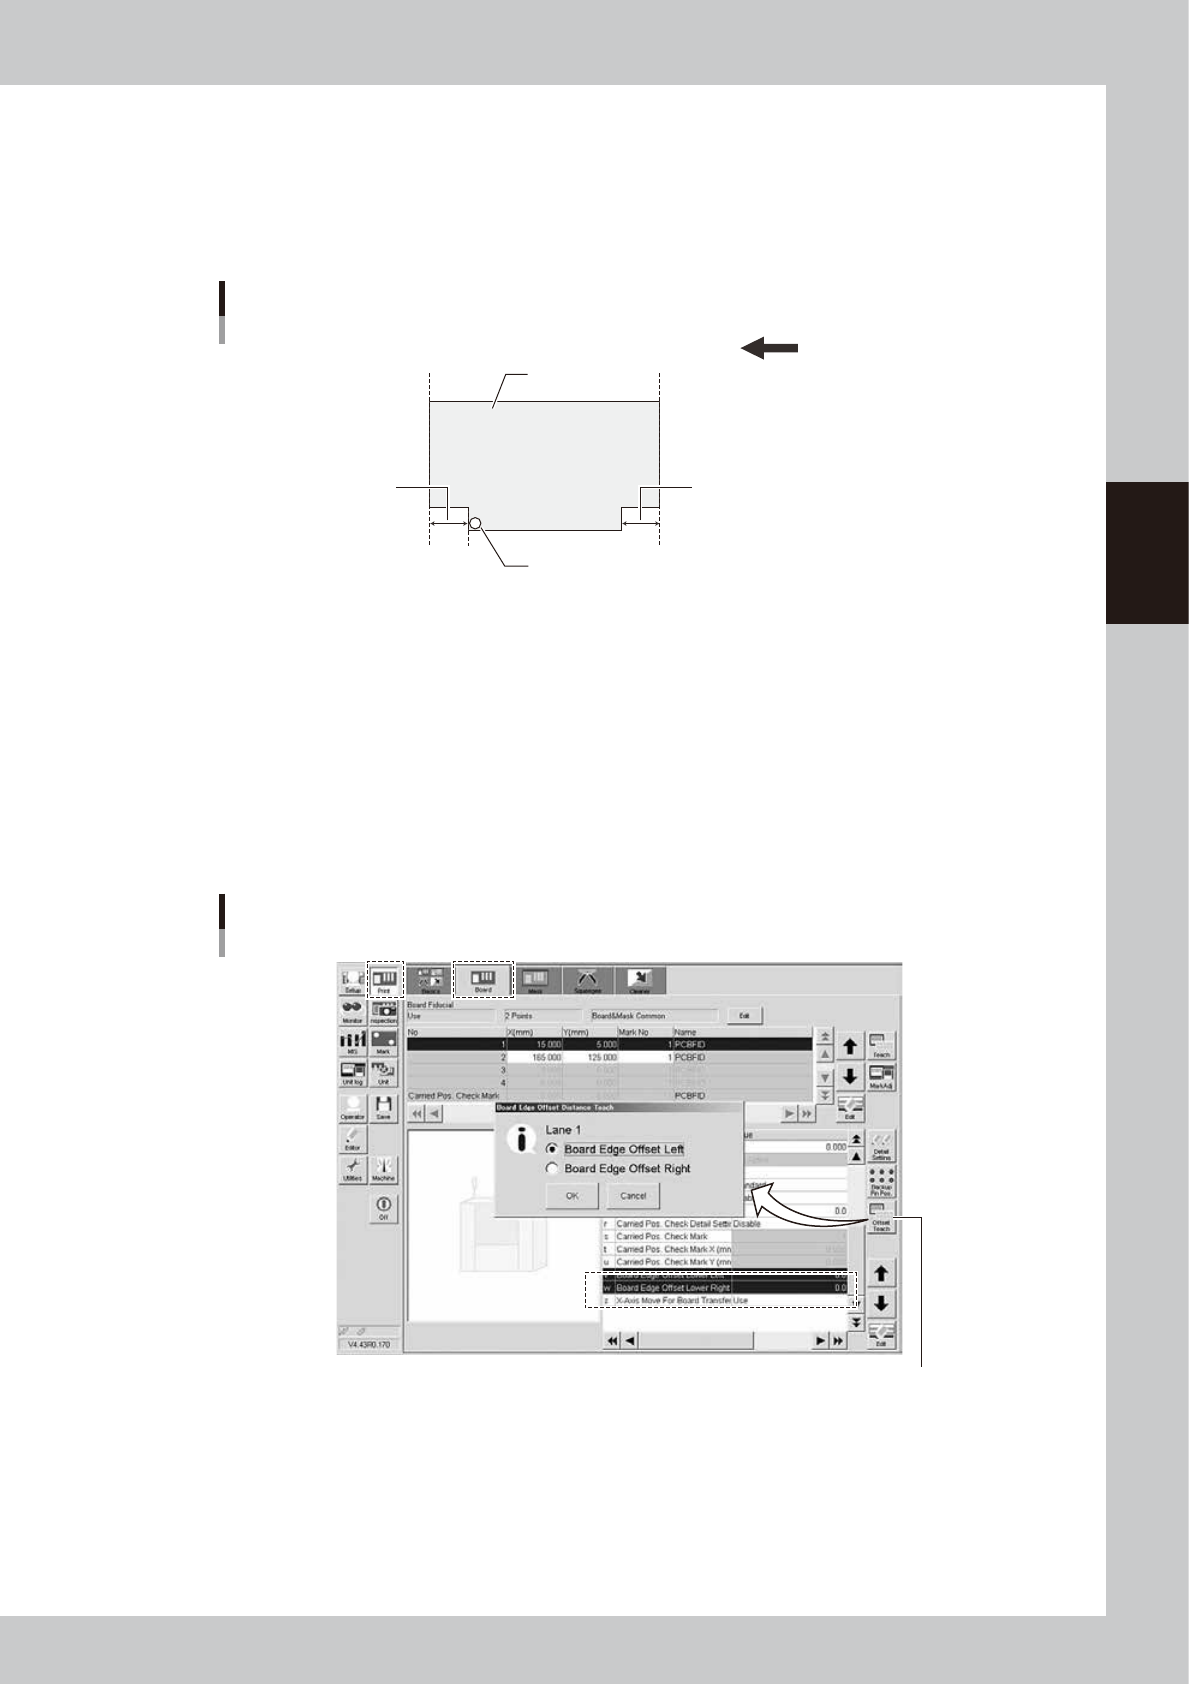
3.2.2 Board edge offset
n
Function
This function sets a deviation in response position of the board detection sensor when detecting the board notch or edge
shape so as to offset the board stop position.
Board edge offset
Transfer direction (right → left)
Board edge
Board
Sensor detection position
Board edge
Board edge offset Board edge offset
63308-N1-00
n
Setting procedure
When using the board edge offset, set the value to “v. Board Edge Offset Lower Left” or “w. Board Edge Offset Lower
Right” on the [Print]-[Board] tab screen through teaching using the [Offset Teach] button.
The initial value is "0.0". When the board edge offset function is not used, remain the initial value.
To use the board edge offset function, follow the steps below.
1. Press the [Offset Teach] button on the [Print]-[Board] tab screen.
2. The screen appears, allowing you to select a board edge offset you want to perform the teaching. Select a desired
board edge offset and press the [OK] button.
Board edge offset
[Offset Teach] button
[Offset Teach] button
64306-N1-10
3-10
3
Printing guide
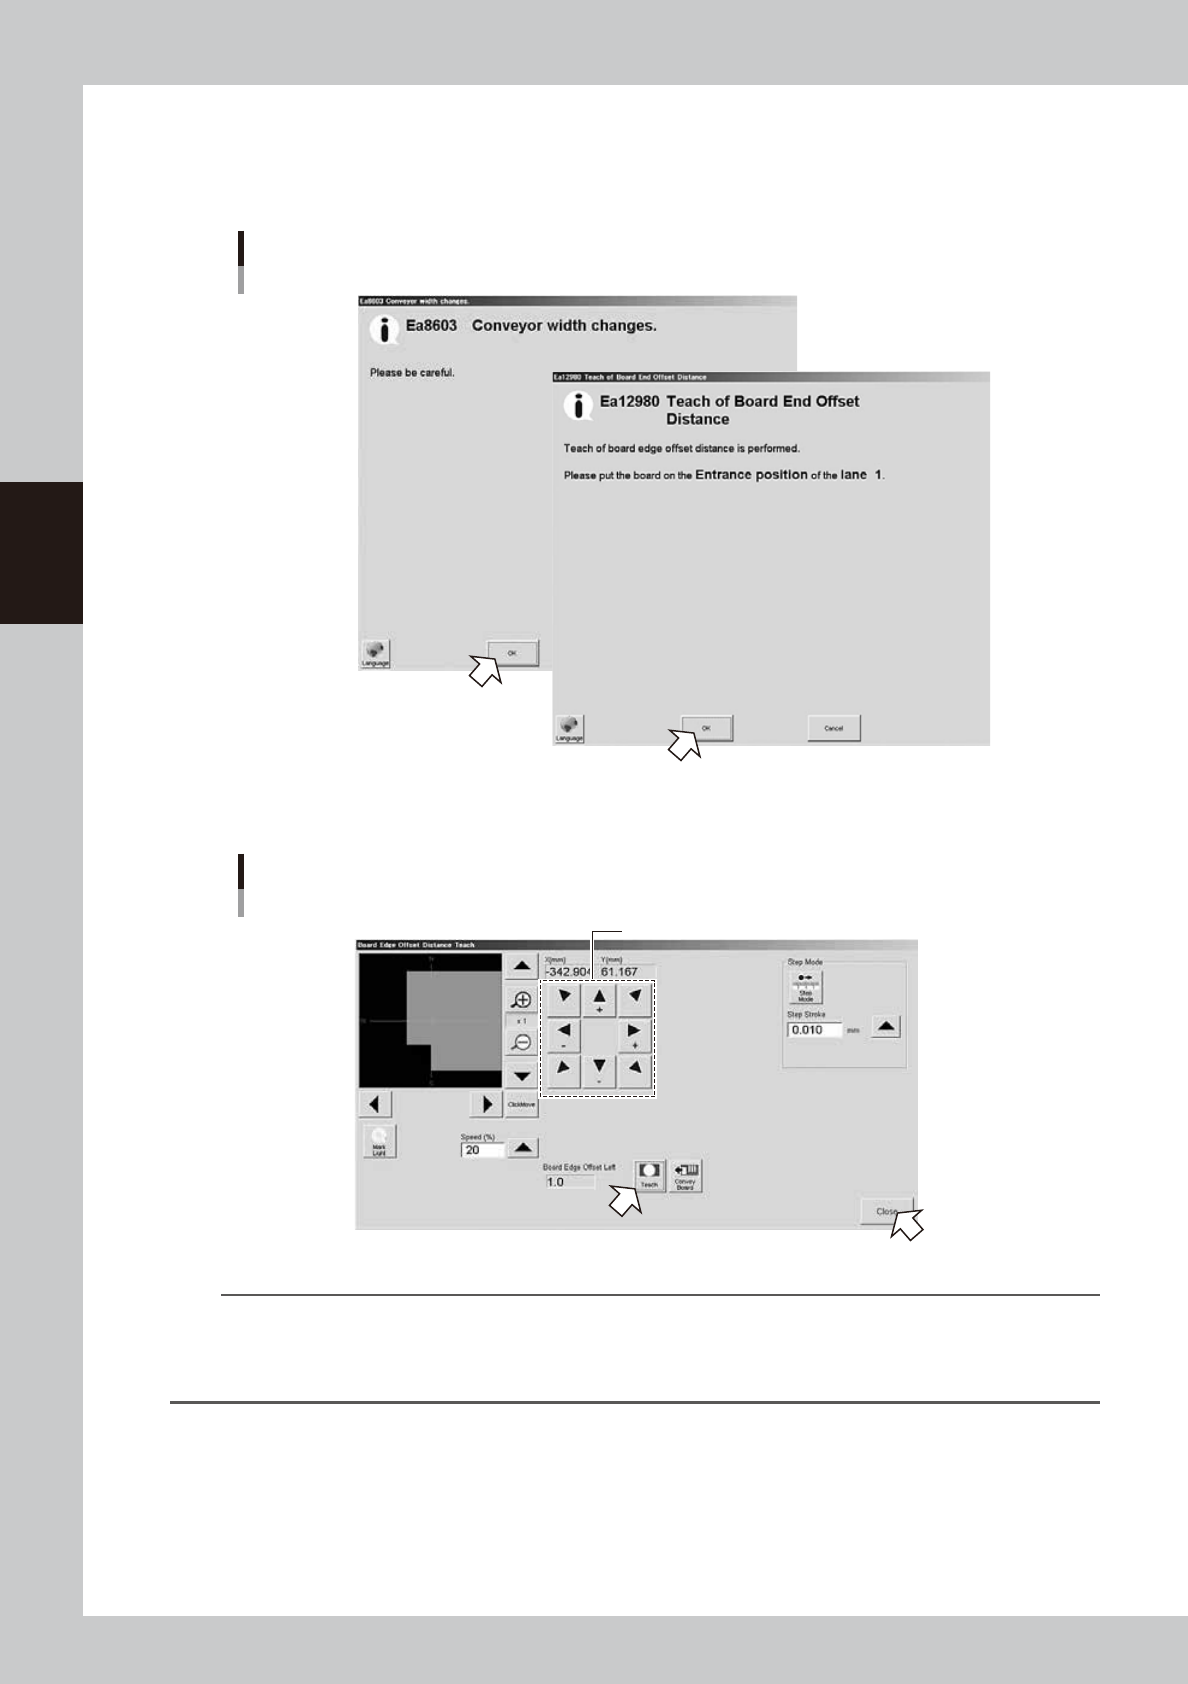
3. The message screen appears. Follow the instructions to set the board at the carry-in port, and then press the [OK]
button.
After the board has been transferred to the board clamp position, the board vision camera moves to the position where
the board detection sensor starts responding and the Teach screen will appear.
Board edge offset
Message screen
64307-N1-00
4. Operate the arrow buttons to display the board edge at the center of the screen, and then press the [Teach] button.
Board edge offset
Teach screen
Operate these buttons to display the board edge at the center.
64308-N1-00
TIP
When pressing the [Convey Board] button, the board is moved to the entrance or exit, and then it is transferred to the
detection sensor again.
When you want to perform the teaching again or make the check again with the values obtained from the teaching,
press this button to perform the operation again.
3-11
3
Printing guide
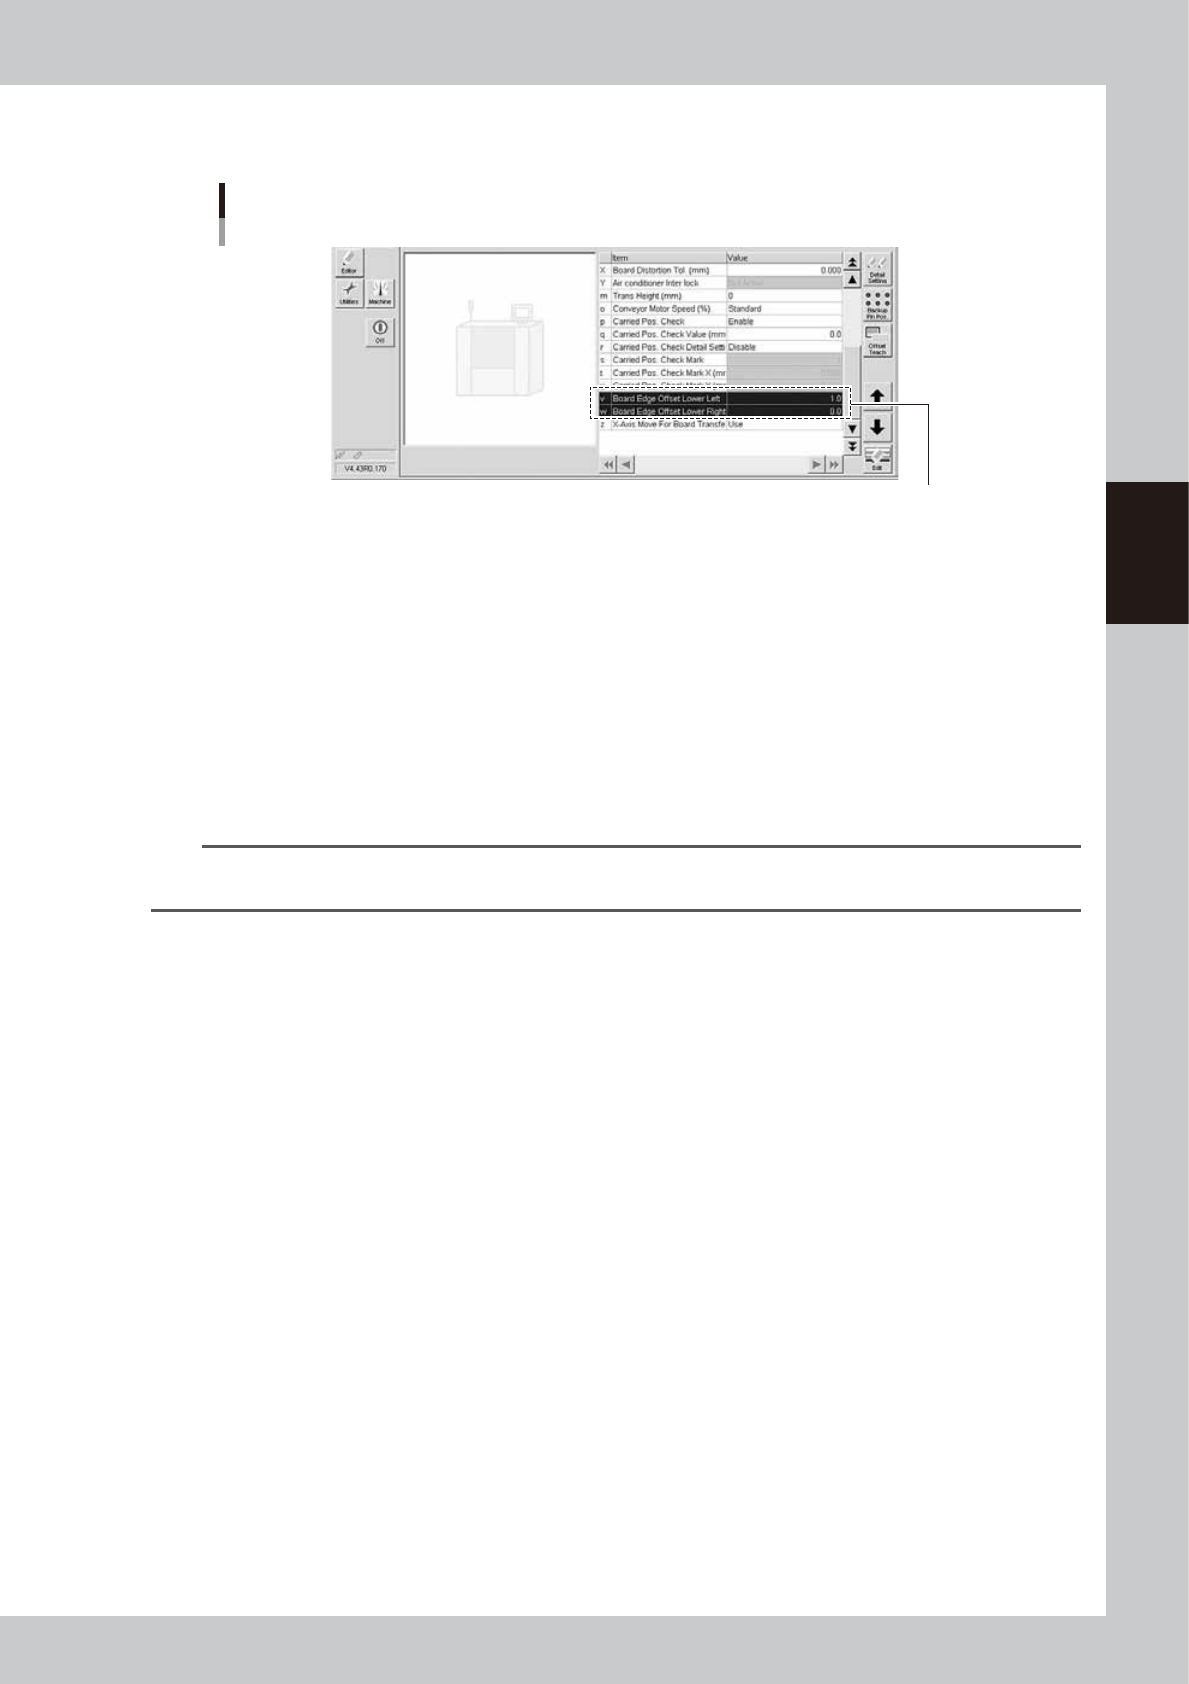
5. Press the [Close] button to close the Teach screen. The screen then returns to the previous screen, and the value
obtained from the teaching is set in "v. Board Edge Offset Lower Left" or "w. Board Edge Offset Lower Right".
Teaching completion
Example of "v Board Edge Offset Lower Left"
The value is entered.
64309-N1-10
3.2.3 Conveyor motor (board transfer) speed
n
Function
This function changes the conveyor motor (board transfer) speed.
n
Setting procedure
Set "o. Conveyor Motor Speed" on the [Print]-[Board] tab screen.
The data set in the machine setting is determined to the standard. To increase the speed, set a speed in a range of +10%
to +50% from this standard in 10% steps. Conversely, to decrease the speed, set a speed in a range of -10% to -90% from
the standard in 10% steps.
n
NOTE
· To increase the tact, increase the speed.
· To make the stop position stable, decrease the speed.