YCP10 Users_E.pdf - 第69页
2-9 2 Basic operations 2.2 Star ting the machine 1 T urn the power switch ON. T ur n on the power switch at the front lower right of the machine, by turning it to the right. The initialization screen appears to start loa…
2-8
2
Basic operations
2.1 Inspecting before operation
The table below shows checkpoints you should make before powering on.
e
w
WARNING
ALWAYS BE SURE TO PRESS THE EMERGENCY STOP BUTTON BEFORE STARTING THE INSPECTION.
n
Checkpoints before operation
Checkpoints Check items Reference
Conveyor unit
Check that no foreign matter or debris is on the
conveyor unit.
Check that the push-up jigs or matrix pins are
not set in areas wider than the board width to be
produced. Check that no matrix pins come loose
from the push-up table.
"4. Conveyor unit" in Chapter 1
Mask camera
Check that no foreign matter is sticking to the mask
camera.
Squeegee
Check that the squeegee knobs are securely
tightened.
Check that the squeegee scrapers have no
scratches, nicks and wear.
Check that no solder and grit are adhering to the
squeegee.
"3. Printing section" in Chapter 1
Cleaning unit
Check that the cleaner gauze roll is set correctly.
Check that the tank is refilled with cleaning alcohol
sufficiently.
"5. Cleaning unit" in Chapter 1
Mask stopper positions
Check that the mask frame stopper positions are
correct.
"7.1 Mask size and mask stopper
pin position" in Chapter 4
Upper door (safety door),
panels
Check that the upper door and panels are all
closed.
Solder
Check that solder has returned to room
temperature and is well agitated and rolled.
Solder manufacturer's instruction
manual
2-9
2
Basic operations
2.2 Starting the machine
1
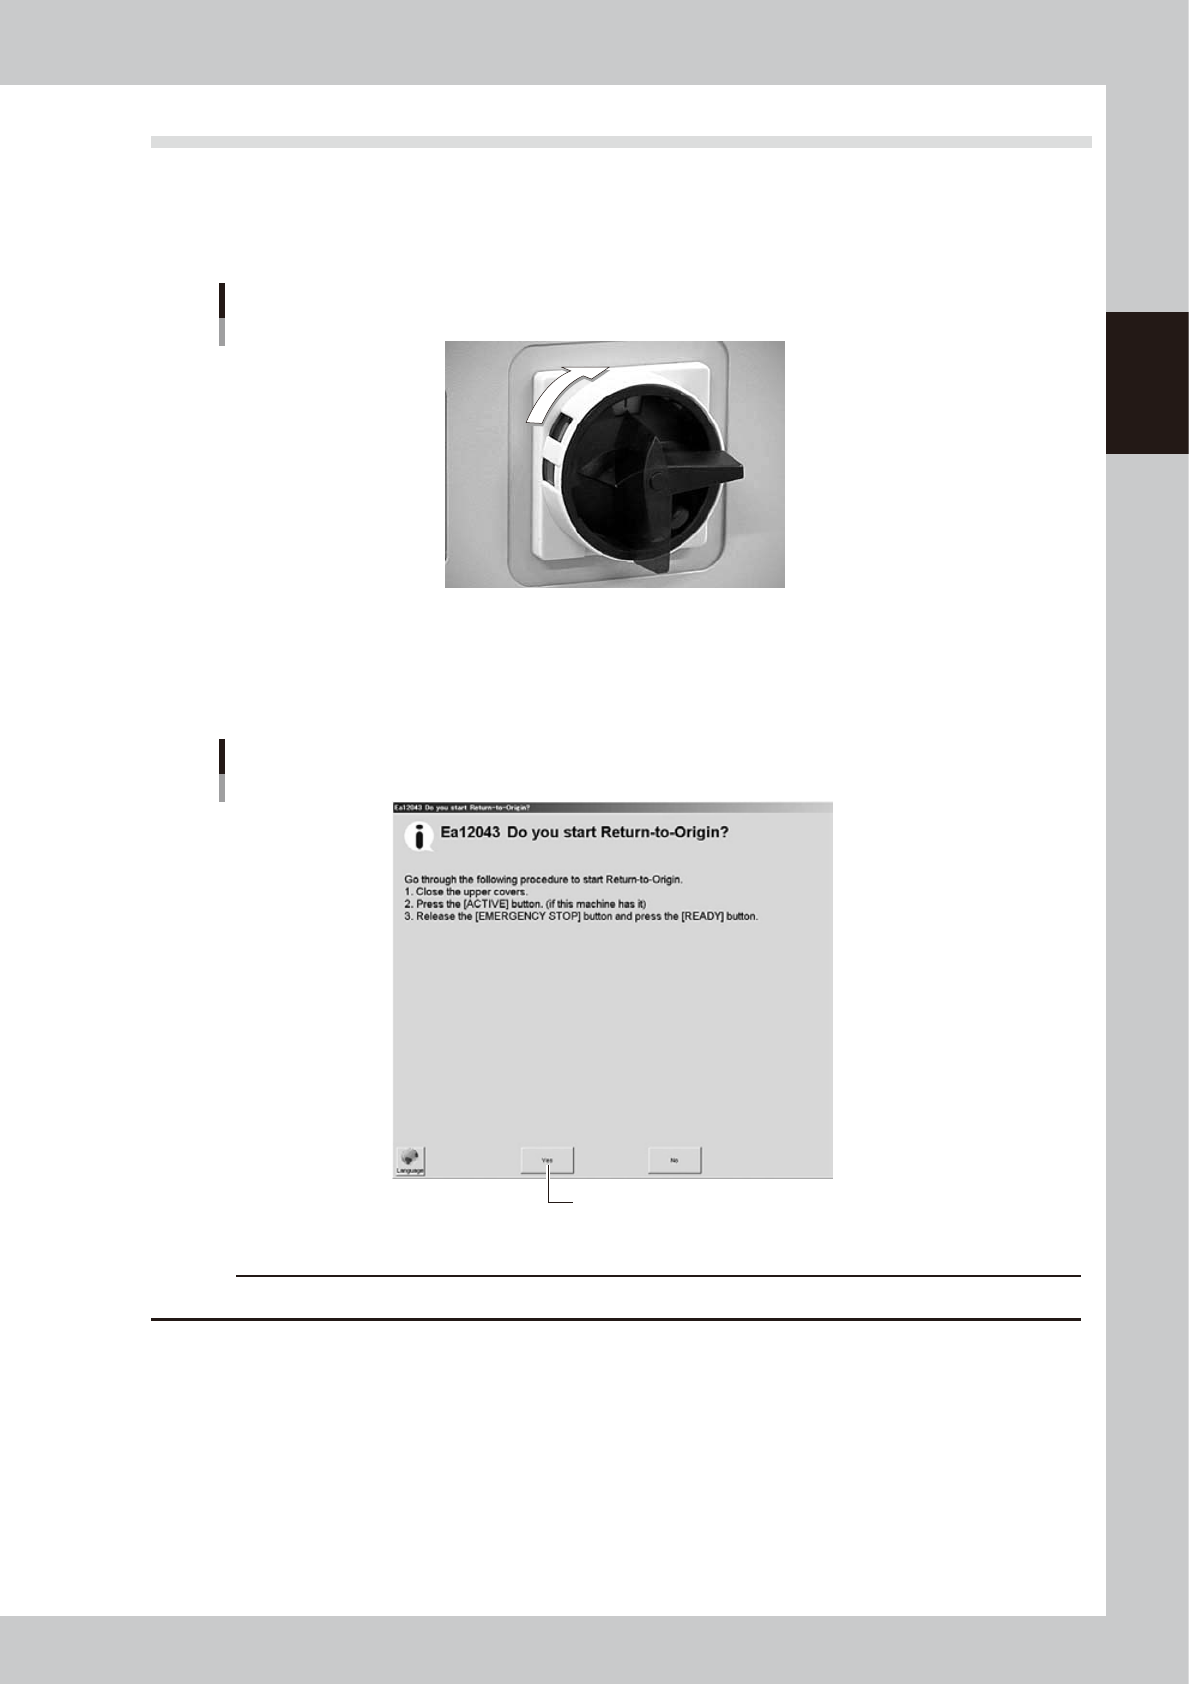
Turn the power switch ON.
Turn on the power switch at the front lower right of the machine, by turning it to the right. The
initialization screen appears to start loading the program needed for machine operation.
ON
OFF
Power switch
63203-N1-00
2
Perform return-to-origin.
The "Return-to-origin" screen appears after initialization. Follow the instructions on the screen to start
return-to-origin operation. The main screen then appears when return-to-origin is complete.
“Return-to-origin” screen
Press [Yes] to start return-to-origin.
64202-N1-00
c
CAUTION
Before starting return-to-origin, always make sure no squeegee is attached to the squeegee head.
2-10
2
Basic operations
3
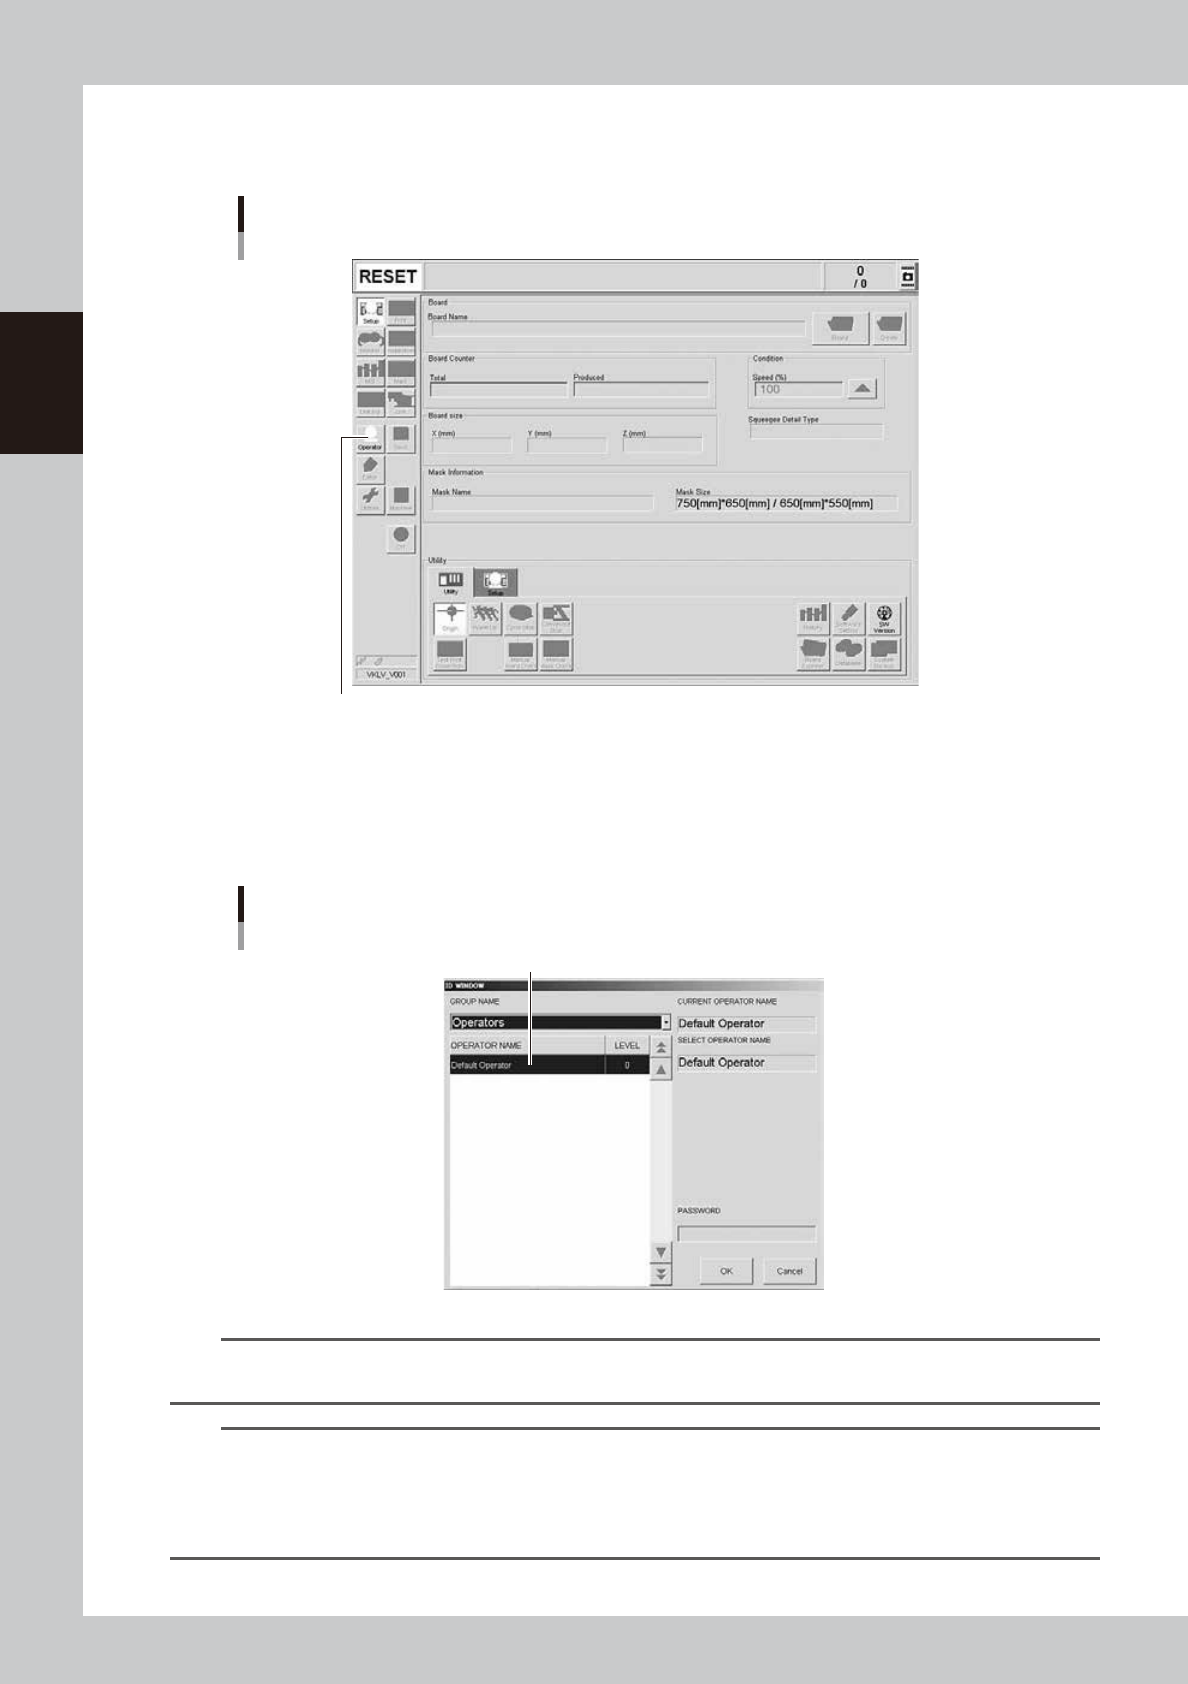
Press the [Operator] button on the operation screen.
The "ID WINDOW" appears for specifying the machine operator.
[Operator] button
[Operator] button
64203-N1-10
4
Specify the operator and enter the password.
You may select "Administrators" or "Operators" from the GROUP NAME dropdown list as needed.
If the password is correct, the initial screen (Setup screen before selecting a board) appears on the
screen.
Specifying the operator
Select operator and press [OK].
64204-N1-00
TIP
For information on how to select board data or how to operate the machine, see "Chapter 4 Daily operation", after
making sure that you understand the contents of this chapter.
TIP
Active menu buttons differ depending on the operation level setup. For example, when the machine is powered on
with the factory setup, the program starts up at an operation level called "Default Operator". This "Default Operator"
level is set to "Level 0" at the time of shipment to allow only basic operation items. This operation level can be
changed as needed. Operators and operation items can also be added and specified by setting the password and
operation level.