YCP10 Users_E.pdf - 第186页
6-4 6 Managing the data 3. When the setting is complete, press the [OK] button in the "Media select" screen to close it. 4. After retur ning to the Board Explor er window, check the "Folder" box to se…
6-3
6
Managing the data
5
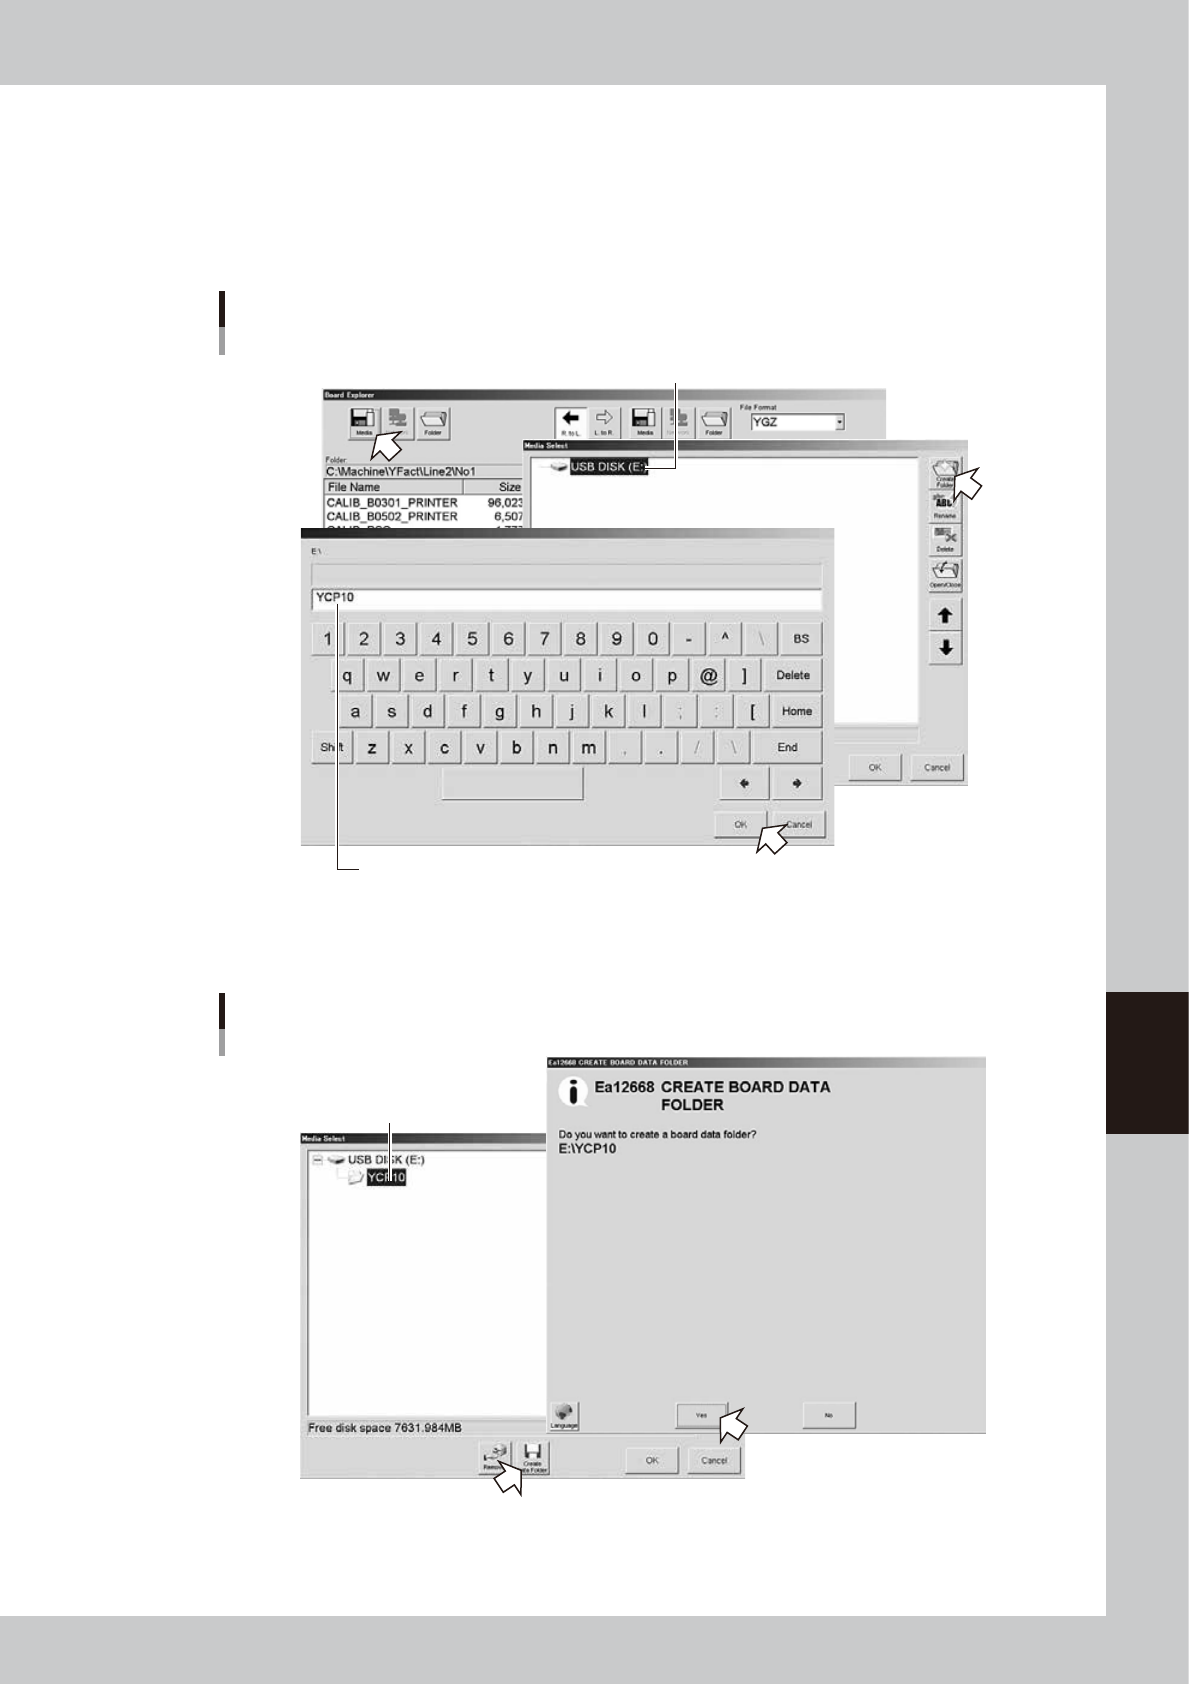
Press the [Media] button.
The "Media Select" screen appears.
6
Select the media and create a board folder.
1. In the "Media Select" screen, select the media (USB flash drive) and press the [Create Folder] button.
When the keyboard screen appears, enter a folder name and press the [OK] button.
Selecting the media
Select the media (USB memory device).
Enter a folder name.
64602-N1-00
2. Select the folder you have just created, and press the [Board folder making] button.
The "Board Folder Making" screen appears. Check the message and press the [Yes] button.
Making a board folder
Select the folder.
64603-N1-00
6-4
6
Managing the data
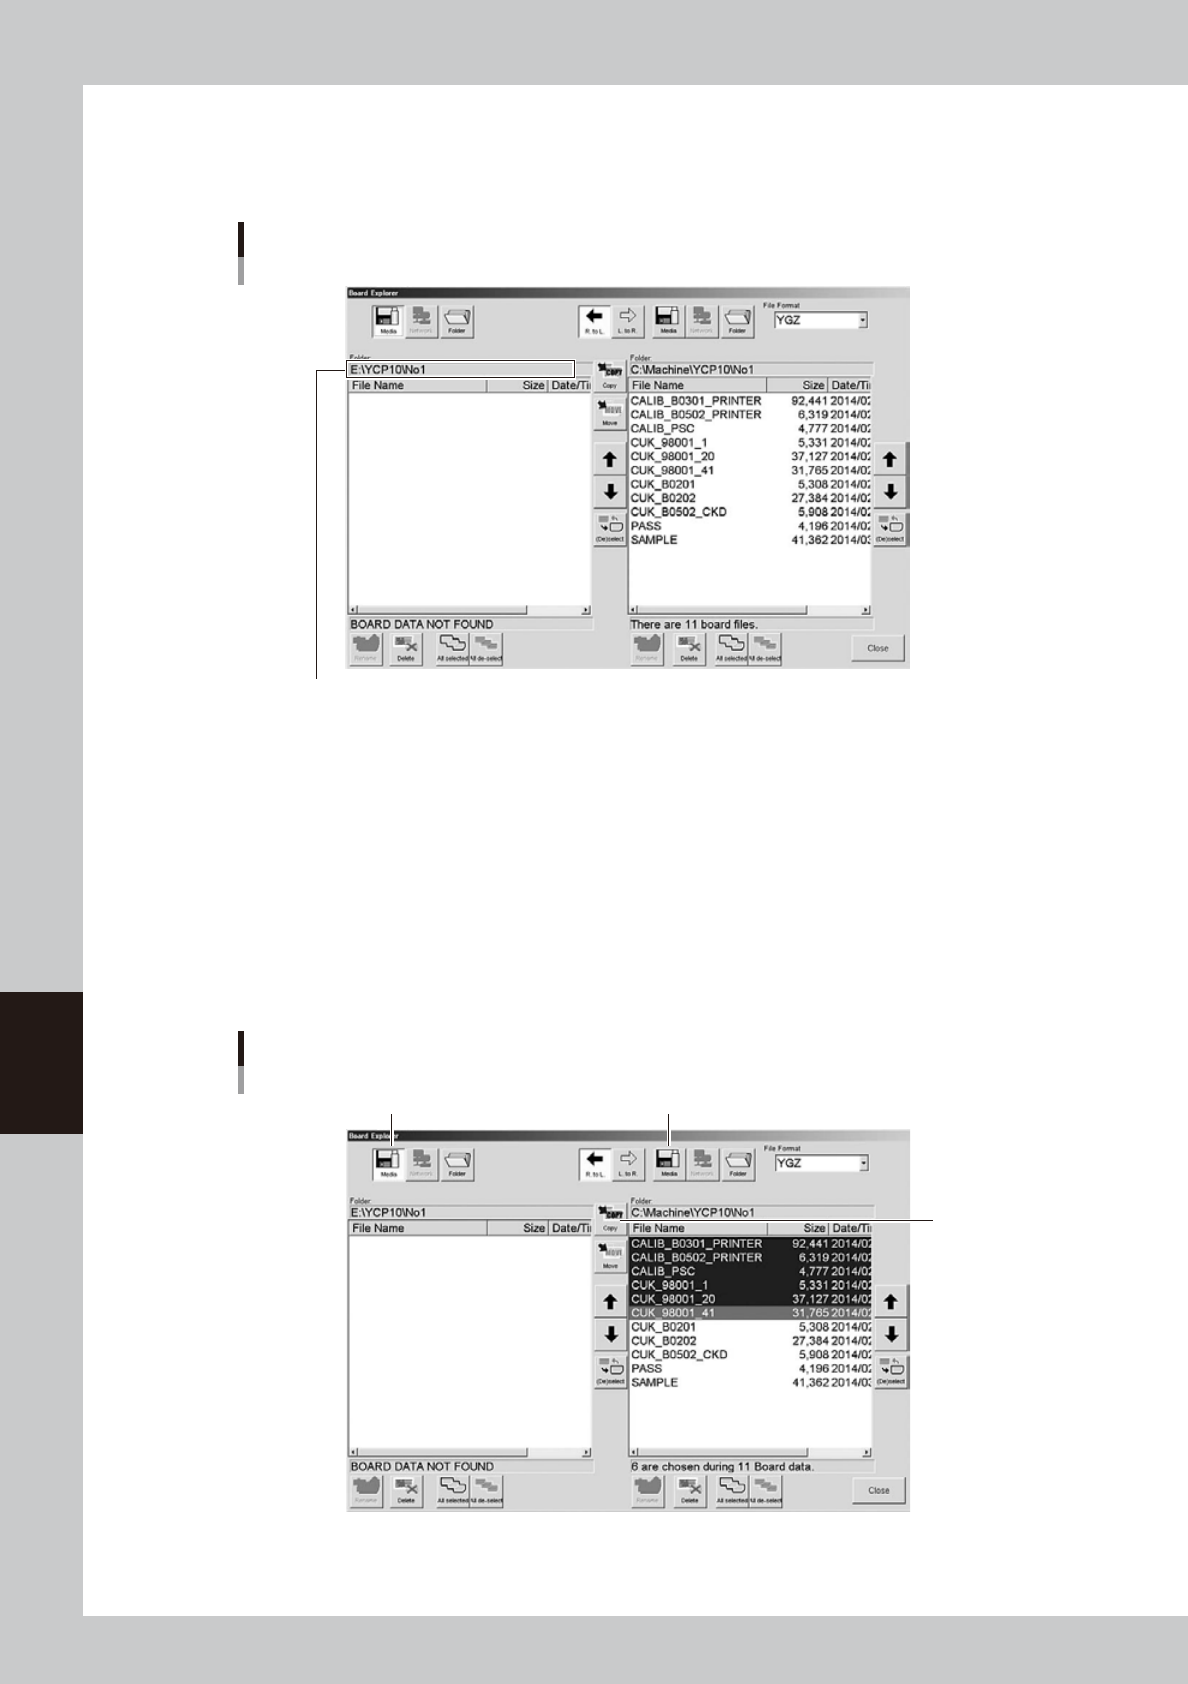
3. When the setting is complete, press the [OK] button in the "Media select" screen to close it.
4. After returning to the Board Explorer window, check the "Folder" box to see if the "No1" folder is
created.
Checking the folder
Check that a folder named "No1" is created.
64604-N1-00
7
Select the file format.
Select the file format from the "File Format" drop-down list box.
8
Select the board data you want to back up.
Line up the cursor with the board data you want to back up. You can select multiple board data by
selecting them while holding down the [Ctrl] key or [Shift] key. When you want to select all board data
in the list, press the [All Selected] button.
9
Designate the copy destination.
Press the [Media] button on the left when copying from right to left, or press the [Media] button on the
right when copying from left to right.
Copy from left to right
[Copy] button
Copy from right to left
Selecting the copy destination
64605-N1-00
6-5
6
Managing the data
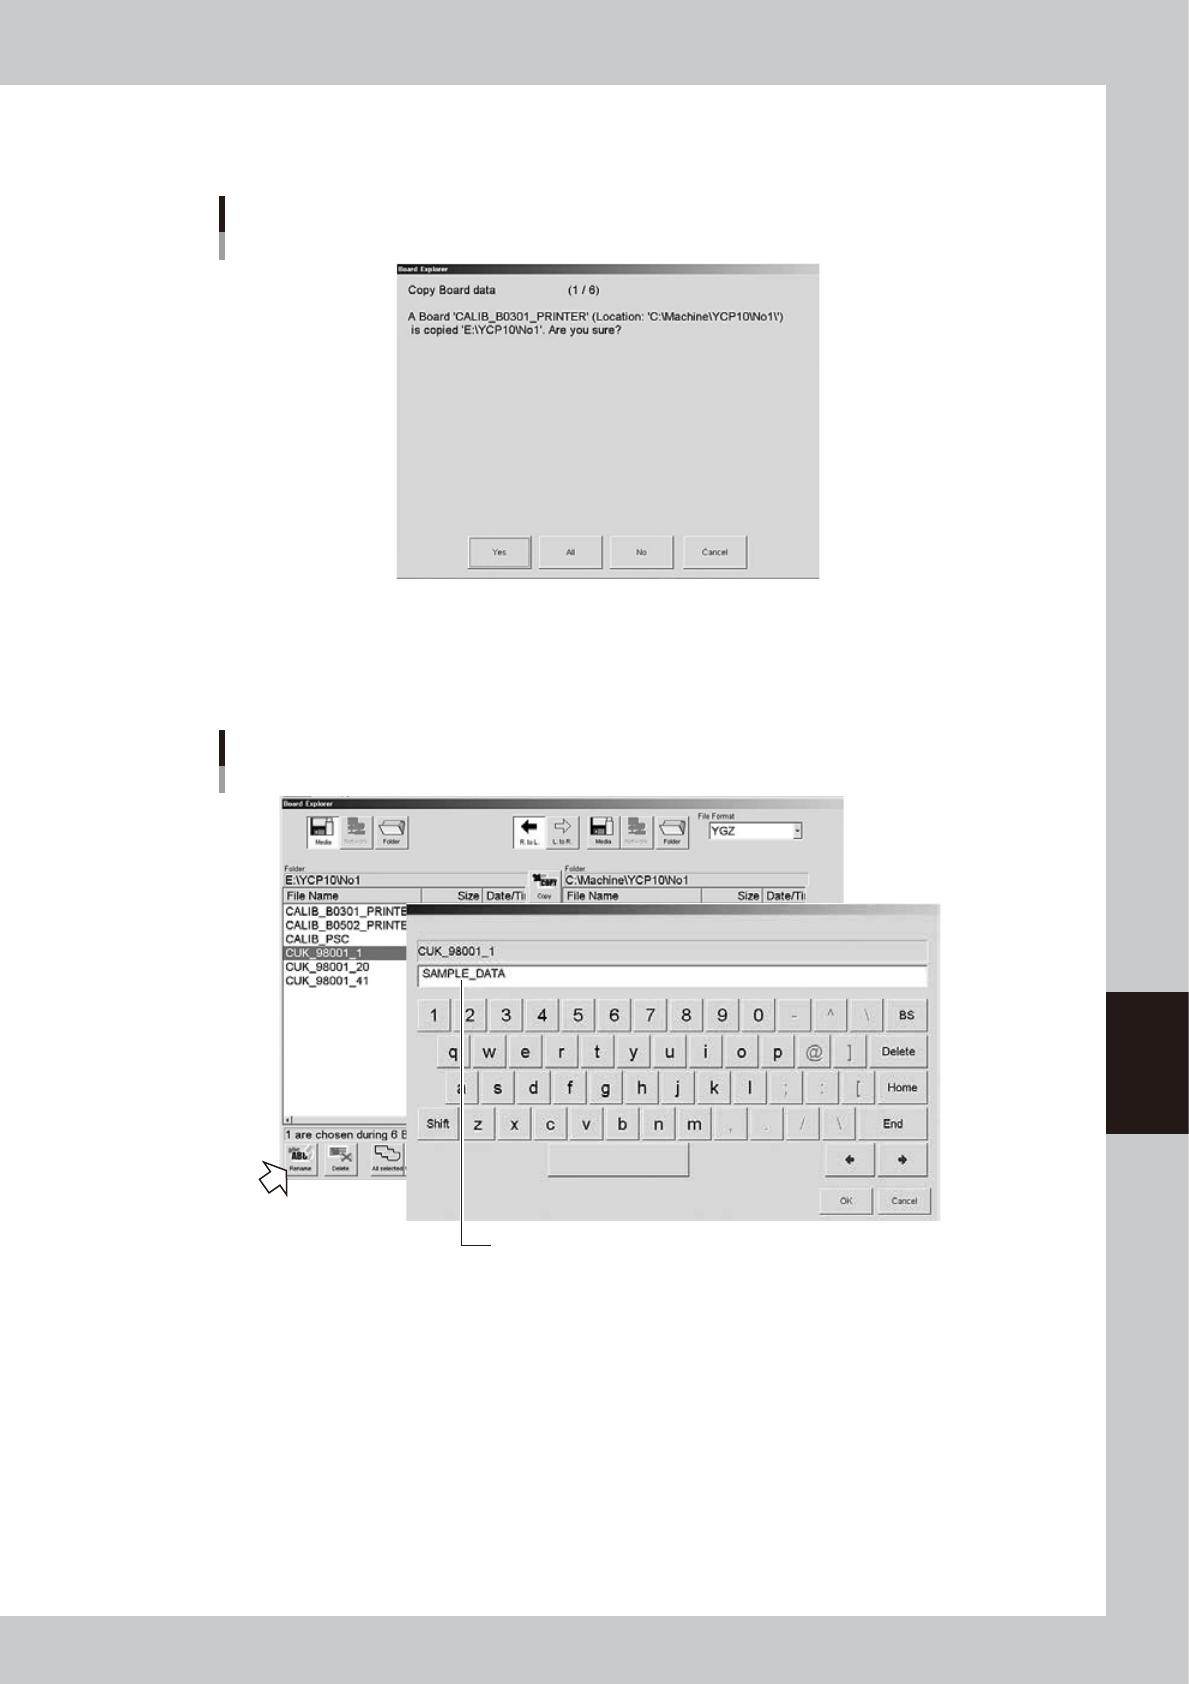
9
Press the [Copy] button.
A confirmation screen appears. Press the [Yes] or [All] button to make a copy to the USB flash drive.
Copy confirmation screen
64606-N1-00
0
Rename the board data as needed.
When you want to change the board name so that you can easily identify it as backup data, press the
[Rename] button. When the keyboard screen appears, enter a new name and press the [OK] button.
Enter a new name for backup data.
Rename
64607-N1-00