3OM-1003-005.pdf - 第177页
4.4 "Placement Data" T ab 0305-001 2-106 AIL01EDTP *2 "Placement Data" Edit Windows These windows can be used to edit the placement data (P) and (O). Refer to "4.4.2 "P-data" T ab"…
*1 *2
4.4 "Placement Data" Tab
0305-001 2-105 AIL01EDTP
4.4 "Placement Data" Tab
The "Placement Data" tab is provided with "U01 to Un" tabs and "P-
data" and "O-data" tabs. When a tab is selected, the corresponding tab
sheet appears.
4.4.1 "U01" to "Un" Tabs
"U01" represents "Unit No. 01" and "n" in "Un" can be any number (01,
02, 03, ...). When the "Un" tab is pressed, the corresponding tab sheet
appears, enabling you to edit the parameters (placement data) of the
selected unit.
• Sheet Layout
When the [U01] tab is pressed after the [Placement Data] tab is se-
lected, the following tab sheet appears.
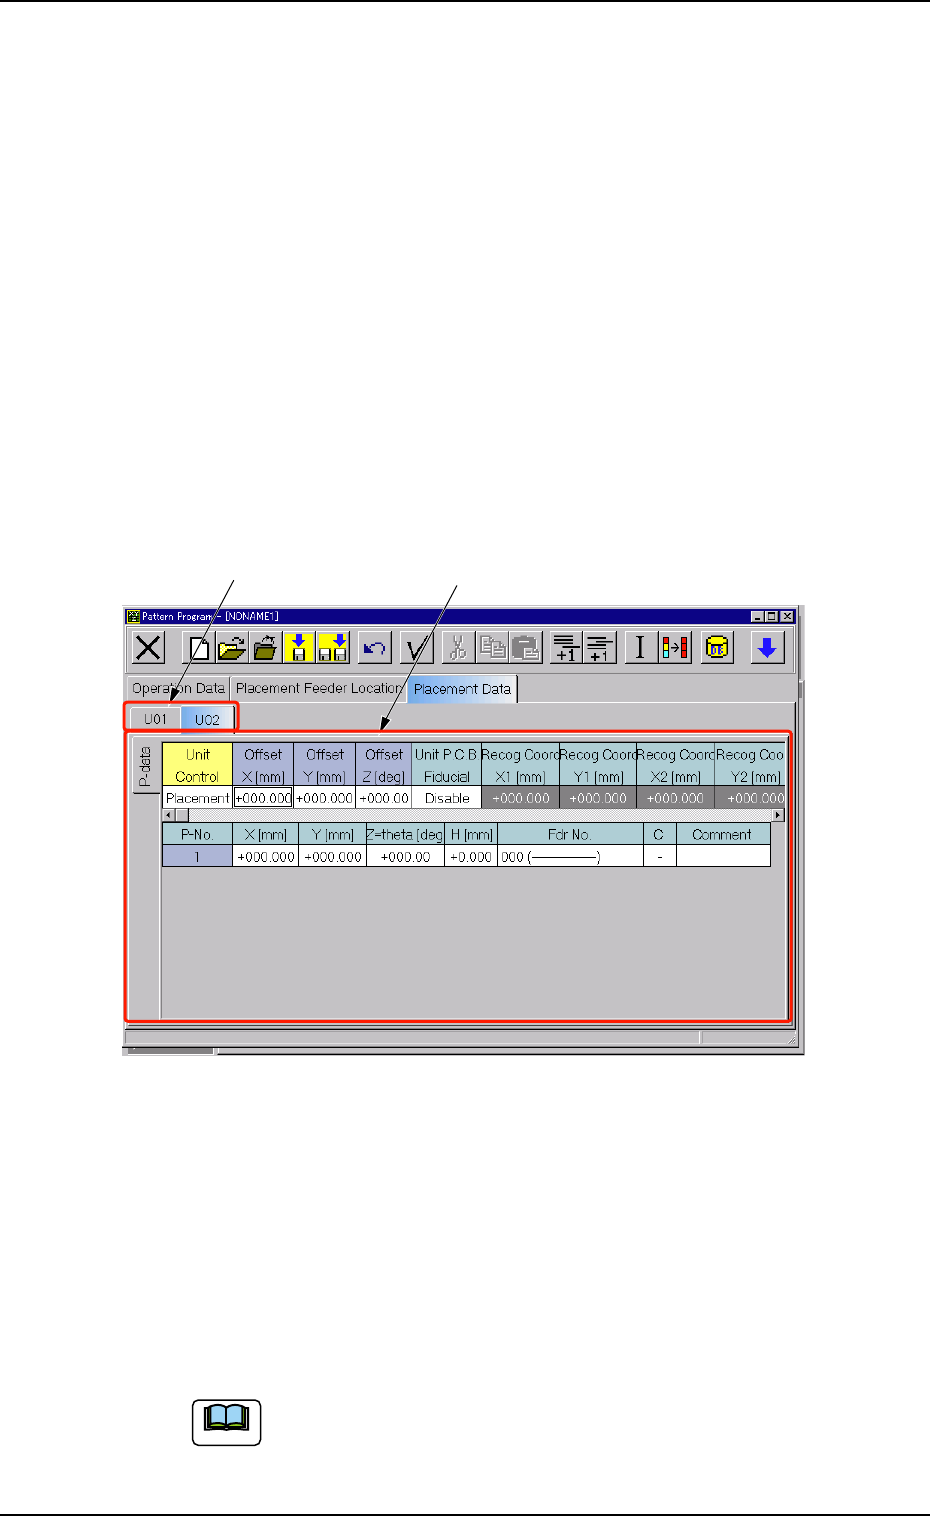
Fig. 3B168 "U01" Tab Sheet
• Sheet Composition
Each parameter is displayed or can be entered.
*1 [U01] to [Un] Tabs
These tabs are used to select a unit. When a tab is pressed, the
corresponding tab sheet appears and is related to the selected unit.
Refer to "• Operation Procedure" (described later) for the
detailed information on how to add or delete a unit.
Note
4.4 "Placement Data" Tab
0305-001 2-106 AIL01EDTP
*2 "Placement Data" Edit Windows
These windows can be used to edit the placement data (P) and (O).
Refer to "4.4.2 "P-data" Tab" and "4.4.3 "O-data" Tab" for
details.
• Operation Procedure
Addition of New Unit
(1) When the second toolbar is not visible, press the [Open 2nd.
Toolbar] icon [ ] to make the second toolbar visible.
(2) When the [Add U Data] icon [
] is selected, a new unit is
added to the last line.
Deletion of Unit
(1) When the second toolbar is not visible, press the [Open 2nd.
Toolbar] icon [
] to make the second toolbar visible.
(2) Use the touch screen or the pointing device to select the unit to
be deleted.
(3) When the [Delete U Data] icon [
] is selected, the selected
unit is deleted.
When a tab (unit) between the adjacent ones is deleted,
the subsequent tabs (units) are shifted left.
Unit Copy and Paste Commands
(1) When the second toolbar is not visible, press the [Open 2nd.
Toolbar] icon [ ] to make the second toolbar visible.
(2) Use the touch screen or the pointing device to select the unit to
be copied.
(3) When the [Copy U Data] icon [
] is selected, the selected unit
is copied.
(4) Select the position of the tab (unit) to be pasted.
(5) When the [Paste U Data] icon [
] is selected, the selected unit
is pasted.
The toolbar is also provided with the [Cut U Data] icon
[
].The cut unit data can be pasted.
Note
Note
Note
*1 *2
*3 *4
4.4 "Placement Data" Tab
0305-001 2-107 AIL01EDTP
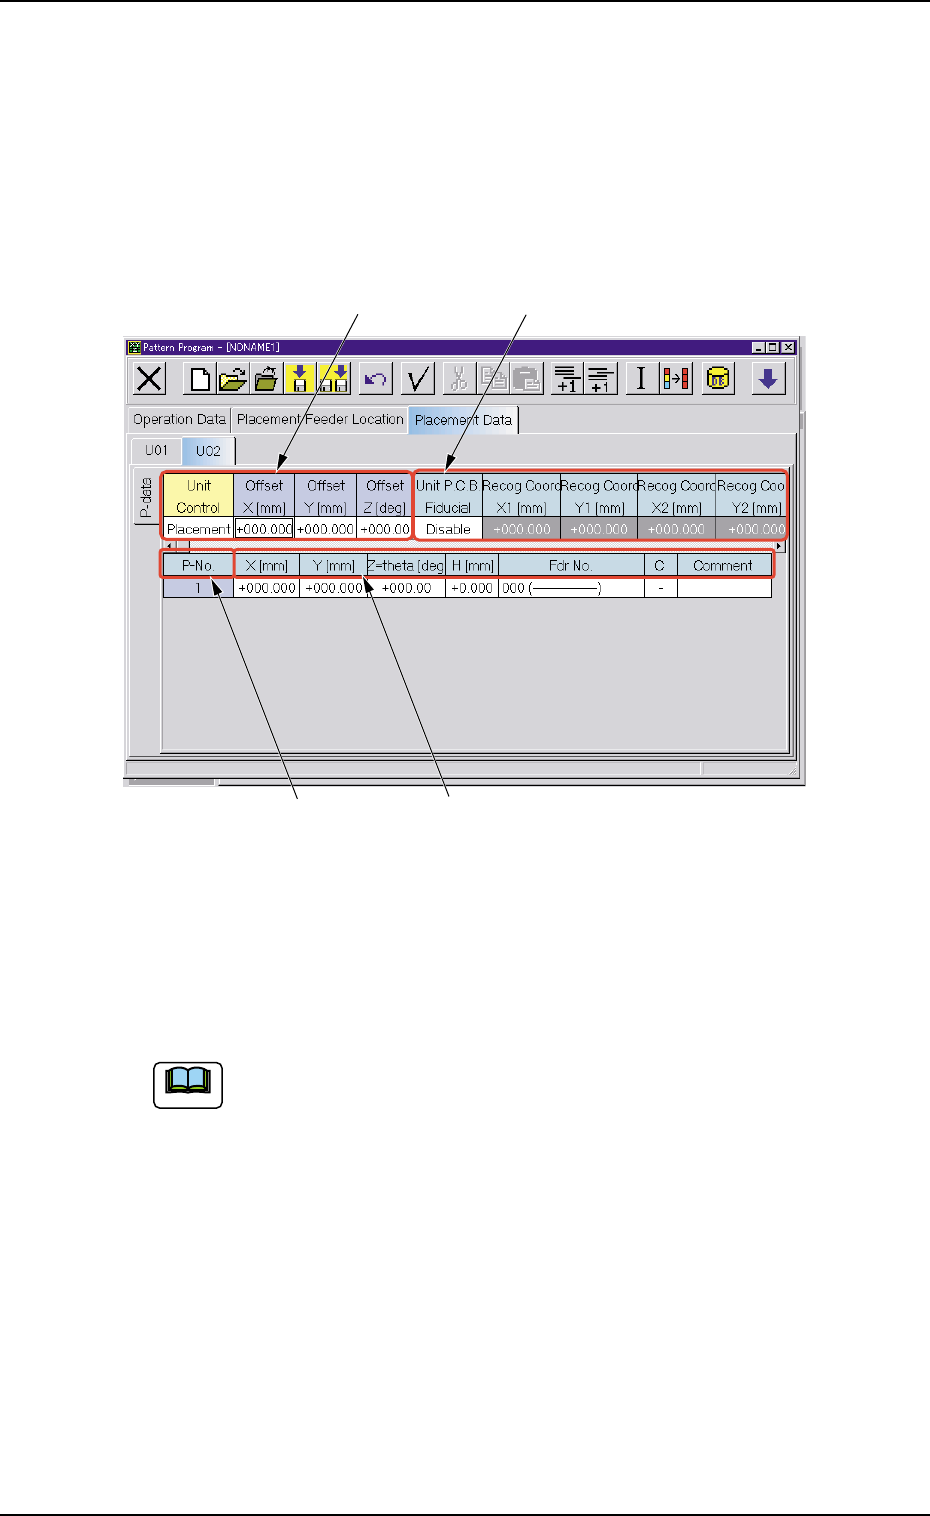
4.4.2 "P-data" Tab
The corresponding tab sheet can be used to edit the placement data (P).
• Sheet Layout
When the "P-data" tab is pressed in the "Placement Data" tab sheet,
the following tab sheet appears.
Fig. 3B169 "P-data" Tab Sheet
• Sheet Composition
Each parameter is displayed or can be entered.
Refer to "4.1.3 Basic Usage of Text Boxes" for the detailed in-
formation on how to enter each parameter.
*1 Unit Control, Offset X [mm], Offset Y [mm], Offset Z [deg]
*2 Unit P.C.B. Fiducial
Recog Coord X1 [mm], Recog Coord Y1 [mm], Recog Coord
X2 [mm], Recog Coord Y2 [mm], Fiducial Mark FM1, and Fi-
ducial Mark FM2
When "Enable" is set for "P.E.C. recognition function", it is re-
quired to enter a parameter in each text box.
Note