3OM-1003-005.pdf - 第353页
4. "Nozzle Data" Window Nozzle types can be set for each nozzle position (Nos. 1 through 5) on each head. The nozzle data can also be set. 4 .1 "Placement Head/Nozzle Data" T ab • Sheet Layout When th…
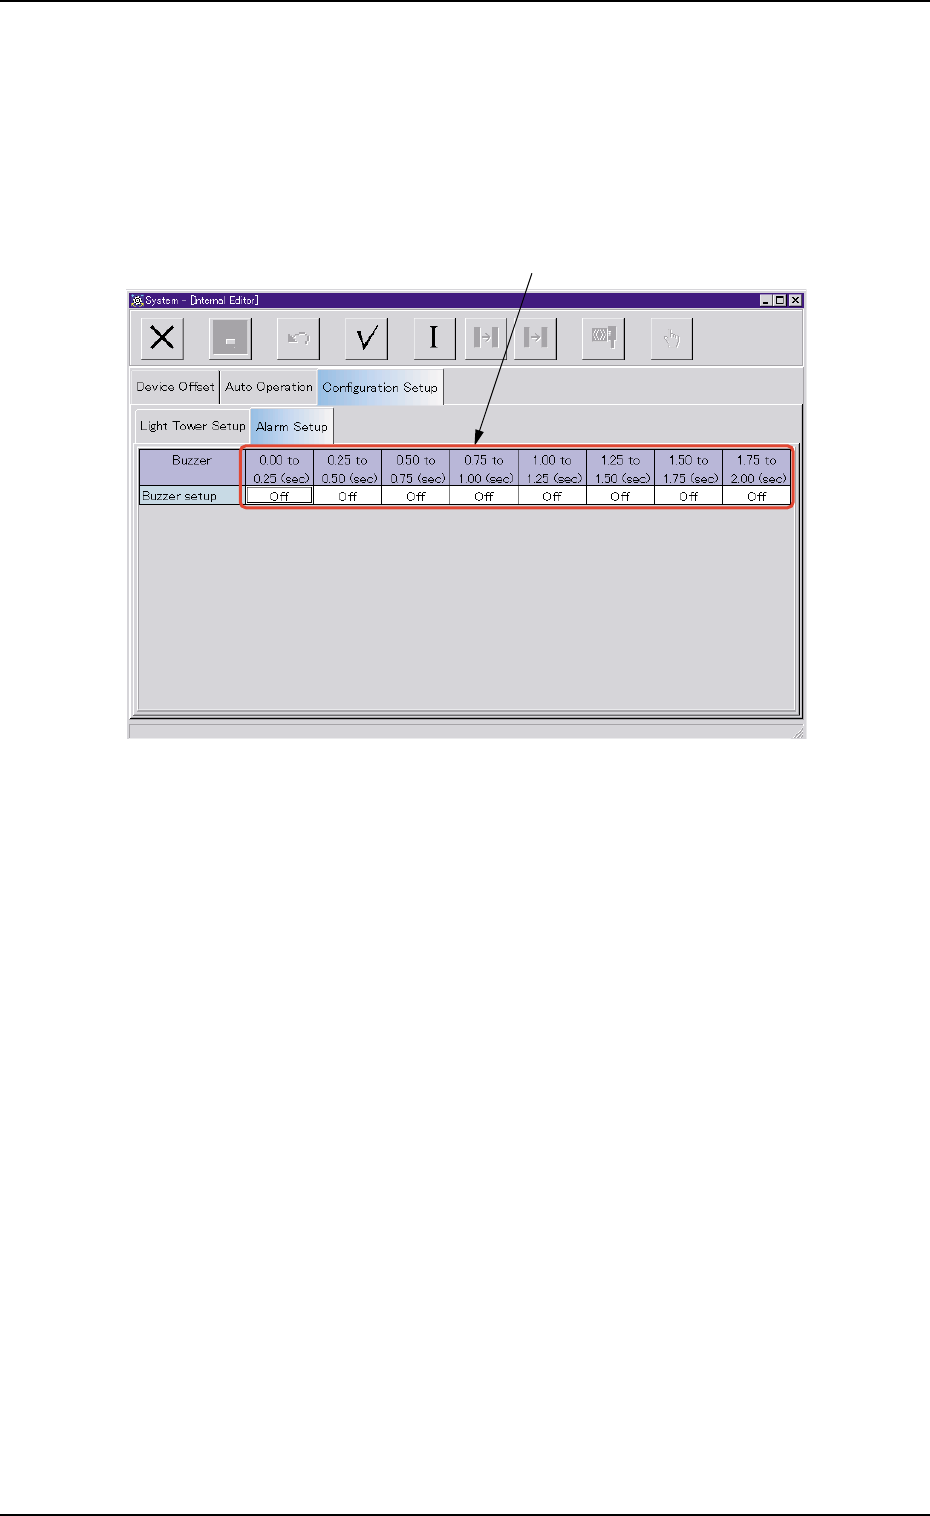
3.4.2 "Alarm Setup" Tab
• Sheet Layout
When the "Alarm Setup" tab is pressed in the "Configuration Setup" tab
sheet, the following tab sheet appears.
Fig. 3E55 "Alarm Setup" Tab Sheet
• Sheet Composition
*1 Time Items
An optional alarm sounds in a cycle of two seconds. The two sec-
onds is divided into 10 intervals and each interval is assigned as
"ON" or "OFF" to make a sound of your own.
0305-001 5-65
AIL01EDTP
*1
3.4 "Configuration Setup" Tab
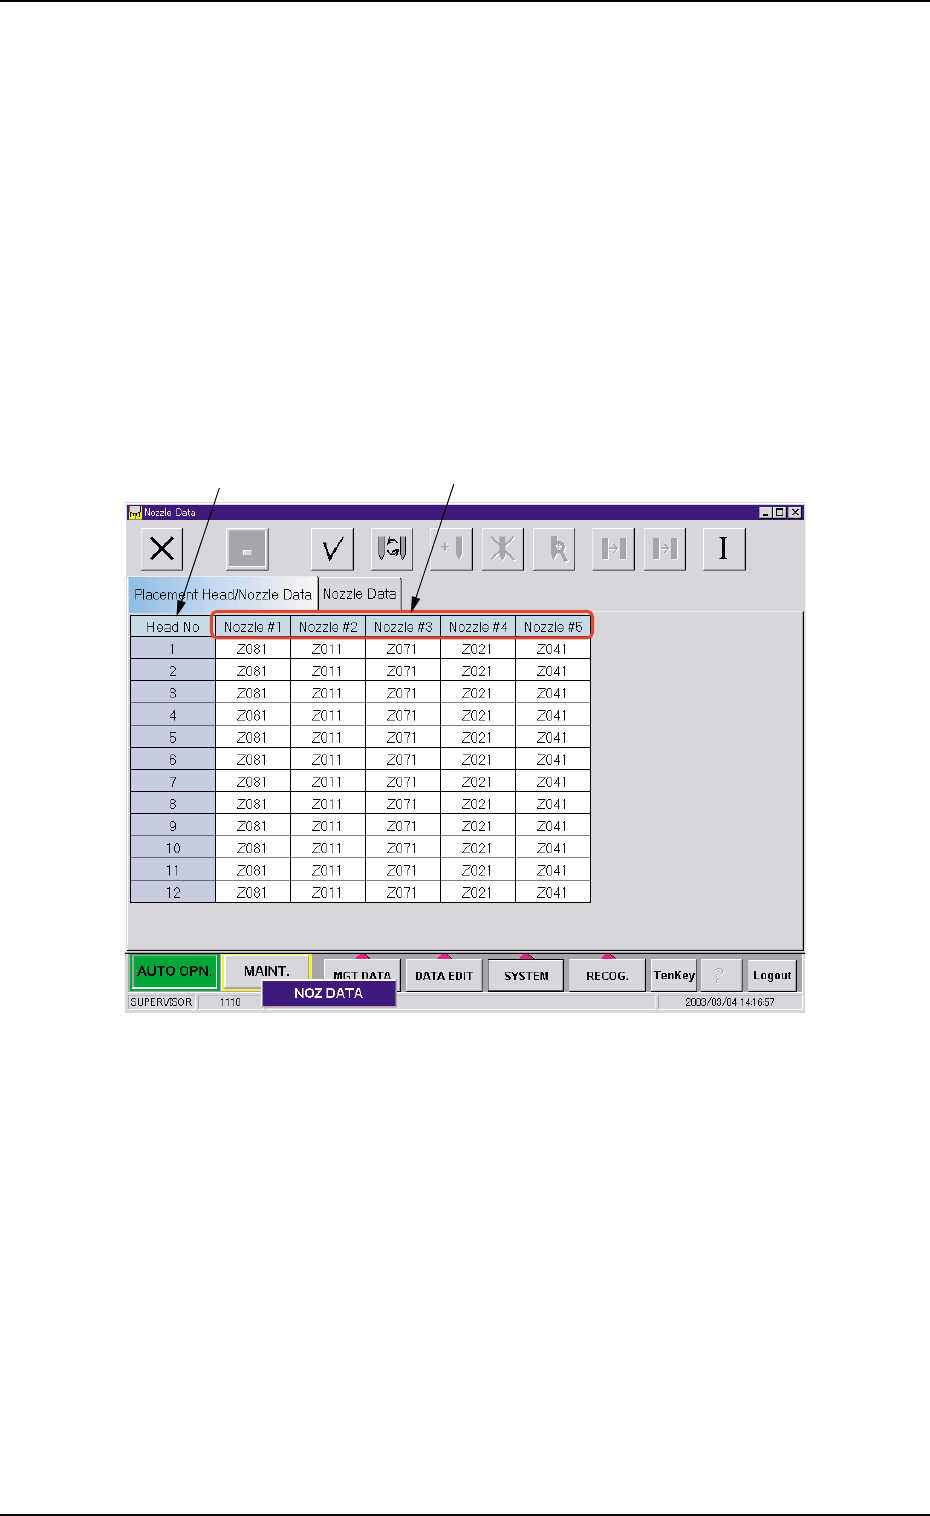
4. "Nozzle Data" Window
Nozzle types can be set for each nozzle position (Nos. 1 through 5) on
each head.
The nozzle data can also be set.
4.1 "Placement Head/Nozzle Data" Tab
• Sheet Layout
When the "Placement Head/Nozzle Data" tab is pressed in the "Nozzle
Data" window, the following tab sheet appears inside the window.
Fig. 3E56 "Placement Head/Nozzle Data" Tab Sheet
• Sheet Composition
*1 Head No
The head Nos. are displayed.
*2 Nozzle #1 to #5
Set a nozzle allocation No. in each text box.
When you double-click an arbitrary text box (nozzle allocation No.),
the "Nozzle Type" window opens.
0403-002 5-66
AIL01EDTP
*2
*1
4. "Nozzle Data" Window
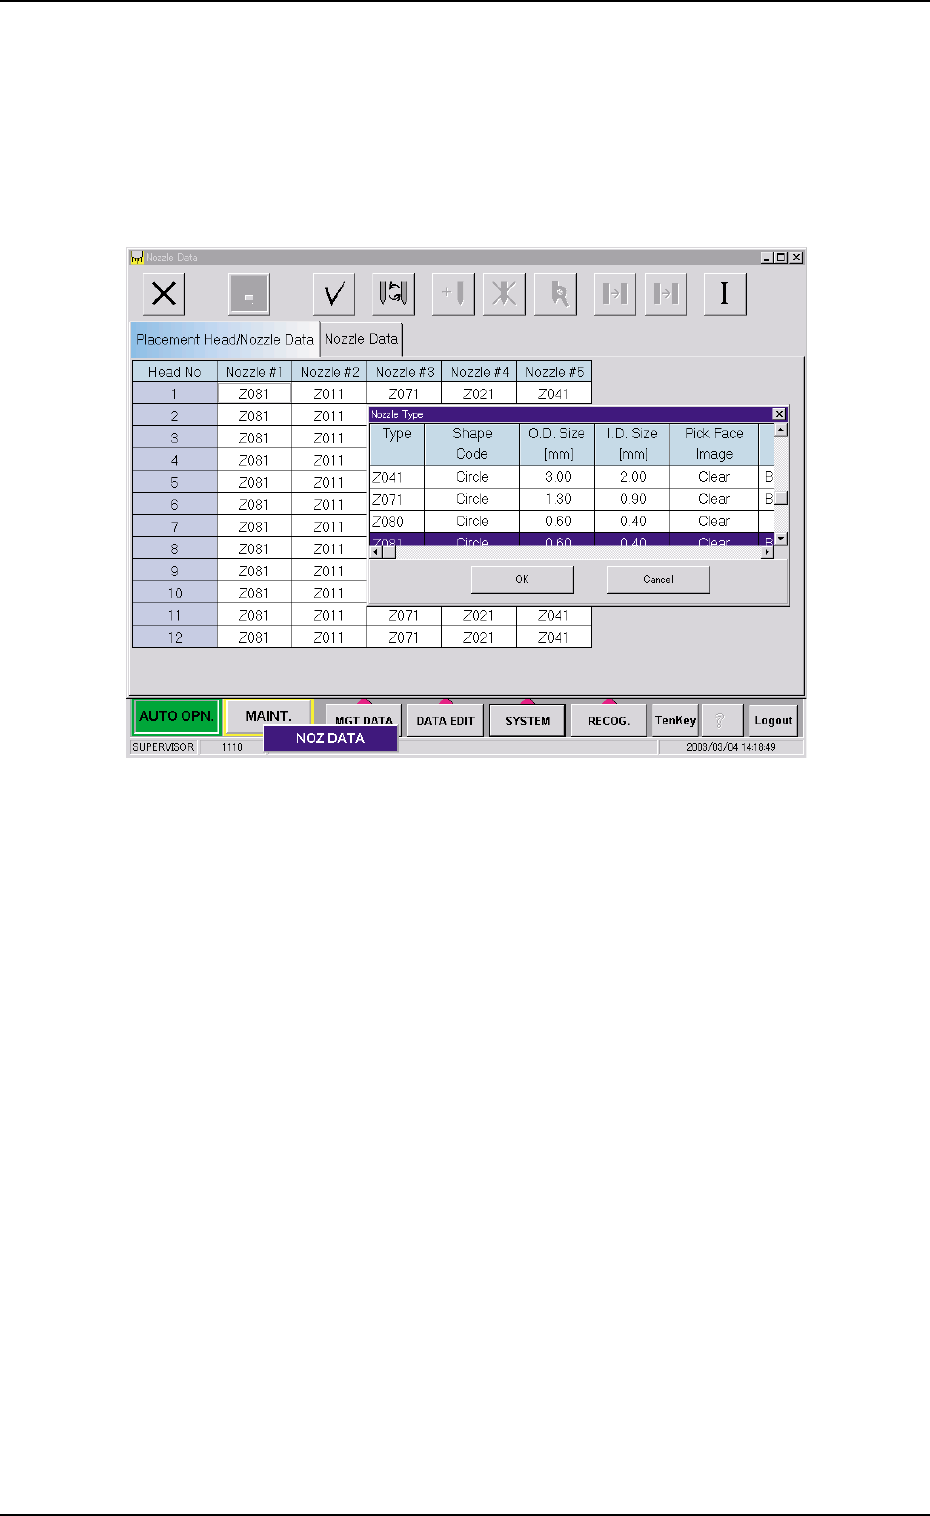
• Operation Procedure
Nozzle Type Change Operation
(1) Select the text box of "Head No." related to the nozzle (Nozzle
#) to be changed and double-click it.
The "Nozzle Type" window opens.
Fig. 3E57
(2) Select the nozzle to be allocated and press the [OK] button.
The selected nozzle type is set in the specified text box.
0305-001 5-67 AIL01EDTP
4.1 "Placement Head/Nozzle Data" Tab