3OM-1003-005.pdf - 第362页
(2) When the [Set T ime (min)] button is pressed with the [Enable] button being selected (the button turns green), the following "Set T ime (min)" edit window opens. Fig. 3E62 "Set Time (min)" Edit Wi…
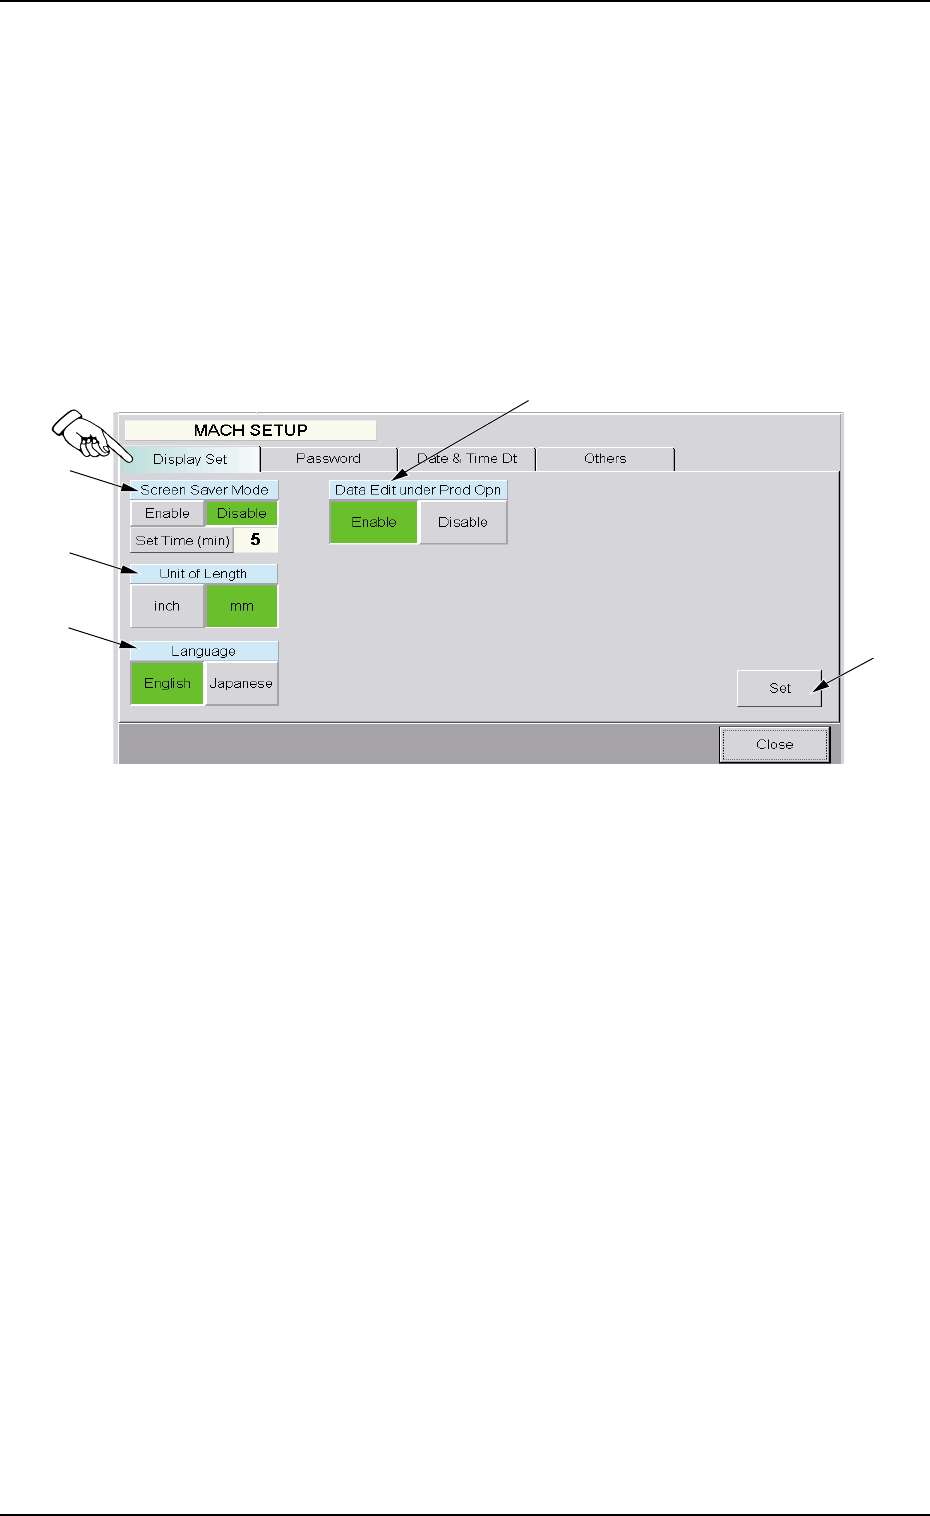
5.1 "Display Set" Tab
The corresponding tab sheet enables the operator to set the screen
saver function and specify the unit of length and a language.
• Sheet Layout
When the "Display Set" tab is pressed in the "MACH SETUP" window,
the following tab sheet appears.
Fig. 3E61 "Display Set" Tab Sheet
• Sheet Composition
*1 Screen Saver Mode
When the touch screen is kept intact for the specified period of time,
the screen saver mode starts working to prevent a static background
from being burned into the screen phosphors.
(1) Press the [Enable] button to validate the screen saver mode.
Press the [Disable] button to cancel the screen saver mode.
5.1 "Display Set" Tab
*5
*2
*3
*1
*4
0305-001 5-74 AIL01EDTP
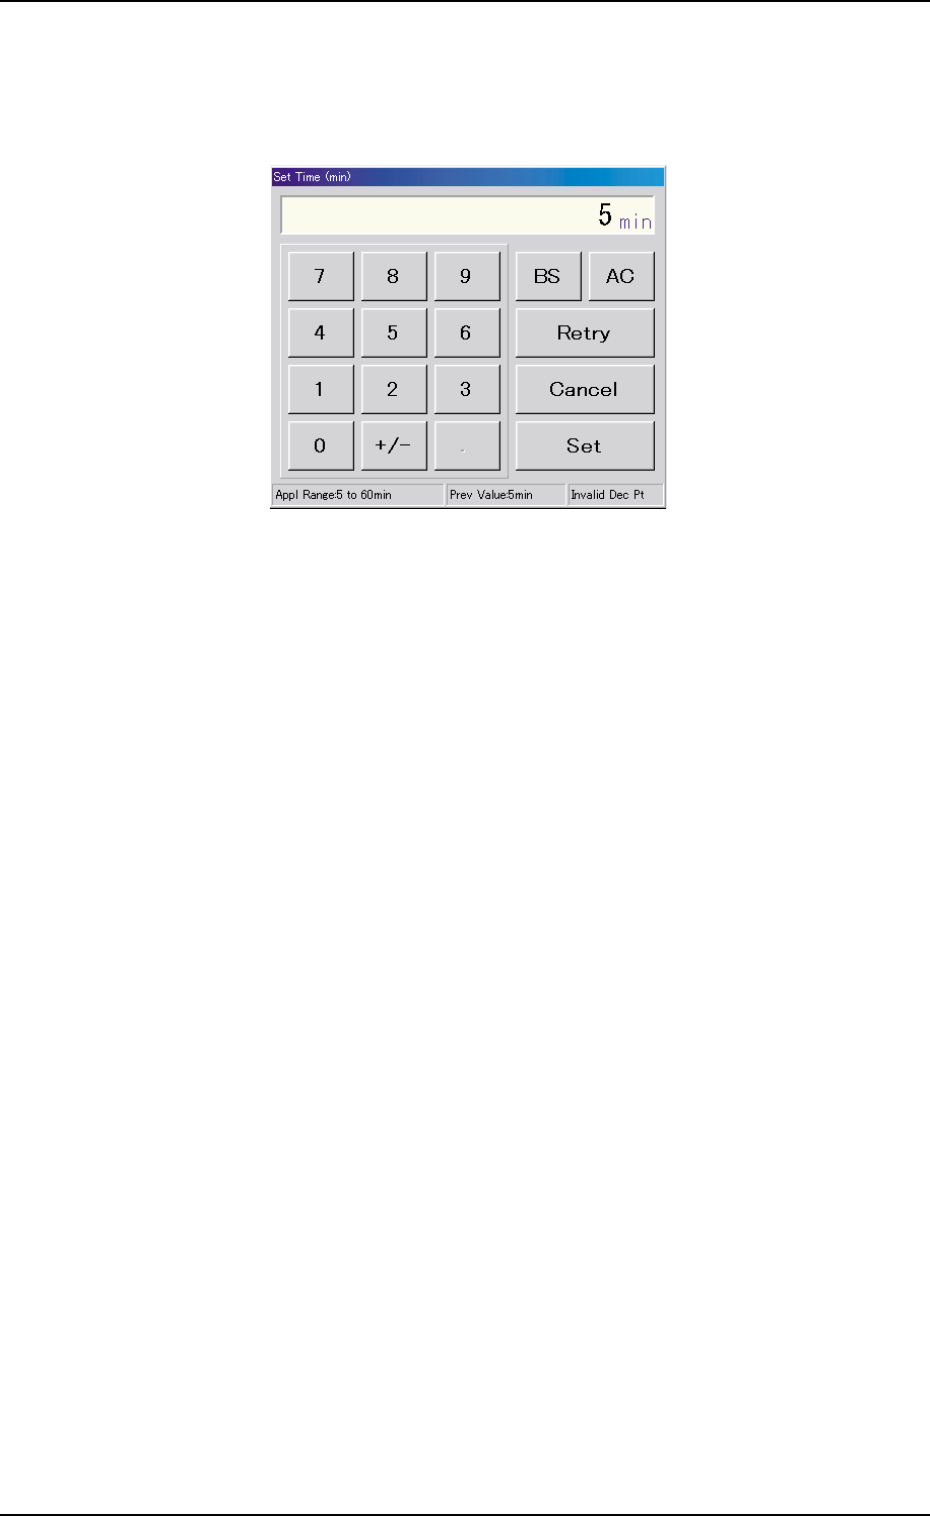
(2) When the [Set Time (min)] button is pressed with the [Enable]
button being selected (the button turns green), the following "Set
Time (min)" edit window opens.
Fig. 3E62 "Set Time (min)" Edit Window
Enter the number of minutes (5 to 60 minutes) you want the
screen to be idle before the screen saver function is activated
and press the [Set] button.
*2 Unit of Length
Press either the [inch] or the [mm] button to select the US custom-
ary system (inches) or the metric system for the dimensions to be
displayed on the screen.
The selected button turns green, indicating that it is selected.
*3 Language
Press either the [English] or the [Japanese] button to select the lan-
guage to be used on the screen.
The selected button turns green, indicating that it is selected.
*4 Data Edit under Prod Opn
The [Enable] or the [Disable] button can be selected to determine
whether or not the data editing should be possible during automatic
operation.
When the [Disable] button is selected, the data can be edited only
with the machine in the "STOP" mode to ensure the reliability of the
automatic operation.
*5 [Set] Button
The selections in "*1" to "*4" are determined.
5.1 "Display Set" Tab
0305-001 5-75 AIL01EDTP
5.2 "Password" Tab
The corresponding tab sheet enables the operator to set a password
and the scope of authority according to the given authority.
The "Password" tab sheet is provided with the following 3 tab sheets.
When a tab is pressed, the corresponding tab sheet appears.
Table 3E4
Tabs Description
Password Set The corresponding tab sheet enables the operator to set a password
according to the given authority.
Available Area Set (1/2) The corresponding tab sheet enables the operator to specify the scope
of authority to use the described functions ("Operation Mode (Modify)"
through "Placement Head/Noz Data").
Available Area Set (2/2) The corresponding tab sheet enables the operator to specify the scope
of authority to use the described functions ("Unit Adjustment" through
"Machine Set-up").
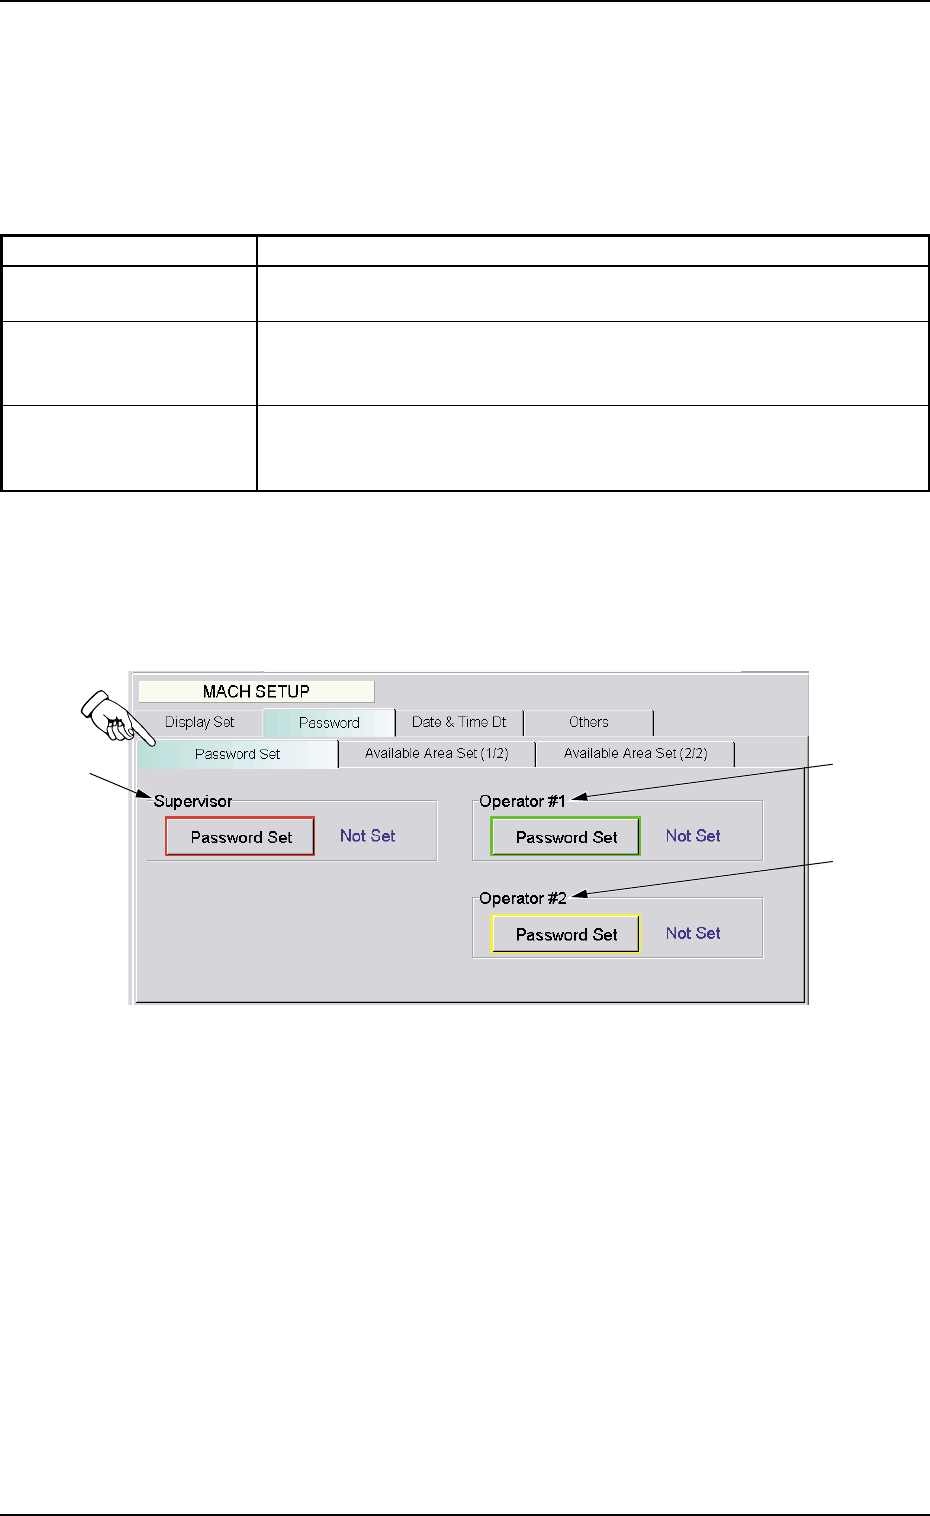
5.2.1 "Password Set" Tab Sheet
• Sheet Layout
When the "Password" tab is pressed, the following tab sheet appears.
Fig. 3E63 "Password Set" Tab Sheet
• Sheet Composition
*1 "Supervisor" Group Box
A password can be set in this group box for the user who has the
scope of authority as "Supervisor".
*2 "Operator #1" Group Box
A password can be set in this group box for the user who has the
scope of authority as "Operator #1".
*3 "Operator #2" Group Box
A password can be set in this group box for the user who has the
scope of authority as "Operator #2".
5.2 "Password" Tab
*2
*1
*3
0305-001 5-76 AIL01EDTP