MV-9_Chapter 5. Teaching.pdf - 第142页
MV -9 Use r Manual 5- 142 [Figure 5- 169 color inspection window creation screen] RGB color c oor d inato r HSV color coordinator LUV color coordinator [Figure 5- 170 Color inspection p arameter accordi ng to color coord…
错误!使用“开始”选项卡将 제목 2 应用于要在此处显示的文字。错误!使用“开始”选项卡将 제목 2 应用
于要在此处显示的文字。 .
5-141
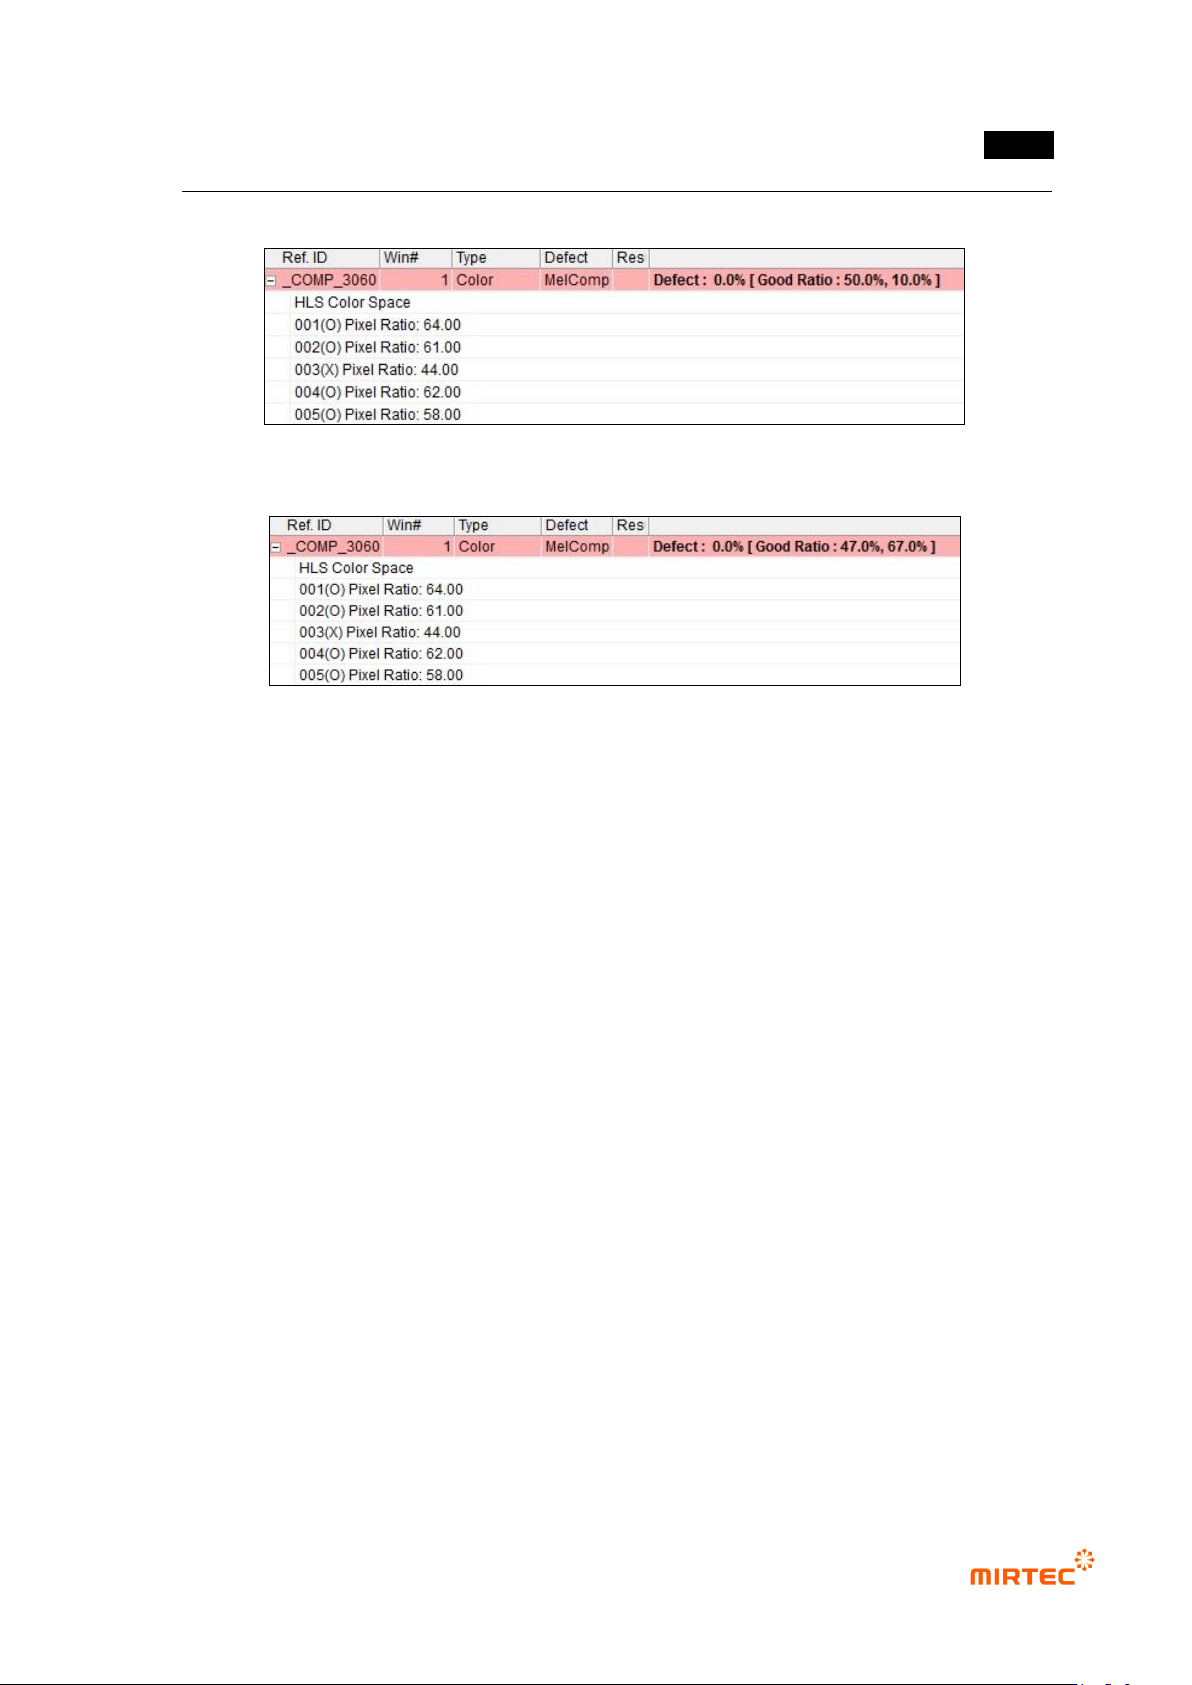
[Figure 5-167 pixel ratio inspection result]
[Figure 5-168 IC average ratio inspection result]
5.3.7 Color inspection window
- Color inspection window is used to inspect items like non-mounting and/or wrong mounting
of component using difference of color of mounted component.
1) Teaching method
① Click <color inspection window> button among operating buttons and draw inspection
window in inspection target area. position for color in inspection window will be automatically
displayed at color coordinator.
② Horizontal + vertical light will be selected for light type. Position for color in inspection
window will be automatically refreshed at color coordinator.
③ Select whether to conduct X coordinate compensation, Y coordinate compensation.
④ Select one of color coordinators (RGB, HSV, LUV) for color inspection.
⑤ Select whether to conduct grid inspection, and enter number of grid width and height. To use
grid inspection, enter normal ratio for good/defect judgment.
⑥ select whether to conduct pixel ratio inspection not color inspection (ratio of pixel that has
color designated in inspection area, displayed by white pixel when preview is selected.).
⑦ Enter normal range.
⑧ Select whether to judge as good when defect is detected.
MV-9 User Manual
5-142
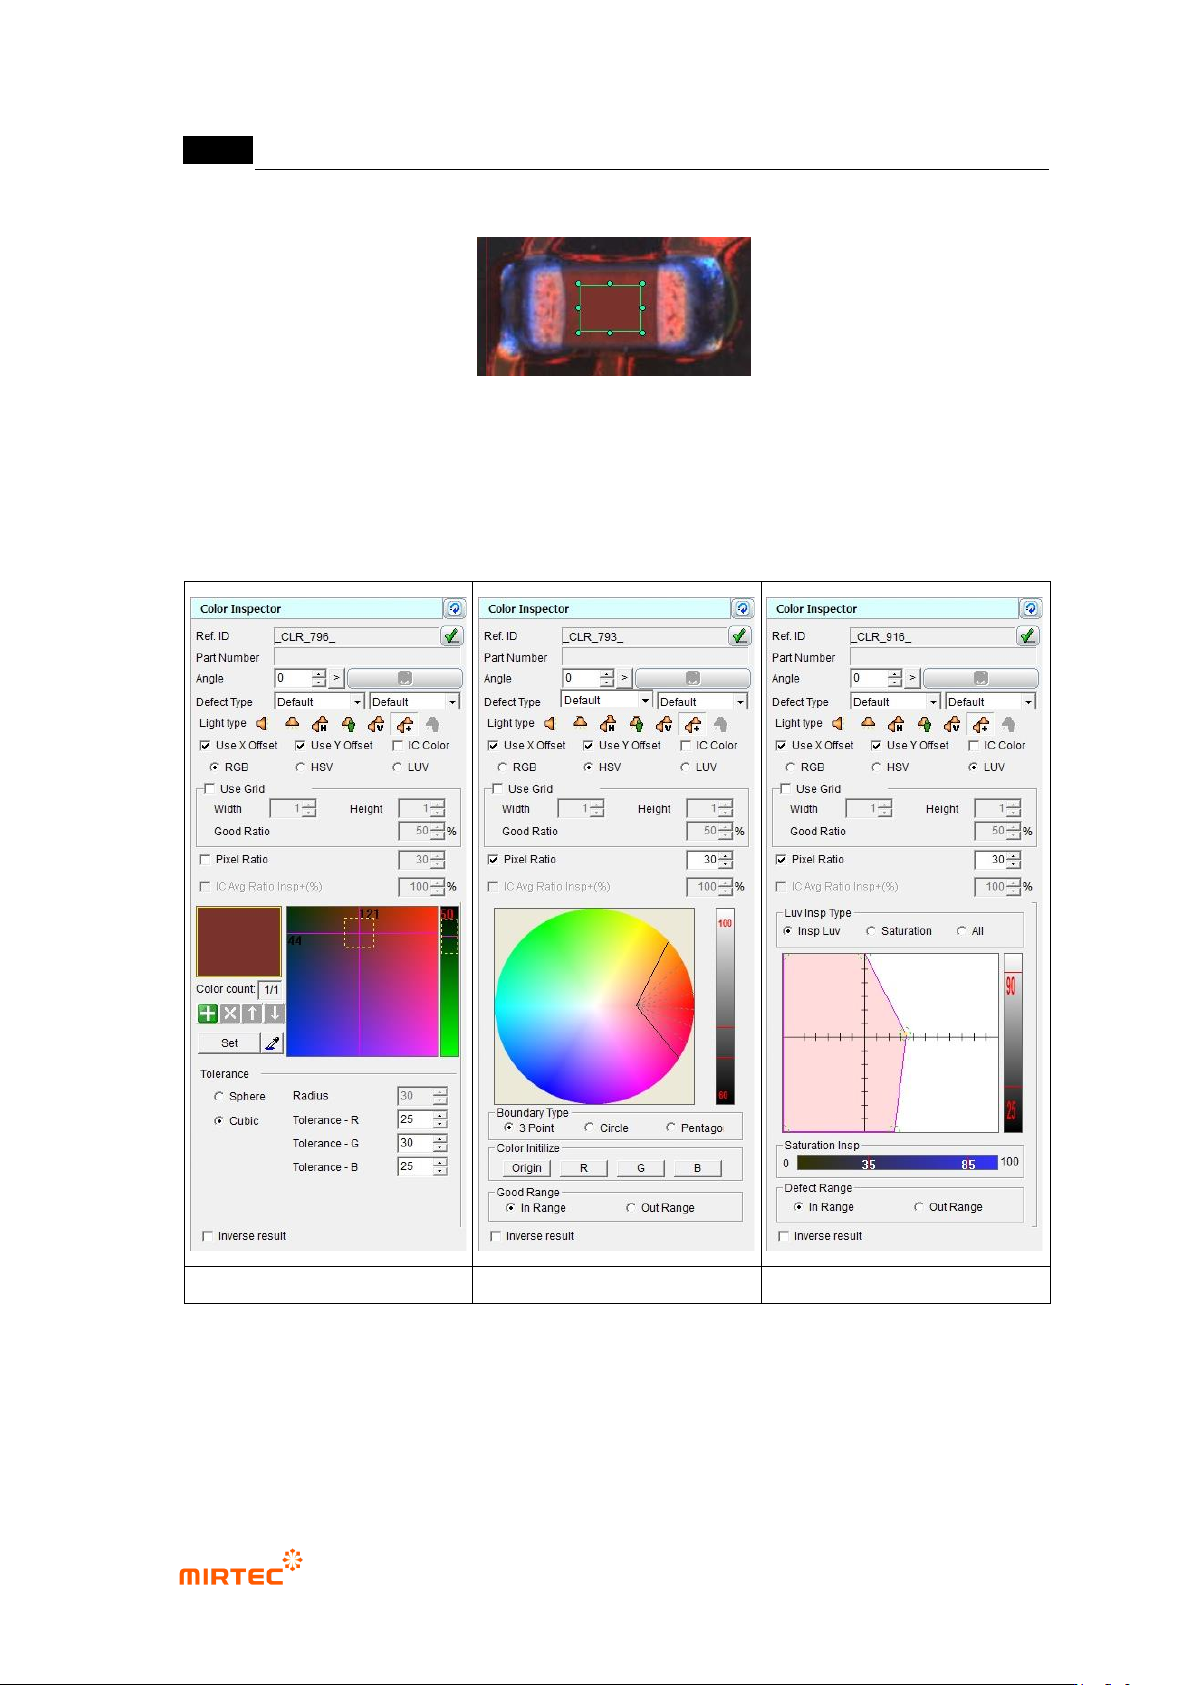
[Figure 5-169 color inspection window creation screen]
RGB color coordinator
HSV color coordinator
LUV color coordinator
[Figure 5-170 Color inspection parameter according to color coordinator]
2) Teaching example of representative component
错误!使用“开始”选项卡将 제목 2 应用于要在此处显示的文字。错误!使用“开始”选项卡将 제목 2 应用
于要在此处显示的文字。 .
5-143
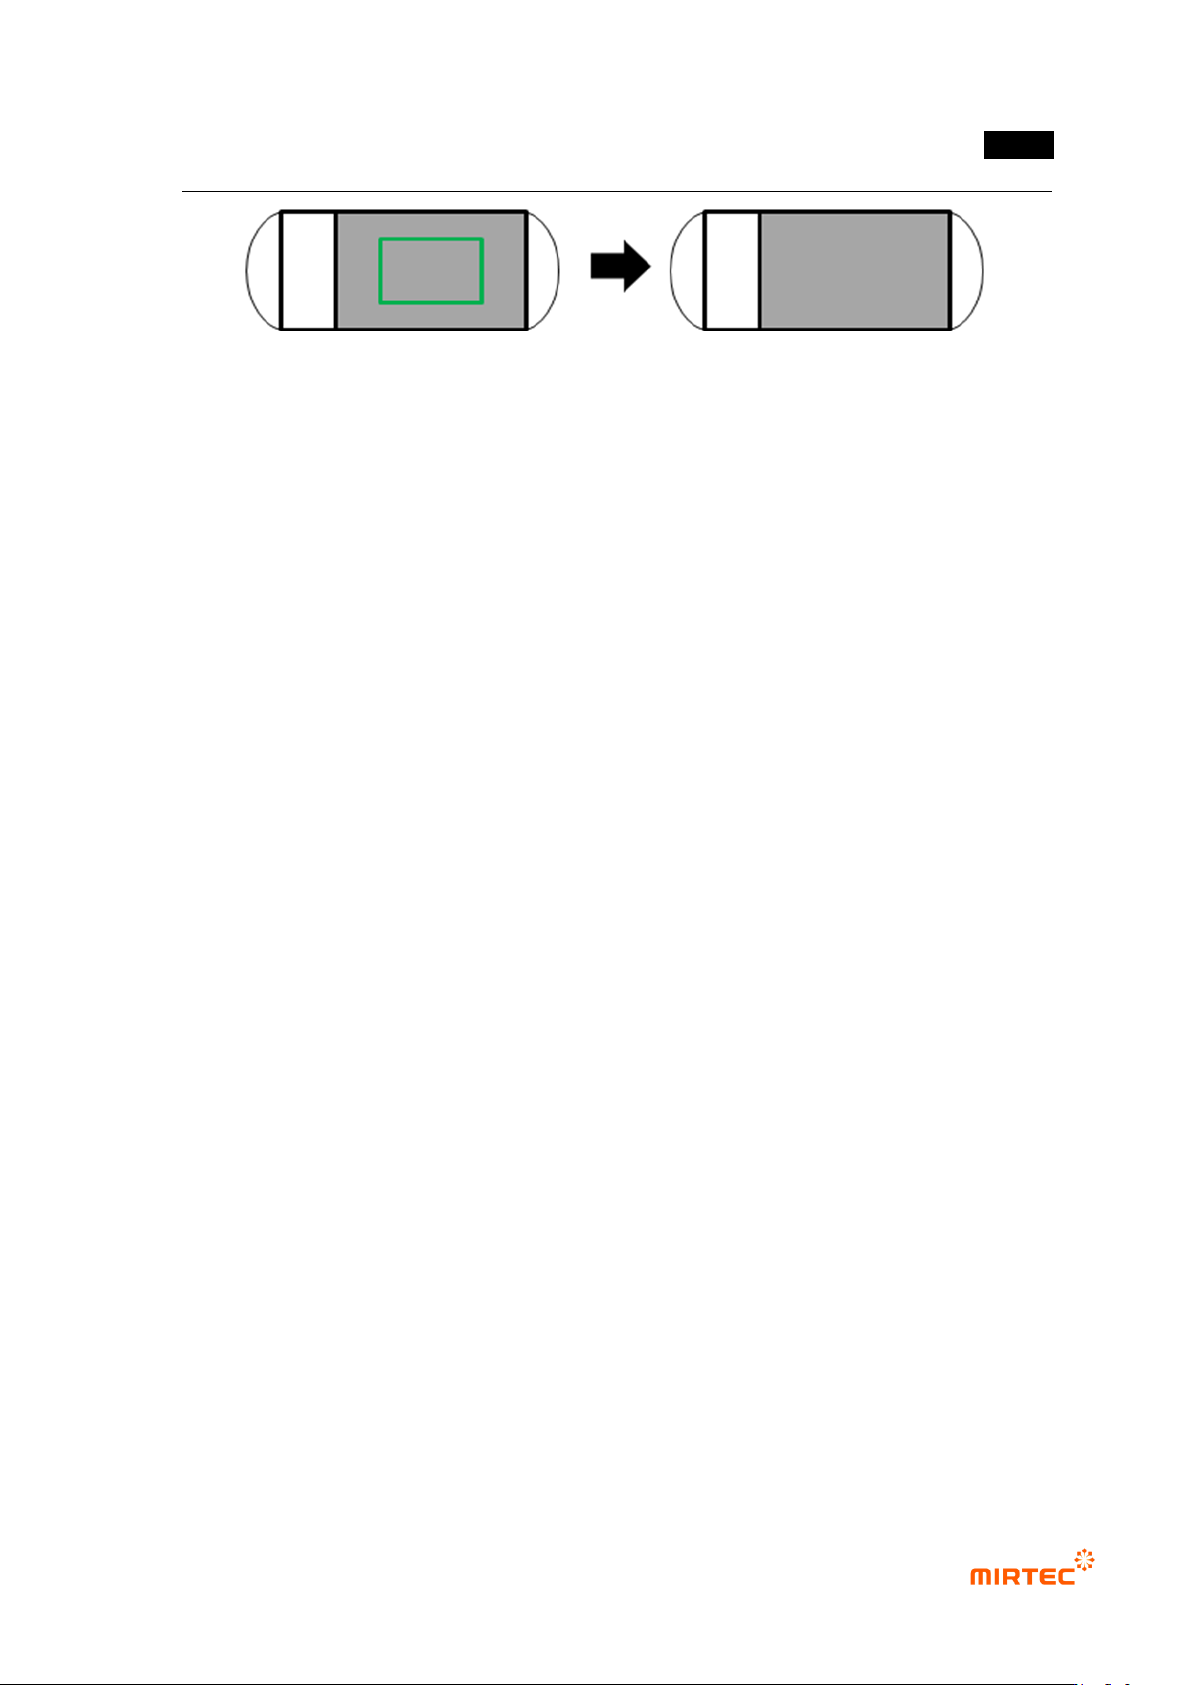
[Figure 5-171 Teaching example of color inspection window]
3) Common parameter of color inspection window
Reference name
- Refer to „reference name in „5.3.1 mounting inspection window‟ excepting shape.
- Name is created in „_CLR_1_‟ format. „CLR‟ means creation order of Color and the number
means color inspection window.
Component name
- Refer to „component name in '5.3.1 light type
- Basically, select horizontal + vertical light for light type. However, select –light in which
color of component inspection area is clear.
Rotation angle
- Refer to „rotation angle in '5.3.1 mounting inspection window‟.
Defect type
- Refer to „defect type in '5.3.1 mounting inspection window‟.
light type
- Basically, select horizontal + vertical light for light type. However, select –light in which
color of component inspection area is clear.
X coordinate compensation
- Select whether to conduct X coordinate compensation for position deviation of mounting
window for compensation of position set at the relevant component.
Y coordinate compensation
- Select whether to conduct X coordinate compensation for position deviation of mounting
window for compensation of position set at the relevant component.
IC color
- Check at this option for lead color inspection by interlocking with IC Bridge inspection
window. (Refer to IC Bridge inspection.)
Use grid inspection
- Divide the relevant window with grid and individually inspect each area.