MV-9_Chapter 5. Teaching.pdf - 第280页
MV -9 Use r Manual 5- 280 - Af ter selecting the added BLU window (part), if „E nd LED‟ i s clicked, the coord i nate of LED Center is calculated through the 3D measurem ent. 63 Ex a mple) 64 Automatic Creation of 3D BLU…
错误!使用“开始”选项卡将 제목 2 应用于要在此处显示的文字。错误!使用“开始”选项卡将 제목 2 应用
于要在此处显示的文字。 .
5-279
· Except for special cases, it is recommended that the manual mode not be used.
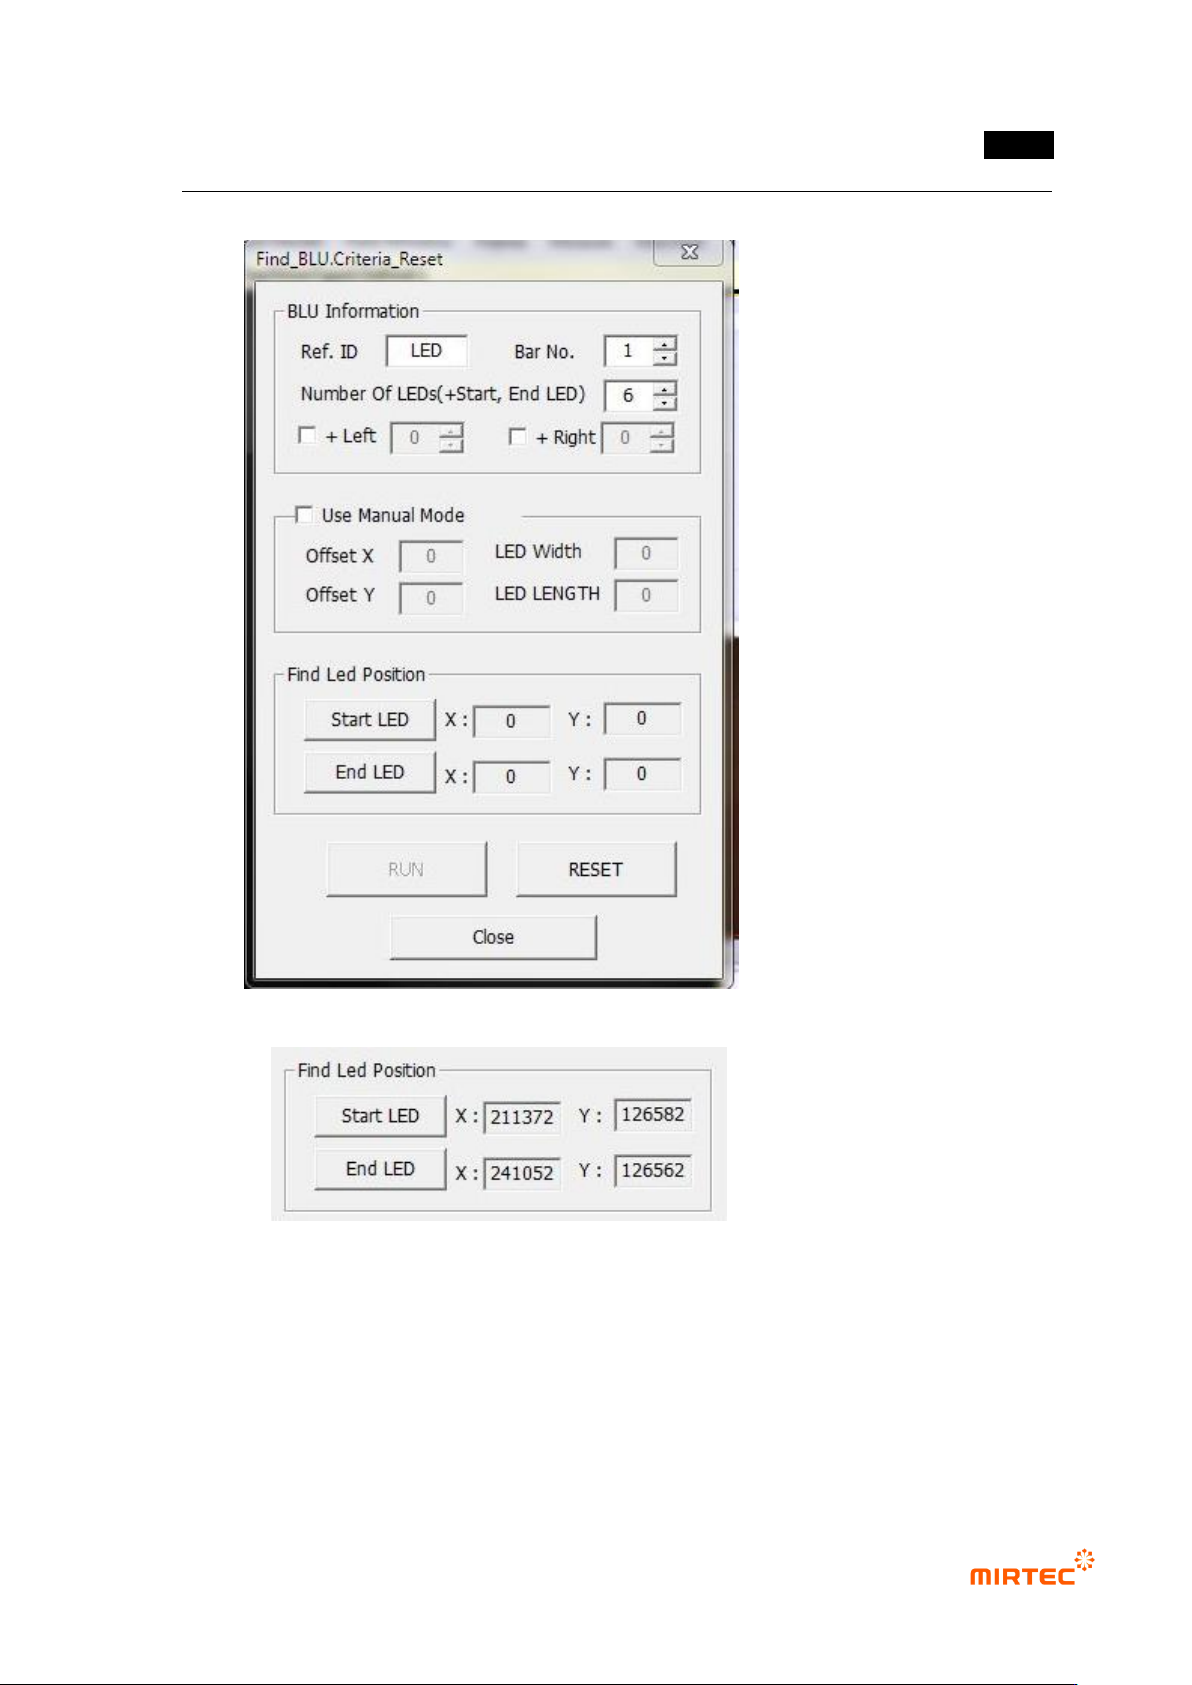
61 Find LED Position
- The window is added by using the BLU library registered in the first LEB of the bar.
- After selecting the added BLU window (part), if „Start LED‟ is clicked, the coordinate of
LED Center is calculated through the 3D measurement.
62 The window is added by using the BLU library registered in the last LEB of the bar.
MV-9 User Manual
5-280
- After selecting the added BLU window (part), if „End LED‟ is clicked, the coordinate
of LED Center is calculated through the 3D measurement.
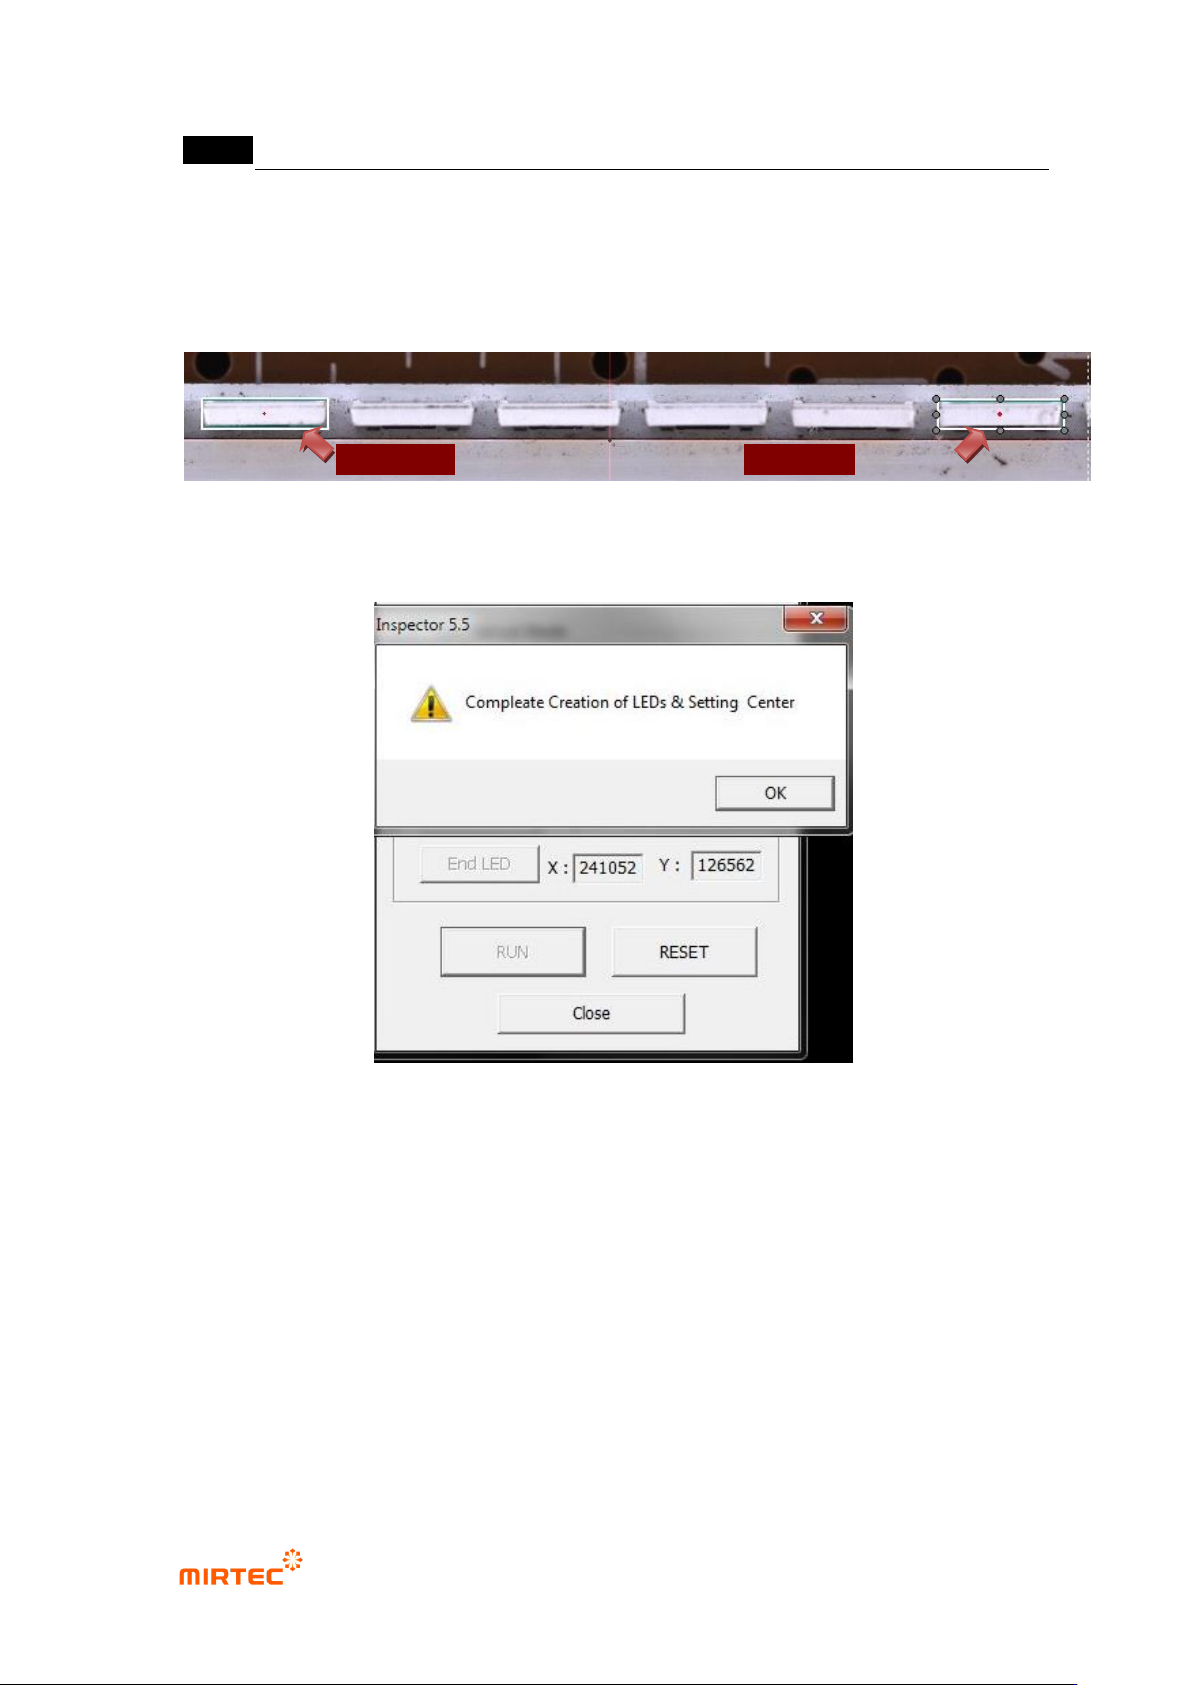
63 Example)
64 Automatic Creation of 3D BLU Window
65 After setting the positions of „Start LED‟ and „End LED‟, if “RUN” is clicked, the window is
automatically created.
66 If the window creation is completed, “Complete Creation of LEDs & Setting Center”
message is output.
67 Teach the entire bars in the same way..
Bar Start LED
Bar End LED
错误!使用“开始”选项卡将 제목 2 应用于要在此处显示的文字。错误!使用“开始”选项卡将 제목 2 应用
于要在此处显示的文字。 .
5-281
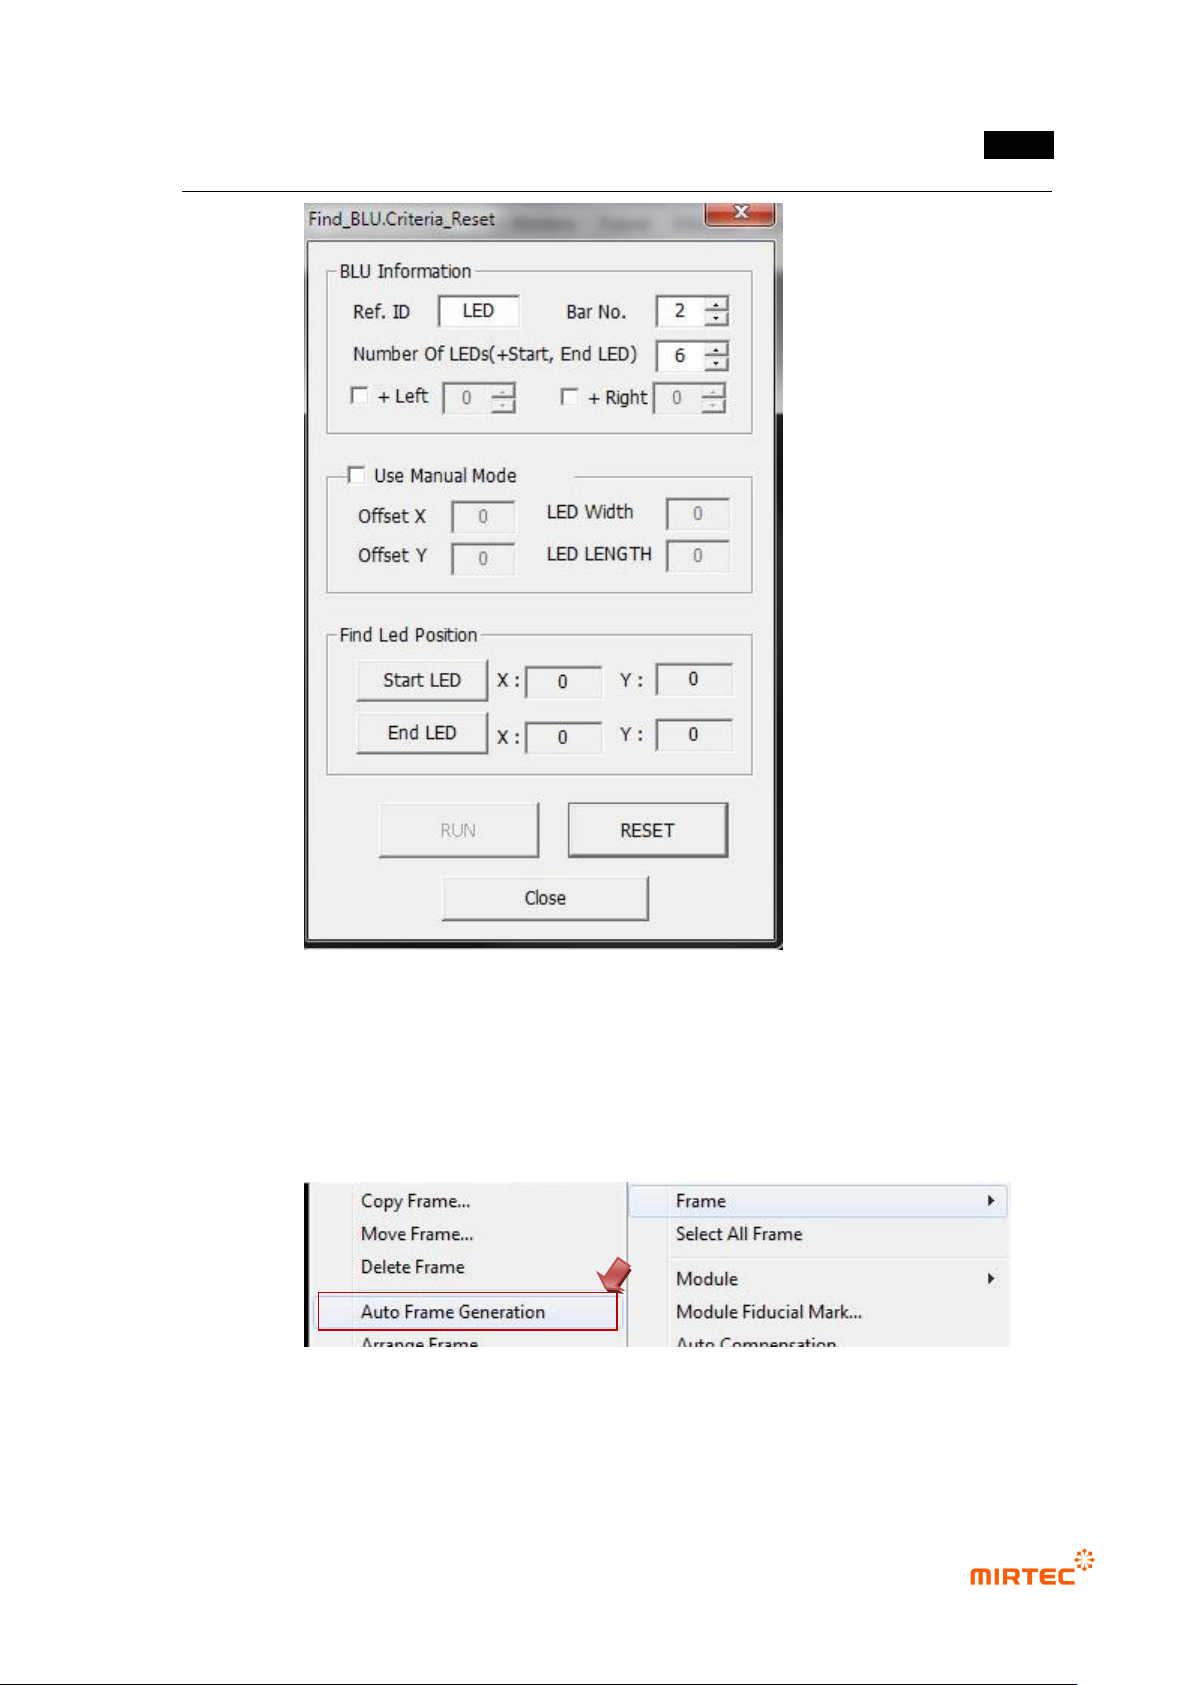
68 If “Reset” button is clicked, the Bar No. increases automatically and the LED Position is
initialized.
69 Create 3D BLU Window (part) for all the bars by repeating processes ③ through ⑤.
70 “Auto Frame Generation”
- Select “Auto Frame Generation” by clicking the right mouse button on the full image
window.
- The created 3D BLU Window (part) is automatically taught to all LED‟s while displayed.