MV-9_Chapter 5. Teaching.pdf - 第8页
MV -9 Use r Manual 5-8 vi. If stopper in inlet part and inspection part is at the up per p art , lower the stopper in inlet part and in spection part in I/O test screen . Refer to „I/O test ( page 4- 50)‟ i n „Chapter 4 …
错误!使用“开始”选项卡将 제목 2 应用于要在此处显示的文字。错误!使用“开始”选项卡将 제목 2 应用
于要在此处显示的文字。 .
5-7
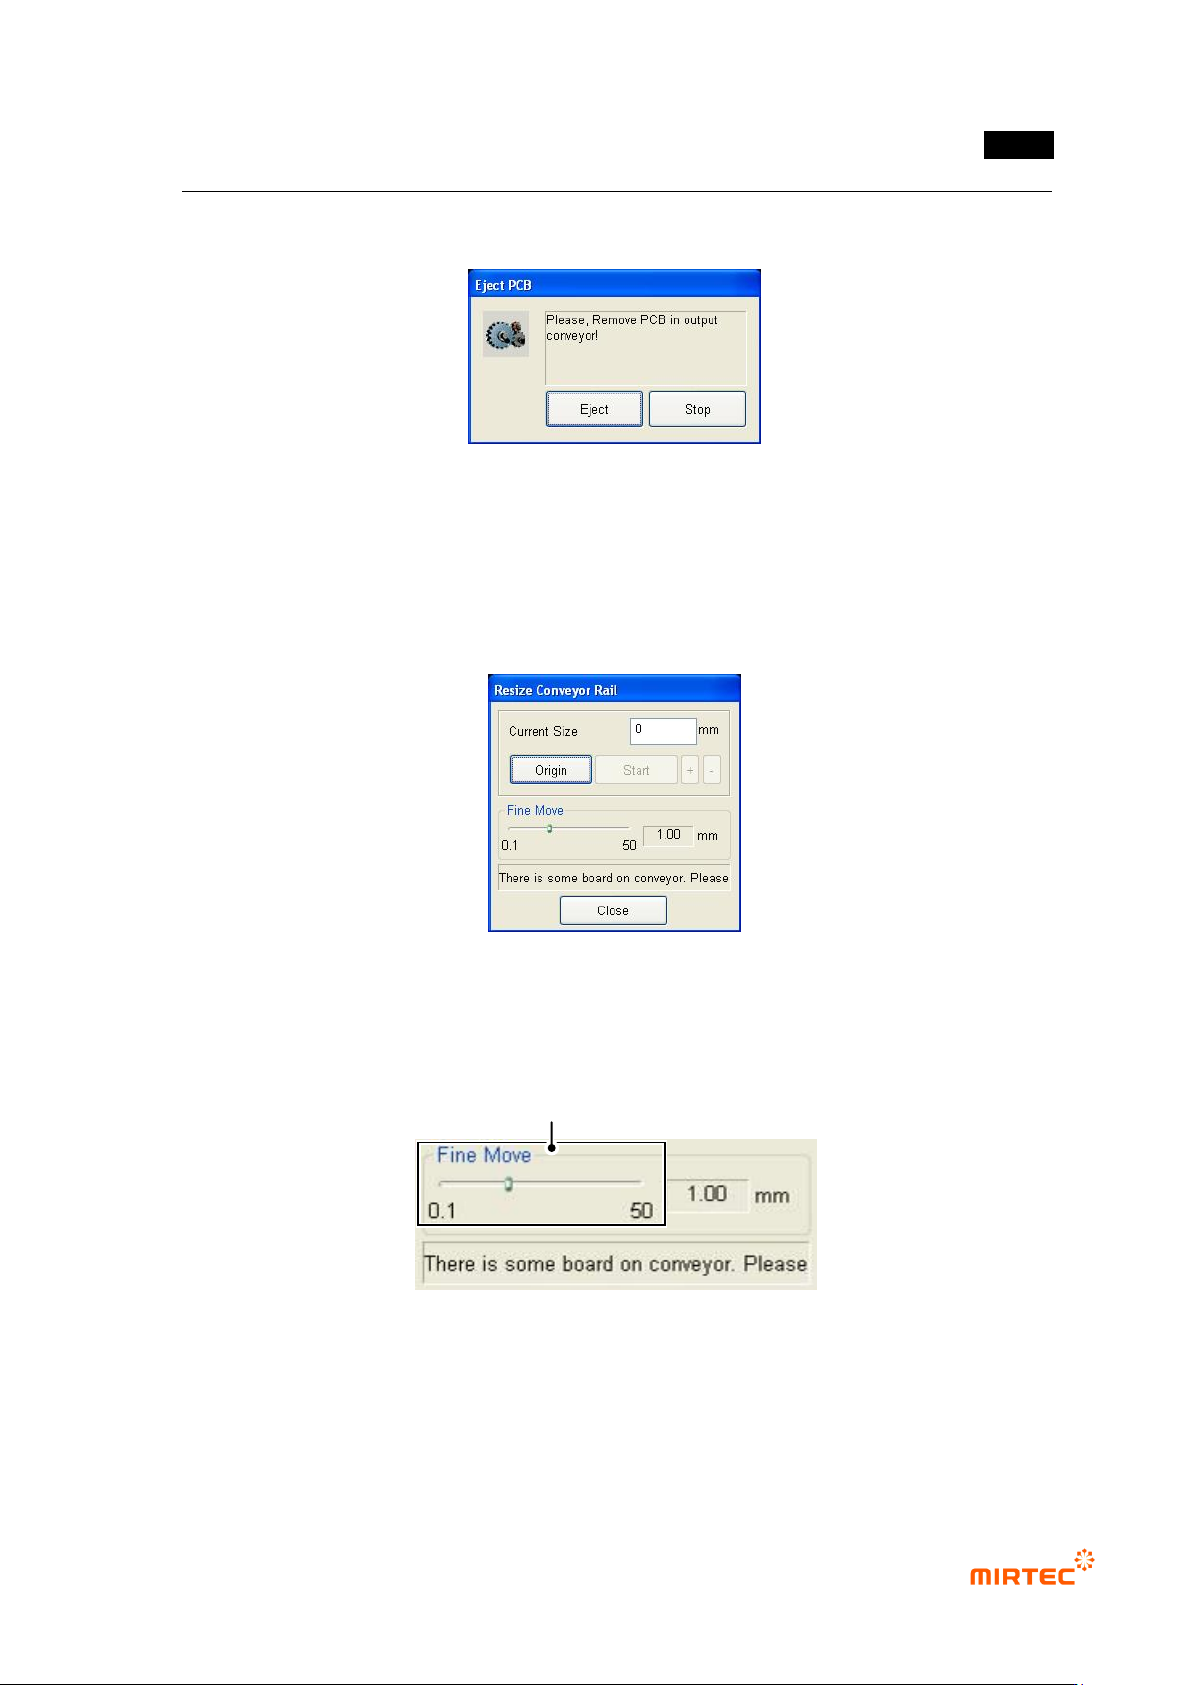
i. Firstly, select „Adjust rail width‟ in „Machine‟ menu. At this point, PCB will be
automatically ejected if there is PCB in the conveyor.
[Figure 5-6 PCB auto eject screen]
ii. If origin of the front axis and rear axis is not set, click <origin return> button for
origin return of axis on the front and rear of the conveyor.
iii. Measure width of PCB to be inspected and enter the value in „width input‟. In case
of error of ± 1mm, click „+/ −‟ button to adjust width.
[Figure 5-7 Screen to adjust conveyor rail width]
iv. To move within 1mm of adjusted width, use fine adjustment interval slide to adjust
the width.
[Figure 5-8 Fine move of conveyor rail width]
v. After adjusting conveyor width, inflow PCB into conveyor in inlet part for actual
inspection to check smooth flow of PCB.
Fine Adjustment Gap Slide Button
MV-9 User Manual
5-8
vi. If stopper in inlet part and inspection part is at the upper part, lower the stopper in
inlet part and inspection part in I/O test screen. Refer to „I/O test (page 4-50)‟ in
„Chapter 4 Config.‟.
vii. Manually test conveyor motor. Open cabinet in PC mounting part on the bottom of
the machine for operation in order using conveyor motor drive button on the top
part of the cabinet.
Operating conveyor
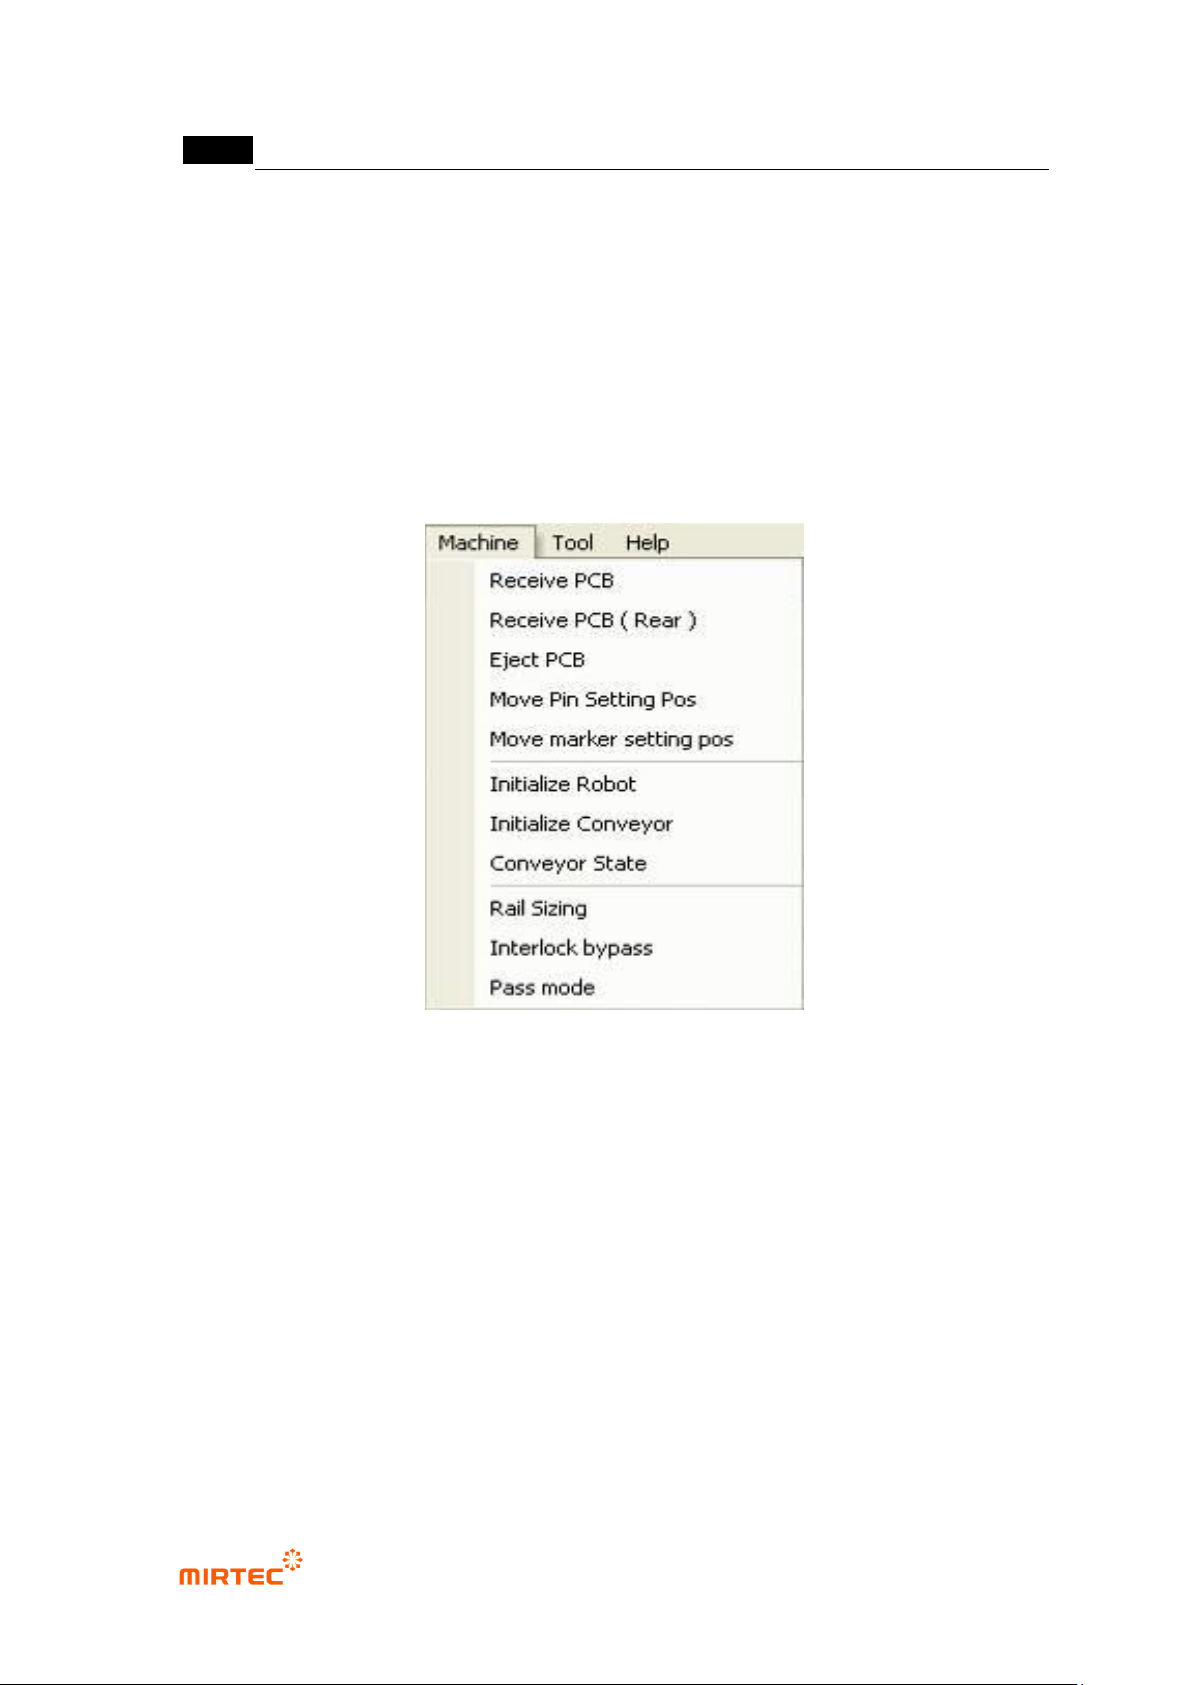
To use in-line machine, select „machine‟ in the menu bar for operation of the conveyor.
[Figure 5-9 Conveyor operation screen]
Substrate inflow
If width of the conveyor for a model desired for inspection or teaching is adjusted, inflow PCB
into the conveyor of inlet part and select „substrate inflow‟ in „menu bar‟.
Substrate inflow (Rear part)
This can be used only in demo mode. Select this option to inflow an ejected PCB backward
into inspection part conveyor.
Substrate eject
Select this to eject PCB that is fixed by clamping.
Pin insert position move
Select this function to move robot for backup pin mounting. For more information, refer to „PCB
position setting (page 4-60)‟ in „Chapter 4 Config.‟.
错误!使用“开始”选项卡将 제목 2 应用于要在此处显示的文字。错误!使用“开始”选项卡将 제목 2 应用
于要在此处显示的文字。 .
5-9
Robot reset
Select this item to conduct origin return and reset conveyor status.
Conveyor reset
Select this to reset PCB without conducting origin return.
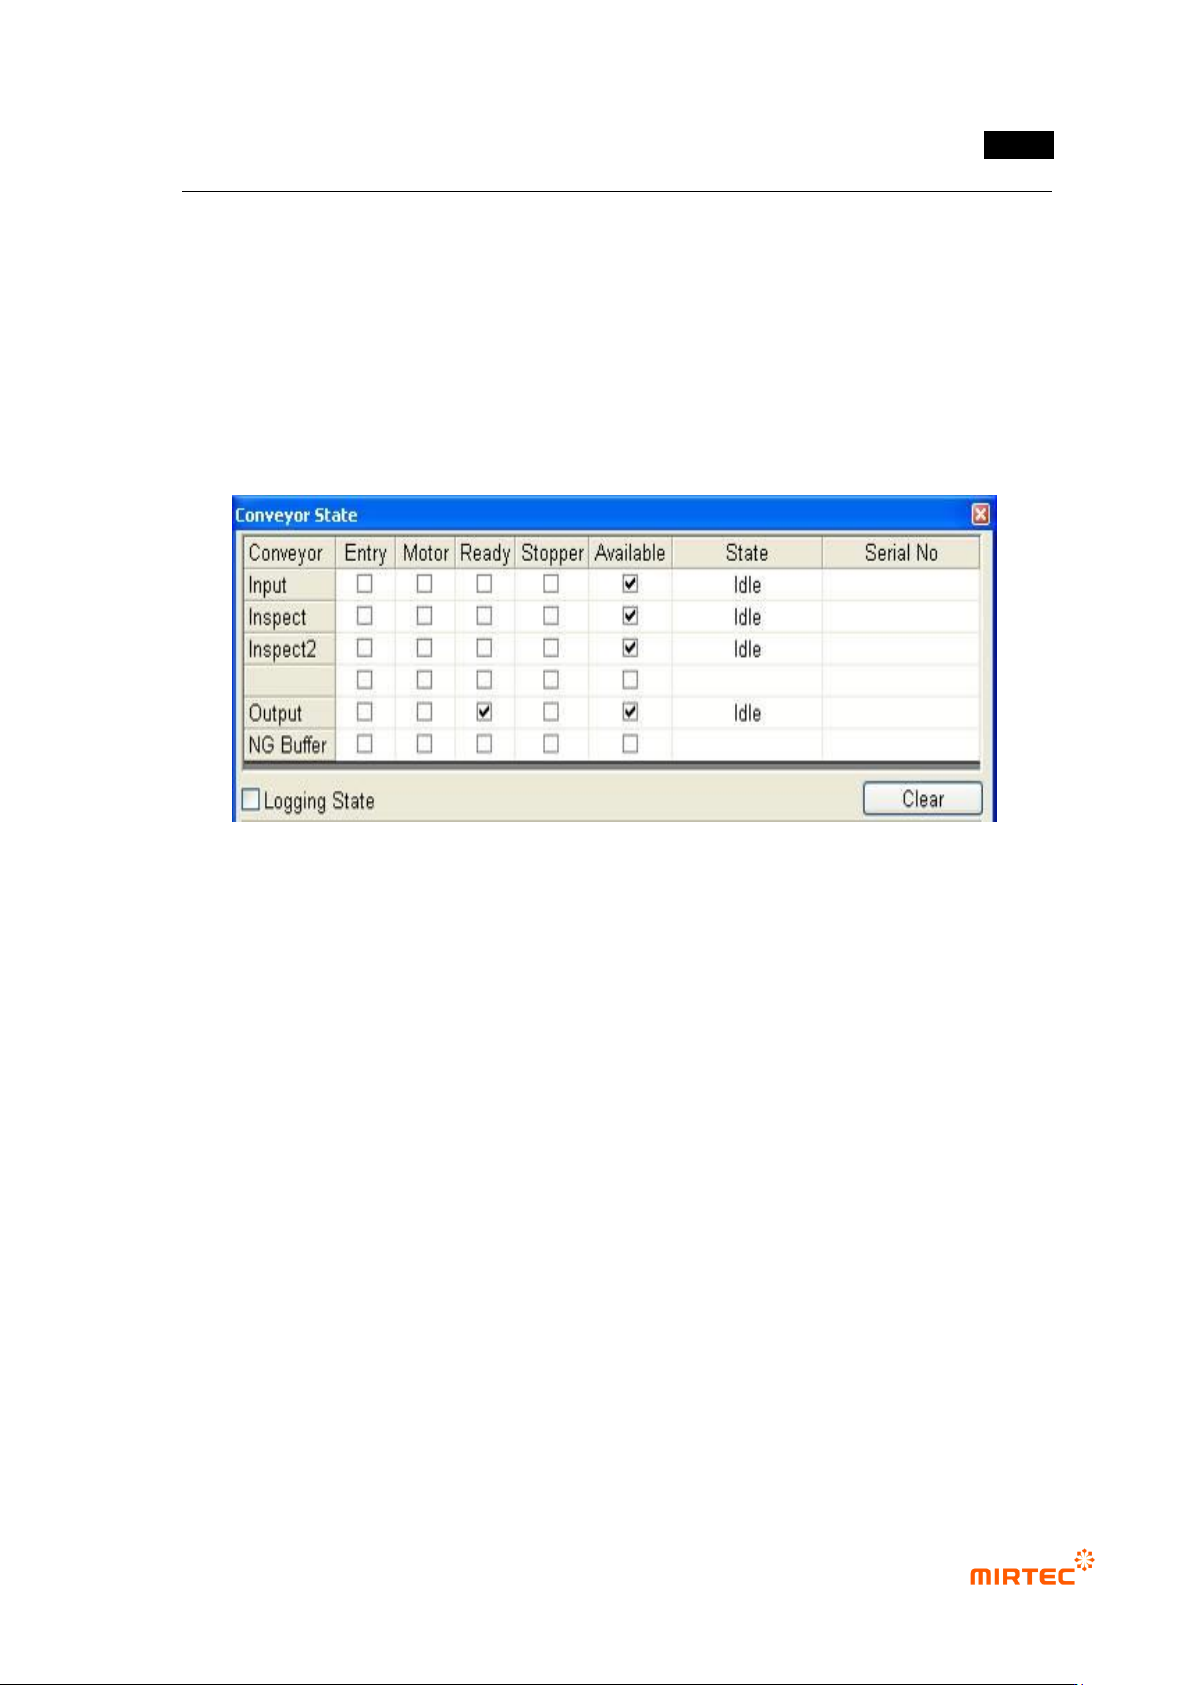
Conveyor status check
Select this to check setting status of the conveyor. Conveyor setting status will be displayed in
the screen in [Figure 5-10].
[Figure 5-10 Conveyor status screen]
Laser origin
Select this to move the laser to the origin.
Rail width change to current model value
Select this to change to rail width that is lastly saved.
Rail width adjust
Select this to adjust rail width according to PCB size.
No use door open sensor
Select this not to use door sensor.
Skip mode
Select this function to eject PCB from inlet part to ejection part at a time. The machine will skip
inspection in inspection part when the machine is in skip mode.