MV-9_Chapter 5. Teaching.pdf - 第26页
MV -9 Use r Manual 5- 26 5.3.2. Mounting inspection window Mounting inspectio n window i s used to i nspect items like position secession or non-mounting , wrong mounting for i nterest i ng com pon e nt . 1) T eaching me…
错误!使用“开始”选项卡将 제목 2 应用于要在此处显示的文字。错误!使用“开始”选项卡将 제목 2 应用
于要在此处显示的文字。 .
5-25
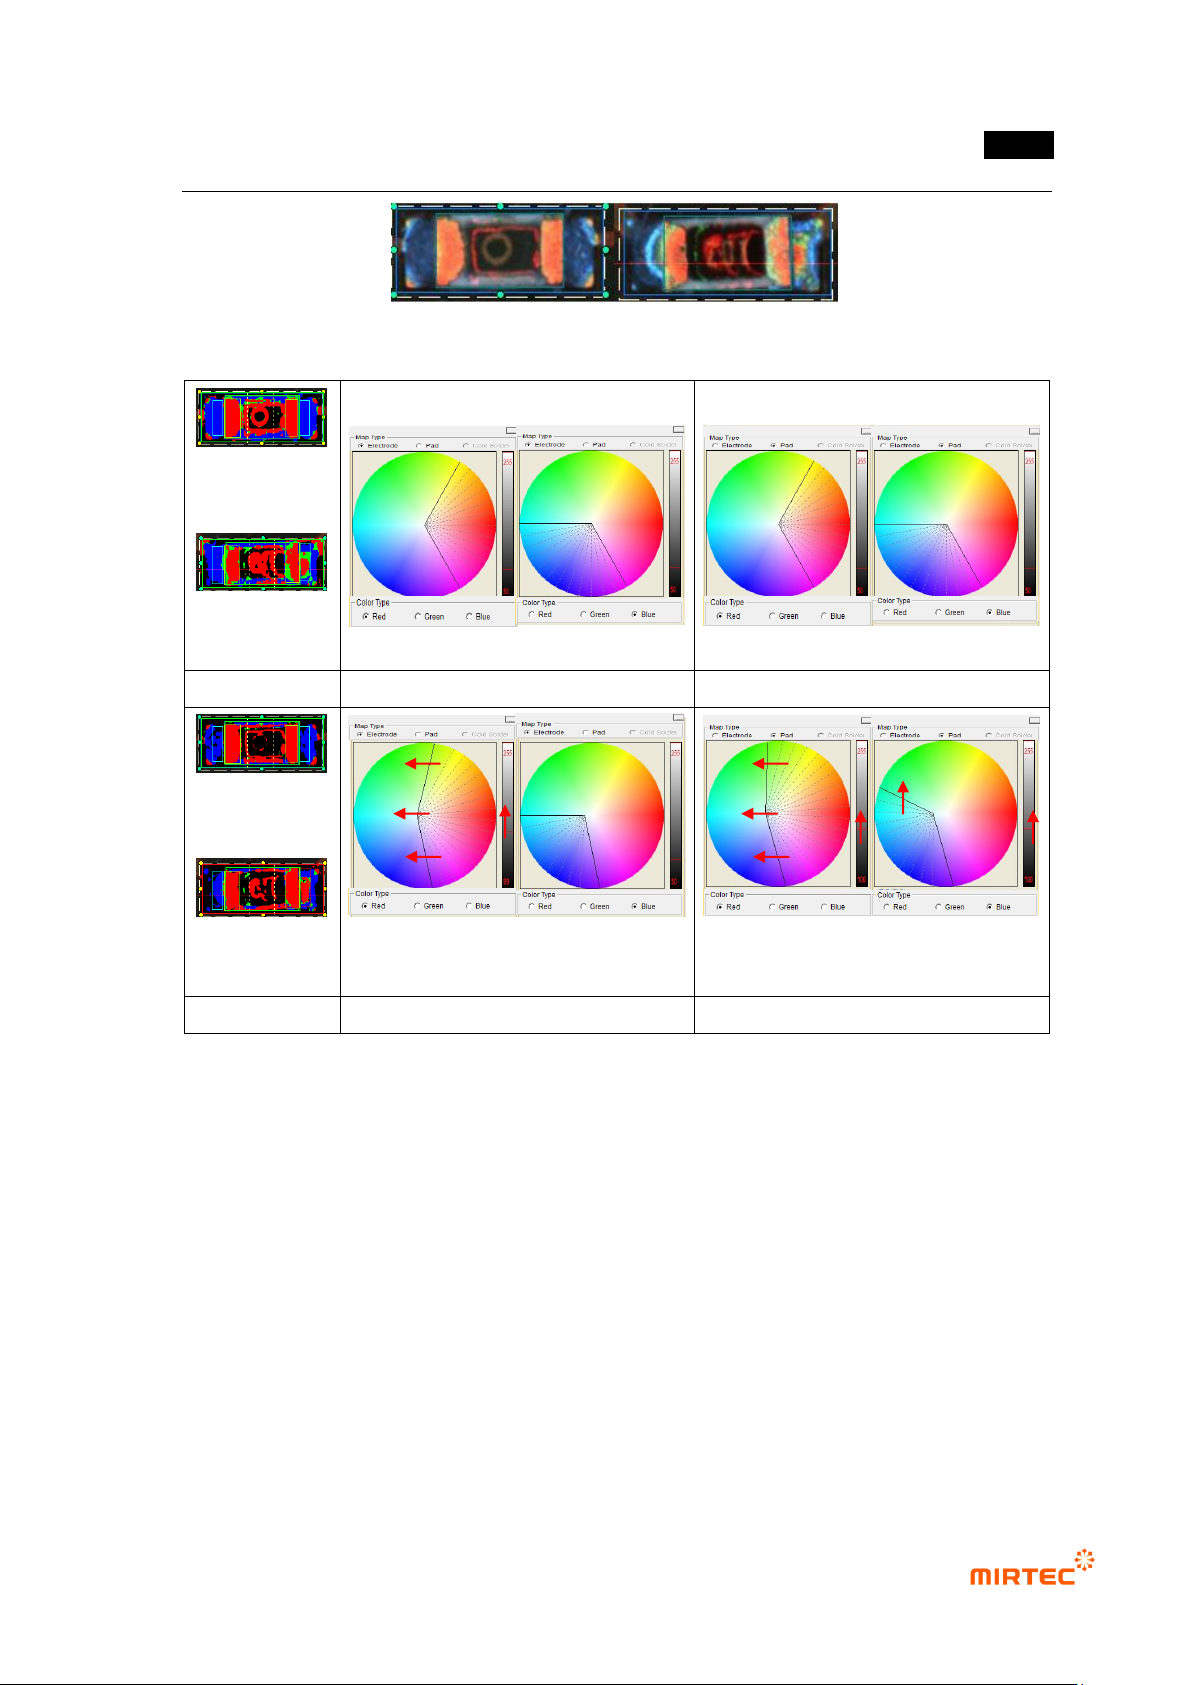
[Figure 5-17 Examples of normal chip and lifted chip]
(Judged as
normal)
(Judged as
normal)
(a) normal
Basic electrode color map
Basic pad color map
(Judged as
normal)
(Judged as
defect)
(b) lifted defect
Modified electrode color map
Modified pad color map
[Figure 5-18 Example of modification of color map for lifted detection]
MV-9 User Manual
5-26
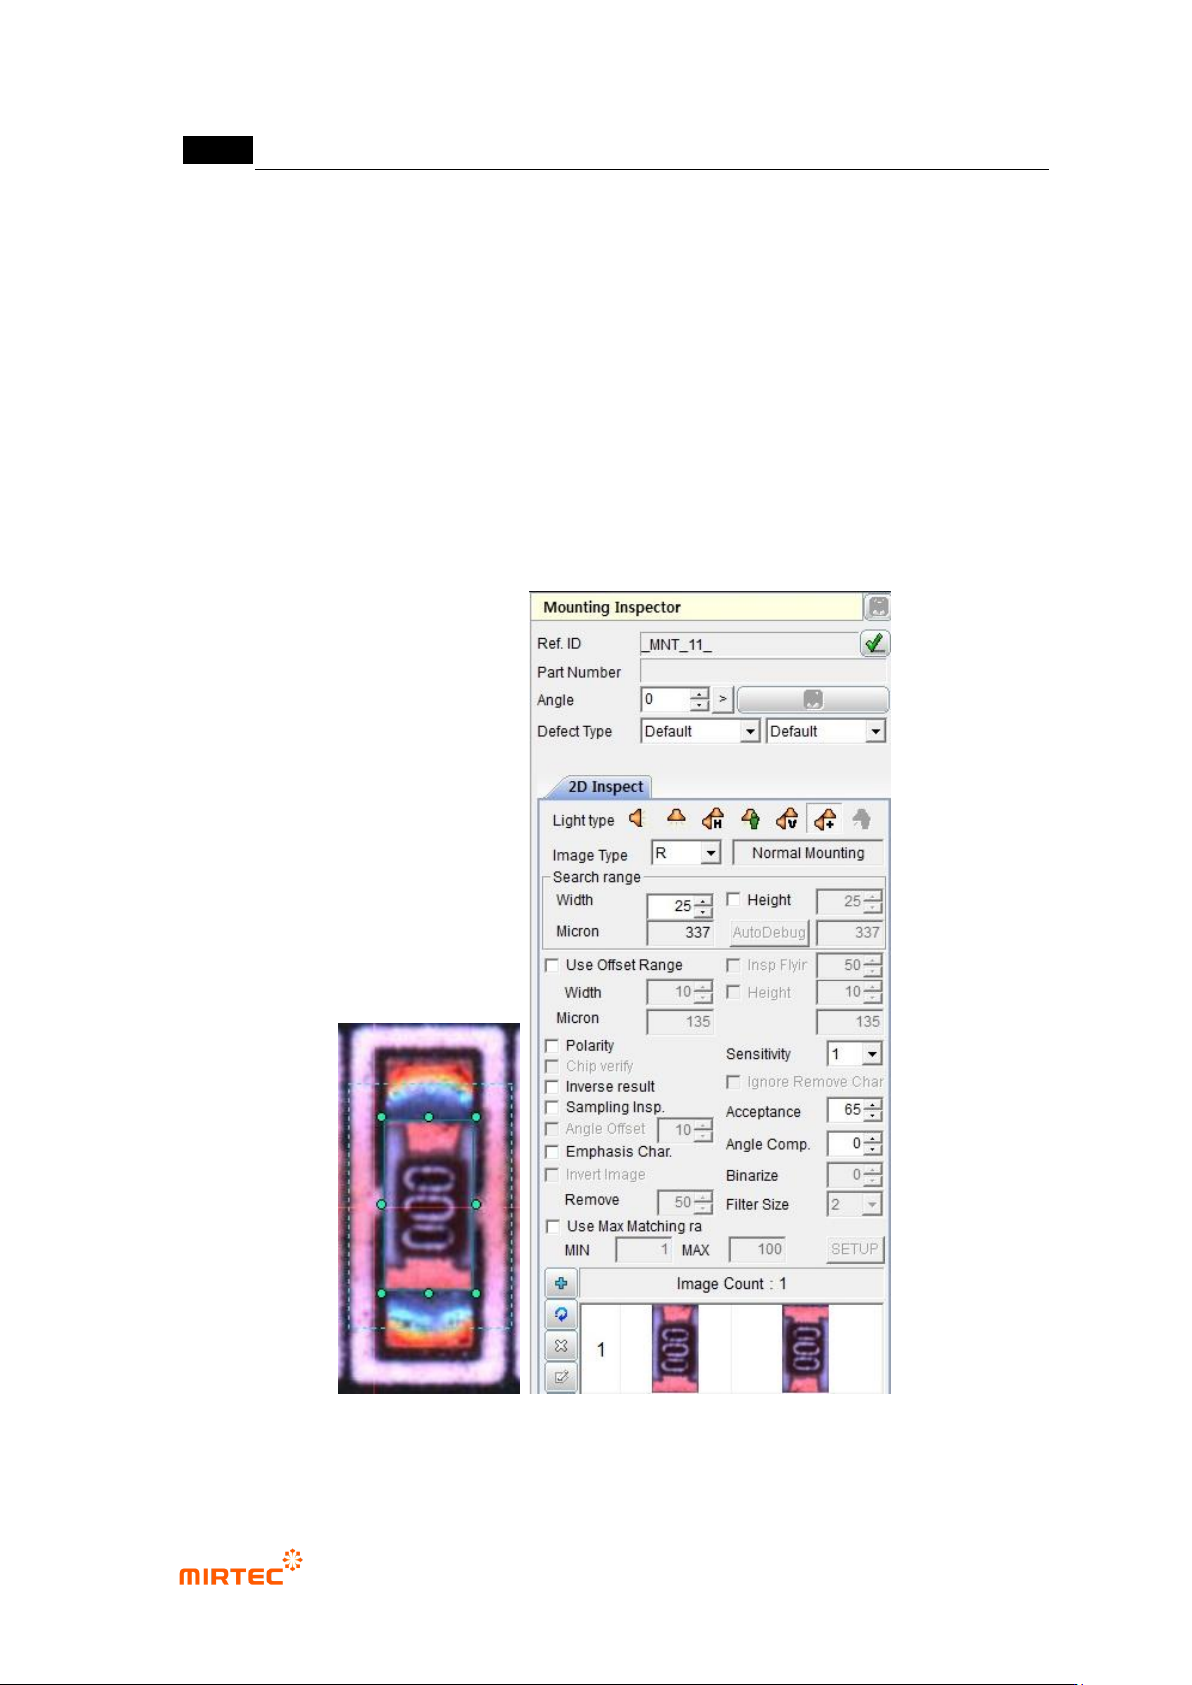
5.3.2. Mounting inspection window
Mounting inspection window is used to inspect items like position secession or non-mounting,
wrong mounting for interesting component.
1) Teaching method
① Click <mounting inspection window> button among operating buttons.
② Draw inspection window in interesting component, and select light type and image type that
clearly divide component from PCB.
③ Select one of R (Red), G (Green), B (Blue) or L (Luminance) for image type. [Figure 5-37]
shows gray image according to image types.
[Figure 5-19 Screen to create mounting inspection window]
错误!使用“开始”选项卡将 제목 2 应用于要在此处显示的文字。错误!使用“开始”选项卡将 제목 2 应用
于要在此处显示的文字。 .
5-27
Red image
Green image
Blue image
Luminance image
[Figure 5-20 Screen to create mounting inspection window]
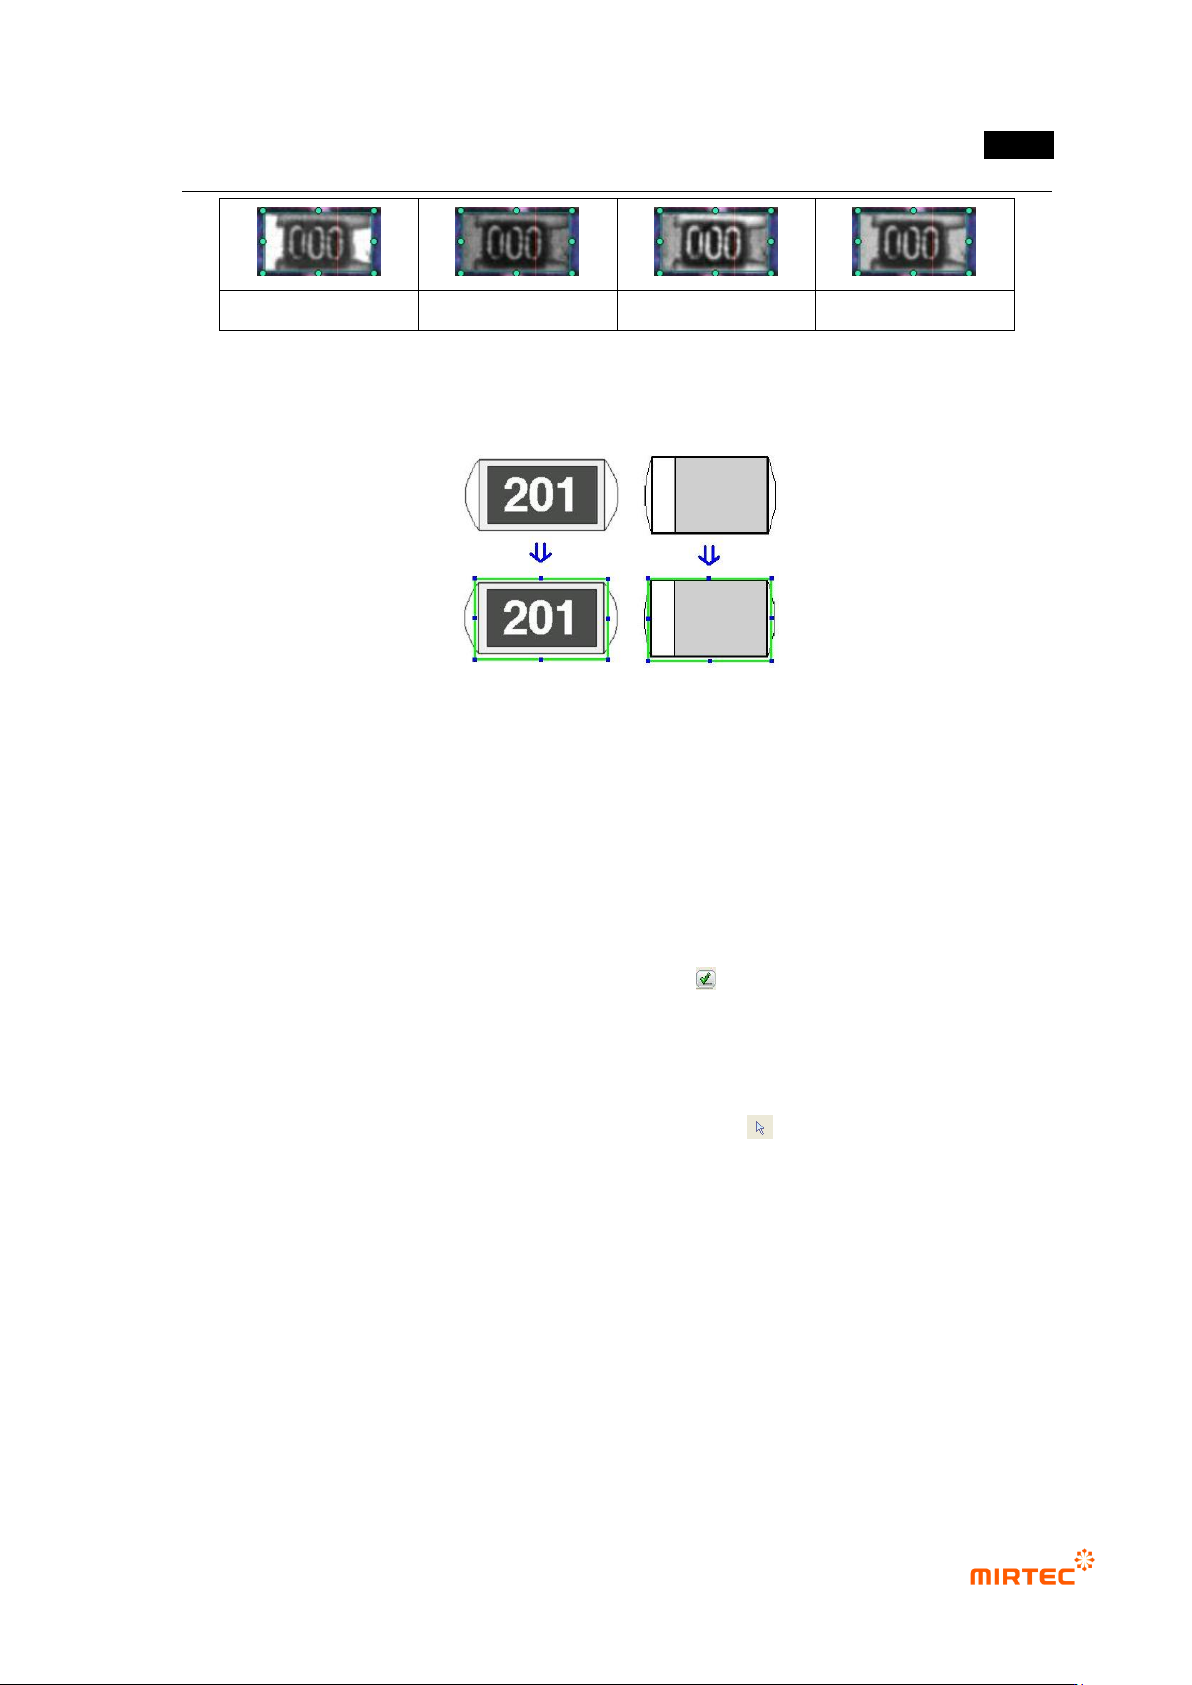
2) Example of teaching of a representative component
[Figure 5-21 Example of mounting inspection window teaching]
3) Parameter of mounting inspection window
Reference name
- Since reference name is automatically created while inspection window is being created, it
has unique name among PCB models.
- Created in „_MNT_1_‟ format. „MNT‟ means Mounting and the number means the order of
creating of mounting inspection window.
- To manually change reference name, click <check ( )> button and enter reference name.
Component name
- To create many inspection windows for one component, group each inspection windows
into one component group and enter component name.
- To enter component name, firstly, click <object selection ( )> button among the operating
buttons and select inspection windows to be grouped. After that, select „Group component‟
popup menu displayed by clicking right button of the mouse.