MV-9_Chapter 5. Teaching.pdf - 第15页
错误 ! 使用“开始” 选项卡将 제목 2 应用于要在此处显示的文字。 错误 ! 使用“开始”选项卡将 제목 2 应用 于要在此处显示的 文字。 . 5- 15 A dd This is to register F id uc i al m ark. Delete This is to delete all register e d Fiducia l m ark. Im age re fresh This is to re…
MV-9 User Manual
5-14
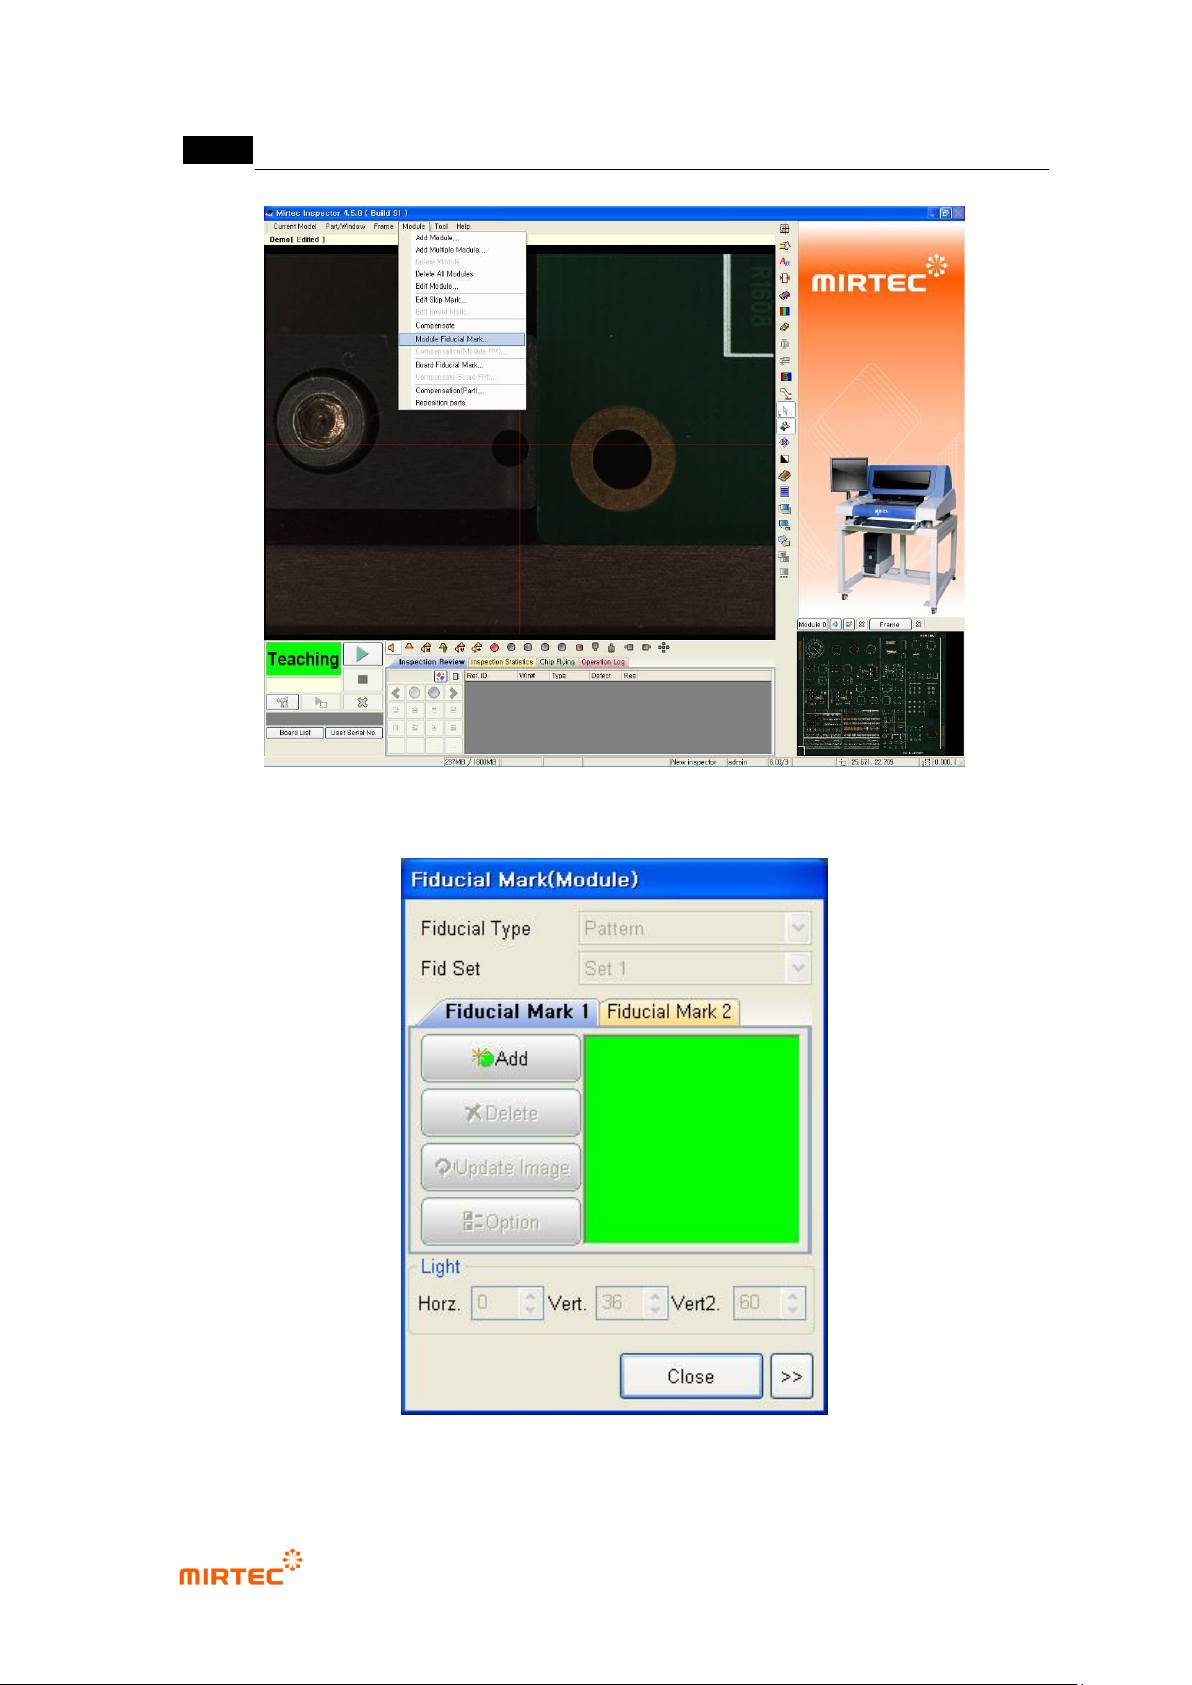
[Figure 5-1 Selecting Fiducial mark setting item]
[Figure 5-2 Fiducial mark setting screen]
错误!使用“开始”选项卡将 제목 2 应用于要在此处显示的文字。错误!使用“开始”选项卡将 제목 2 应用
于要在此处显示的文字。 .
5-15
Add
This is to register Fiducial mark.
Delete
This is to delete all registered Fiducial mark.
Image refresh
This is to refresh final image.
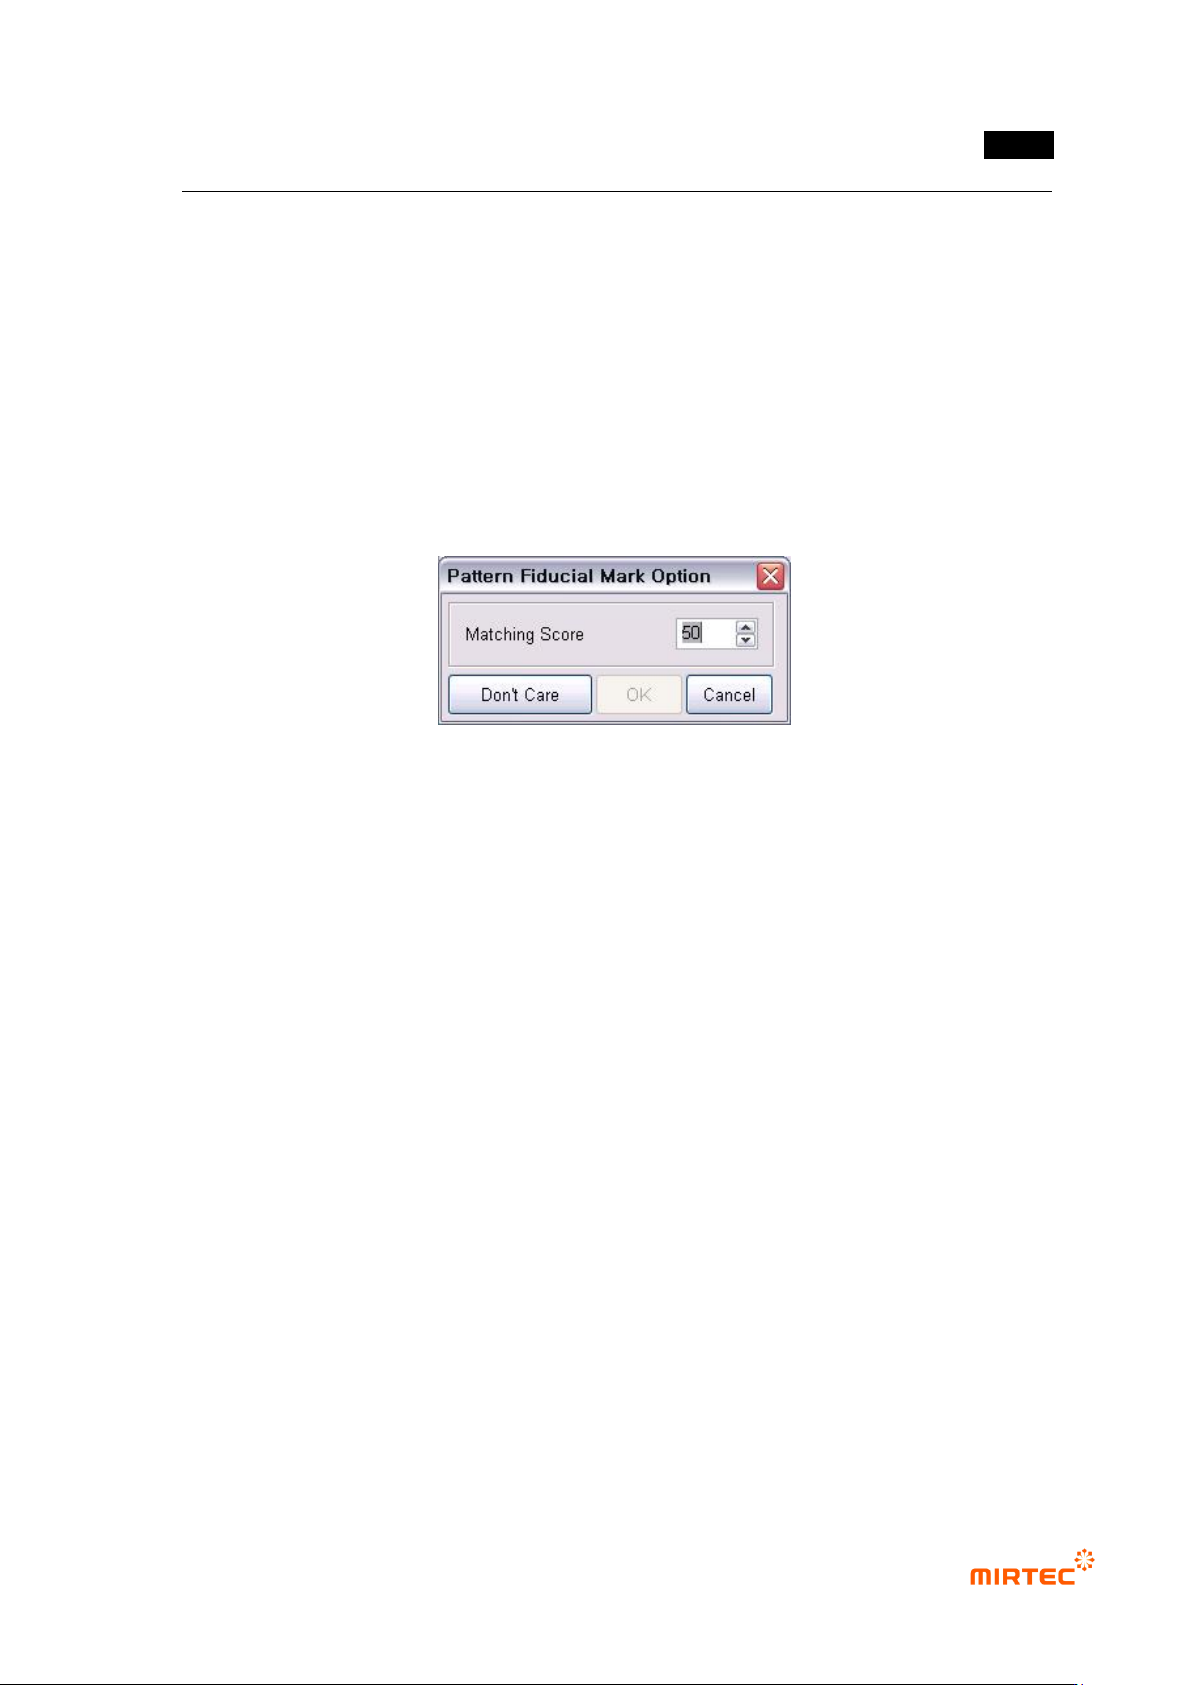
Option
The option includes matching ratio and inspection „Don‟t care region‟ for matching test.
For more information about inspection „Don‟t care region‟, refer to „5.3.1 mounting
inspection window
[Figure 5-3 Fiducial mark option screen]
Light setting
This is to change luminance of Fiducial mark light that is set. It can be also changed in
„light setting‟ in „Config.‟.
② Use <fine move> or <move screen> button to move the robot to Fiducial mark in PCB center
of position desired to be registered and then click <Add> button in „Fiducial mark 1‟ in
Fiducial mark screen to create Fiducial mark window at the relevant position.
③ Inner window is the area to save reference image for Fiducial mark recognition, and outer
window is search range to find registered Fiducial mark.
MV-9 User Manual
5-16
[Figure 5-4 Screen to set Fiducial mark window]
④ After registering „Fiducial mark1‟, move the robot to the second Fiducial mark position of
PCB. After that, click <Add> button in „Fiducial mark 2‟ to register it.
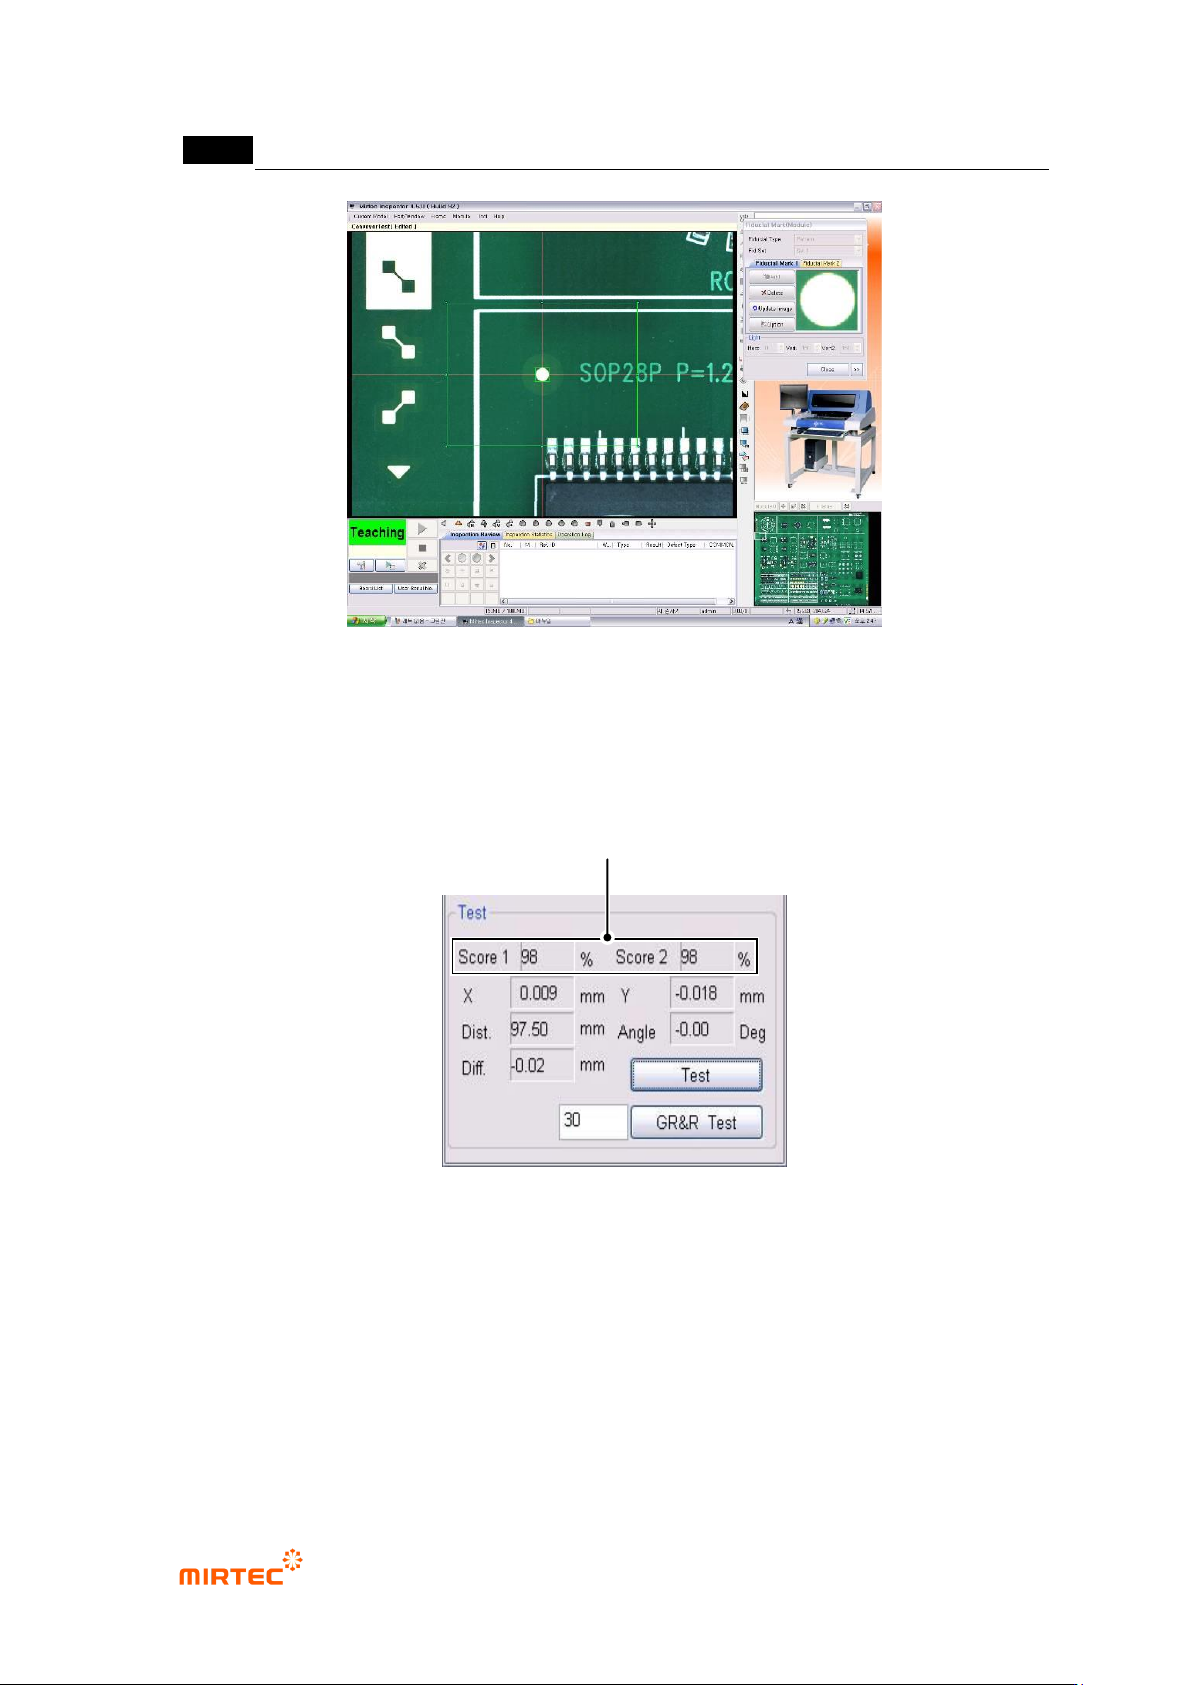
⑤ After registering 2 Fiducial marks, click <test> button in the figure below to confirm Fiducial
mark position. After that, click <Close> button to complete registering Fiducial mark.
[Figure 5-5 result screen by clicking test button]
Matching Rate for Registered Fiducial mark