N7201A616E00_0317.pdf - 第159页
NPM-W 2 EJM7DE-MB-02O-0 0 2-5-1 -4 Preparatio n SERVO ON 7 8 ● Move the front/rear X-axes and make sure they do not interfere w ith th e stopper. 9 Secure the nozzle changer 10 Attach the feeder cart ( → [Maintenance] P.…
NPM-W2 EJM7DE-MB-02O-00
2-5-1-3
Operating procedure
2-5-1
Individu-
al
prepara-
tion
Replacing the nozzle
changer/ dummy dispensing
unit/calibration jig 2
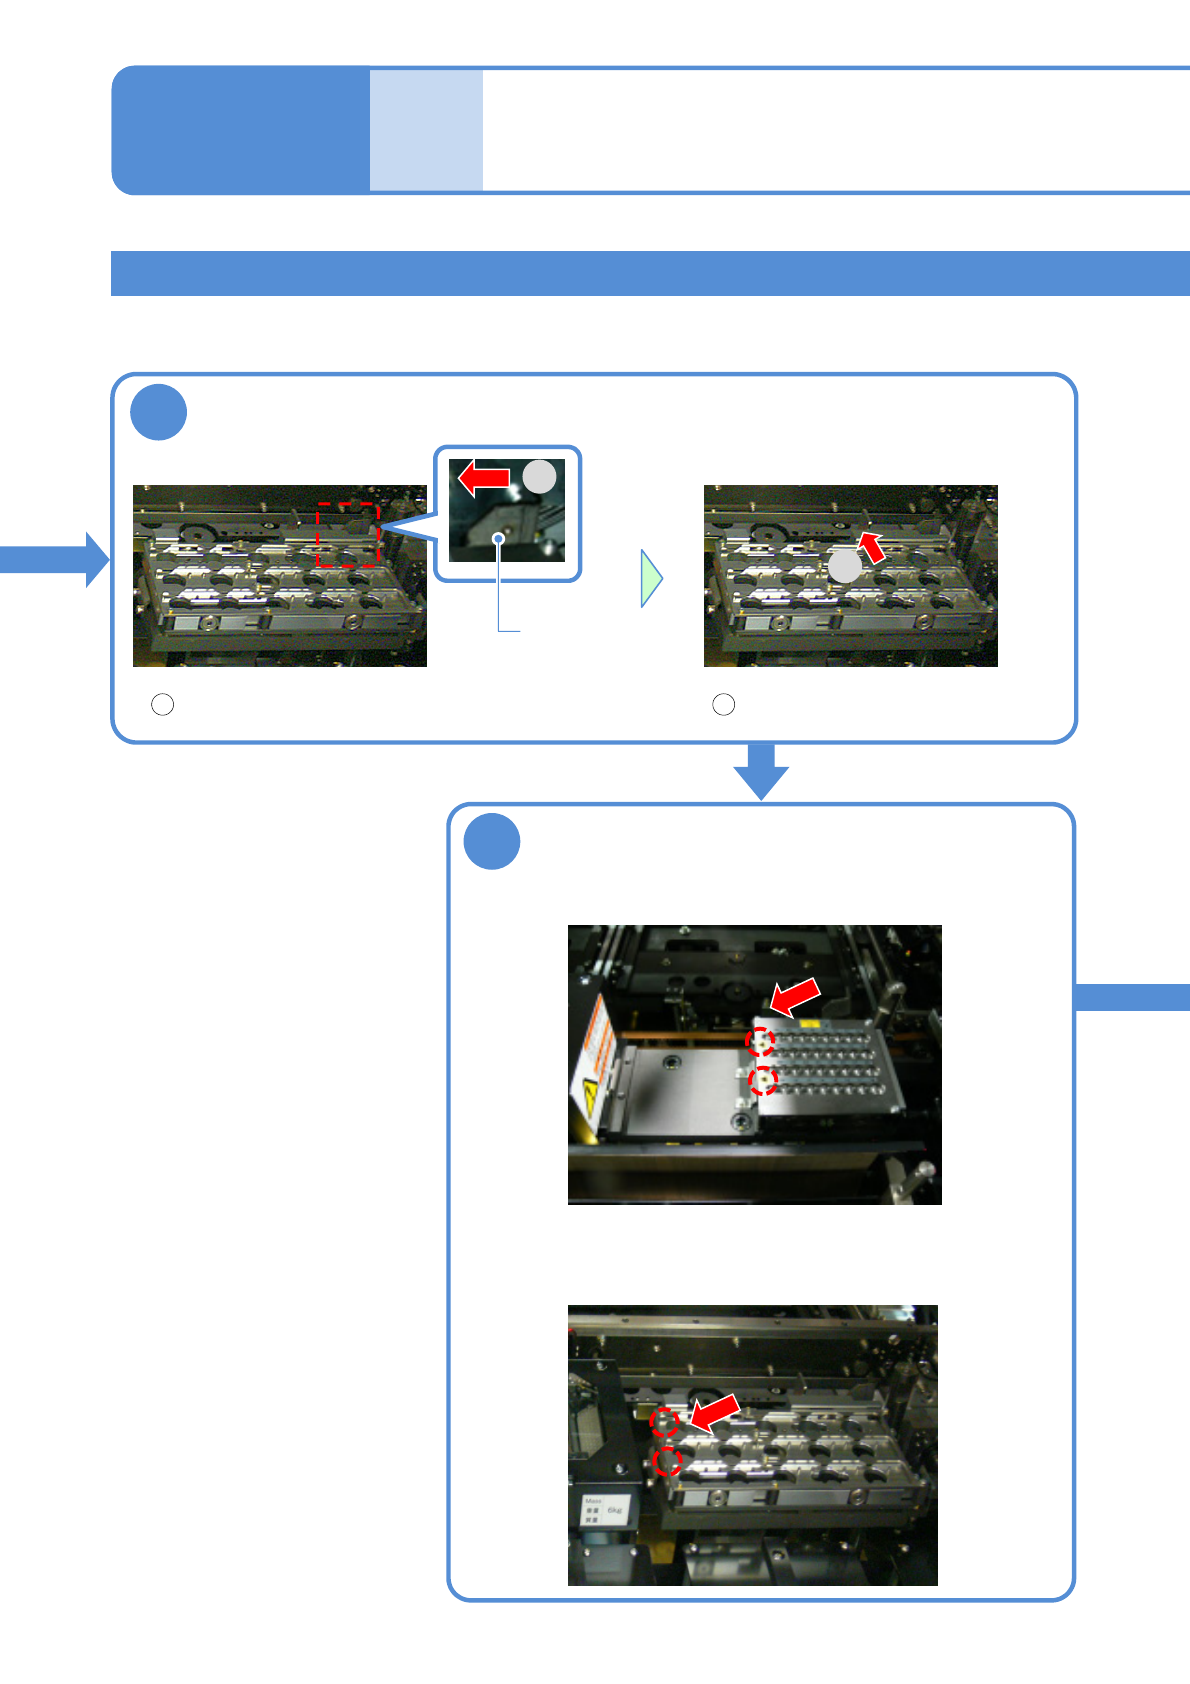
How to change the nozzle changer/dummy dispensing unit/calibration jig
The placement head is used to describe how to replace the nozzle changer while the dispensing head and
inspection head are used, respectively, for the dummy dispensing unit and calibration jig. This section
describes how to replace the nozzle changer as an example.
5
6
■For 3-nozzle head
■For light weight 16-/12-/8-nozzle head
Attach the new nozzle changer
●Slide it after aligning [▲] with [▼].
Lever
Remove the nozzle changer
2
1
1 2
Fold the lever to the left Remove the nozzle changer

NPM-W2 EJM7DE-MB-02O-00
2-5-1-4
Preparation
SERVO
ON
7
8
●Move the front/rear X-axes
and make sure they do not
interfere with the stopper.
9
Secure the nozzle changer
10
Attach the
feeder cart
(→[Maintenance]
P.3-2)
Lever
Fold the lever to the left and fix the
nozzle changer.
OK NG
NPM-W2 EJM7DE-MB-02O-00
Individu-
al
prepara-
tion
Replacing the nozzle 1
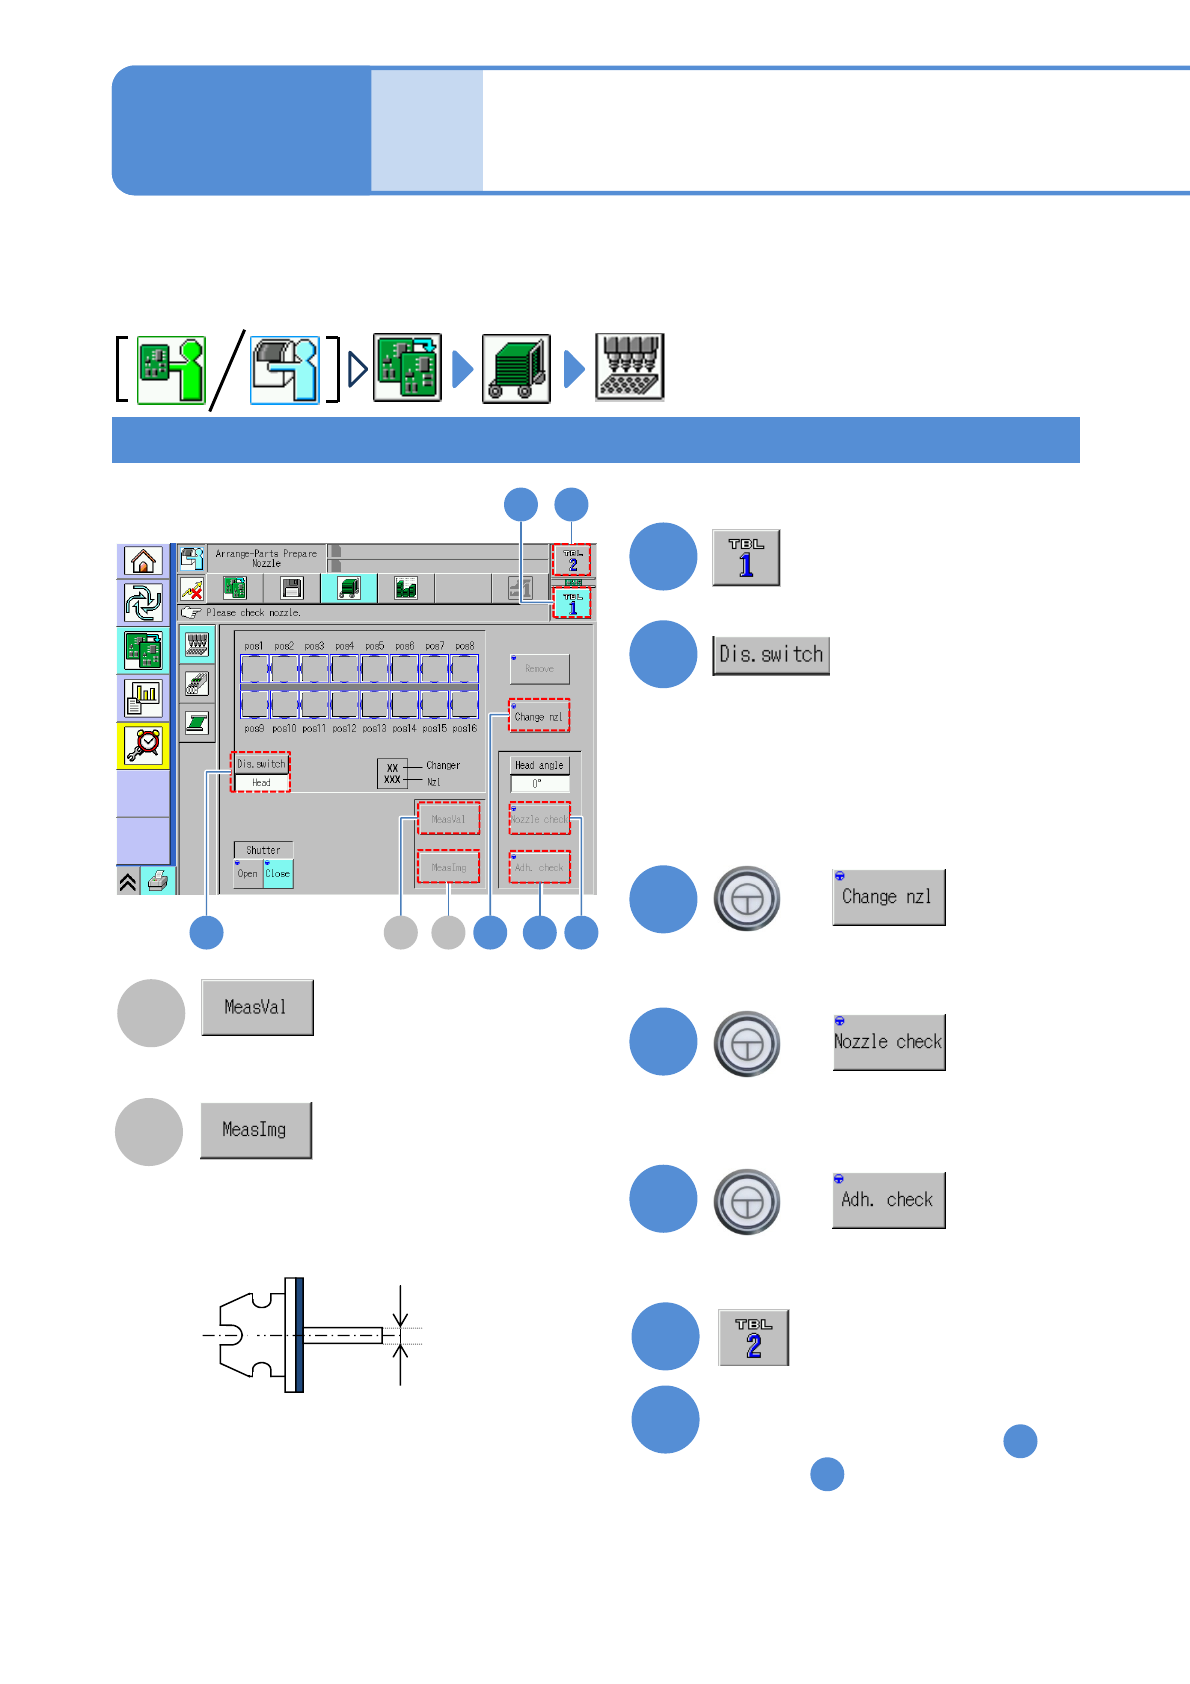
Nozzle check
2-5-2-1
B
A
Displays the measurement value
of the nozzle outer dimensions.
Displays the nozzle image recognized
by the [Nozzle check].
Operating procedure
2-5-2
This helps you replace or remove nozzles. Nozzles can be attached to, or detached from, the head by one
operation, and also the nozzle configuration of each head can be confirmed. The numbers of nozzles
currently being attached to each head are shown.
Using the 12-nozzle head as an example, the screen below explains how to replace the nozzle; however,
the light weight 16-, 8- and 3-nozzle heads can be replaced in the same manner.
2
1
●Switches the display to Changer.
●Make sure that the nozzles actually set
on the changer are consistent with the
screen display.
●To confirm the nozzles by detaching
the nozzle changer. (→P.2-5-1)
3
(The nozzles inside the nozzle changer
are installed to the head.)
4
(The axis diameter of the nozzles are
measured.)
5
●Check foreign matter adhering on the
nozzle tips.
●Check on the nozzles.
*1)
*1)
●To accurately identify the type of nozzles, remove and visually check the nozzles. (Since the shape of the
nozzle end face is unrecognizable, the type of nozzles cannot be identified.)
●For information on the 2D code recognition of the nozzles, refer to the following. (→ P.2-5-2
-7)
●In the case of 3-nozzle heads, the “Change nzl” button is not displayed.
The axis
diameter of
the nozzles
6
7
Confirm the nozzles in the same
manner as shown in steps
through
2
5
1
2
6
BA 3 45
+
+
+