N7201A616E00_0317.pdf - 第596页
NPM-W 2 EJM7DE-MB-07 O-00 Unit adjust- ment PCB tr ansf er c hec k 7-2-9 You can check whether PCBs are transferred normally. ● For dual lane mode, you need to choose a lane in advance. 1 B + A 2 + + Operating procedure …
NPM-W2 EJM7DE-MB-07O-00
2 3
Syringe status check
(dispensing head)
7-2-8
1
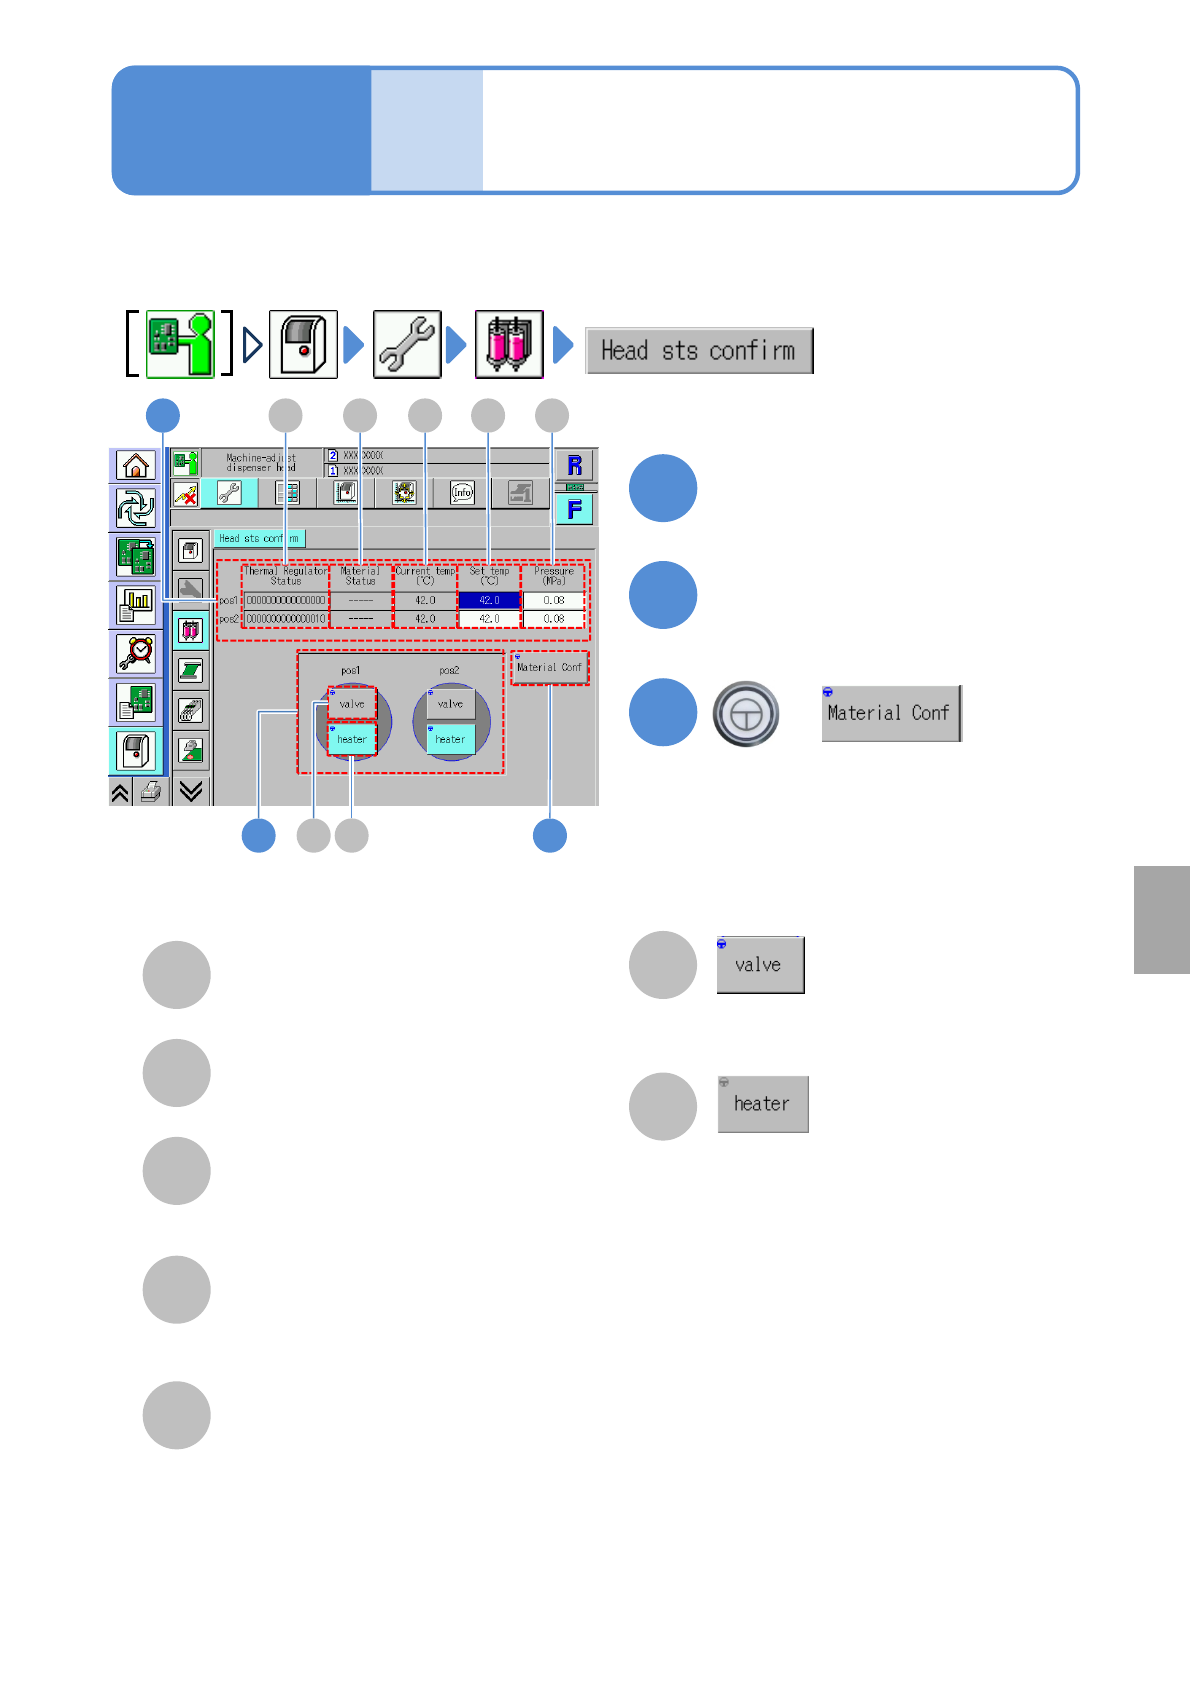
You can check the status of each unit installed on the dispensing head.
1
F G
Confirm the status of each unit
BA C D E
A
Thermal Regulator Status
The temperature control status of each
nozzle.
B
Material Status
The parts-empty detection status of each
nozzle.
C
Current temp(℃)
The current temperature of the
temperature control unit attached to the
syringe of each nozzle.
D
Set temp(℃)
The desired temperature for the
temperature control unit attached to the
syringe of each nozzle.
E
Pressure(MPa)
The electropneumatic regulator pressure
applied to the syringe of each nozzle
2
Choose the desired syringe pos.
to check action
F
The dispensing valve turns ON/OFF for
the nozzle
G
The heater control of the temperature
control unit turns ON/OFF for the nozzle.
3
+
●Checks the material-empty status.
Unit
adjust-
ment
Operating procedure
7-2-8
System
administration
NPM-W2 EJM7DE-MB-07O-00
Unit
adjust-
ment
PCB transfer check
7-2-9
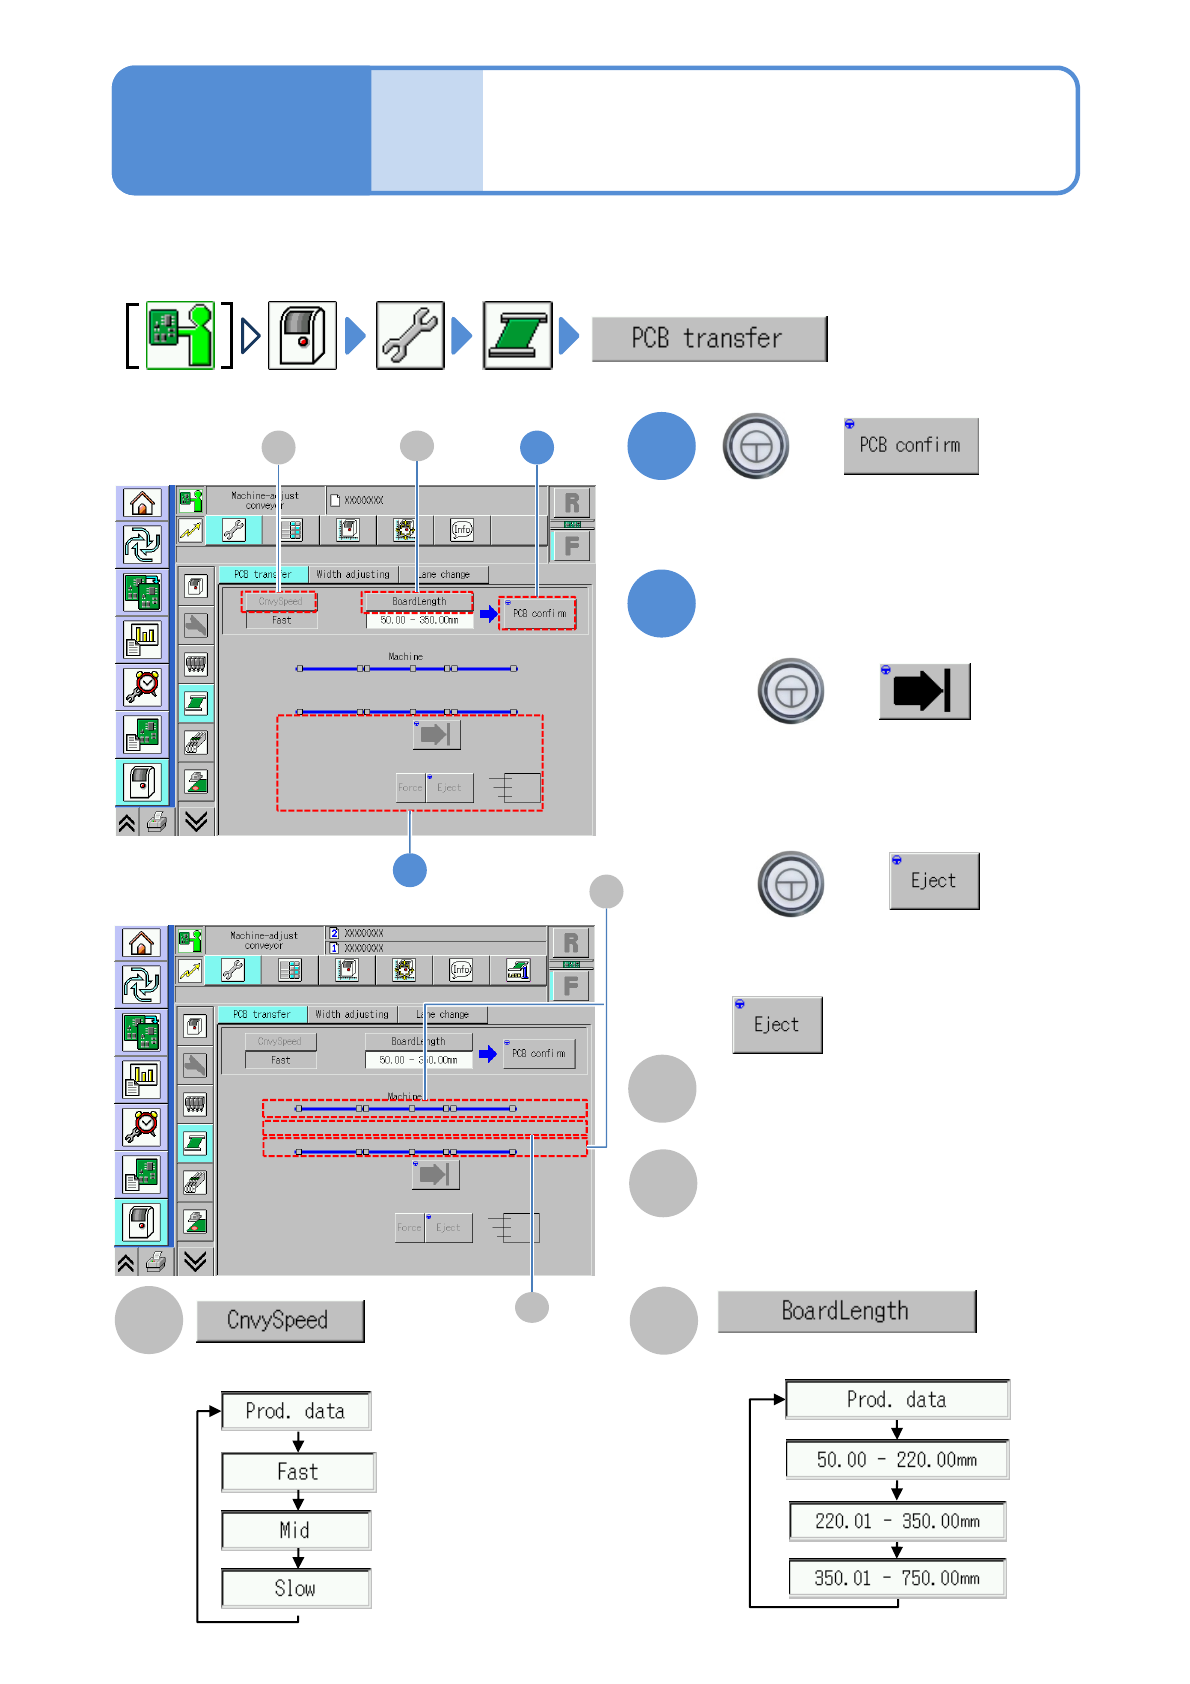
You can check whether PCBs are transferred normally.
●For dual lane mode, you need to choose a lane in advance.
1
B
+
A
2
+
+
Operating procedure
7-2-9
Choose a PCB length.
(When a PCB is present on the transfer
conveyor, its position is displayed)
Choose a transfer speed.
■To unload a PCB without the request
signal from the post process
becomes enabled.
(The PCB is transferred to a selected
position)
Transfer
■To load a PCB into the machine
■To unload a PCB outside of the
machine
1
C
2
A
B
■In single lane mode
D
■In dual lane mode
C
Sensor
Displays the status of the board sensor.
D
Transfer position
Displays presence or absence of the
current board.
NPM-W2 EJM7DE-MB-07O-00
Unit
adjust-
ment
Conveyor width
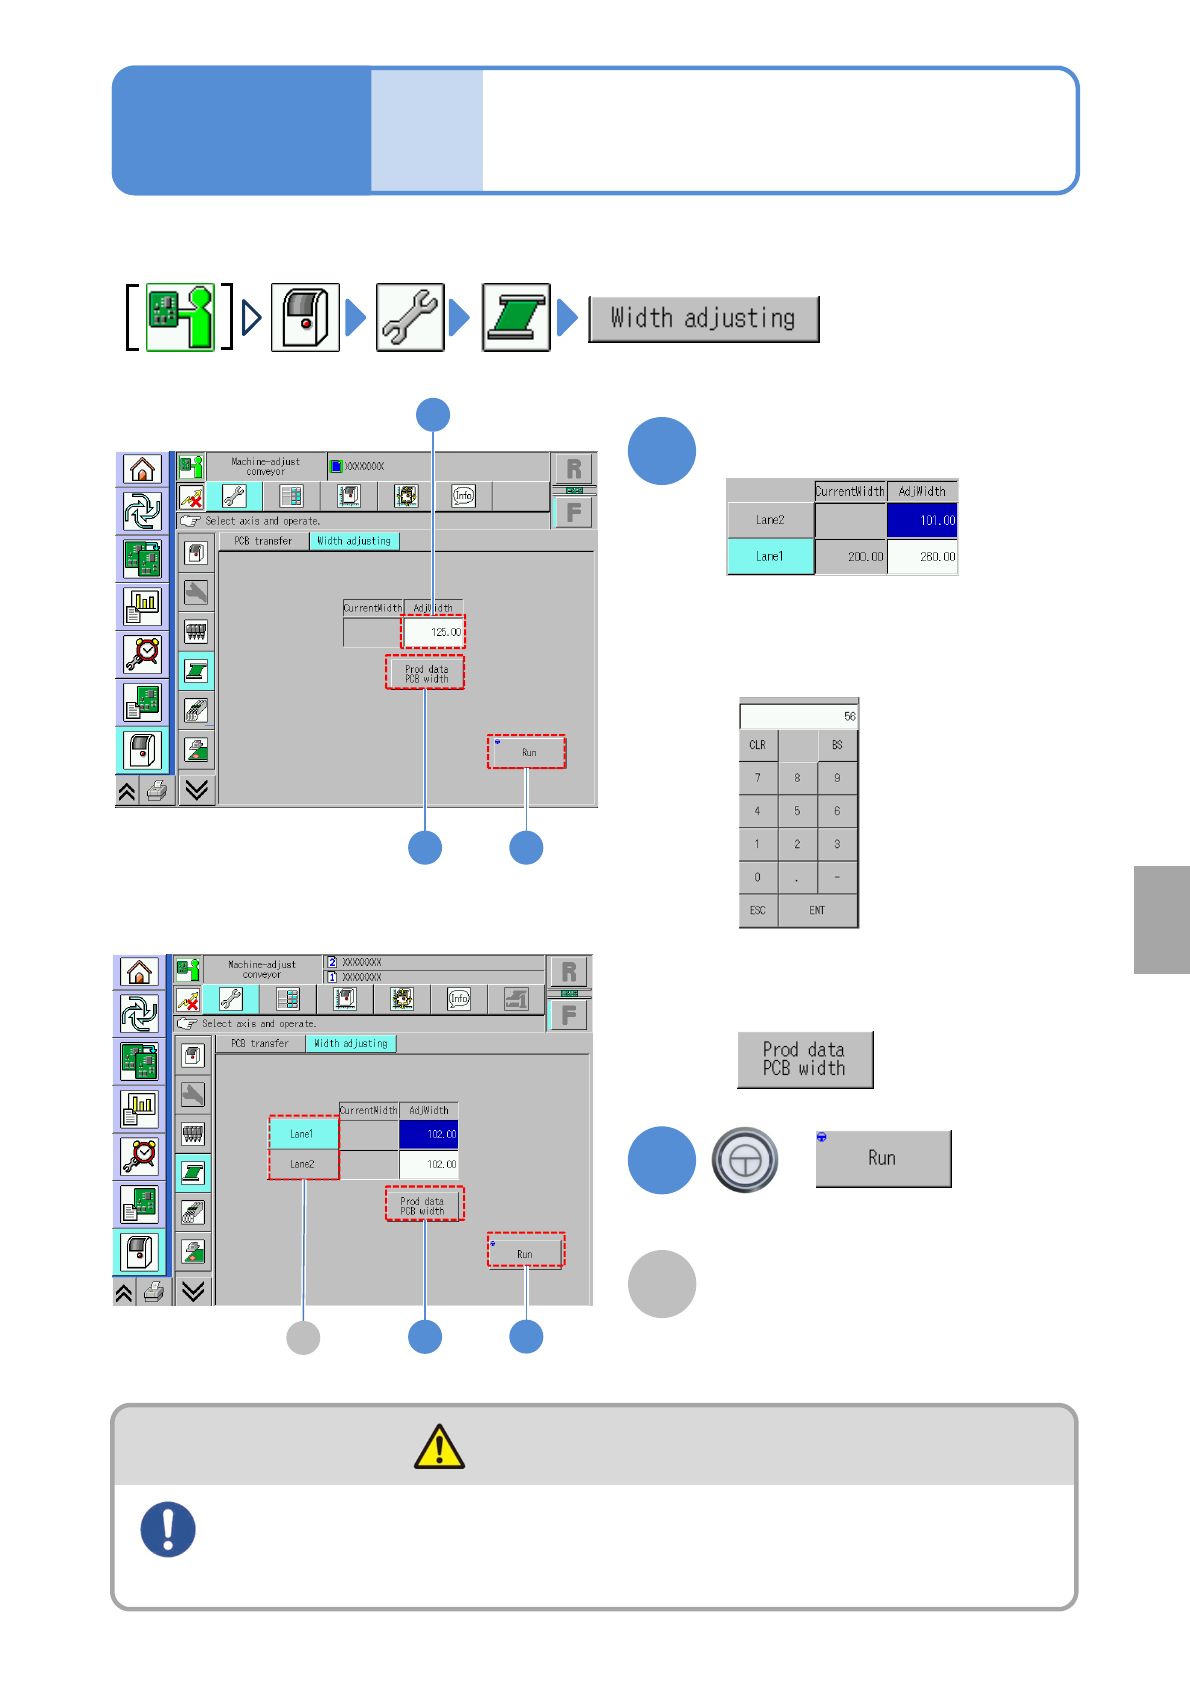
adjustment
7-2-10
●Always remove all PCB support pins before adjusting conveyor width.
Operating procedure
7-2-10
1 2
2
1
+
1
(Manual input)
(The conveyor width is adjusted)
■To input production data of LNB
or the SD card
Input adjustment width
■To input manually
Touch the numerical part on the screen
to display the input screen.
When PCBs are loaded onto or removed from the conveyor, be
sure to turn OFF the servo switch
(Risk of injury due to machine movement)
DANGER
(Production data)
A
2
1
■In single lane mode
■In dual lane mode
A
Lane
Select the desired lane and adjust the
width. If both lanes are selected, both
lanes can be moved simultaneously.
System
administration