N7201A616E00_0317.pdf - 第172页
NPM-W 2 EJM7DE-MB-02O-0 0 2-5-4 Individu- al prepara- tion Adjusting tr anspor t con v ey or width Operating procedure 2-5-4 This explains how to adjust the transport conveyo r width. ● When you cha nge to smaller PC Bs,…
NPM-W2 EJM7DE-MB-02O-00
2-5-3-4
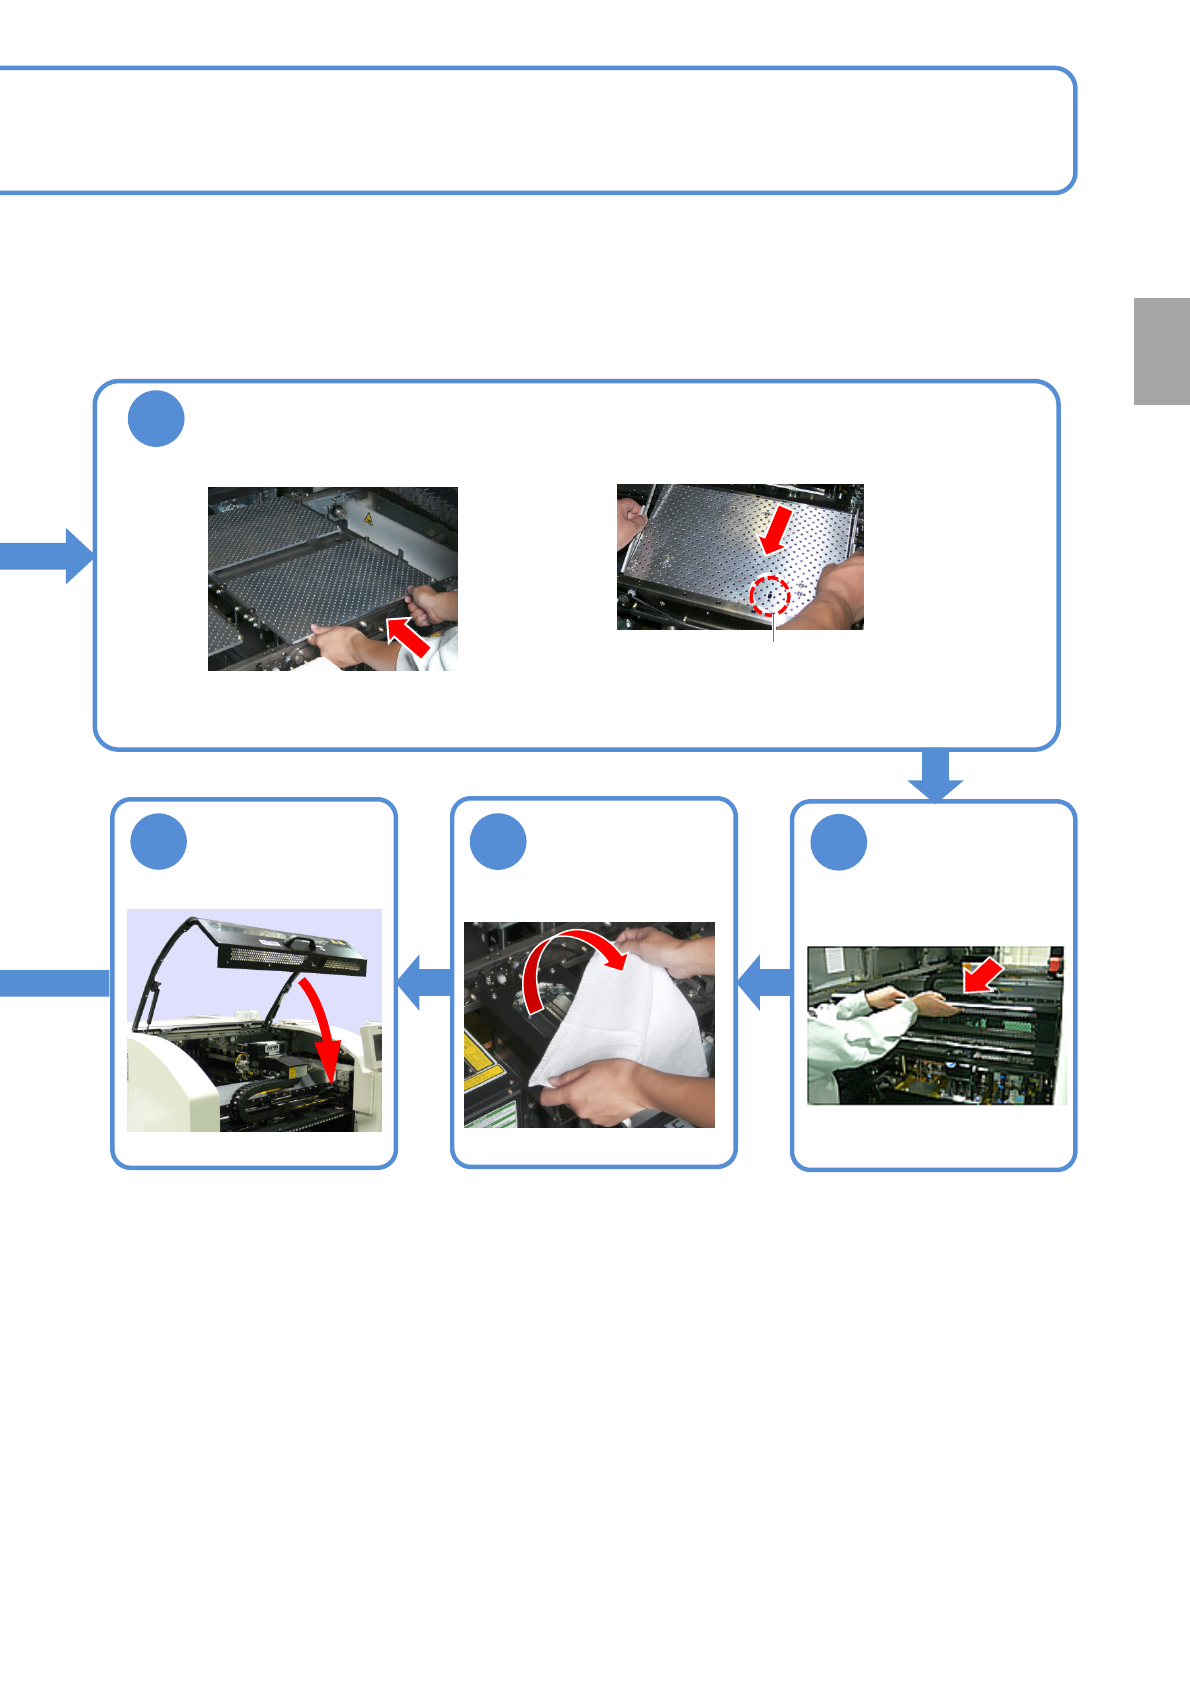
10
Attach the PCB support block as there is no tilt (Avoid interfering with the
rail)
■For single conveyor ■For dual conveyor
●Adjust the guide pins on the main unit to
the holes on the PCB support block.
Guide pin
12
Remove the
cloth
13
11
Put the feeder
table cover back
in its place
Preparation
NPM-W2 EJM7DE-MB-02O-00
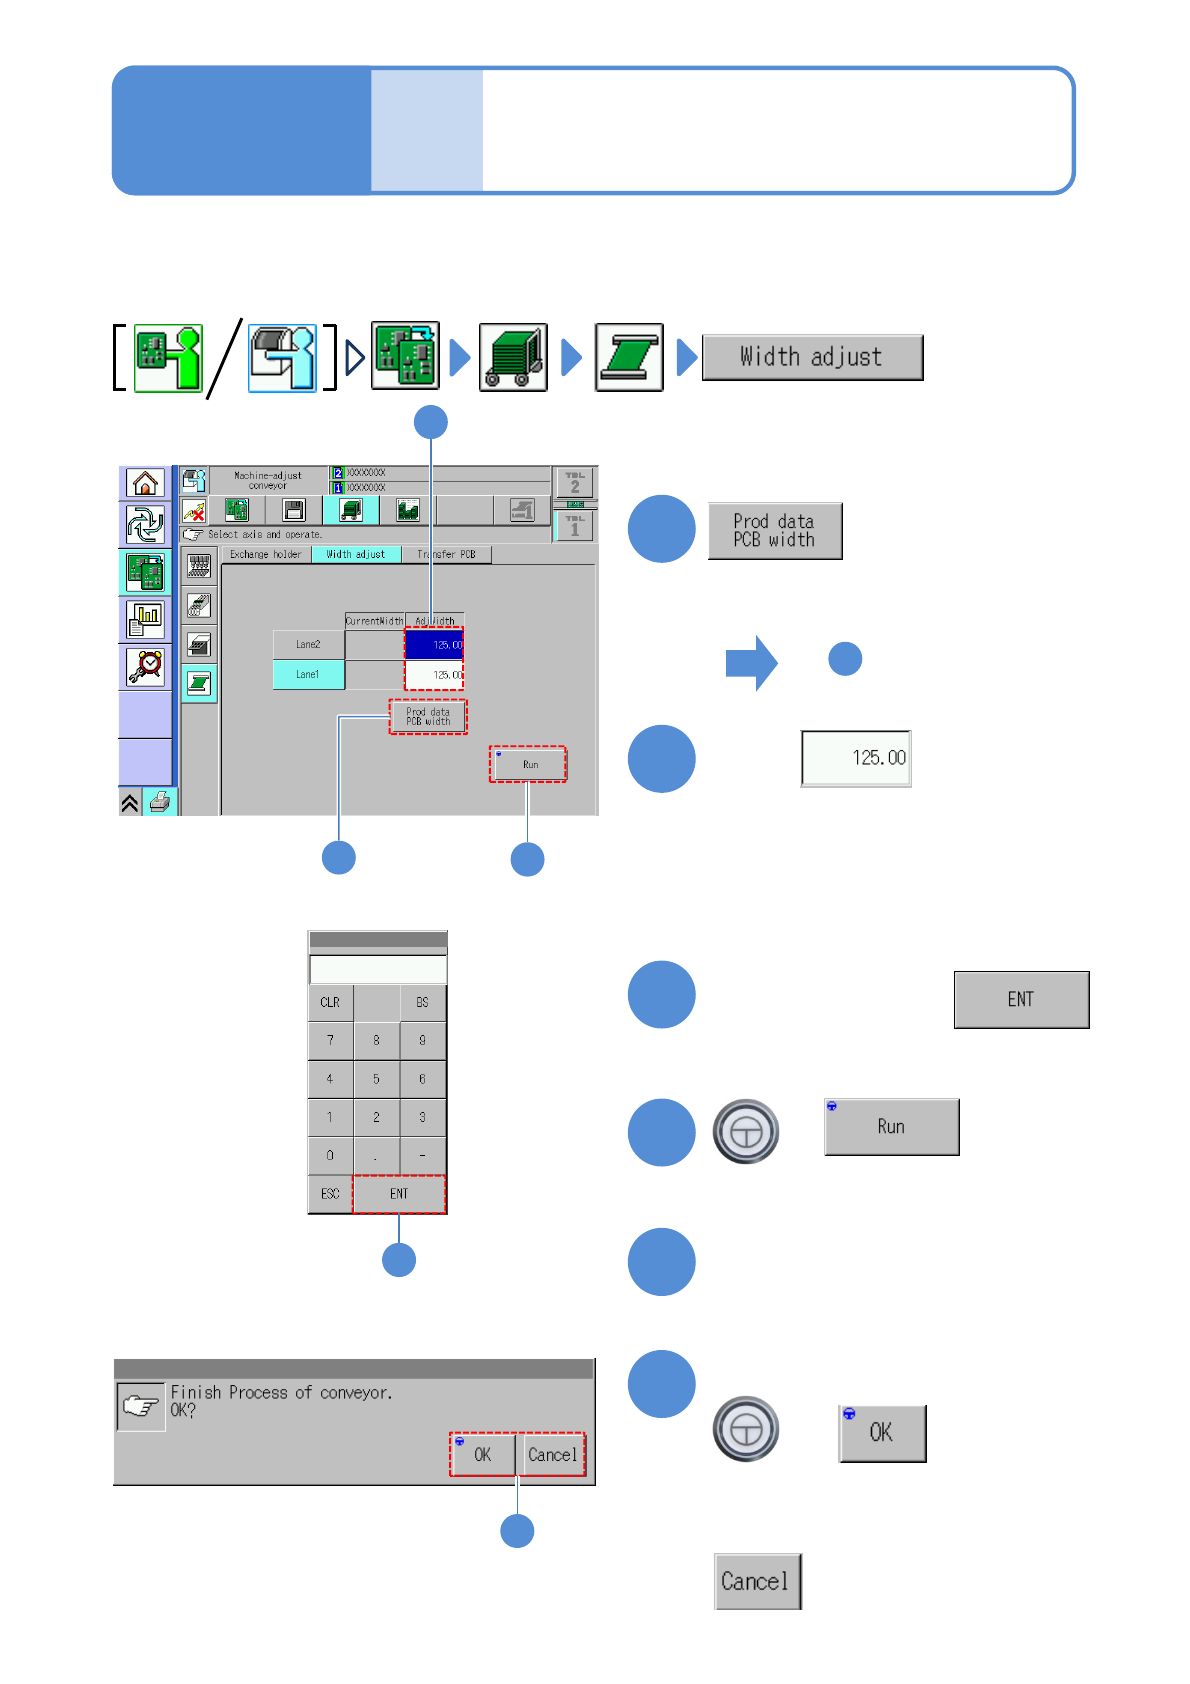
2-5-4
Individu-
al
prepara-
tion
Adjusting transport
conveyor width
Operating procedure
2-5-4
This explains how to adjust the transport conveyor width.
●When you change to smaller PCBs, remove the PCB support blocks and the support pins.
●Avoid changing the conveyor width by rotating the belt by hand. (Otherwise, PCBs may not be detected
with precision)
1
4
1
3
+
(The transport rail width is adjusted)
■To adjust to the PCB width of
production data
■To enter a new PCB width
(The numeric keypad window appears)
Type a PCB width
4
5
Press the next operation button
6
Confirm the message
+
(Switches to the next operation screen)
Touch
4
2
2
6
■To cancel
3
To
(The PCB width of production data is
shown in the numerical field of ‘AdjWidth’)
NPM-W2 EJM7DE-MB-02O-00
Individu-
al
prepara-
tion
PCB transport test
2-5-5
Operating procedure
2-5-5
This explains how to test PCB transport on the assumption that you have completed testing on the
preceding processes and that PCBs are present in the upstream process.
●For dual conveyor, you need to choose a lane in advance.
Preparation
B
Sensor
Color Sensor status
*1)
Red ON
Gray OFF
A
PCB transfer position
The location of PCBs on the transport
conveyor is displayed.
2
3
+
+
4
+
(Transported to the 2nd placement
position)
(Transported to the 1st placement
position)
(Transported to the unloading position)
2 3 4
1
1
+
A
*1) This sensor shows the presence /
absence of PCB, with the support
plate being lowered.
B
Loading position
2
nd
placement
position
1
st
placement
position
Unloading
position
(Confirm PCB presence and put it in
transfer ready condition)