N7201A616E00_0317.pdf - 第181页
NPM-W 2 EJM7DE-MB-02O-0 0 2-5-7 -2 Preparatio n 1 1 1 ■ When the current temper ature is higher than t he operating temperature difference warning value (judgment par ameter) (Only when the temperature warning check opti…
NPM-W2 EJM7DE-MB-02O-00
2-5-7-1
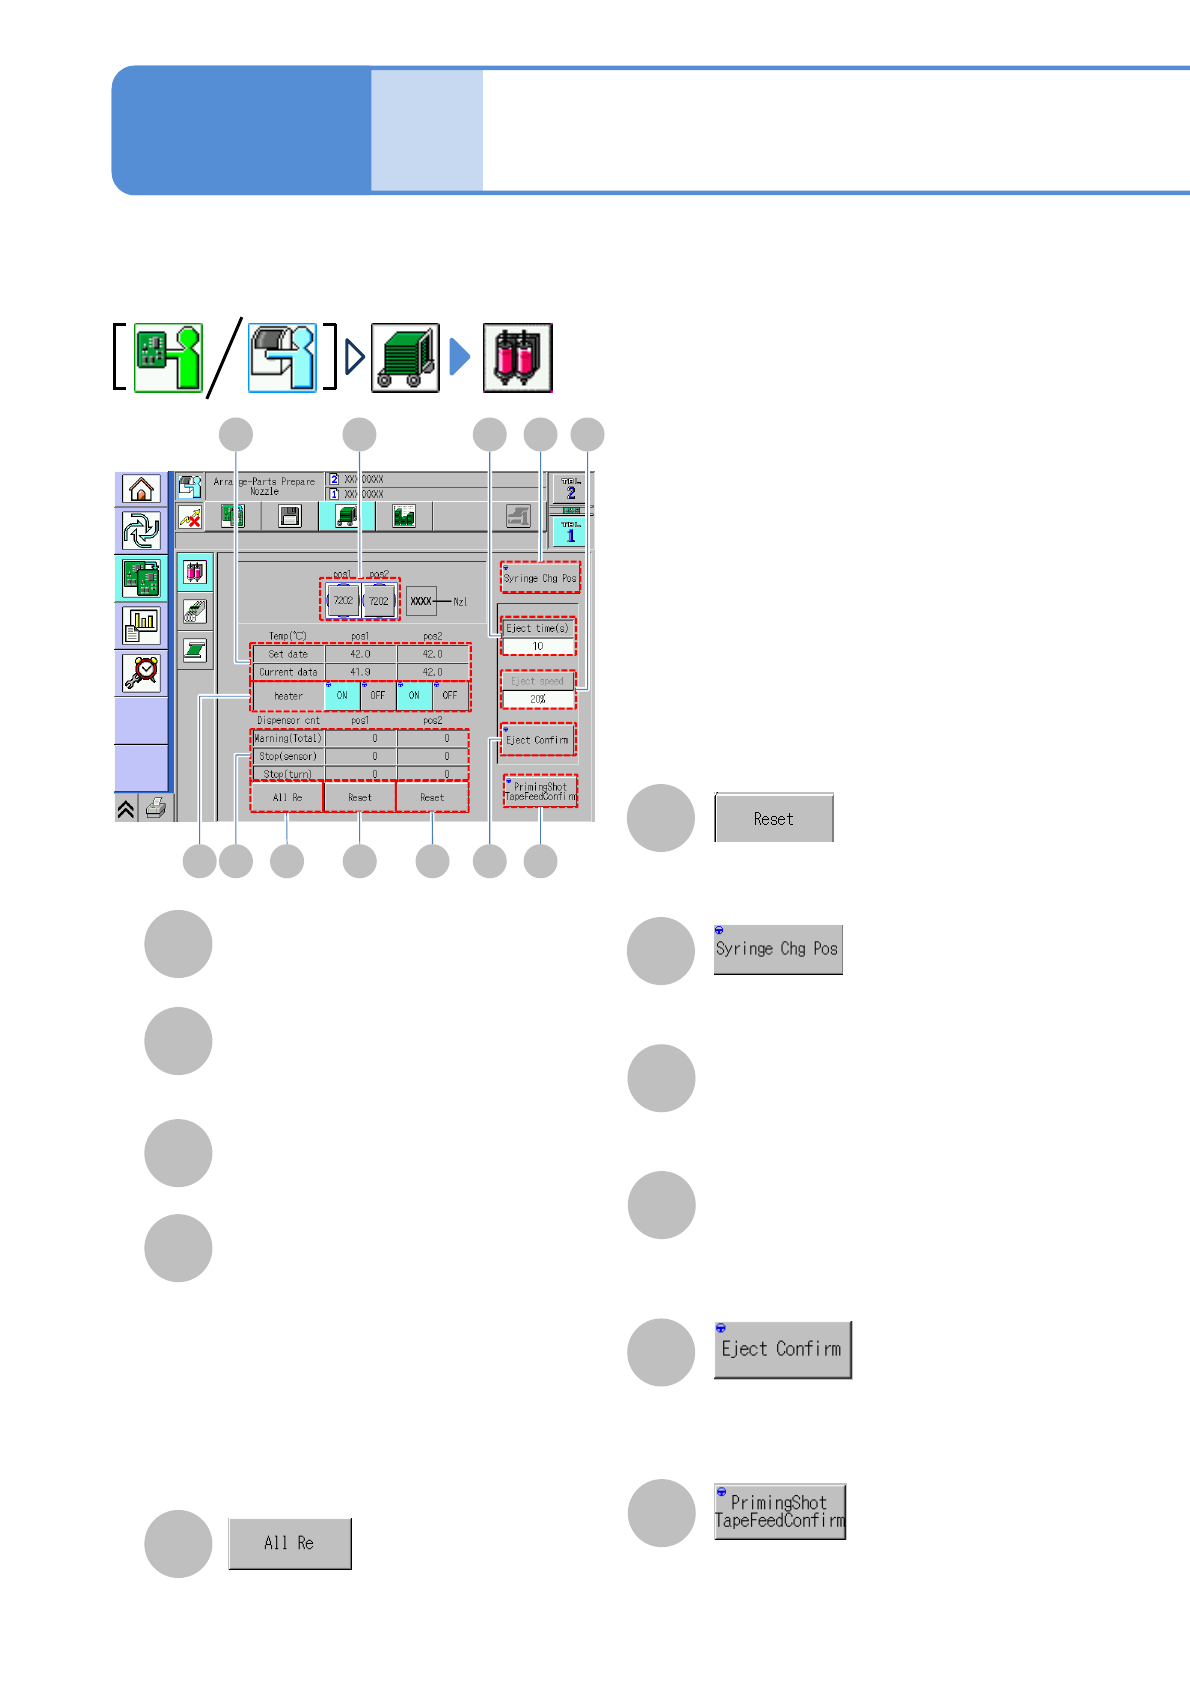
Temp (℃)
Displays the preset temperature and
current temperature of the temperature
control unit.
Heater
Starts or stops the temperature control
of the temperature control unit.
Dispensor cnt
Warning (total)
The total number of dispensing count
warning is displayed.
Stop (sensor)
The number of dispensing count
sensor stop is displayed.
Stop (turn)
The number of dispensing count stop
is displayed.
The head moves over to the syringe
(nozzle) change position.
Eject time (s)
The time to dispense adhesive is entered
and displayed.
Eject speed
The rotation speed of the screw shaft in
adhesive dispensing is selected (only
engineer mode is selectable).
The number of dispensing count is reset.
The number of dispensing count at the
specified position is reset.
The adhesive is dispensed under the
conditions (dispensing time and speed)
specified against the selected nozzle.
Tape feed of the priming shot unit is
carried out.。
Individu-
al
prepara-
tion
Changing the Syringe
(dispensing head)
Operating procedure
2-5-7
This is used to change the syringe (nozzles) attached to the dispensing head unit.
●How to set syringe (→P.3-4)
C D E
B A
F F
H G I
J K
G
I
J
A
B
C
D
H
E
F
K
Nzl
The nozzle number is displayed.
NPM-W2 EJM7DE-MB-02O-00
2-5-7-2
Preparation
1
1
1
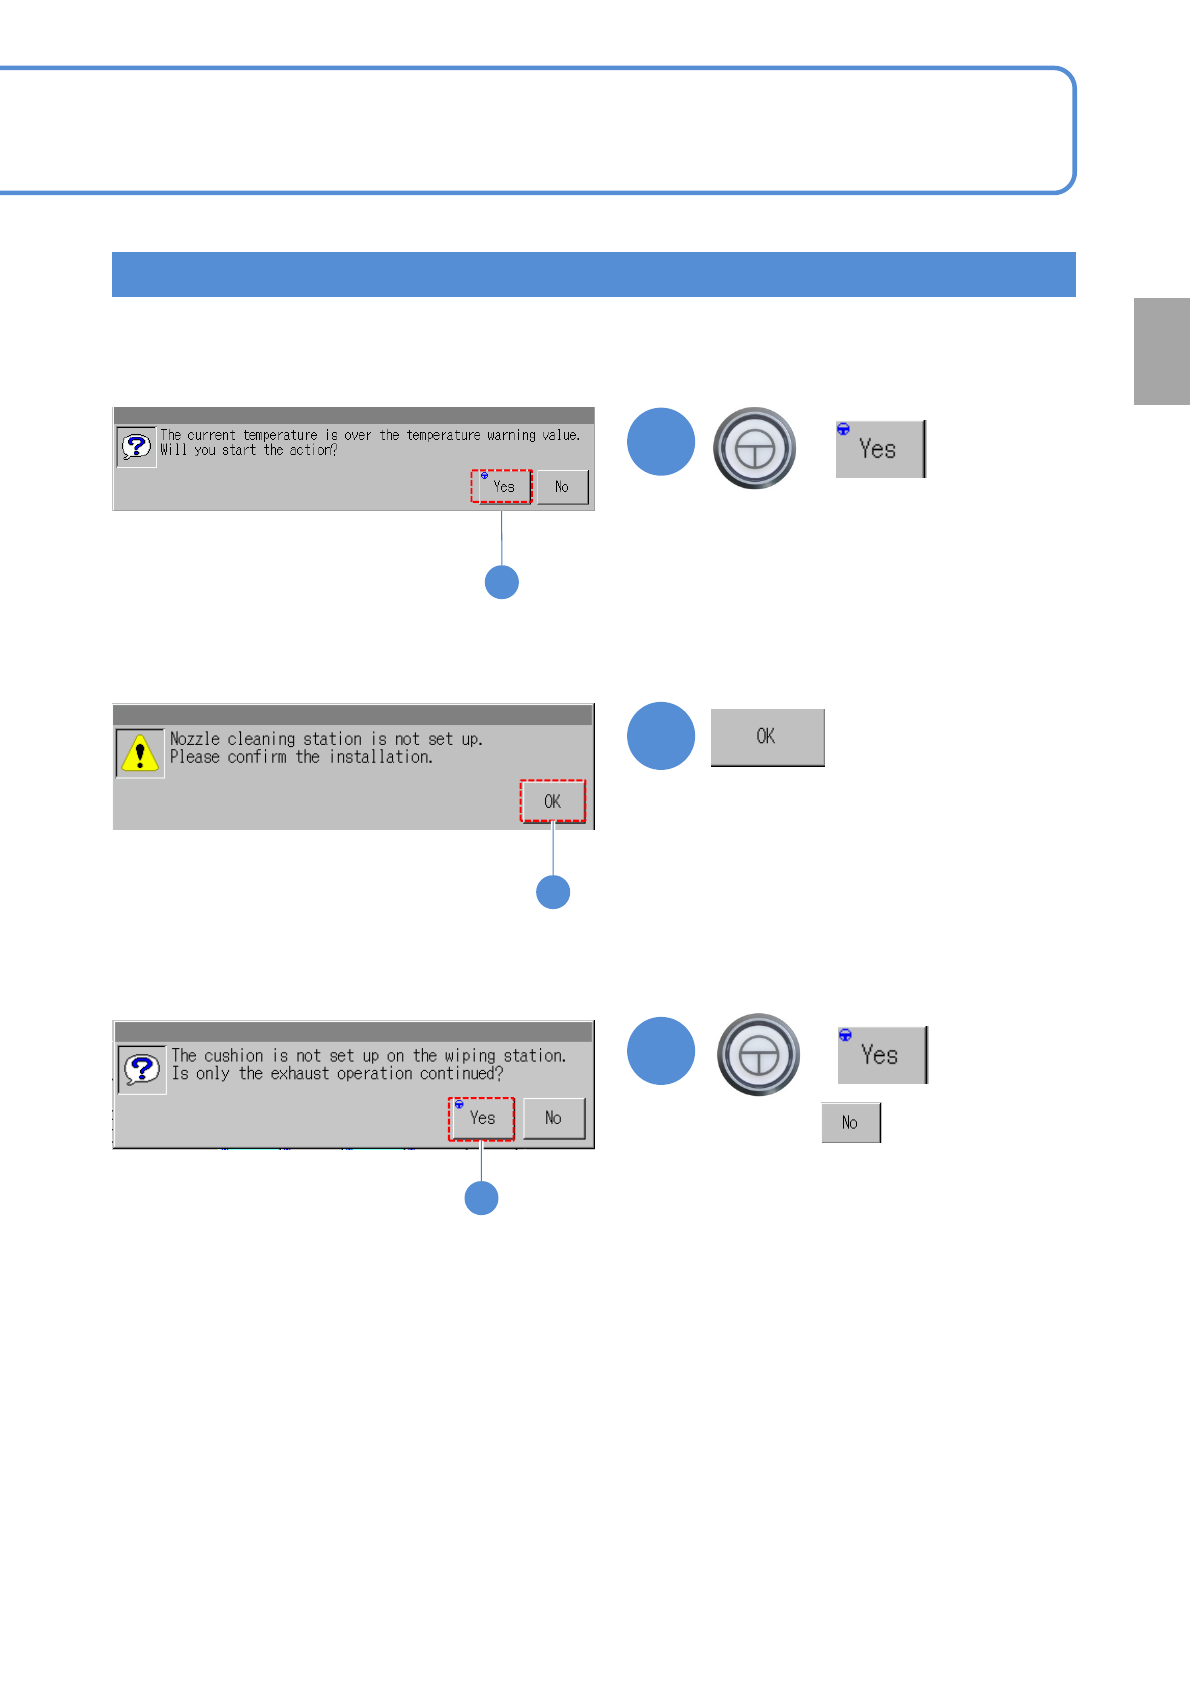
■When the current temperature is higher than the operating temperature
difference warning value (judgment parameter) (Only when the temperature
warning check option is set to ‘ON.)
■When the nozzle cleaning station is not installed
Confirmation window for ejection
●Pressing performs only
material ejection.
●Confirm the installation condition of
the station.
1
+
1
1
+
■When the cushion is not installed on the nozzle cleaning station
NPM-W2 EJM7DE-MB-02O-00
Individu-
al
prepara-
tion
Operating procedure
2-5-8
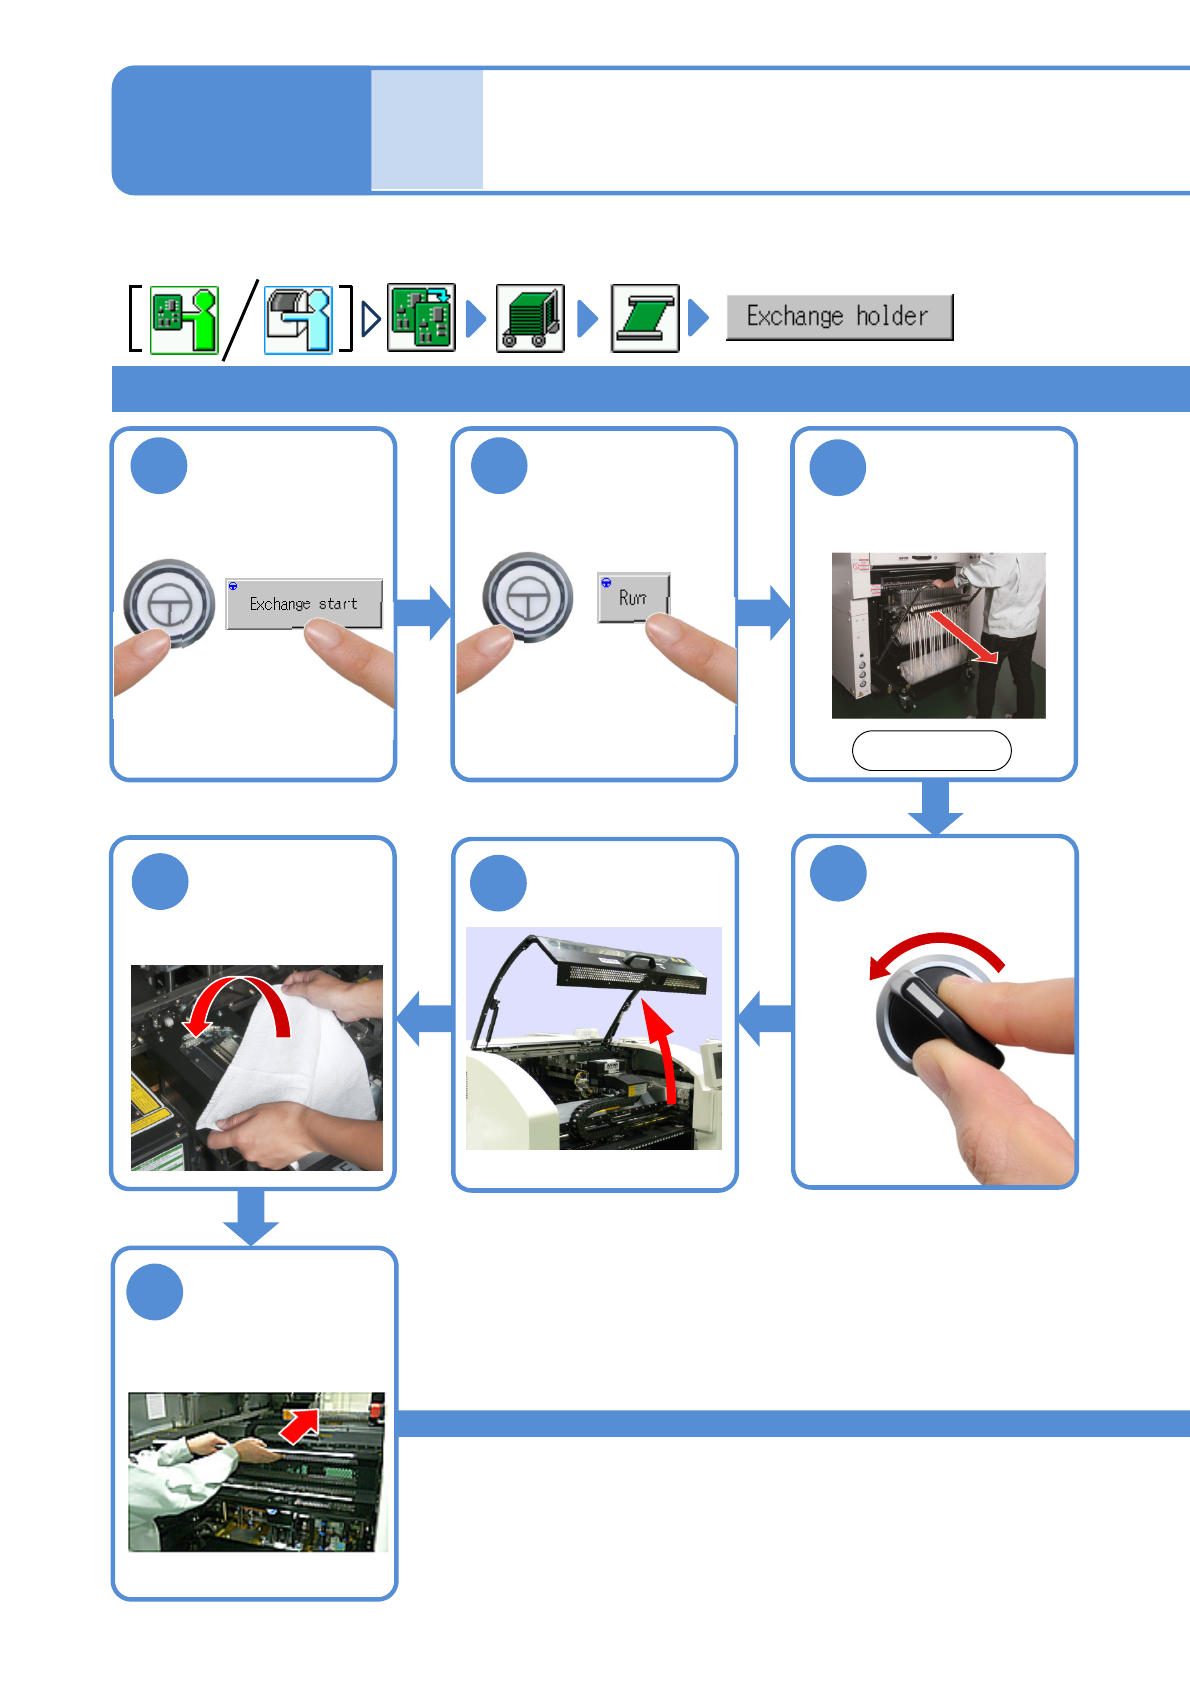
Installing support pins
(for automatic change) 1
1
ENABLING
2
ENABLING
3
Single conveyor 1
OFF
SERVO
5
4
7
6
2-5-8-1
Cover the Multi-
recognition
camera with the
lint-free cloth
Fold the feeder
table cover to
the back
Detach the feeder
cart
(→[Maintenance]
P.3-2)
After removing
PCBs
Front side
Confirm a
message
●The PCB-support block
moves up.
For tray specifications for single and dual conveyors, support pins need to be inserted from the front side of a
target stage.