N7201A616E00_0317.pdf - 第480页
NPM-W 2 EJM7DE-MB-06 O-00 6-2-9 -3 Produc- tion data teaching Placement coor dinates teac h 2 Operating procedure 6-2-9 Choosing a measurement position Measures th e selected po sition to ca lculate the center coordinate…
NPM-W2 EJM7DE-MB-06O-00
6-2-9-2
Setting
change
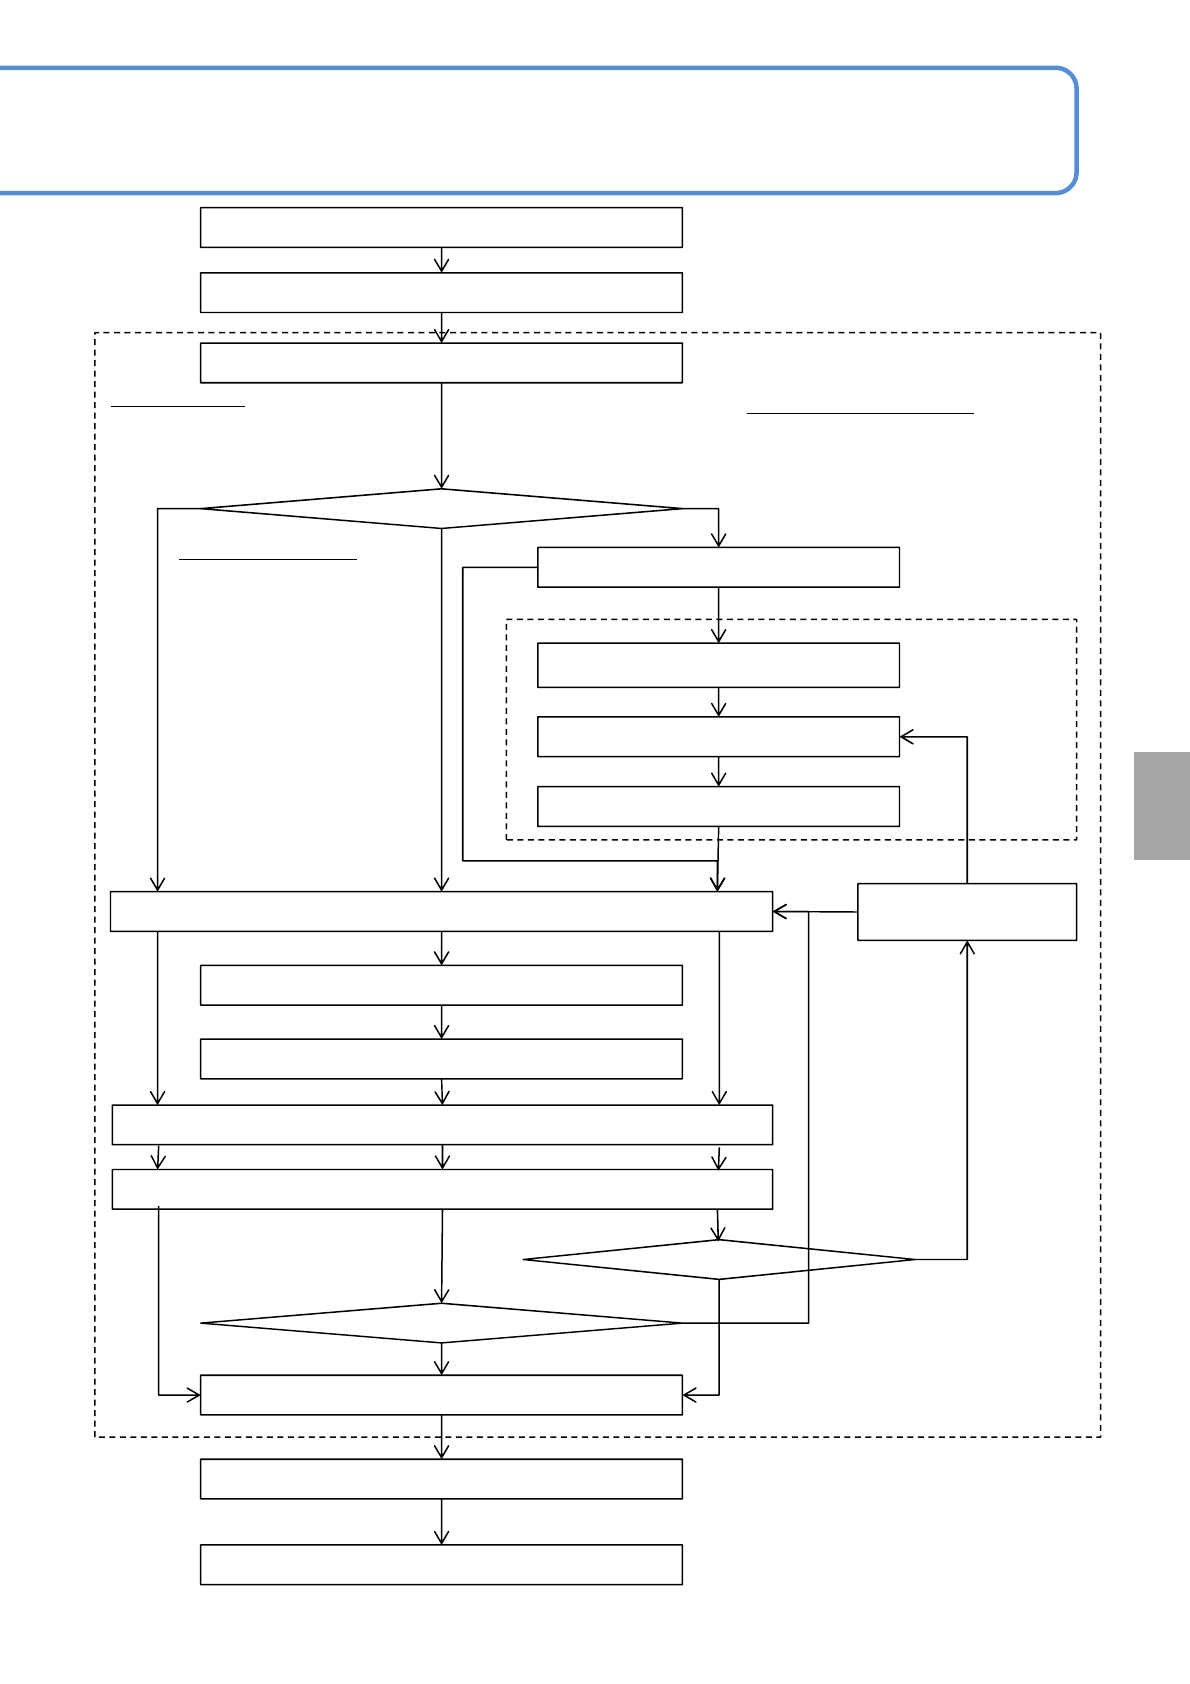
Teach start
Board transfer
Placement point set
Meas. position set
Head camera movement
Inching
Present position confirmed
Last meas
*)
Offset value calculation
Whether the previous teach data is used
Image selection
(recog. /shape lithography)
Inching
Parts position set
Board transfer
Teach end
Last meas
*)
Whether the previous
teach data is used
Inching
Modified position confirmed
Board is transferred.
Procedures 1 through 8
Set a placement point to perform placement
coordinates teaching.
Use
Not used
<Parts pos. teach>
screen
Procedures 13
through 23
Not used
Use
<Placement coordinate
teach> screen
Procedures 8 through 27
YES
NO
YES
NO
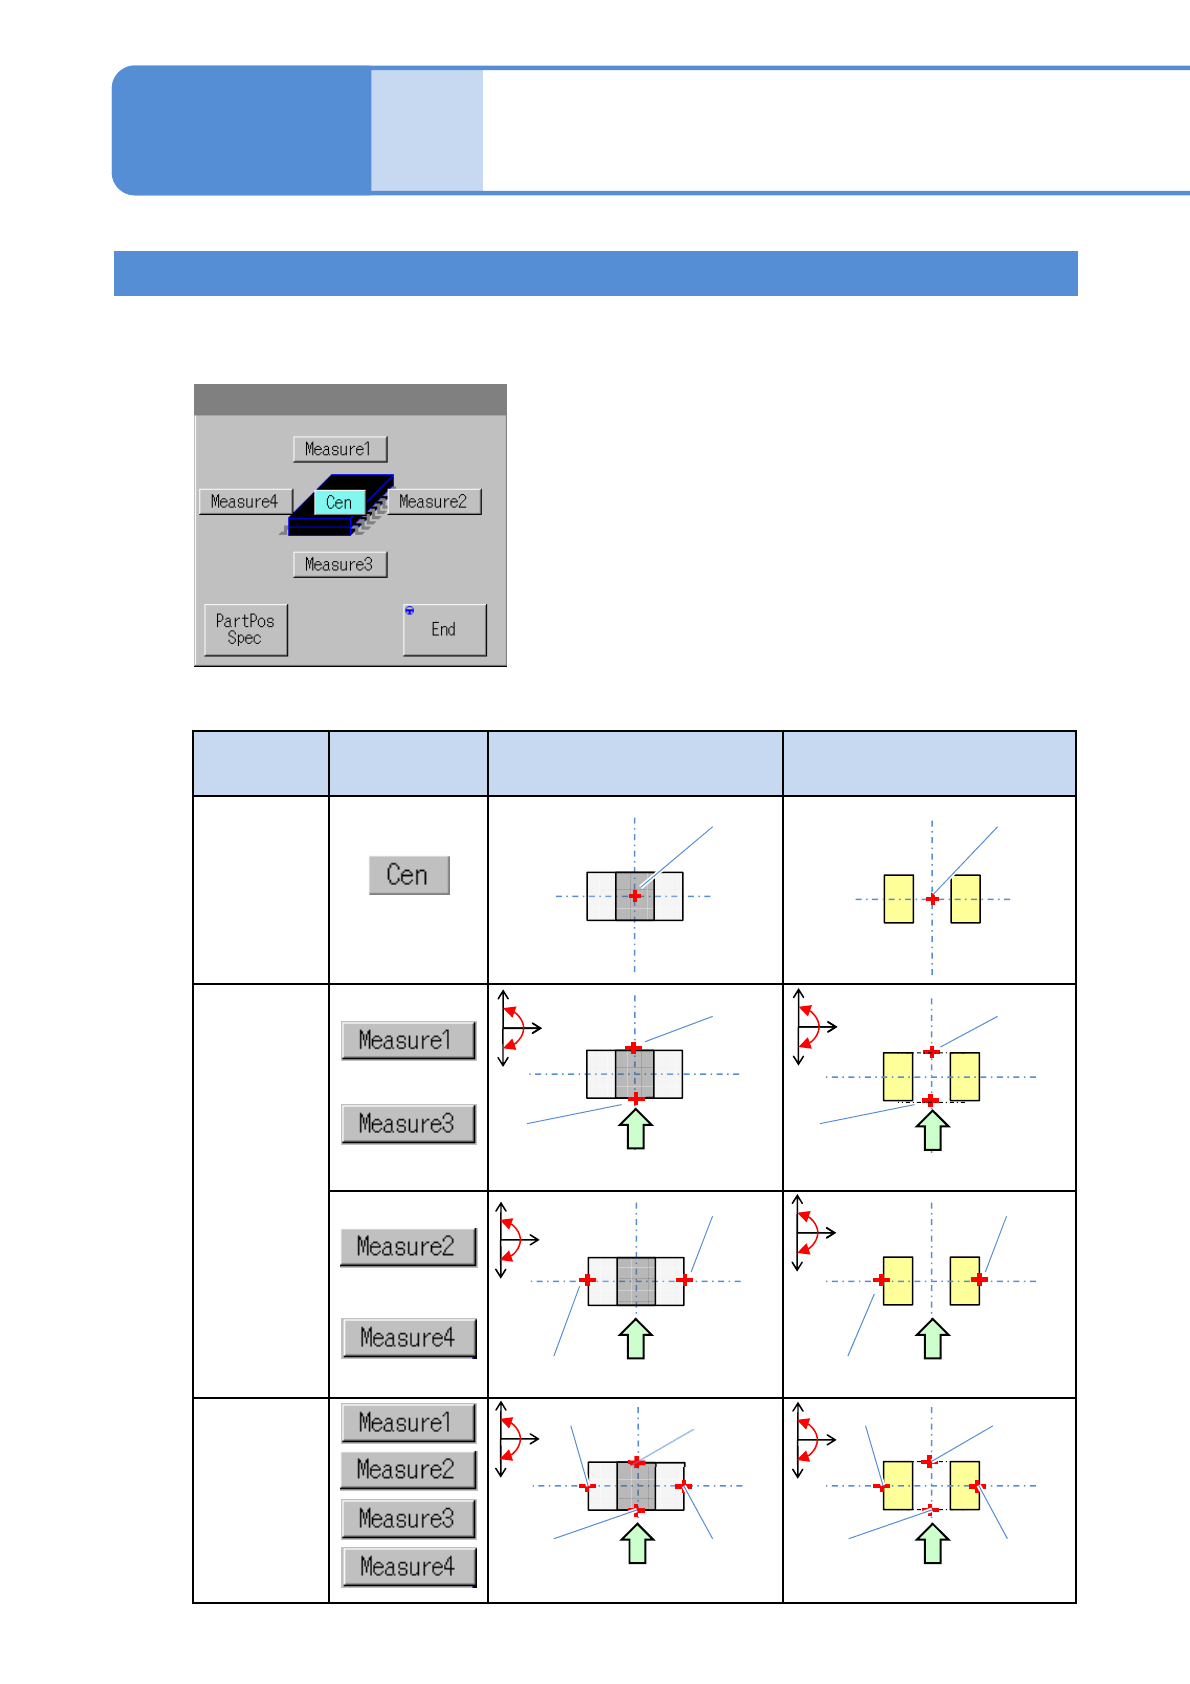
Choose Center
Adjusts the center position of a
part.
Choose Meas.1 to 4
Adjusts the positions of 4
measuring points such as
four corners of a part.
■Using a board, adjust a
placement position.
Choose Parts position set
Adjusts the particular position of a part
including the lead.
■Using a board and a part, adjust a
placement position.
*) Last measurement position
Selection of Meas.1,3: Meas.1→3(last)
Selection of Meas.2,4: Meas.2→4(last)
Selection of Meas.1,2,3,4:
Meas.1→2→3→4(last)
Selection of Part position specification:
Meas1→2(last)
NPM-W2 EJM7DE-MB-06O-00
6-2-9-3
Produc-
tion data
teaching
Placement coordinates
teach 2
Operating procedure
6-2-9
Choosing a measurement position
Measures the selected position to calculate the center coordinates of a component or an electrode on the PCB.
■Setting screen of the measurement position
■Measurement method and position button
Measurement
method
Button Component Electrode on the PCB
One point
Two points
Four points
Measure 1
Measure 3
Center
Measure 1
Measure 3
Center
Measure 2
Measure 4
Measure 2
Measure 4
Measure 2Measure 3
Measure 1Measure 4
Tape flow direction
Tape flow direction
Tape flow direction
Tape flow direction
Tape flow direction
Measure 2
Measure 3
Measure 1Measure 4
Tape flow direction
+
-
+
-
+
-
+
-
+
-
+
-
NPM-W2 EJM7DE-MB-06O-00
6-2-9-4
Setting
change
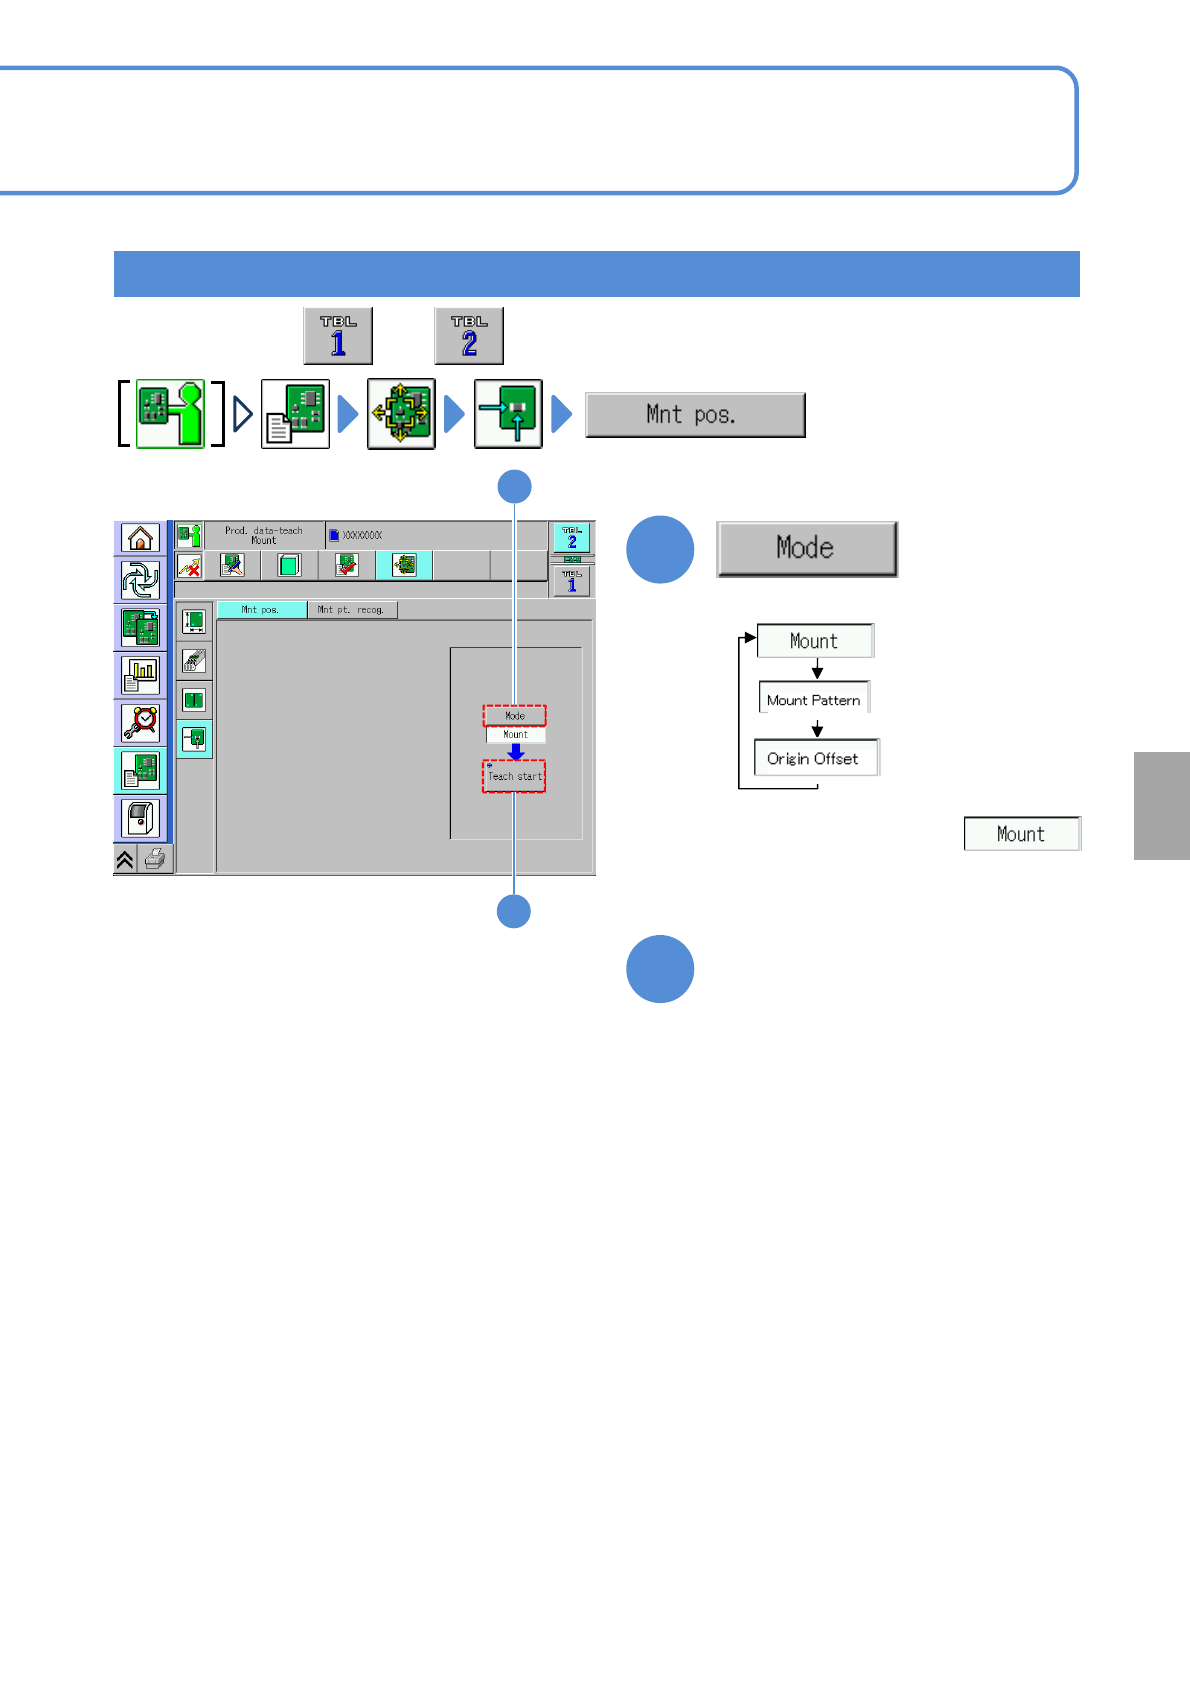
Teaching with component (measuring method: 1 point) 1
1
2
Set a PCB on the PCB entrance
1
3
Choose a teaching mode
●
The description below
assumes to be chosen
●Perform on both and .