00196625-03_AI_SX12_PCB_Barcode_de_en.pdf - 第147页
Setting up and Commissioning Preparing the SIPLACE SX Installing the PCB Barcode Scanner PCB Barcode LP-Barcode 147 Option boards on conveyor contr ol 1 and conveyor co ntrol 2 ► Fit the option board on the conveyor cont…
Setting up and Commissioning
Installing the PCB Barcode Scanner Preparing the SIPLACE SX
146 PCB Barcode LP-Barcode
3.2.5 Preparing the SIPLACE SX
► End all tasks on the SIPLACE SX and shut down the machine.
► Switch off the machine at the main switch and secure it to prevent unauthorized reactivation.
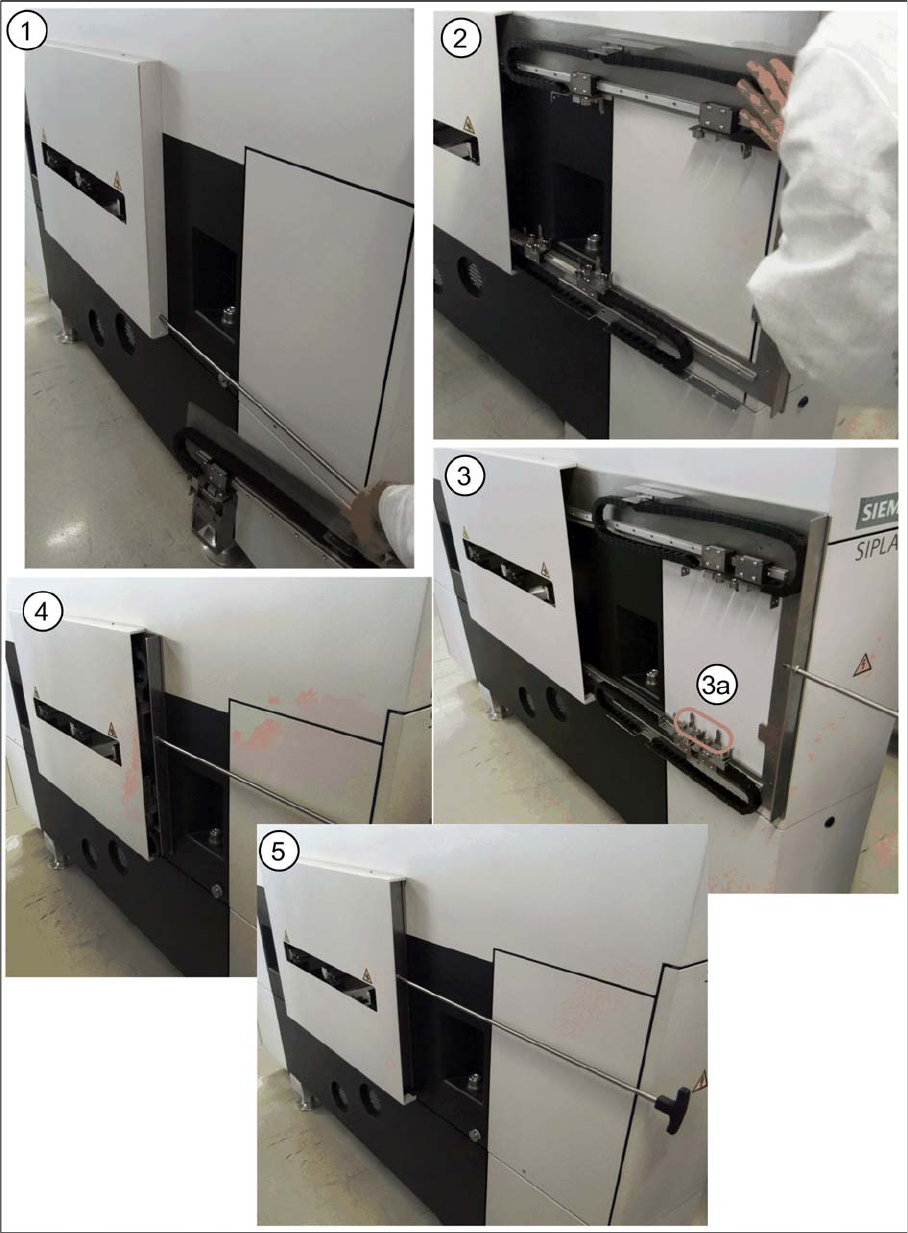
► Remove the changeover tables from the machine.
► Move the component heads manually to the back.
► Release the conveyor sides, so that these can be adjusted to make room for working.
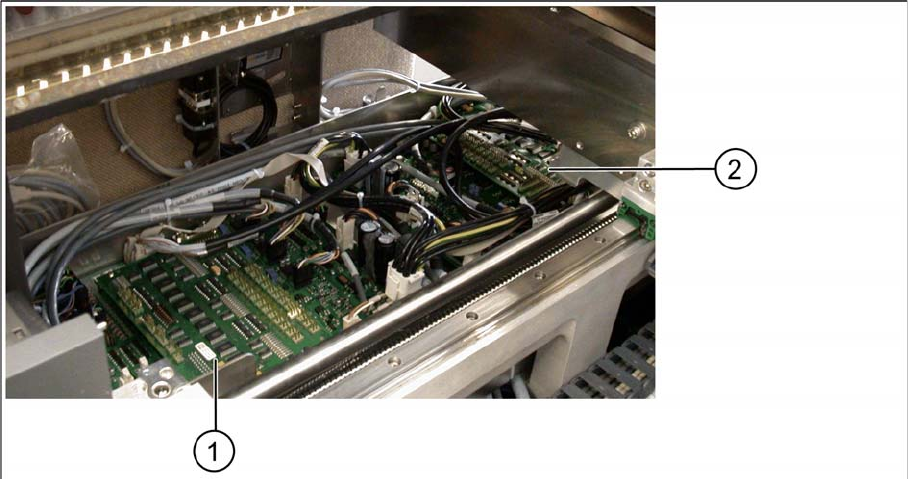
Access to the conveyor control system
Fitting the option board
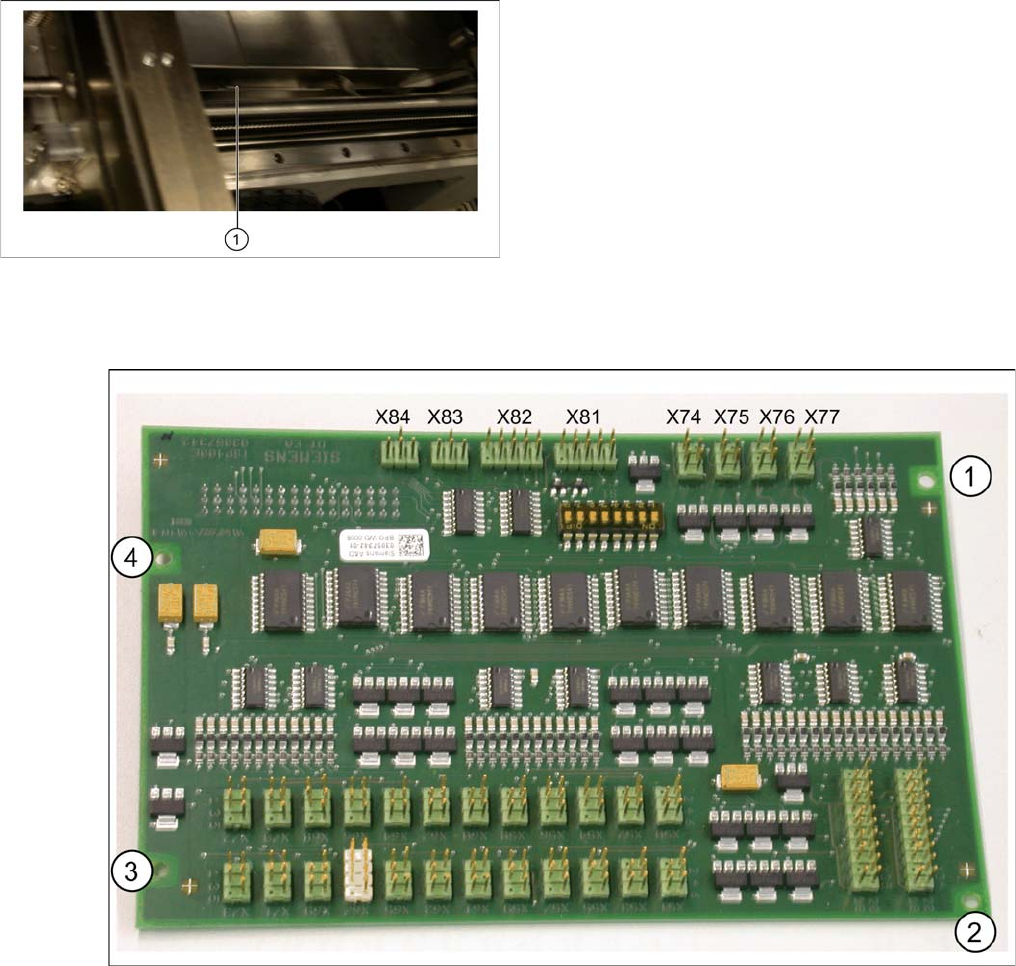
Option board with connections and drilled holes
Position of the fixture screw (1)
► Remove the cover from the conveyor control. To do
this, unscrew the relevant fixture screw until you can
take off the cover. Do not remove the screw!
► Lift the cover carefully out of the machine, making
sure that it does not catch on any parts.
You will need to remove both covers on machines
with a dual conveyor.
Setting up and Commissioning
Preparing the SIPLACE SX Installing the PCB Barcode Scanner
PCB Barcode LP-Barcode 147
Option boards on conveyor control 1 and conveyor control 2
► Fit the option board on the conveyor control and fix into place with four screws.
You need to fit one option board for each conveyor control when using machines with a dual con-
veyor.
► To do this, loosen the screw (1) and remove the cover.
Setting up and Commissioning
Installing the PCB Barcode Scanner Fitting and Fastening the Mounting Frame
148 PCB Barcode LP-Barcode
3.2.6 Fitting and Fastening the Mounting Frame
Fitting the mounting frame in the machine base
Fitting the mounting frame - example without barcode scanner
► Remove the cover on the PCB barcode scanner installation position in the machine base.