00196625-03_AI_SX12_PCB_Barcode_de_en.pdf - 第183页
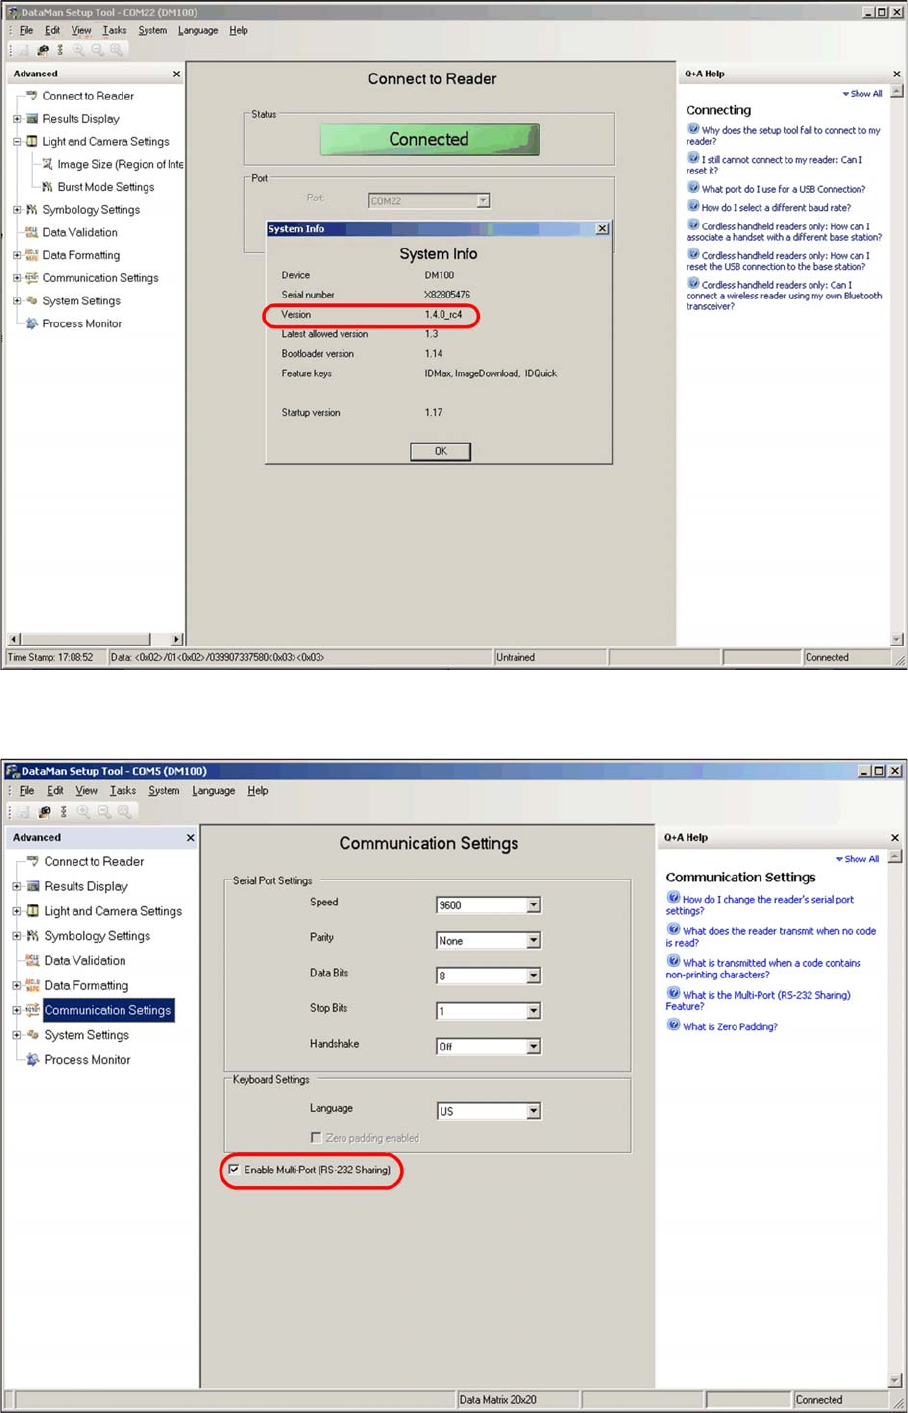
Setting up and Commissioning 2D PCB Barcode Scanner Configuring the PCB Barcode Scanner PCB Barcode LP-Barcode 183 ► Set the parameters shown in the s creenshot for the first time. ► Enable the option Enables Multi-Port …
Setting up and Commissioning
Configuring the PCB Barcode Scanner 2D PCB Barcode Scanner
182 PCB Barcode LP-Barcode
Displaying "System Info"
► Switch over to the Communication Settings view.
Communication Settings view
Setting up and Commissioning
2D PCB Barcode Scanner Configuring the PCB Barcode Scanner
PCB Barcode LP-Barcode 183
► Set the parameters shown in the screenshot for the first time.
► Enable the option Enables Multi-Port (RS 232 - Sharing).
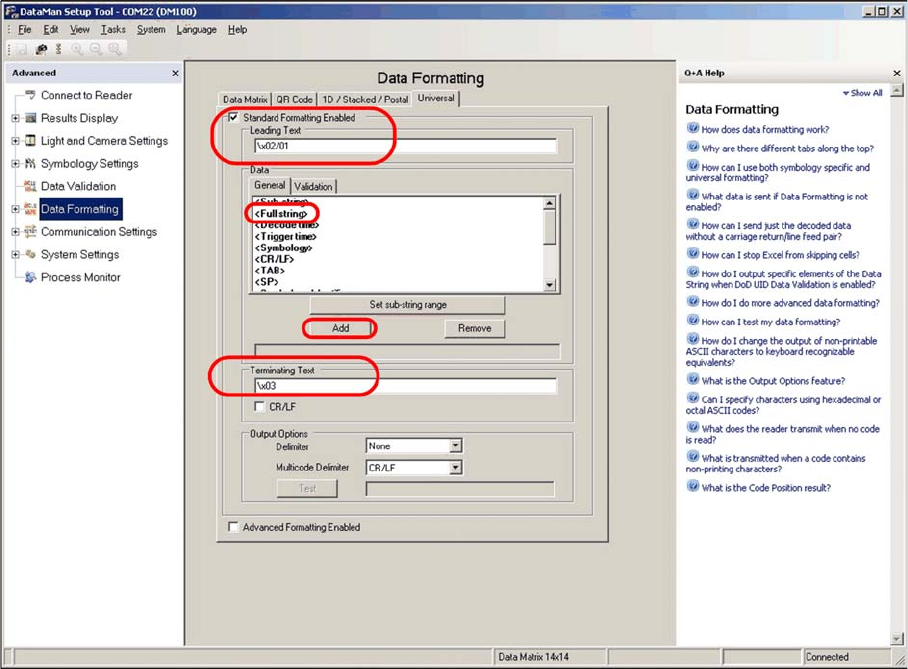
► Switch over to the Data Formatting view.
"Data Formatting" view
► Select the Universal tab.
► Define the settings shown in the screenshot.
► Enter the following at Leading Text:
\x02/01
► Enter the following at Terminating Text:
\x03
The Data field shows the part of the data string in the code which is to be sent to the conveyor control.
► Go to the Data field and select the General tab.
► In the selection box, mark the <Full string> line and click on Add.
If required in individual cases, a specific part of the data in the code can be selected or suppressed
here.
The machine can process a maximum data string length of 40 characters. If the data length of the codes
used does not exceed 40 characters, you can select <Full string> to transmit the complete data content.
If a longer code occurs, an error message will be issued at the station (data format barcode, error no. 80).
In order to read a code label which is longer than 40 characters, part of the code must be selected for
transmission, using the <Sub String> option. For example, this could be the characters 1-40.
► Switch over to the System Settings view.
Setting up and Commissioning
Configuring the PCB Barcode Scanner 2D PCB Barcode Scanner
184 PCB Barcode LP-Barcode
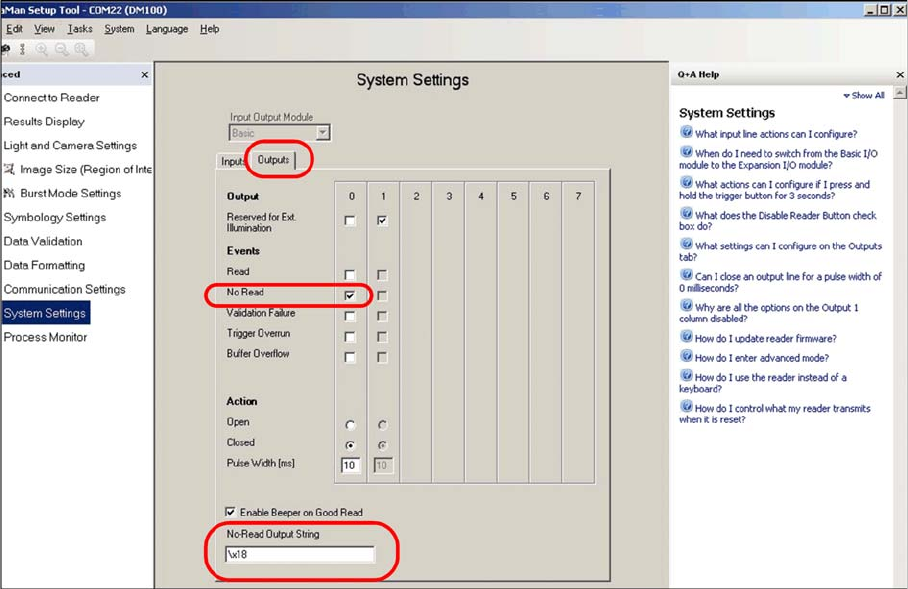
"System Settings" view
► Select the Outputs tab.
► Define the settings shown in the screenshot.
► Enter the following at No-Read Output String:
\x18
After these settings, the barcode scanner is able to provide the machine with the data in the required
formats.
► Switch over to the Symbology Settings view.
The code types and algorithms can be selected there.