00196625-03_AI_SX12_PCB_Barcode_de_en.pdf - 第153页
Setting up and Commissioning Connecting the Barcode Scanner to the SIPLACE SX Installing the PCB Barcode Scanner PCB Barcode LP-Barcode 153 Running the USB cable from the converter to the Box PC ► Connect the USB cable t…
Setting up and Commissioning
Installing the PCB Barcode Scanner Connecting the Barcode Scanner to the SIPLACE SX
152 PCB Barcode LP-Barcode
Fitting the cover and converter
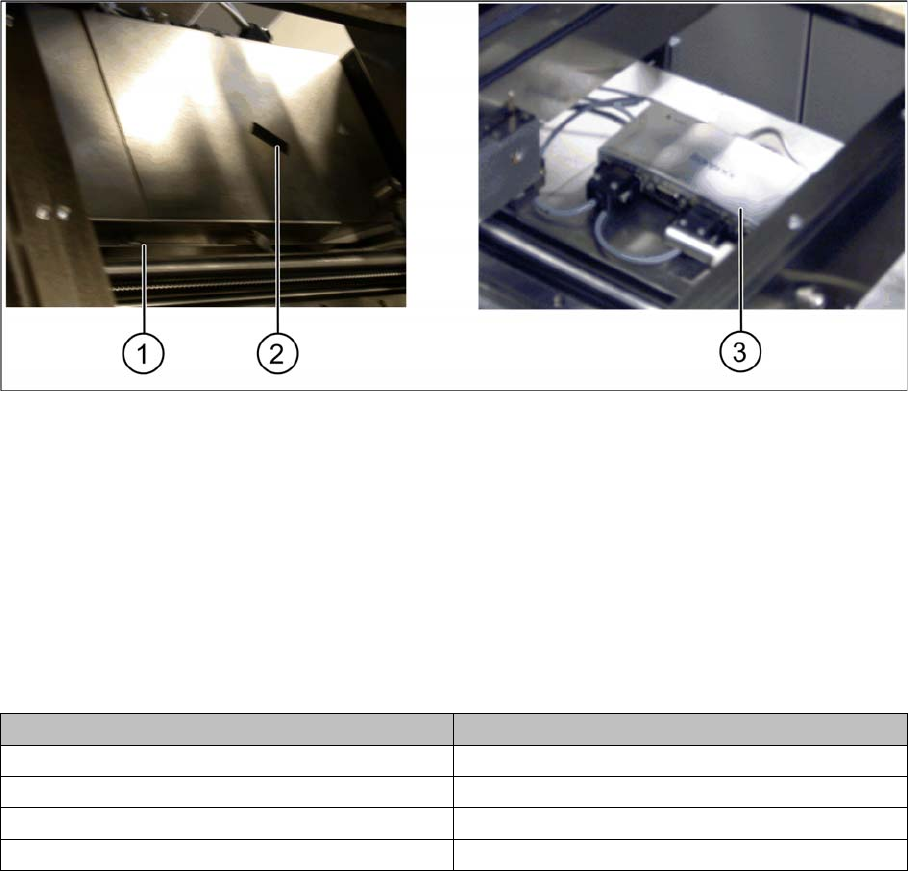
Conveyor control 1 and 2 – cover fitted and RS232/USB converter fixed
► Refit the conveyor control cover(s). Fit the nib (1) under the screw and then fix the covers(s) into
place with the screw.
► Fix the RS232/USB converter on one of the two conveyor controls with the help of the hook and loop
fastening tape (2) provided.
Connections and conveyor lanes
1 Nib of cover 2 Hook and loop fastening tape
3 RS232/USB converter, fixed
Conveyor lane Connections to the RS232/USB converter
Conveyor lane 1 top X85_2 on X2
Conveyor lane 2 top X85_4 on X4
Conveyor lane 1 bottom X85_1 on X1
Conveyor lane 2 bottom X85_3 on X3
Setting up and Commissioning
Connecting the Barcode Scanner to the SIPLACE SX Installing the PCB Barcode Scanner
PCB Barcode LP-Barcode 153
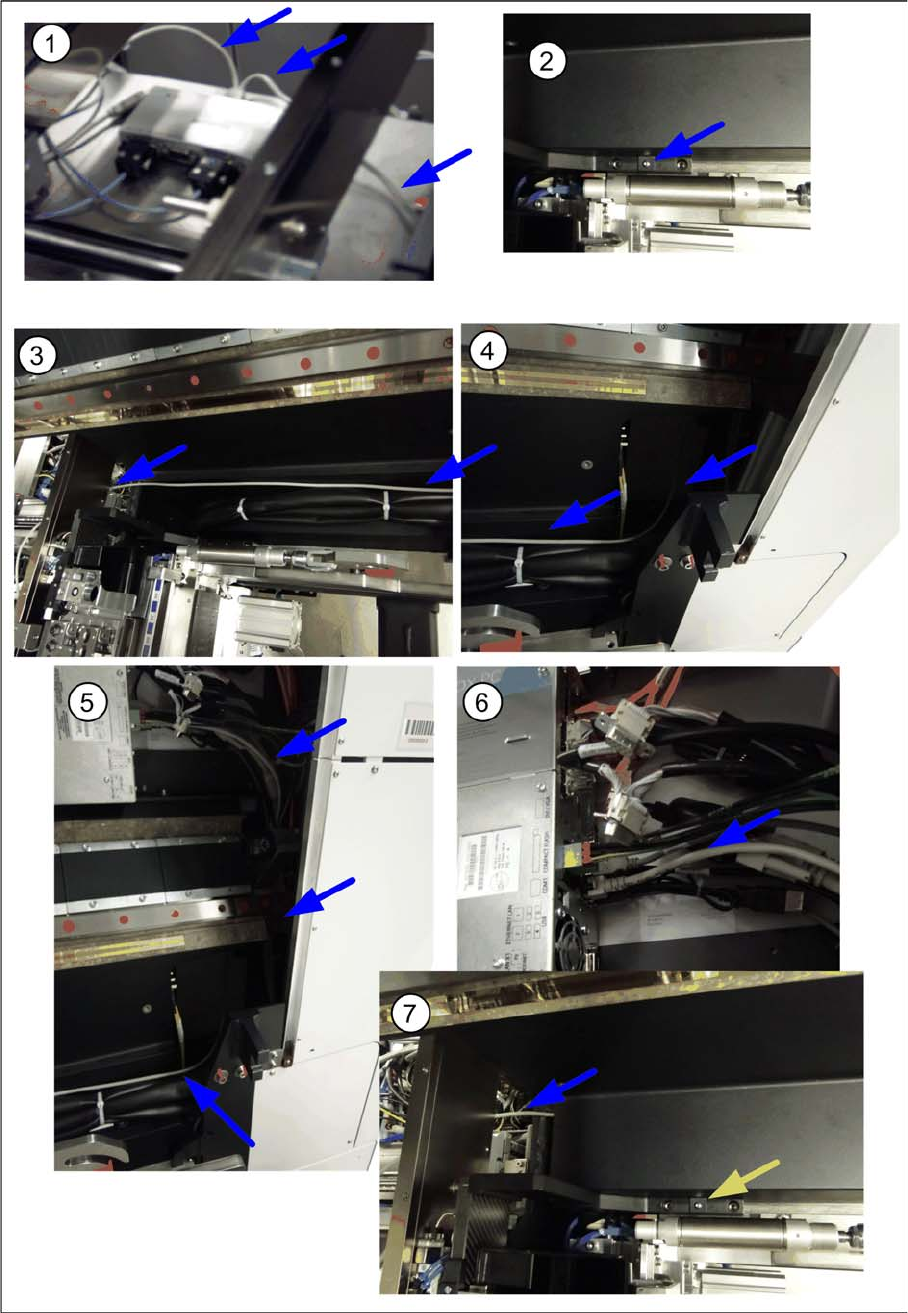
Running the USB cable from the converter to the Box PC
► Connect the USB cable to the relevant connection on the converter and run the cable over the con-
veyor control cover towards the box PC (1).
Setting up and Commissioning
Installing the PCB Barcode Scanner Connecting the Barcode Scanner to the SIPLACE SX
154 PCB Barcode LP-Barcode
► Run the cable under the conveyor side and through the cable duct to the box PC (2 to 4). Make sure
that the cable is not in the hazard area of the gantry.
► Use cable ties to fix the cable to the other cables already present.
► Connect the cable to the unoccupied USB port on the box PC (5).
► Fit the cover on the cable duct (6).
See also
3.3.2.1.1 Installing the Barcode Scanner Software [ ➙ 177]