00196625-03_AI_SX12_PCB_Barcode_de_en.pdf - 第159页
Setting up and Commissioning Fitting the Ruler Installing the PCB Barcode Scanner PCB Barcode LP-Barcode 159 Changing the ruler position Legend ► To change the position of the zero point, loosen the screw clam ping t he …
Setting up and Commissioning
Installing the PCB Barcode Scanner Fitting the Ruler
158 PCB Barcode LP-Barcode
► Run the cable under the conveyor side and through the cable duct to the box PC (2 to 4). Make sure
that the cable is not in the hazard area of the gantry.
► Use cable ties to fix the cable to the other cables already present.
► Connect the cable to the unoccupied USB port on the box PC (5).
► Fit the cover on the cable duct (6).
See also
3.3.2 2D PCB Barcode Scanner [ ➙ 177]
3.2.8 Fitting the Ruler
You can measure the Y position of the PCB barcode scanner with the help of the ruler and pointer. The
zero point of the ruler corresponds to the position of the fixed conveyor side. A separate ruler is supplied
on its own support plate for the top and bottom installation positions at which the PCB barcode scanner
can be fitted.
The ruler position on its support plate can be changed according to the position of the fixed side (align-
ment from left to right or from right to left possible).
CAUTION
Pay attention to the conveyor version
► The pointer version used will depend on the conveyor.
Use the long pointer [03073262-xx] at V1-conveyors.
Use the short pointer [03095905-xx] at V2-conveyors.
► The position of the ruler is represented by the example of a V1-conveyor.
At V2-conveyors the position of the ruler differs from the pictures.
Setting up and Commissioning
Fitting the Ruler Installing the PCB Barcode Scanner
PCB Barcode LP-Barcode 159
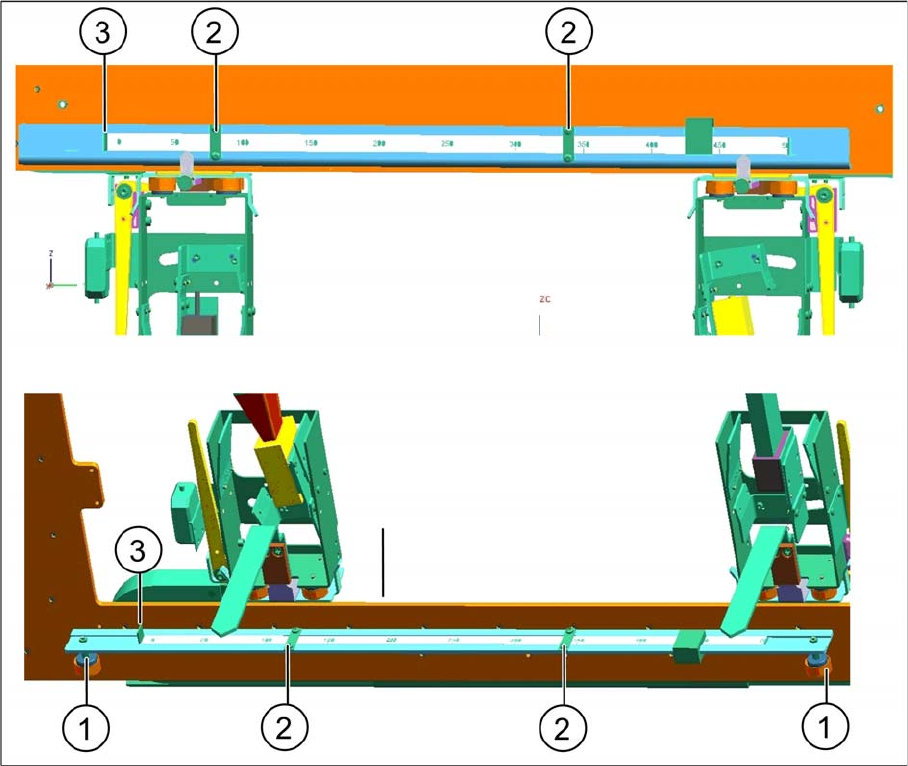
Changing the ruler position
Legend
► To change the position of the zero point, loosen the screw clamping the ruler to the support plate (2)
and push the ruler on the support plate to the left or right, as needed, until the zero point of the ruler
(3) corresponds to the fixed side of the conveyor.
► Fix the ruler in its new position on the support plate with the help of the screw you loosened.
1 Fixture in the machine 2 Ruler clamp on support plate
3 Ruler zero point
Setting up and Commissioning
Installing the PCB Barcode Scanner Fitting the Ruler
160 PCB Barcode LP-Barcode
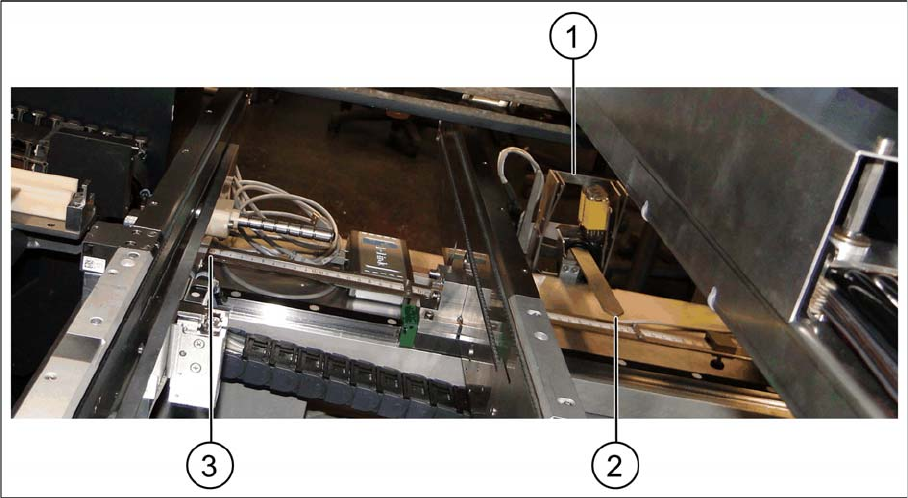
Fitting the ruler in the bottom position
Fitting the ruler in the bottom position
Legend
► Place the ruler above the conveyor control, with the zero point on the fixed conveyor side (3).
► Fix the ruler to the magnets above the conveyor control cover.
► Fit the pointer to the relevant recess on the PCB barcode scanner holder (2) and fix into place with
two socket-head screws.
1 PCB barcode scanner holder 2 Pointer
3 Zero point at the fixed conveyor rail