00196625-03_AI_SX12_PCB_Barcode_de_en.pdf - 第185页
Setting up and Commissioning 2D PCB Barcode Scanner Configuring the PCB Barcode Scanner PCB Barcode LP-Barcode 185 "Symbology Settings" view ► Select the General tab. ► Select the ID Max algorithm. ► Enable the…
Setting up and Commissioning
Configuring the PCB Barcode Scanner 2D PCB Barcode Scanner
184 PCB Barcode LP-Barcode
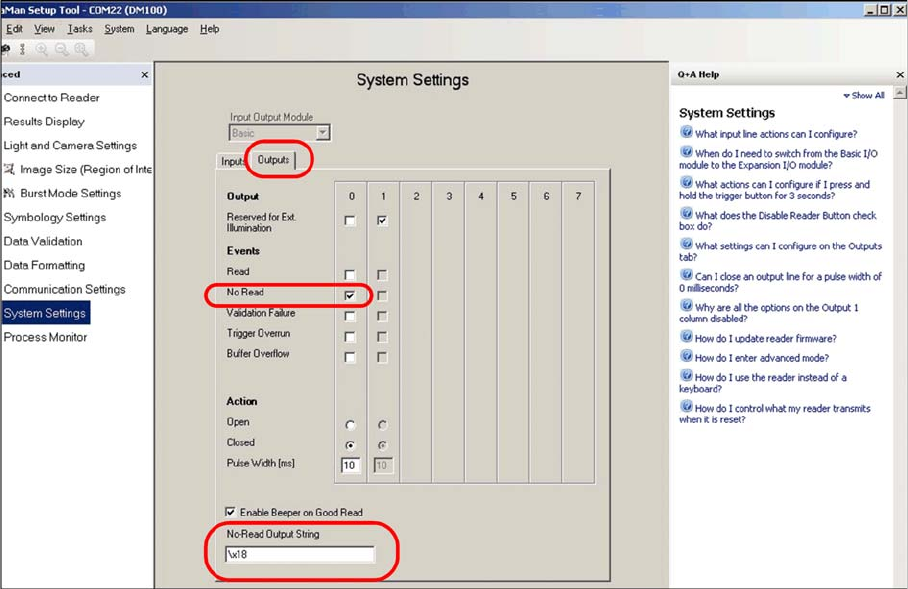
"System Settings" view
► Select the Outputs tab.
► Define the settings shown in the screenshot.
► Enter the following at No-Read Output String:
\x18
After these settings, the barcode scanner is able to provide the machine with the data in the required
formats.
► Switch over to the Symbology Settings view.
The code types and algorithms can be selected there.
Setting up and Commissioning
2D PCB Barcode Scanner Configuring the PCB Barcode Scanner
PCB Barcode LP-Barcode 185
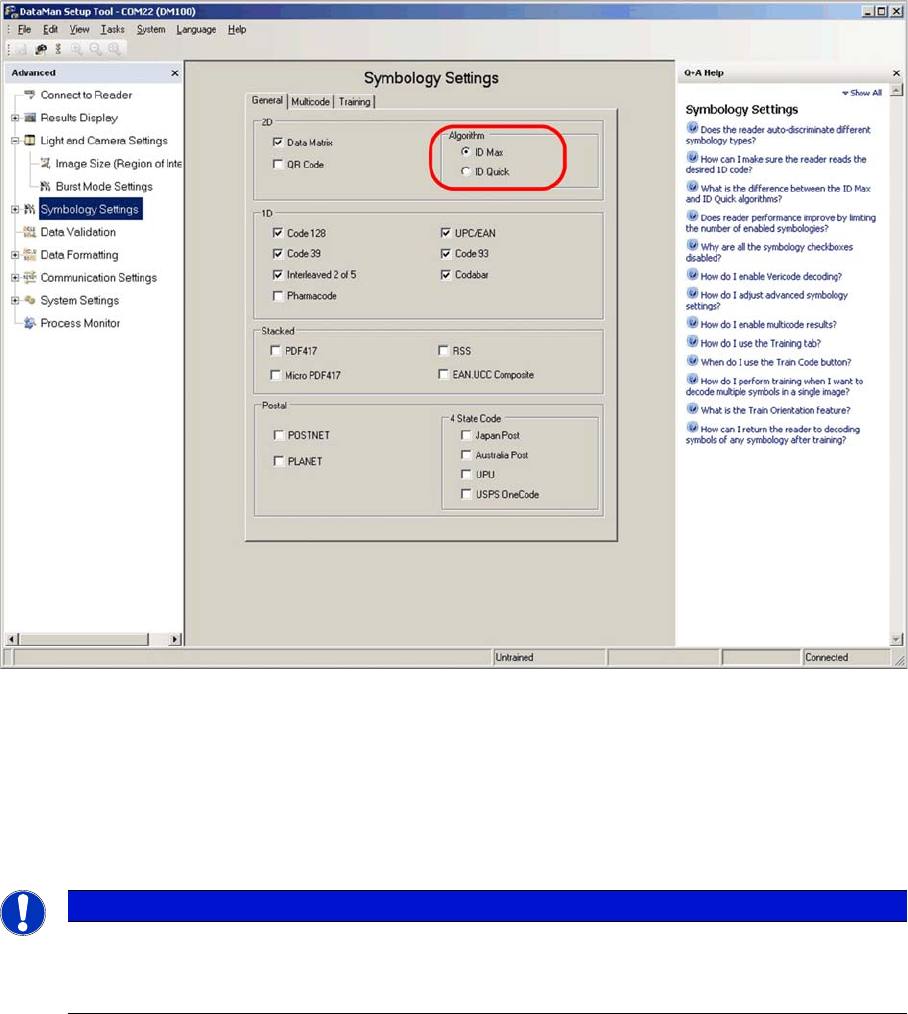
"Symbology Settings" view
► Select the General tab.
► Select the ID Max algorithm.
► Enable the code types used on the board(s). In most cases this will only be Data Matrix.
You can also choose 1D codes here. However, due to the movement of the PCB during scanning, and
the single-image method used by the scanner, 1D barcodes can only be read if they are very small.
► Go to the Light and Camera Settings view and switch to Burst Mode Settings.
NOTICE
If no selection is possible, this means that the scanner has already been programmed to a cer-
tain fixed code (Train Code).
► In this case, switch over to the Results Display dialog and click on Untrain code.
Setting up and Commissioning
Configuring the PCB Barcode Scanner 2D PCB Barcode Scanner
186 PCB Barcode LP-Barcode
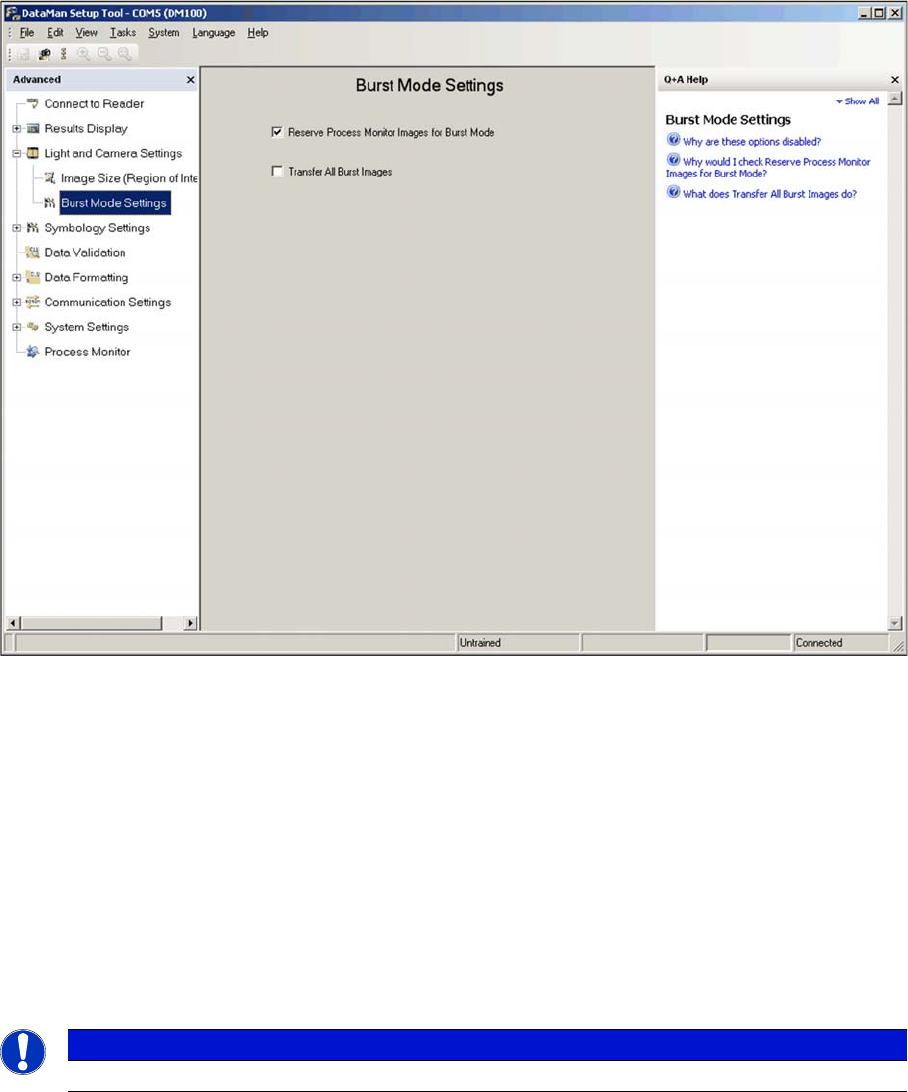
"Burst Mode Settings" view
The Cognex 2D scanner is a camera-based system, which records trigger-controlled individual images
and then searches through these for the codes contained using special algorithms.
The Burst Mode function of the scanner describes the process of taking and storing a large number of
images within a certain period. The images are then evaluated in sequence and the first code found is
transmitted.
► Enable the Reserve Process Monitor images for Burst Mode option. This provides storage capacity
for 22 image recordings, instead of just 16.
The function Transfer All Burst Images can be helpful for detecting errors. This transfers all images re-
corded during one burst to the Windows SW and not just the first image in which a code is found. How-
ever, due to the length of time taken for evaluation and transmission, this function should not be enabled
for normal operations.
► Switch over to the Light and Camera Settings view.
General settings can be defined there, such as trigger delay, exposure and intensity.
NOTICE
This field should be disabled after the settings and tests have been completed.