00196625-03_AI_SX12_PCB_Barcode_de_en.pdf - 第160页
Setting up and Commissioning Installing the PCB Barcode Scanner Fitting the Ruler 160 PCB Barcode LP-Barcode Fitting the ruler in the bottom position Fitting the ruler in the bottom positio n Legend ► Place the ruler abo…
Setting up and Commissioning
Fitting the Ruler Installing the PCB Barcode Scanner
PCB Barcode LP-Barcode 159
Changing the ruler position
Legend
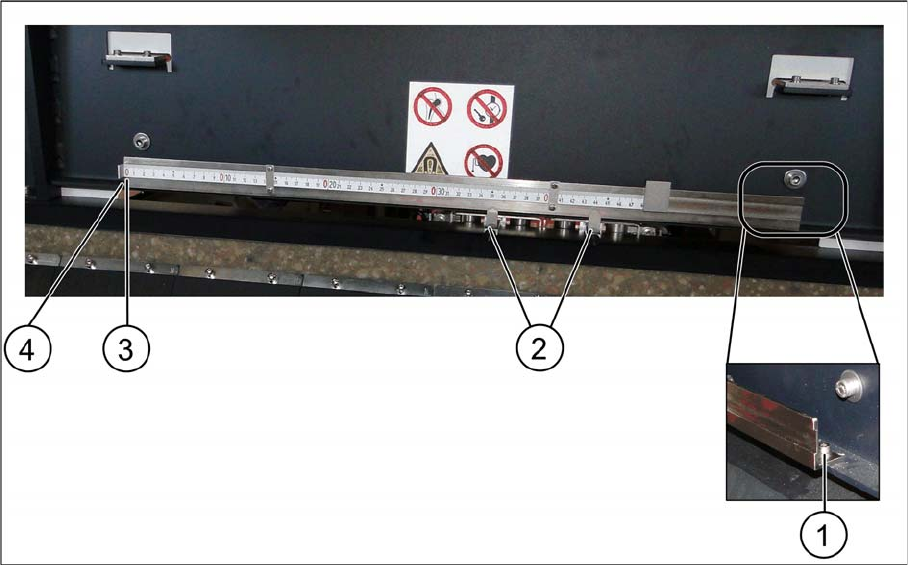
► To change the position of the zero point, loosen the screw clamping the ruler to the support plate (2)
and push the ruler on the support plate to the left or right, as needed, until the zero point of the ruler
(3) corresponds to the fixed side of the conveyor.
► Fix the ruler in its new position on the support plate with the help of the screw you loosened.
1 Fixture in the machine 2 Ruler clamp on support plate
3 Ruler zero point
Setting up and Commissioning
Installing the PCB Barcode Scanner Fitting the Ruler
160 PCB Barcode LP-Barcode
Fitting the ruler in the bottom position
Fitting the ruler in the bottom position
Legend
► Place the ruler above the conveyor control, with the zero point on the fixed conveyor side (3).
► Fix the ruler to the magnets above the conveyor control cover.
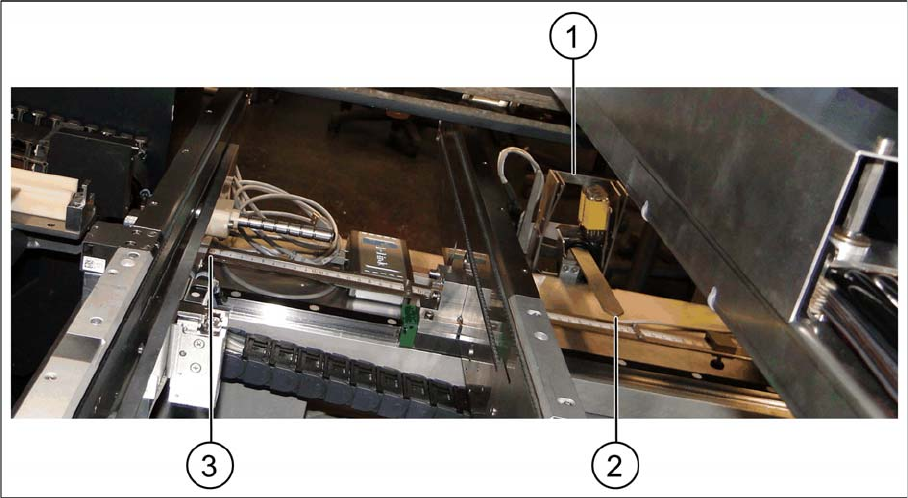
► Fit the pointer to the relevant recess on the PCB barcode scanner holder (2) and fix into place with
two socket-head screws.
1 PCB barcode scanner holder 2 Pointer
3 Zero point at the fixed conveyor rail
Setting up and Commissioning
Configuration File Backup Installing the PCB Barcode Scanner
PCB Barcode LP-Barcode 161
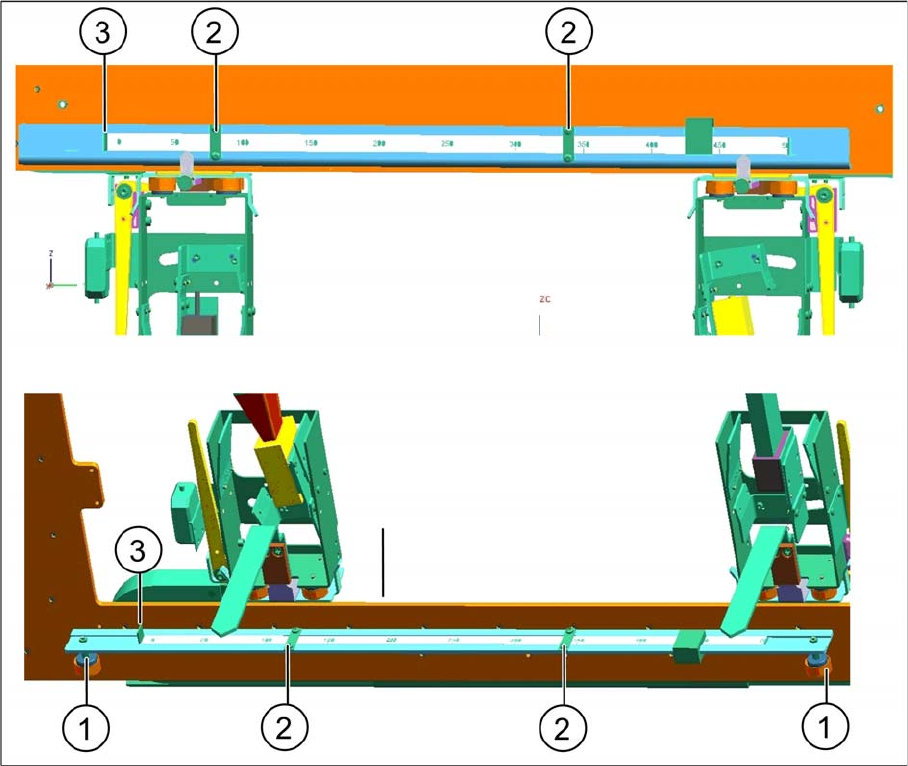
Fitting the ruler to the top position
Fitting the ruler to the top position
Legend
► Position the ruler inside the machine base, with the zero point on the fixed conveyor side (3).
► Fix the ruler to the machine base with two screws, to the positions (1) and (4).
► Fit the pointer to the relevant recess on the PCB barcode scanner holder (2).
3.2.9 Configuration File Backup
► Save the configuration files both on the station computer and on an external data carrier belonging
to the customer.
During a service visit, the configuration files should also be saved at "Account-Attachments" in
SISCOPE, with the following file name format:
Line_machine type_machine serial number._conveyor lane_installation position of scanner, e.g.:
Line 5_SX2_K163G-12039179_Lane 2_top.cfg
1 Fastening screw 2 Pointer
3 Zero point 4 Fastening screw