00196625-03_AI_SX12_PCB_Barcode_de_en.pdf - 第176页
Setting up and Commissioning Configuring the PCB Barcode Scanner 1D PCB Bar code Scanner 176 PCB Barcode LP-Barcode Setting the barcode scanner to the board The barcode scanner need s to be set to the printed circuit bo …
Setting up and Commissioning
1D PCB Barcode Scanner Configuring the PCB Barcode Scanner
PCB Barcode LP-Barcode 175
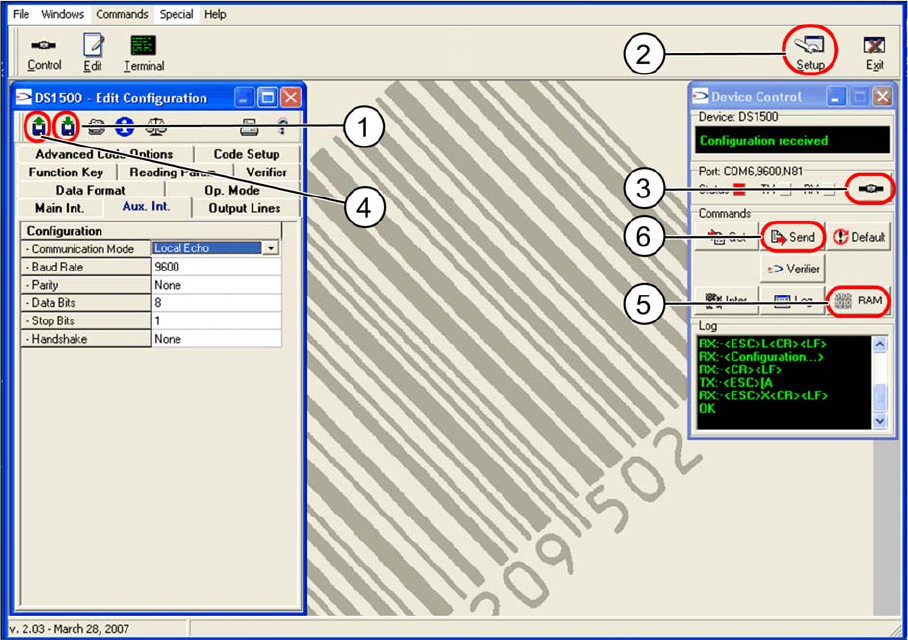
Saving and transmitting configuration data
Saving and transmitting configuration data
The barcode scanner configuration data can be saved in a file and transmitted to other connected scan-
ners.
Saving the configuration data
► Go to the "Edit Configuration" dialog and click on the "Save Configuration" (1) button.
► Specify the folder and name to be used for saving the file.
Transmitting configuration data to another barcode scanner
► Click on the Setup (2) button.
The Setup dialog will open.
► Go to Serial port settings and select the virtual COM port for the barcode scanner to be configured
from the Port list box. Confirm with OK.
► Go to the Device Control dialog and click on the Connect to device (3) button.
► Go to the Edit Configuration dialog and click on the Load Configuration (4) button.
► Select the configuration file to be loaded.
► Go to the Device Control dialog and click on the RAM (5) button.
This button will switch over to EEPROM.
► Click on Send (6), to transmit the data to the barcode scanner.
After a few seconds, you will see Configuration sent in the upper output line of the dialog.
Setting up and Commissioning
Configuring the PCB Barcode Scanner 1D PCB Barcode Scanner
176 PCB Barcode LP-Barcode
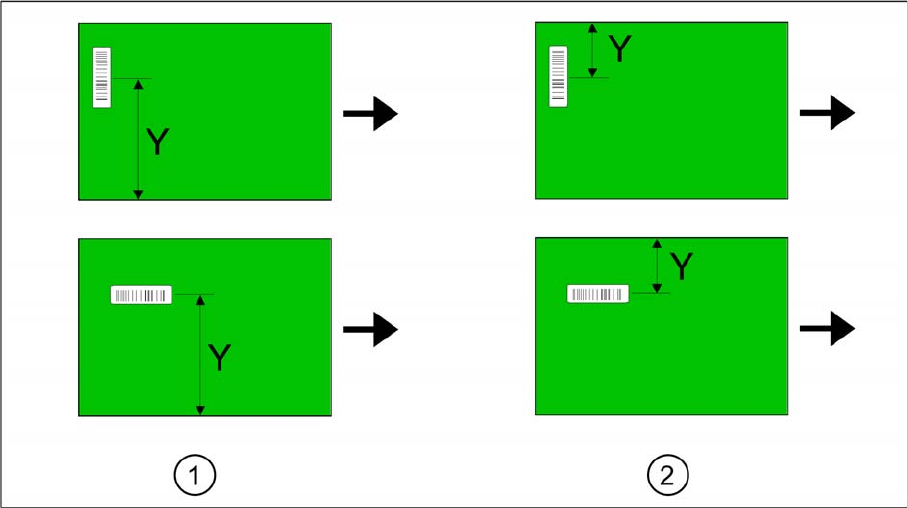
Setting the barcode scanner to the board
The barcode scanner needs to be set to the printed circuit board on initial installation and before each
product change.
Find the Y dimension on the board.
Legend
1. Fixed conveyor side = right
2. Fixed conveyor side = left
The barcode scanner needs to be set to the position of the code on the printed circuit board in the Y
direction. A setting scale is provided on the barcode scanner guide rails, for this purpose.
► Determine the Y dimension on the board i.e. the center of the code to the board edge of the fixed
conveyor side.
► Use the pointer on the scale to set the Y dimension. The required accuracy is approx. +/- 2 mm.
Setting up and Commissioning
2D PCB Barcode Scanner Configuring the PCB Barcode Scanner
PCB Barcode LP-Barcode 177
3.3.2 2D PCB Barcode Scanner
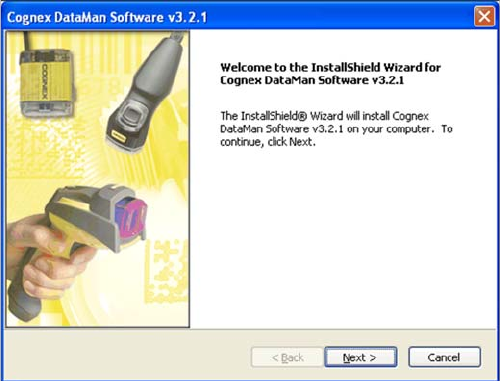
3.3.2.1 Installing and Configuring the Barcode Scanner Software
The barcode scanner software DataMan 3.x is supplied on a CD. It can also be downloaded from the
Download Center.
Installing the Barcode Scanner Software
This software is used to configure the scanner. It is not needed during productive operations. If required,
it can be started from the Windows interface of the station computer.
► Log into Windows at the station computer as an administrator.
► Place the CD into the drive.
► Doubleclick on the installation file setup.exe.
This opens the installation dialog for the Cognex DataMan software.
Installing the Cognex DataMan software
► Follow the instructions issued by the installation soft-
ware.
► Accept the default values.
If you need to install the Acrobat Reader to view the Re-
adme file, this can be done during the installation proce-
dure.
After the installation procedure has been successfully
completed, an icon for configuration of the Cognex Data-
Man software will be placed on the desktop. You can
specify whether the setup tool should be automatically
started after the installation.