00196625-03_AI_SX12_PCB_Barcode_de_en.pdf - 第182页
Setting up and Commissioning Configuring the PCB Barcode Scanner 2D PCB Bar code Scanner 182 PCB Barcode LP-Barcode Displaying "System Info" ► Switch over to the Communication Settings view. Communication Setti…
Setting up and Commissioning
2D PCB Barcode Scanner Configuring the PCB Barcode Scanner
PCB Barcode LP-Barcode 181
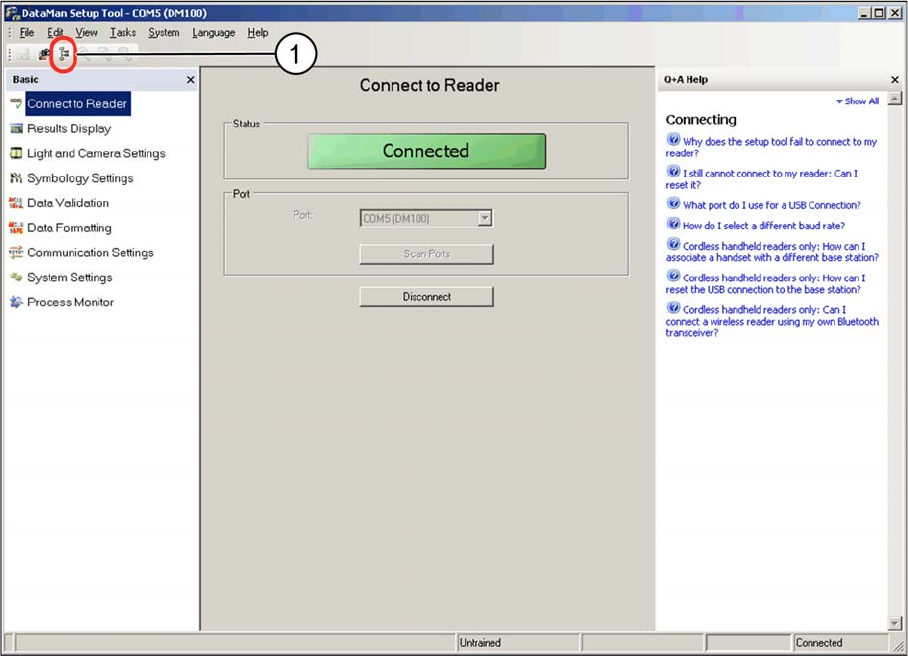
"Connect to Reader" view - changing mode
► Click on the Toggle View (1) button, to switch over to Advanced mode.
► Open the menu View – System Info – Version, to view the current firmware version for the barcode
scanner. You need at least version 1.4.0.
Setting up and Commissioning
Configuring the PCB Barcode Scanner 2D PCB Barcode Scanner
182 PCB Barcode LP-Barcode
Displaying "System Info"
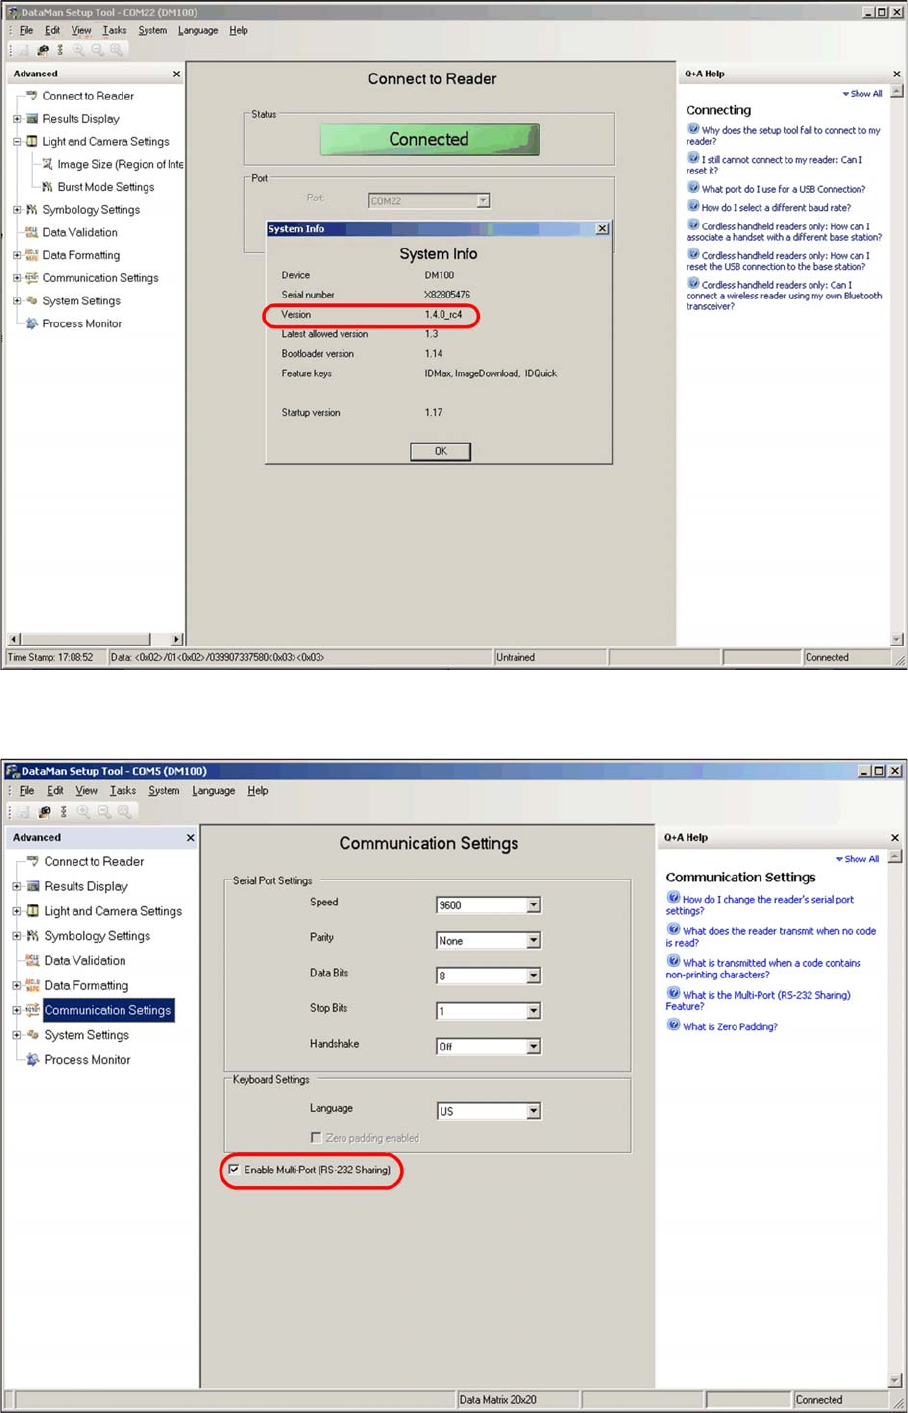
► Switch over to the Communication Settings view.
Communication Settings view
Setting up and Commissioning
2D PCB Barcode Scanner Configuring the PCB Barcode Scanner
PCB Barcode LP-Barcode 183
► Set the parameters shown in the screenshot for the first time.
► Enable the option Enables Multi-Port (RS 232 - Sharing).
► Switch over to the Data Formatting view.
"Data Formatting" view
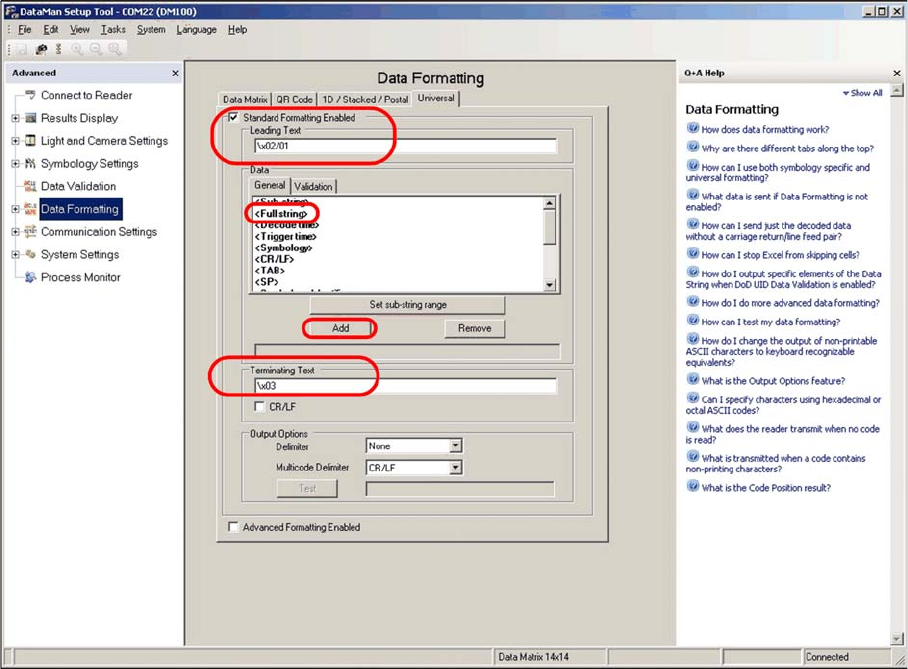
► Select the Universal tab.
► Define the settings shown in the screenshot.
► Enter the following at Leading Text:
\x02/01
► Enter the following at Terminating Text:
\x03
The Data field shows the part of the data string in the code which is to be sent to the conveyor control.
► Go to the Data field and select the General tab.
► In the selection box, mark the <Full string> line and click on Add.
If required in individual cases, a specific part of the data in the code can be selected or suppressed
here.
The machine can process a maximum data string length of 40 characters. If the data length of the codes
used does not exceed 40 characters, you can select <Full string> to transmit the complete data content.
If a longer code occurs, an error message will be issued at the station (data format barcode, error no. 80).
In order to read a code label which is longer than 40 characters, part of the code must be selected for
transmission, using the <Sub String> option. For example, this could be the characters 1-40.
► Switch over to the System Settings view.