00196625-03_AI_SX12_PCB_Barcode_de_en.pdf - 第169页
Setting up and Commissioning 1D PCB Barcode Scanner Configuring the PCB Barcode Scanner PCB Barcode LP-Barcode 169 "Device Control" dialog - connected barcode scanner detected ► Confirm the following in forma t…
Setting up and Commissioning
Configuring the PCB Barcode Scanner 1D PCB Barcode Scanner
168 PCB Barcode LP-Barcode
Configuring the Barcode Scanner Software
WinHost configuration program
► Doubleclick on the WinHost icon on your desktop.
This opens the WinHost configuration program.
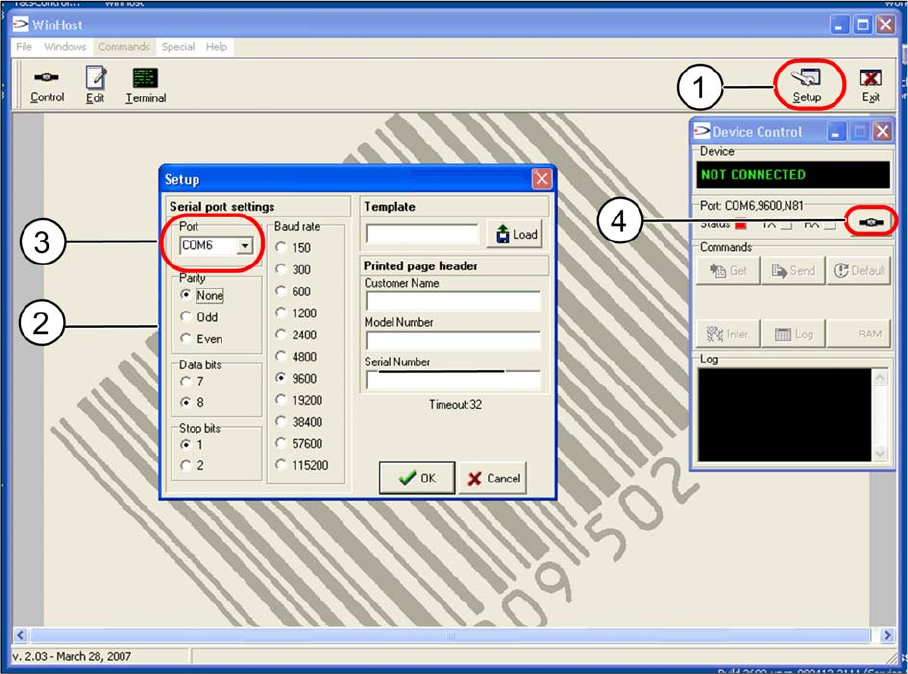
► Click on the Setup (1) button.
The Setup dialog will open (2).
► Go to Serial port settings and select the virtual COM port for the barcode scanner to be configured
from the Port (3) list box (the example shows COM6 for the barcode scanner at conveyor lane 1,
bottom).
► Accept the pre-filled values for the other port settings without changes.
► Confirm the settings with OK.
► Confirm the Update device control query with Yes.
► Go to the Device Control dialog and click on the Connect to device (4) button.
Setting up and Commissioning
1D PCB Barcode Scanner Configuring the PCB Barcode Scanner
PCB Barcode LP-Barcode 169
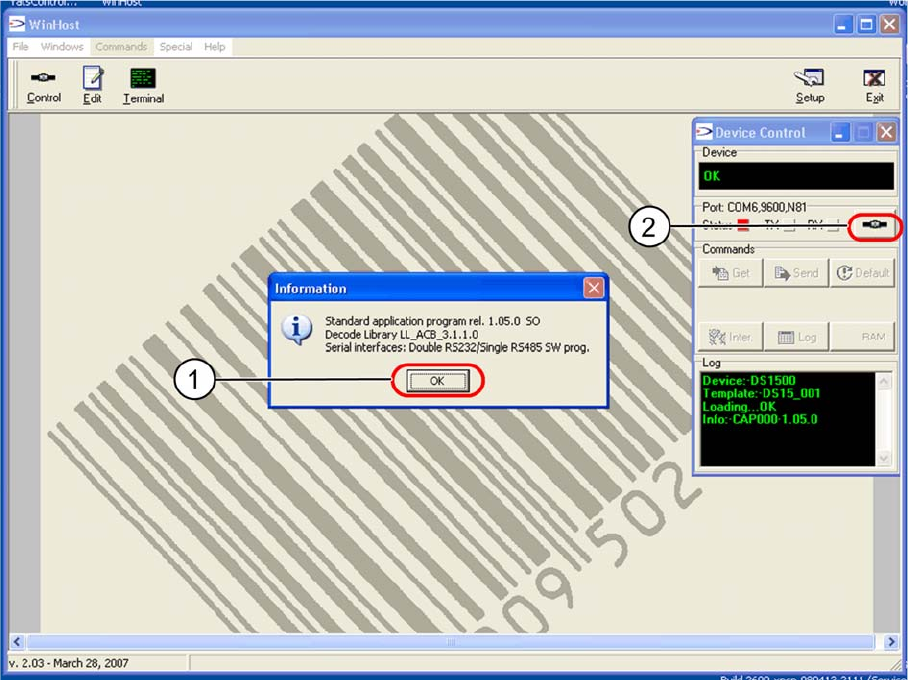
"Device Control" dialog - connected barcode scanner detected
► Confirm the following information message with OK (1).
► Click on the Connect to device (2) button.
The Edit Configuration will be shown.
The entries shown in the individual tabs will be automatically read by the barcode scanner and shown in
the Device Control dialog with the status Configuration received.
Setting up and Commissioning
Configuring the PCB Barcode Scanner 1D PCB Barcode Scanner
170 PCB Barcode LP-Barcode
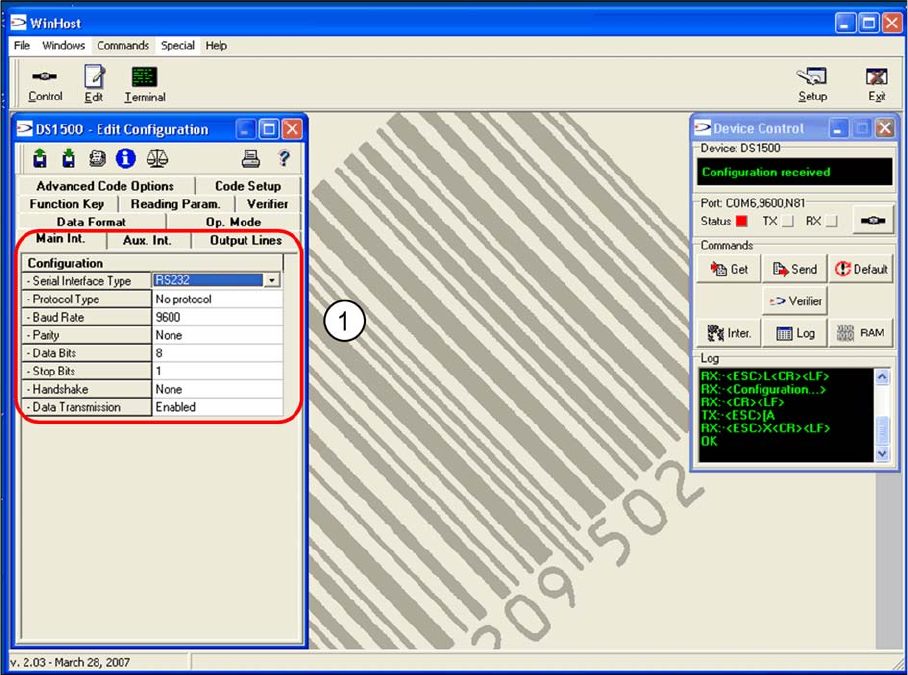
"Edit Configuration" dialog – "Main Int." tab
"Edit Configuration" dialog – "Main Int." tab
The parameters for the MAIN interface, which connects the barcode scanner to the conveyor control (for
transfer of read code data), are set in the Main Int tab.
► Accept the values shown in the screenshot (1).