YSD_Users_E.pdf - 第103页
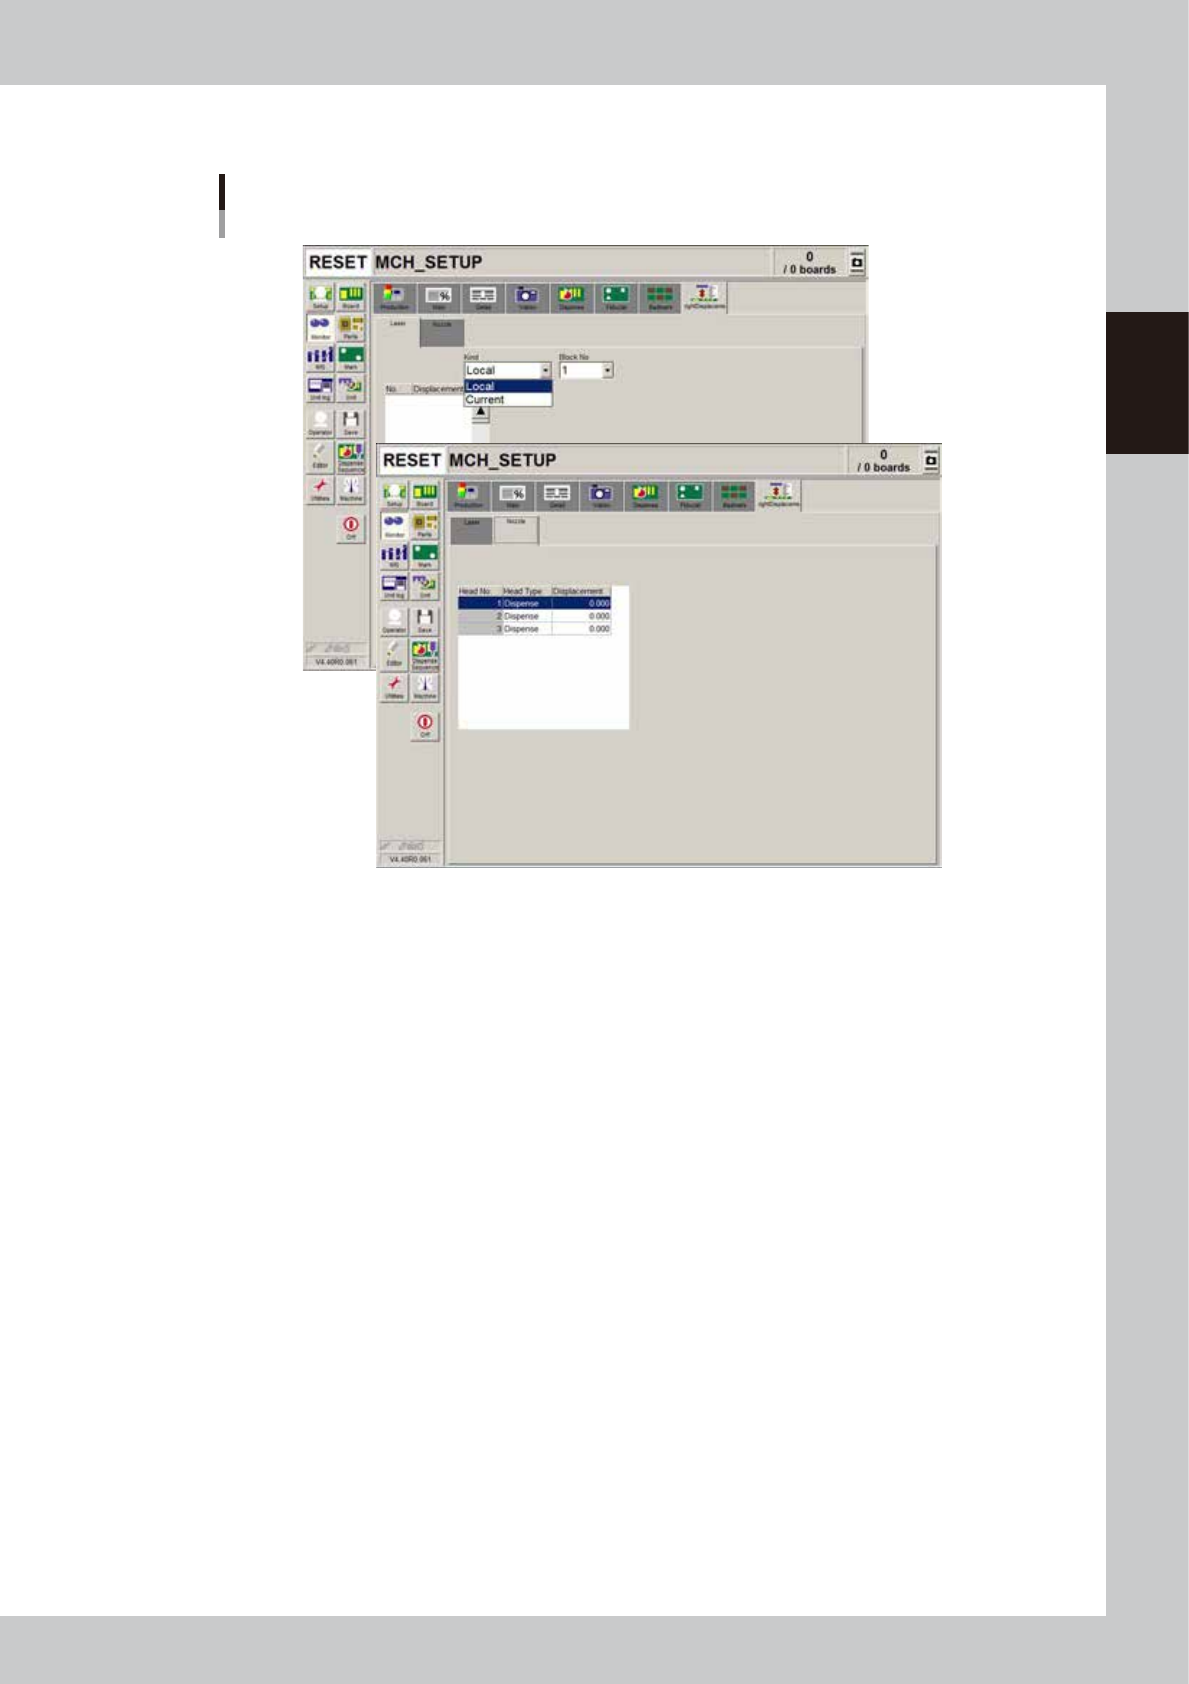
2-43 2 Basic operation n Monitor: Height Displacement Monitor Height Displacement 64225-N7-00 n Laser • Current Shows the current height measured with the laser displacement meter . T he sampling count depends on the mac…
2-42
2
Basic operation
n
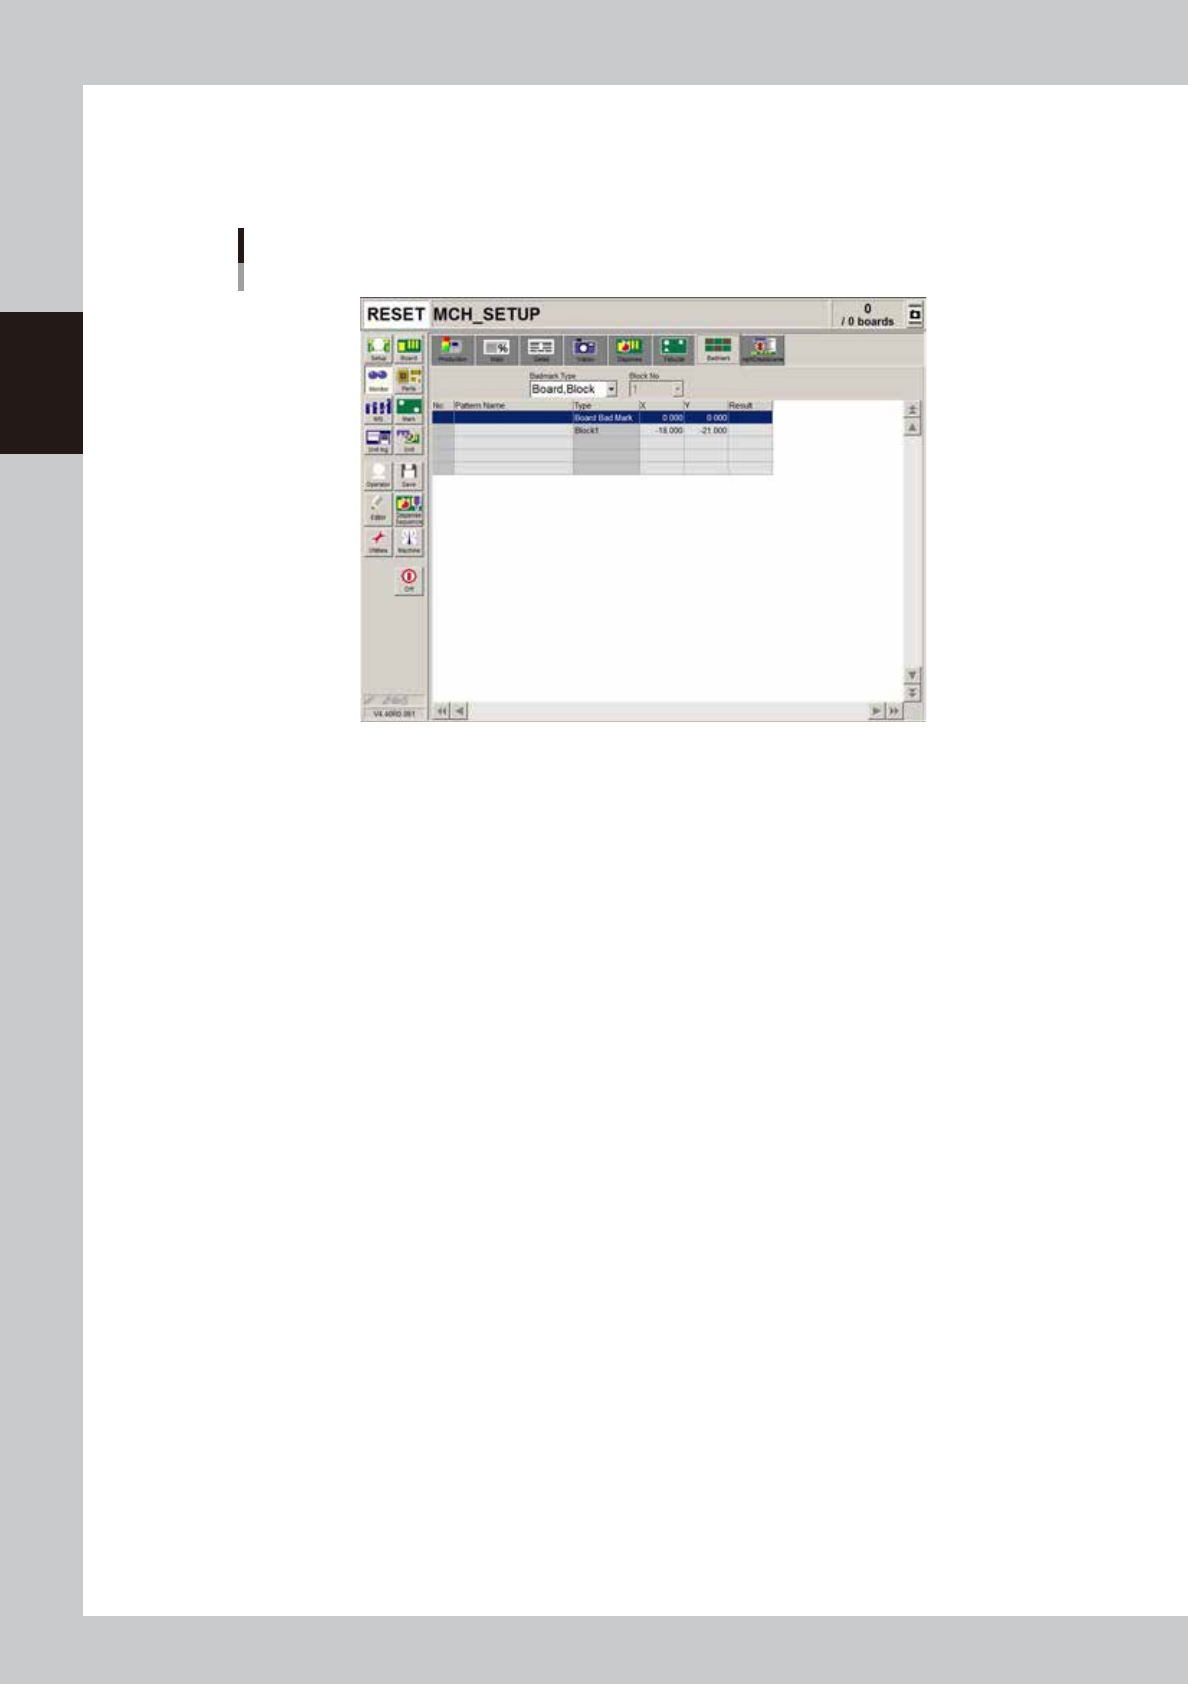
Monitor: Badmark
The [Badmark] tab screen shows the results after badmarks such as "Board, block", "Local" and "Point" badmarks were
recognized.
Monitor
Badmark
64222-N7-00
• X, Y
Shows the board data input values (by taking block offset amount into account).
• Result
Makes an "OK" or "NG" decision based on the badmark recognition result.
OK : Work is performed when no badmark is recognized.
NG : Work is not performed when a badmark is recognized.
2-43
2
Basic operation
n
Monitor: Height Displacement
Monitor
Height Displacement
64225-N7-00
n
Laser
• Current
Shows the current height measured with the laser displacement meter. The sampling count depends on the machine data
setting. The displayed value is the offset from the zero reset point of the laser. When the zero reset point is equal to the
board surface height, the offset relative to the board surface height is displayed. The plus/minus directions are the same
as those for the Z-axis of the head.
• Local
Shows the average value calculated by dividing the measurement results by the sampling count. The "No." indicates the
"No." shown in the "Height" column on the [Board]-[Dot Dispense] tab. The displayed value is the offset from the zero
reset point of the laser.
When the zero reset point is equal to the board surface height, the offset relative to the board surface height is displayed.
The plus/minus directions are the same as those for the Z-axis of the head.
n
Nozzle
• Height
Shows the dispense nozzle height offset measured with the [Nozzle Length] button in the "Utility" group box of the Setup
screen.
The displayed values are the offset relative to the reference height set as machine data.

2-44
2
Basic operation
3.10 Finishing board production
To finish board production, follow these steps.
1
Stop machine operation.
There are three methods for stopping the machine.
1. Emergency stop button:
Press this button to trigger emergency stop. Do not use this button in normal operation.
e
2. [STOP] button (operation panel):
Pressing the [STOP] button stops the machine immediately. To resume operation, press the [START]
button on the operation panel.
3. [Cycle Stop] button:
Pressing this button stops the machine when dispense operation for the current board is completed.
4. [ConveyOut Stop] button:
Use this button when you want to finish production after adhesive is dispensed on the boards
currently on the conveyor. All boards on the conveyor are transferred to the downstream side after
adhesive dispensing, but new boards are not transferred from the upstream side.
c
CAUTION
Do not press the emergency stop button during operation except in case of emergency.
2
Reset the operation.
Press the [RESET] button on the operation panel. The machine stops operation immediately and returns
to the board production standby status.
e
3
Remove the back-up pins.
After pressing the emergency stop button, open the safety cover and remove the back-up pins.
4
Cancel emergency stop.
Close the safety cover, release the emergency stop button, and press the [READY] button.