YSD_Users_E.pdf - 第63页
2-3 2 Basic operation 1.2 Canceling emergency stop F ollow these steps to cancel emergency stop. 1 Release the emergency stop button. T ur n the emergency stop button clockwise to release it. 2 Check safety . Before cont…
2-2
2
Basic operation
3
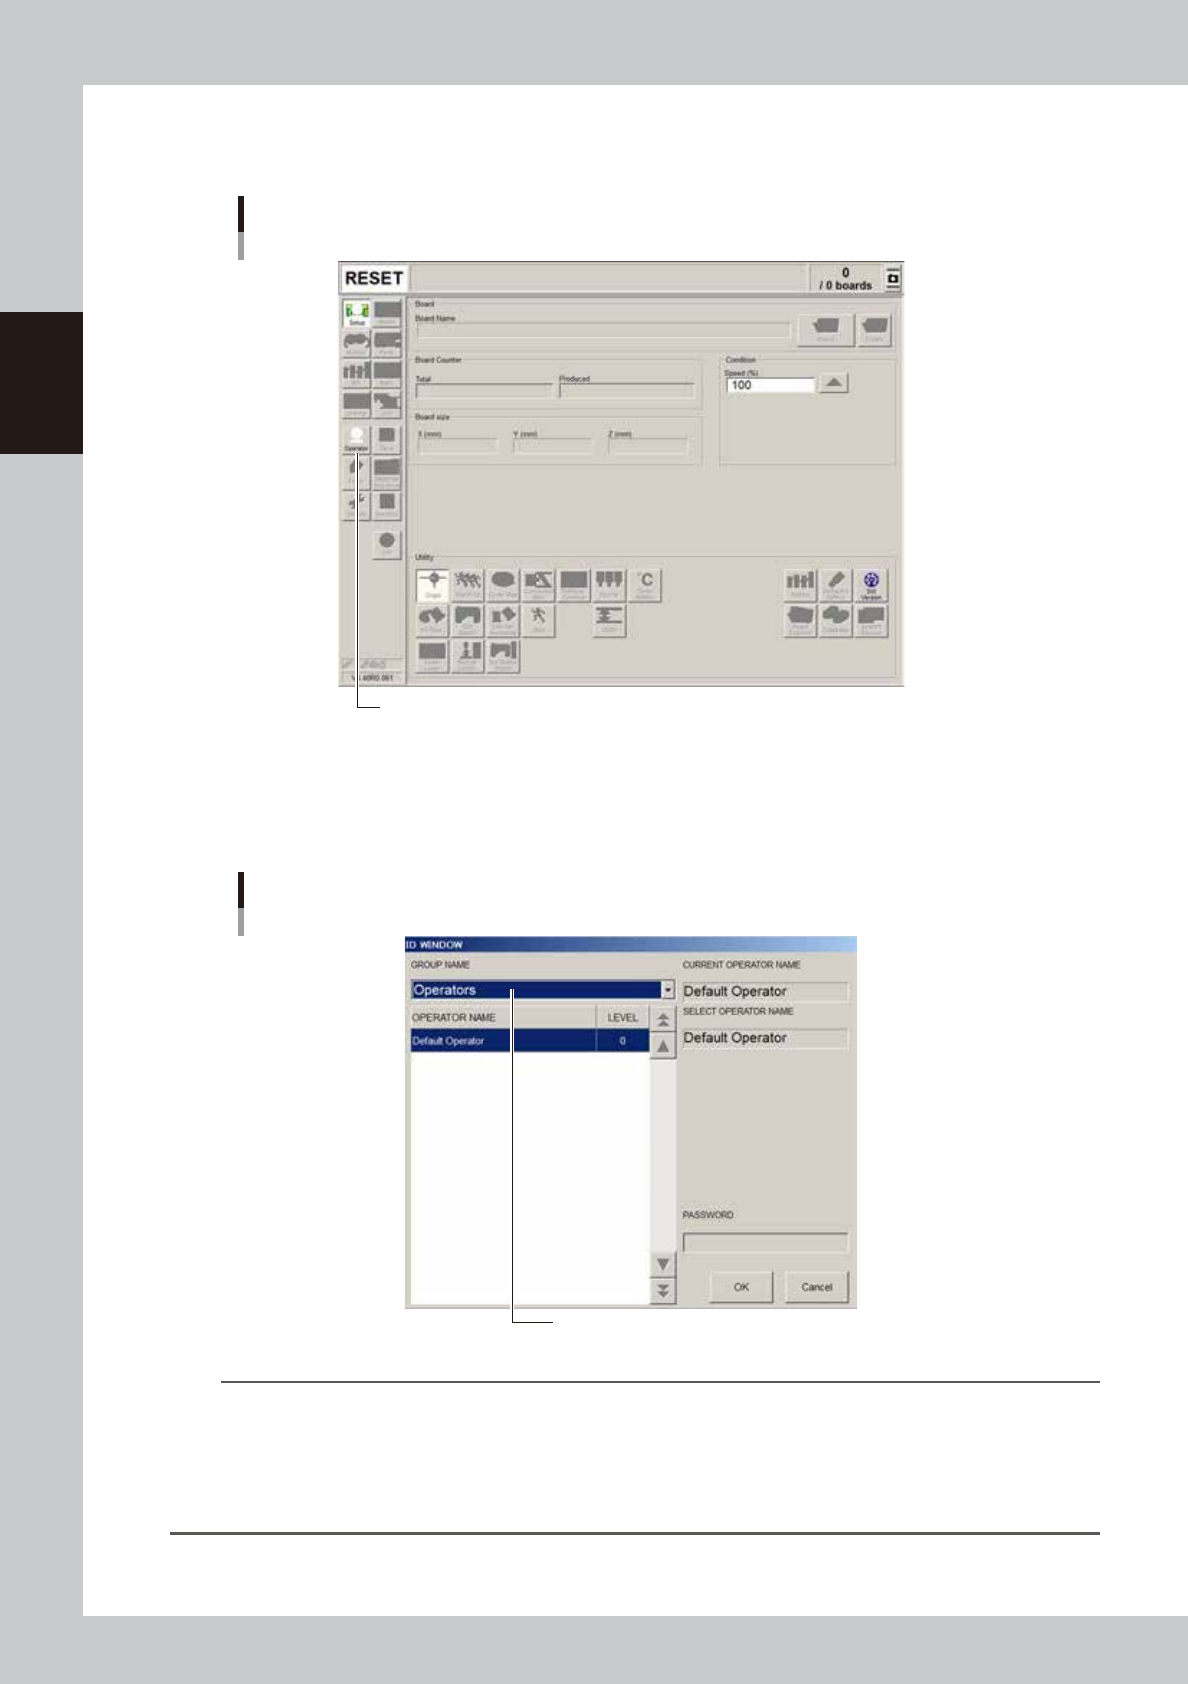
Press the [Operator] button.
The ID WINDOW dialog box appears for specifying the operator.
[Operator] button
Press the [Operator] button to open the ID WINDOW.
64203-N7-00
4
Specify the operator and enter the password.
From the GROUP NAME drop-down list,“Operators” or “Administrators” can be selected as needed.
When the password is matched, the initial screen (Setup screen before selecting a board) appears.
Specifying the operator
Select the operator and press [OK].
64204-N7-00
TIP
Active menu buttons differ depending on the operation level setup. For example, when the machine is turned on with
the factory setup, the program starts up at an operation level called “Default Operator”. This “Default Operator” level
is set to “Level 0” at the time of shipment to allow only basic operation items. This operation level can be changed as
needed. Operators and operation items can also be added and specified by setting the password and operation
level.
For more details, see “A2 Operator access control” in Appendix of the programming manual.
2-3
2
Basic operation
1.2 Canceling emergency stop
Follow these steps to cancel emergency stop.
1
Release the emergency stop button.
Turn the emergency stop button clockwise to release it.
2
Check safety.
Before continuing the procedure, check the surrounding area for safety.
3
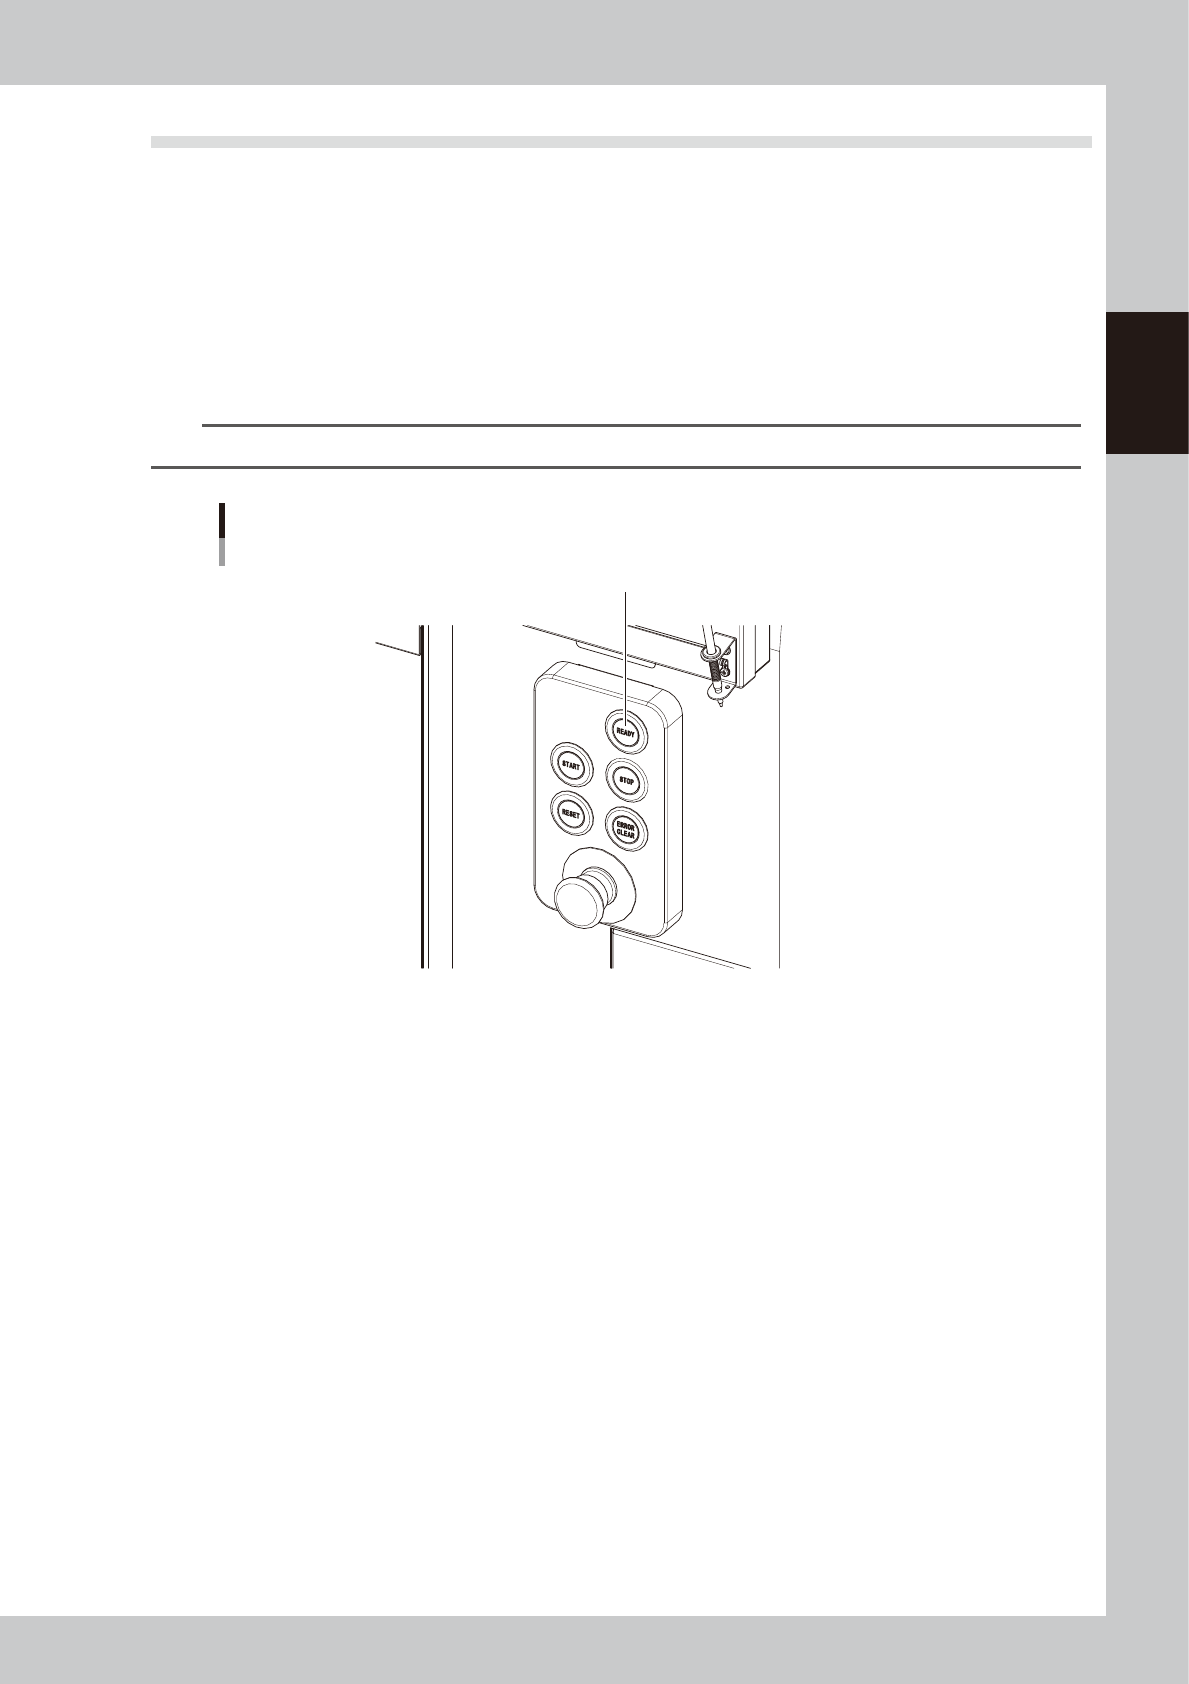
Press the [READY] button.
Pressing the [READY] button on the operation panel turns on the servomotors.
n
NOTE
Emergency stop is then canceled to allow each axis to move.
[READY] button
Press the [READY] button to turn on the servo.
63200-N7-00
4
Check the signal light and screen display.
Check that the red lamp of the signal light is off and the emergency stop sign on the operation screen
has disappeared.

2-4
2
Basic operation
1.3 Clearing an error
If an error occurs, a buzzer sounds and a yellow warning screen appears. To clear the error, use the following
steps. For information on how to correct errors, see “1.1 Typical errors and troubleshooting” in Chapter 3.
1
Turn off the buzzer.
Press the [ERROR CLEAR] button on the operation panel to turn off the buzzer.
2
Check the cause of the error.
Possible causes are displayed on the lower part in the error screen, so check or make a note of the
description.
3
Clear the error screen.
Press the [ERROR CLEAR] button again to clear the error screen.
4
Check the signal light and screen display.
Check that the yellow lamp of the signal light is off and the error message on the upper left of the status
area on the screen has disappeared.