YSD_Users_E.pdf - 第351页
8-31 8 Managing the data 3.2 Production and operation log settings Using the [Software Setting] and [History] buttons on the Setup screen, y ou can make settings for production logs. 3.2.1 Setting to store production log…
8-30
8
Managing the data
[Clear] button (on "MIS" screen only)
Use this button to delete all log data currently displayed on the screen. Data cannot be deleted in rows.
When a confirmation dialog box appears, press the [Yes] button to delete the log data.
c
CAUTION
Data cannot be recovered once deleted, so use caution.
[Reset] button ("Unit Log" screen only)
Use this button to reset the contents currently displayed on the screen.
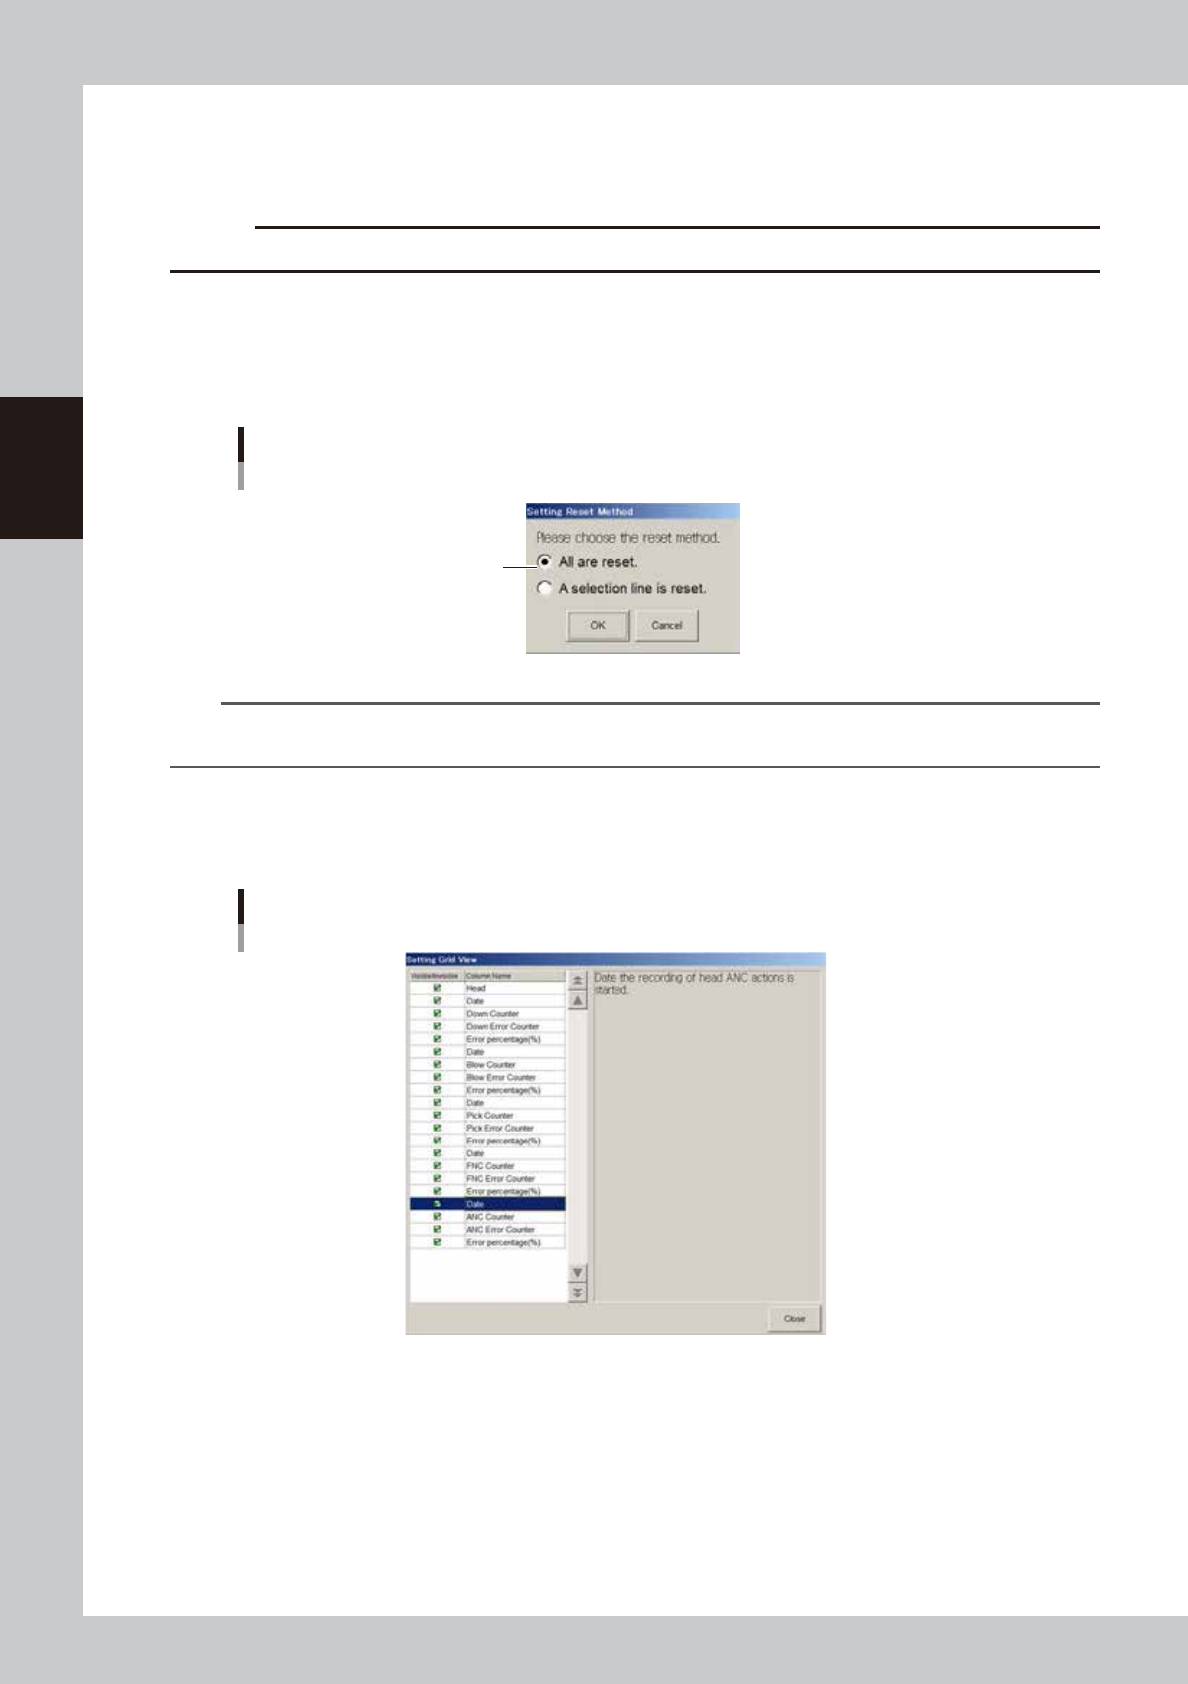
1. Press this button to open the "Setting Reset Item" dialog box, select the reset method, and press the [OK] button.
2. When a conformation dialog box appears, press the [Yes] button to reset the selected items.
“Setting Reset Item” dialog box
[Conveyor] tab
Select reset method.
64829-N7-00
TIP
If you want to clear/reset all production log data to an external medium at one time, make settings on the "History
Utility" screen. For information on the "History Utility" screen, refer to "4.2.3 History Utility" described later on.
[Option] button
Pressing the [Option] button opens the "Setting Grid View" screen that allows you to show or hide each log data item.
Check the items you want to display, and uncheck the items you do not want to display.
Selecting the items to display
64830-N7-00
8-31
8
Managing the data
3.2 Production and operation log settings
Using the [Software Setting] and [History] buttons on the Setup screen, you can make settings for production
logs.
3.2.1 Setting to store production logs per board data
When the function for storing production logs per board data is enabled, you can manage the production logs
per board data, as well as the ordinary production logs.
n
NOTE
• When the function for storing production logs per board data is enabled, a production log is saved each time
board data is saved. If the board data is renamed, the production logs for that board data are also copied under
the renamed board data name.
• Deleing board data also deletes the production logs for that board data.
• When board data is changed, the production logs for that board data recorded up until that point is saved in a
file. If the newly loaded board data has a file of production logs, the contents of those logs are
also loaded, and new logs will be added.
1
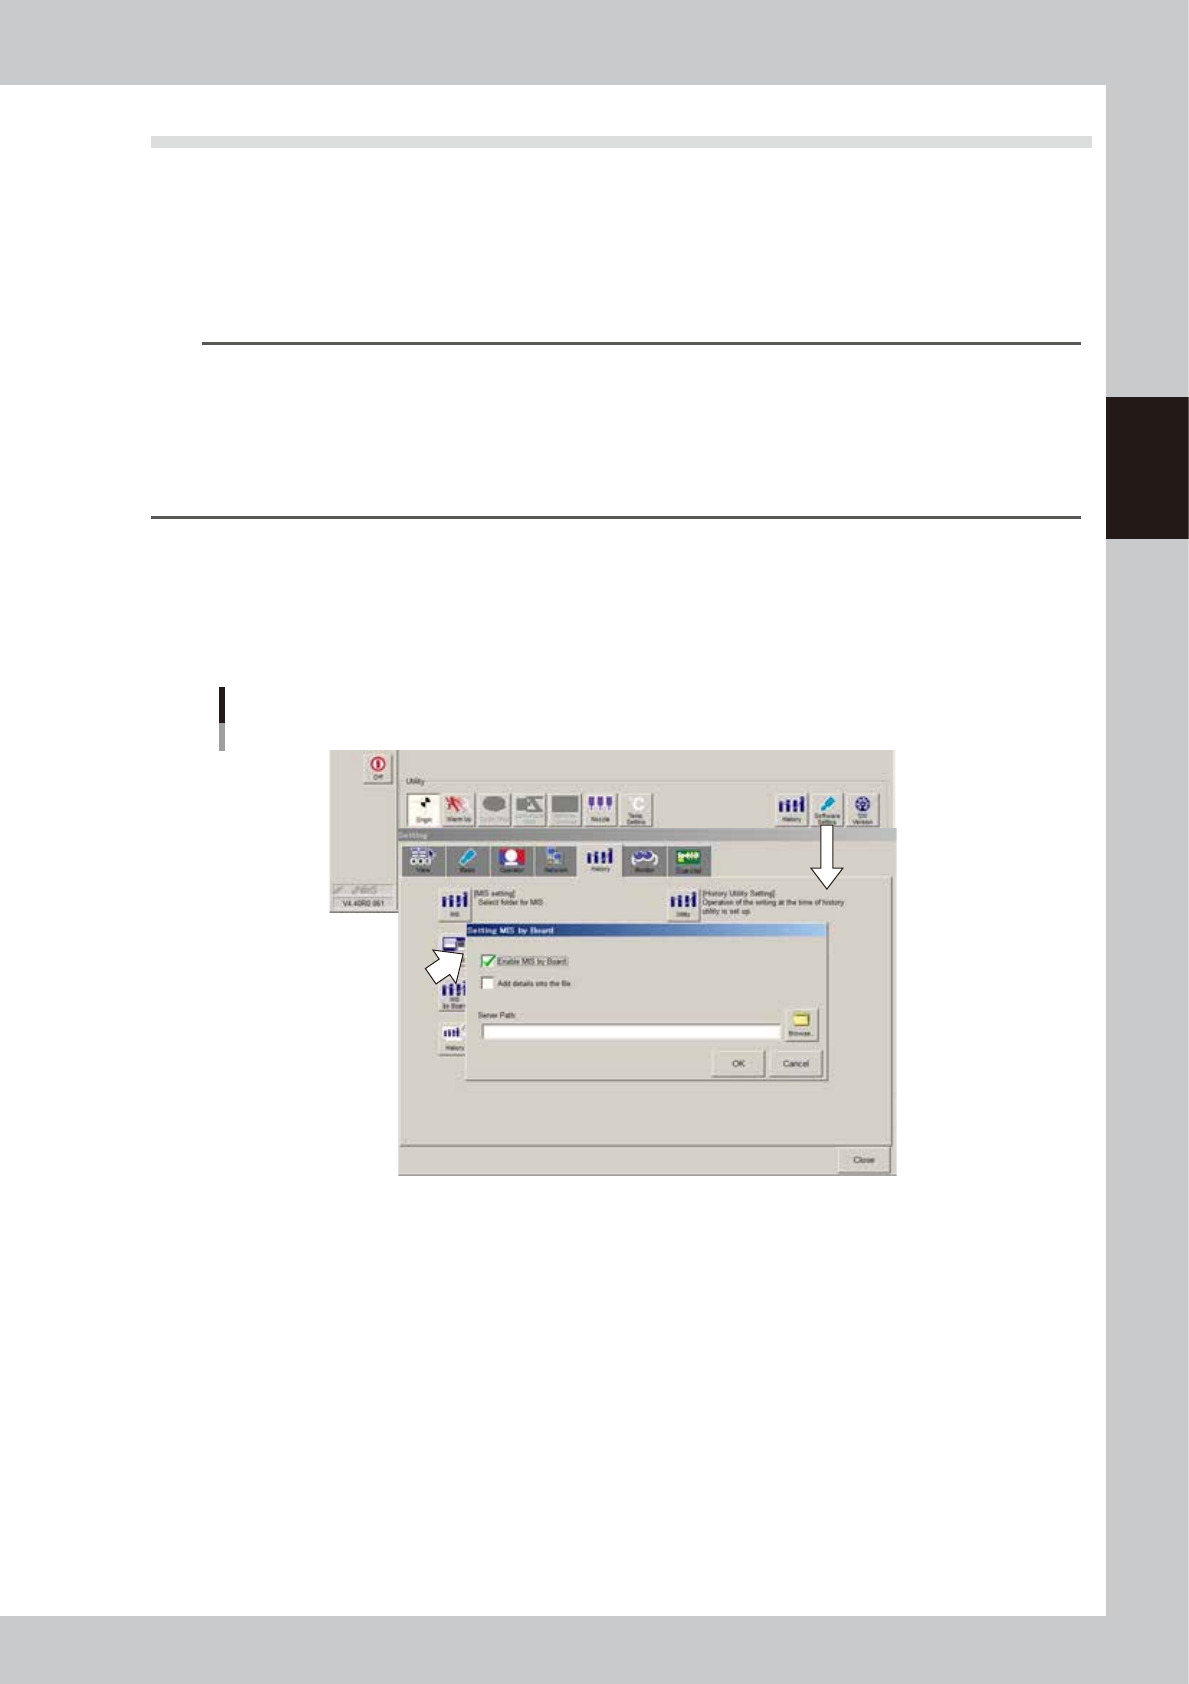
On the Setup screen, press the [Software Setting] button and then open the
[History] tab.
2
Press the [MIS by Board] button.
The "Setting MIS by Board" screen then appears. Make the necessary settings.
Setting to store production logs per board data
64831-N7-00
Enable MIS by Board
Select this check box to enable the function for storing production logs per board data. The [MIS by
Board] tab then appears on the "MIS" screen, allowing you to view production logs per board data.
Add details into the file (Not used with this machine)
When this check box is selected, the error count for each head is added to the "Parts Info" sub-tab, and
the error count for each nozzle to the "Head Info" sub-tab when the production log file is saved.
Server Path
If you want to save the production log file to a server, set the path to the server. Only the production log
file will be saved in the server in the path. (Board data will not be saved there.)
3
When the setting is complete, press the [OK] button.
This returns to the "Setting" screen. Press the [Close] button on the "Setting" screen.
8-32
8
Managing the data
3.2.2 Specifying the auto-save destination
Log data can be automatically saved in the specified locations at the time when the machine is turned off. To
specified the save destination, follow these steps.
1
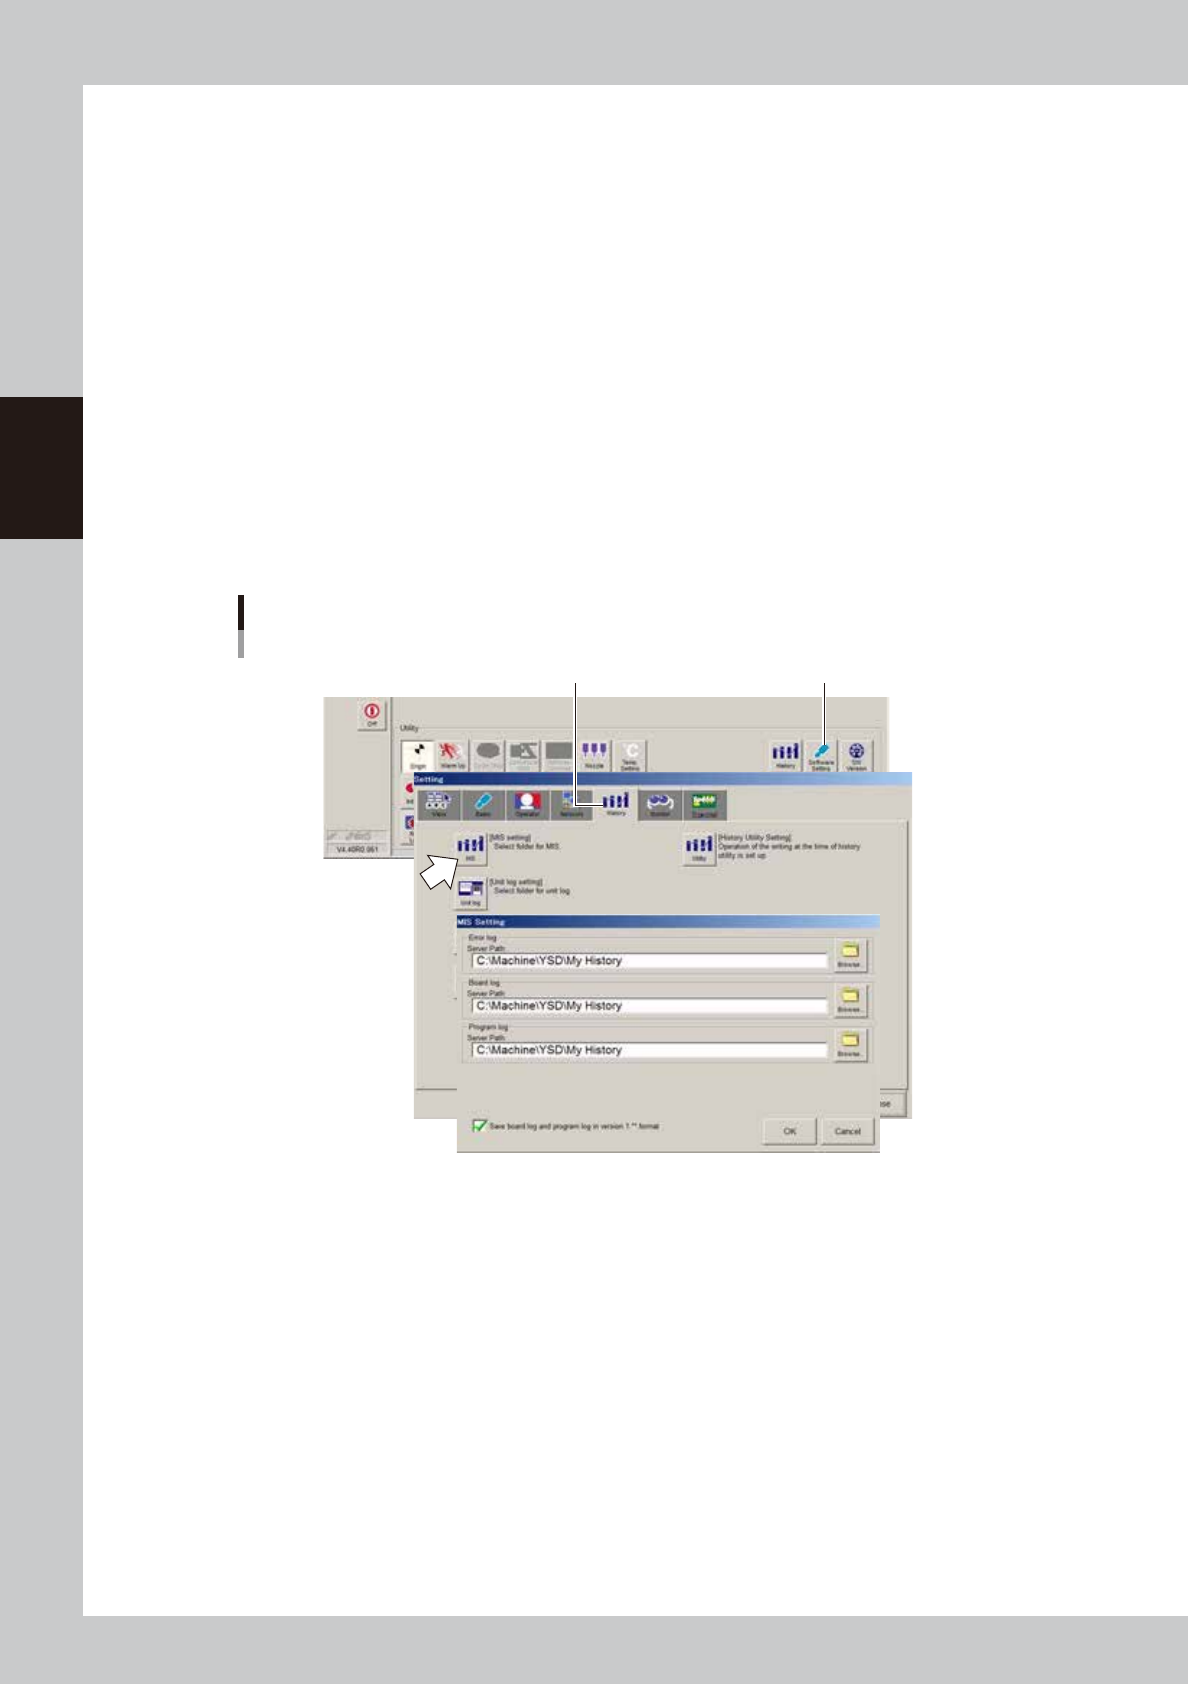
Press the [Software Setting] button on the Setup screen.
The "Setting" screen then appears. Open the [History] tab.
2
Press the [MIS] or [Unit log] button.
• Press the [MIS] button to set the save destination of production log data.
The "MIS Setting" dialog box appears.
• Press the [Unit Log] button to set the save destination of operation log data.
The "Unit Log Setting" dialog box appears.
3
Set the server paths.
1. Press the [Browse] button and specify the path to each folder where the log data will be stored. (You
can directly enter the paths in each path entry box.)
2. After specifying the folders, press the [OK] button.
Log data will be automatically saved in the folders specified here.
Specifying the destination to save log data
[History] tab
[Software Setting] button[History] tab
64832-N7-00