YSD_Users_E.pdf - 第259页
5-70 5 Creating the board data 3 Displa y the dot dispense par ameters. Click the Dot Dispense icon in the tree view (left pane) or click the [Dot Dispens e] tab in the main view (right pane). 4 Perform dispense distribu…
5-69
5
Creating the board data
2
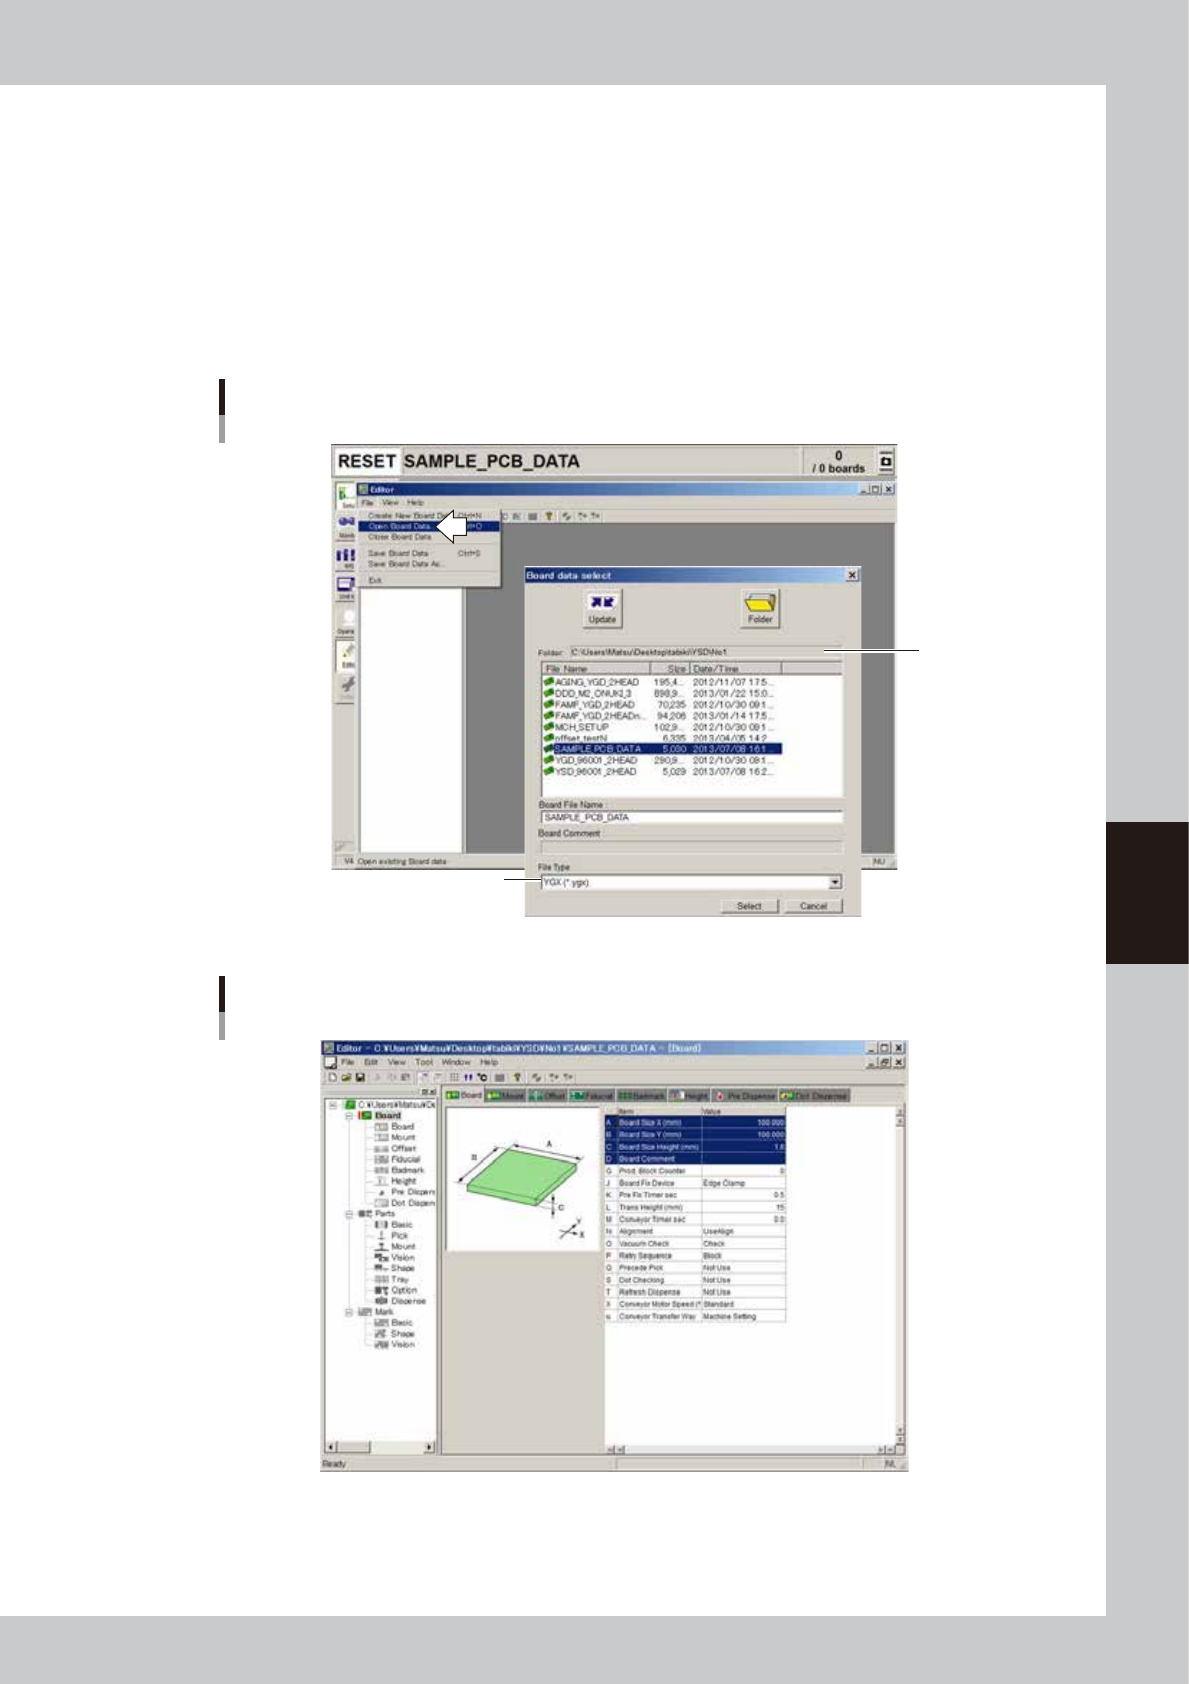
Select the board to be subjected to dispense distribution.
Select "Open Board Data" from the File menu or click the [Open Board Data] button on the toolbar. The
"Board data select" dialog box appears.
1. Check that the "Folder" box shows the path to the folder that contains the board data you want to
select. If not, press the [Folder] button and specify the folder containing the board data and press
the [OK] button.
2. Select the file type from the File Type drop-down list.
3. Select the board data and click the [Select] button.
The selected board data is loaded and displayed in the Editor window.
Selecting the board data
Check the
folder path.
Select the file type.
64542-N7-00
Editor window
64543-N7-00
5-70
5
Creating the board data
3
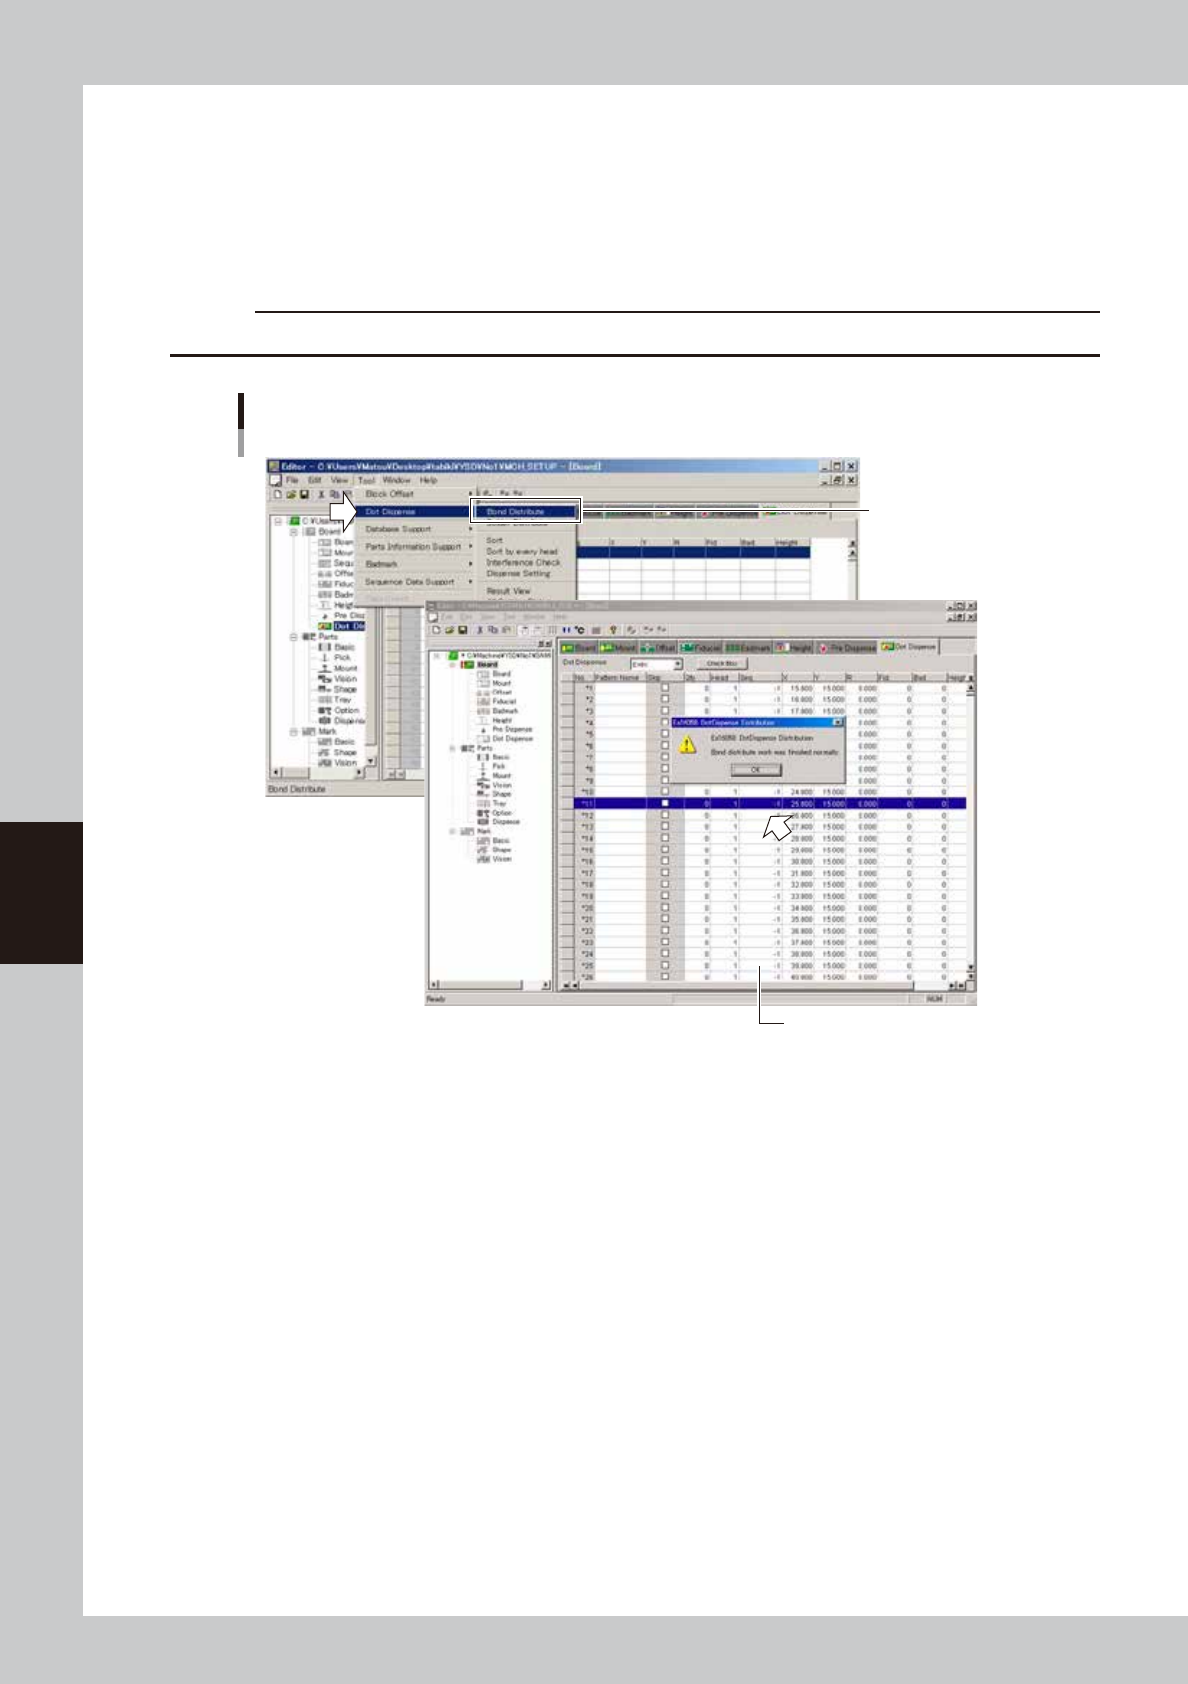
Display the dot dispense parameters.
Click the Dot Dispense icon in the tree view (left pane) or click the [Dot Dispense] tab in the main view
(right pane).
4
Perform dispense distribution.
From the [Edit] menu, select [Dispense Distribute] - [Bond Distribute] or [Solder Distribute].
Dispense distribution will start and dispense coordinates will be created according to the mount data.
c
CAUTION
Performing dispense distribution will overwrite the dispense data which is in effect before dispense distribution.
Dispense Distribution
Select eithter command.
DIstributed data is displayed.
64544-N7-00
5
Sort the dispense coordinates.
From the Tool menu, select "Dispense Distribute" - "Sort" or "Sort at every head".
If you are going to check alignment amount, select [Sort at every head].
6
Perform an interference check.
From the Tool menu, select "Dispense Distribute" - "Interference Check".
Check whether the stopper steps on dispensed dots. If such a possibility exists, the related data rows will
be displayed, so correct them.
5-71
5
Creating the board data
n
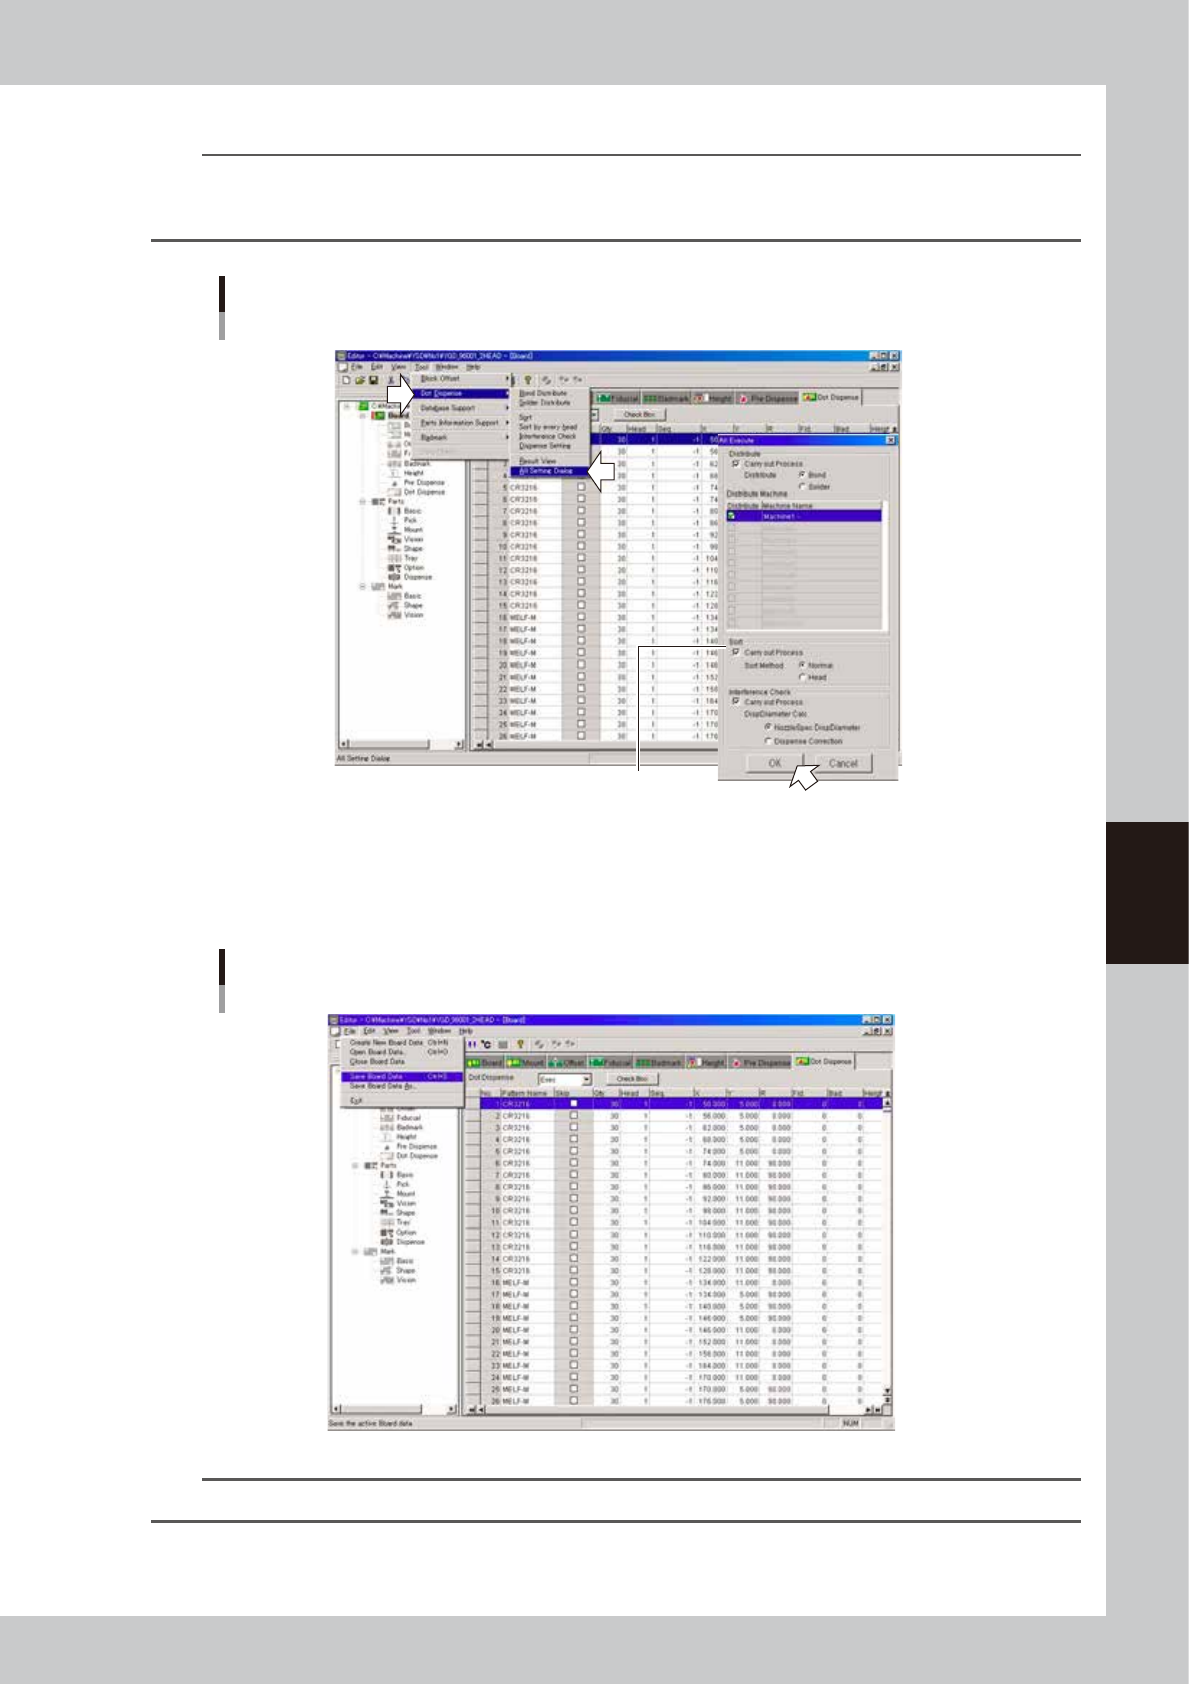
”All Setting Dialog” command
TIP
The task from steps 4 to 6 can be performed at one time.
From the Tool menu, select "Dot Dispense" - "All Setting Dialog" and make the necessary settings in the dialog box that
appears and click the [OK] button.
Dispense distribution
Selecting "All Setting Dialog" command
Select the option buttons as needed.
64545-N7-00
7
Save the board data and quit the Editor.
1. Select "Save Board Data" from the File menu or click the [Save Board Data] button on the toolbar.
The board data is saved and the existing board data is overwritten.
"Save Board Data" command
64546-N7-00
TIP
If you do not want the existing board data to be overwritten, select "Save Board Data As…" from the File menu.