YSD_Users_E.pdf - 第140页
4-12 4 Making the dispensing stable 3.1.2 Creating the predispense parameters In most cases, copy the predispense par ameters from other board data and paste them to create the necessary predispense parameters. Also set …
4-11
4
Making the dispensing stable
3
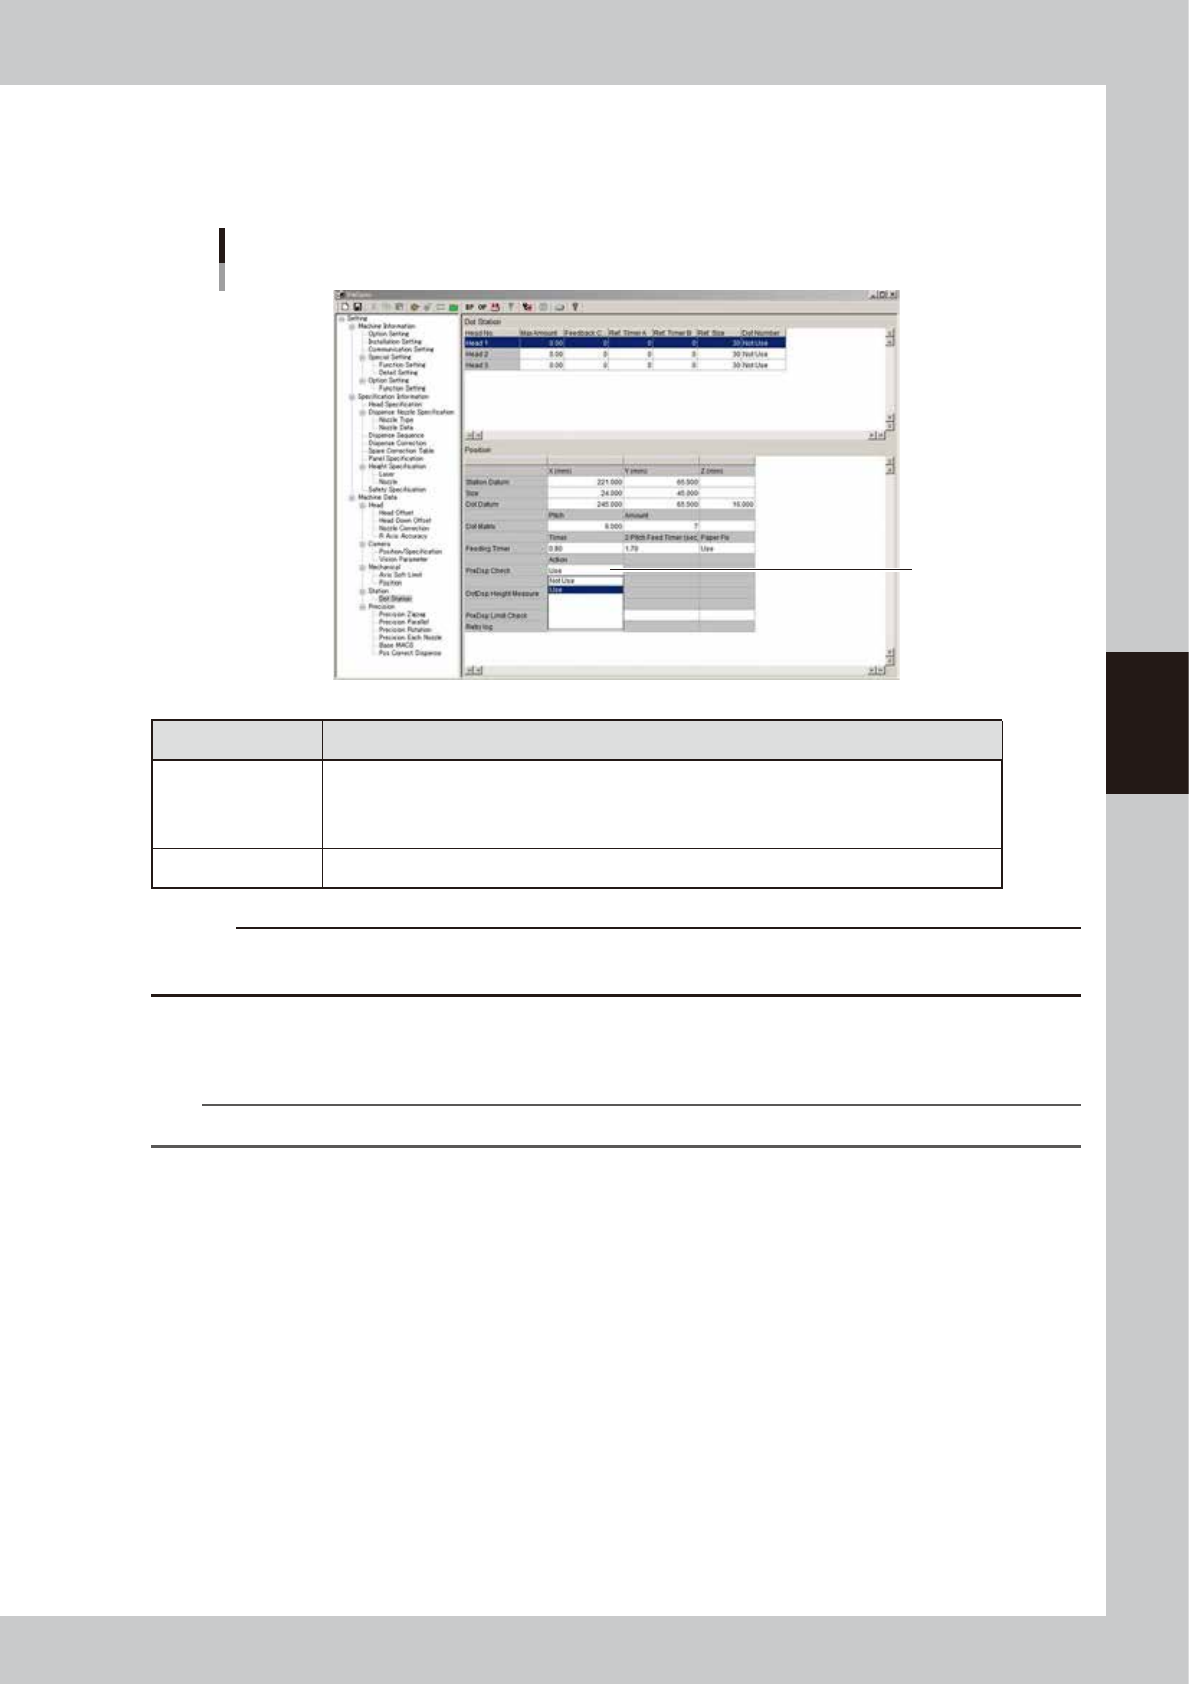
Set the “PreDisp Check” parameter to “Use”.
1. Press the [Machine] button to open the VmSpec window.
2. Open the “Machine Data” – “Dot Station” screen, and set “PreDisp Check” to “Use”.
”PreDisp Check”
Set to "Use".
64428-N7-00
PreDisp Check Description
Use
• Checks the dispensing amount after correction. The head moves 20 mm in the Y direction by
utilizing the correction amount obtained by the first predispensing and performs dispensing and
recognition (for mark check).
• Performs predispensing immediately before dot dispensing for the corresponding head.
Not Use All heads perform predispensing before starting dot dispensing.
c
CAUTION
When the correction amount check is used, the predispensing and dot recognition count increases, causing the
production cycle to become longer.
4
Reload the board data.
Press the [Board] button and then the [Select] button to reload the board data.
n
NOTE
After changing the machine data setting, the board data must be reloaded to enable the change.
4-12
4
Making the dispensing stable
3.1.2 Creating the predispense parameters
In most cases, copy the predispense parameters from other board data and paste them to create the necessary
predispense parameters. Also set the information on the predispensing coordinates and correction.
1
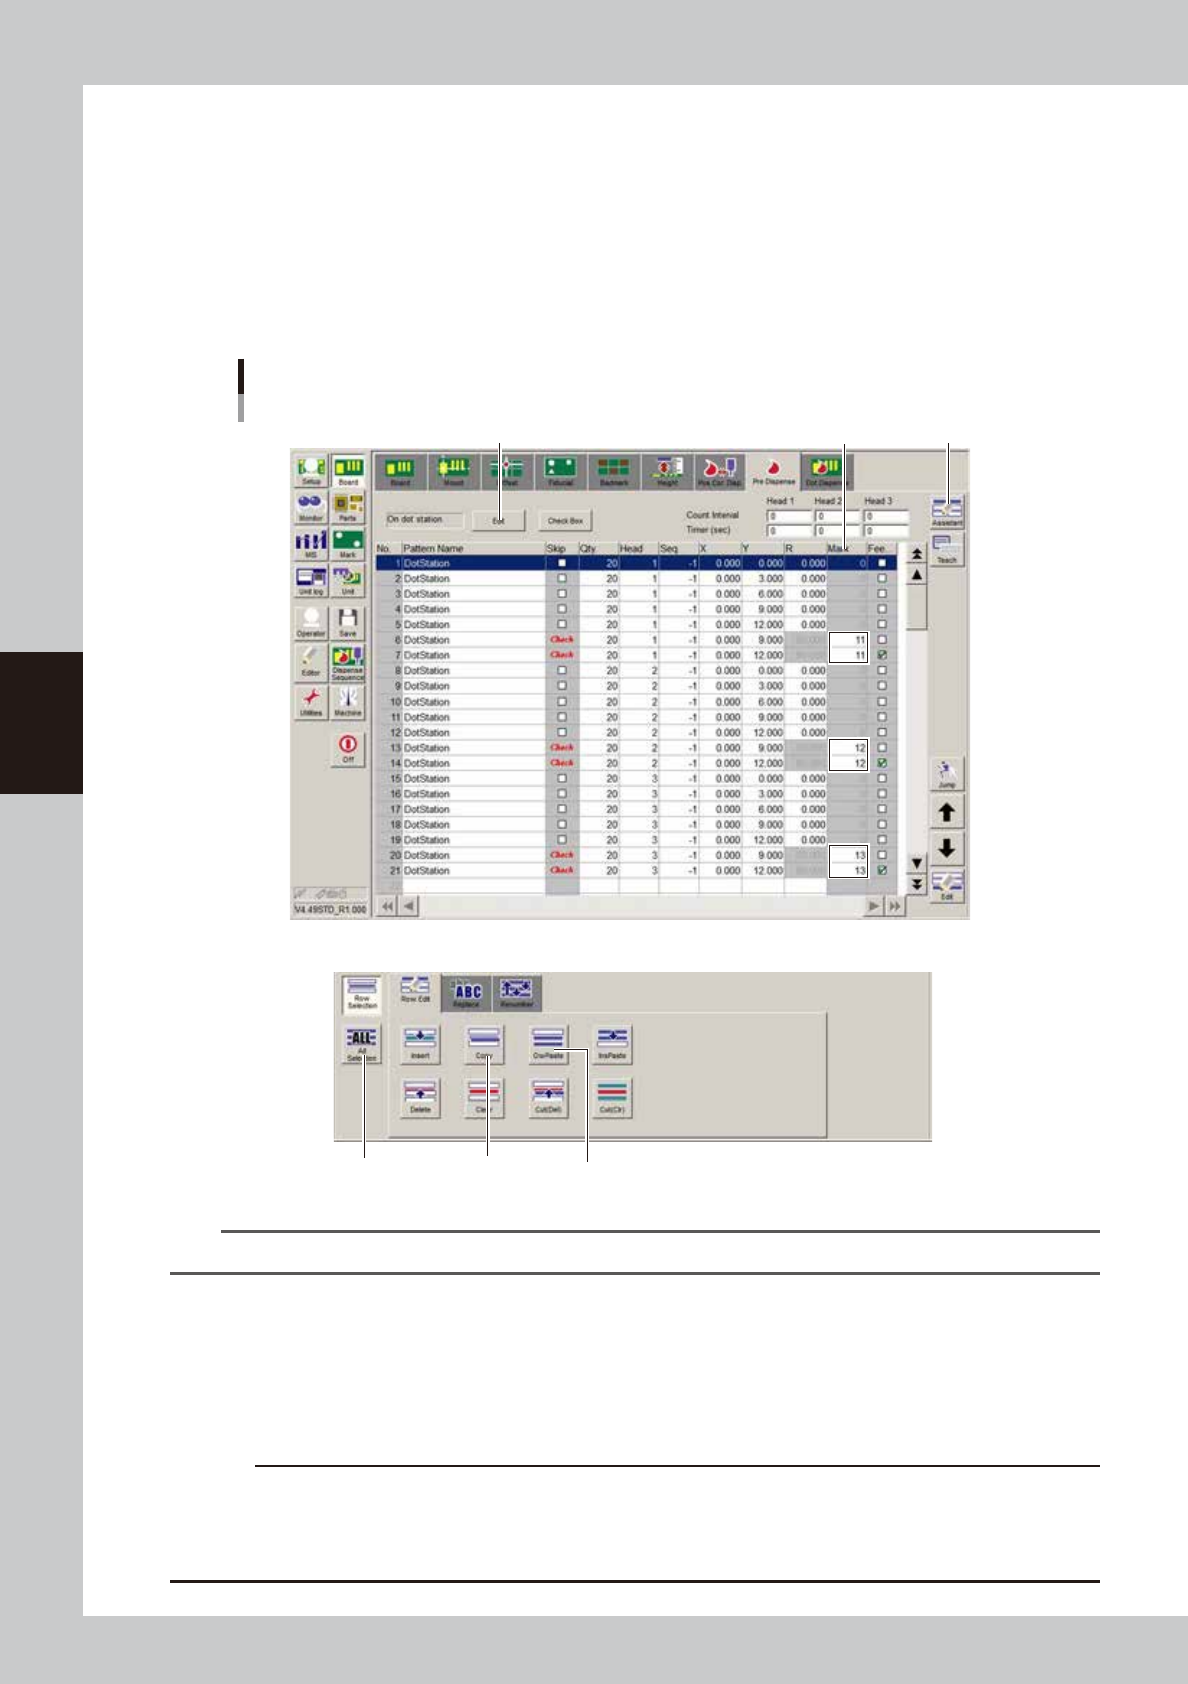
Copy the predispense parameters.
1. Open the board data from which you want to copy the parameters.
2. Open the [Board]-[Pre Dispense] screen and press the [Assistant] button.
3. Press the [ALL] button and then the [Copy] button.
[Pre Dispense] screen
Examples of Parameters
[ALL] button [Copy] button [OwPaste] button
[Edit] button
[Assistant] button
[Pre Dispense] – [Assistant]
Mark No.
64429-N7-00
TIP
Refer to the above values when creating the predispense parameters.
2
Paste the predispense parameters.
1. Open the board data where you want to paste the parameters.
2. Open the [Board]-[Pre Dispense] screen, place the cursor on the first row, and press the [OwPaste]
button.
3. Add, edit or delete the parameters according to the number of heads you use.
c
CAUTION
When using two or more heads while “PreDisp Check” on the “Machine Data” – “Dot Station” screen in the VmSpec
window is set to “Not Use”, enter the minus offset value in the X coordinate for the head that will be used for the next
predispensing.
(Example) Head 1 “X: 0.00”, Head 2 “X: -4.00”, Head 3 “X: -8.00”
4-13
4
Making the dispensing stable
3
Set the predispensing location to “On dot station”.
Press the [Edit] button and select “On dot station” as the predispensing location.
4
Set the mark numbers.
Enter the mark numbers to use for correction. When a Type 111 nozzle is used, enter “11” in most cases.
n
NOTE
Any mark numbers can be used, but enter similar numbers to make them easier to group with other settings. For the
setting of each nozzle, see “
n
Nozzle setting values” in “3.1 Using the dispense correction function” in this chapter.
n
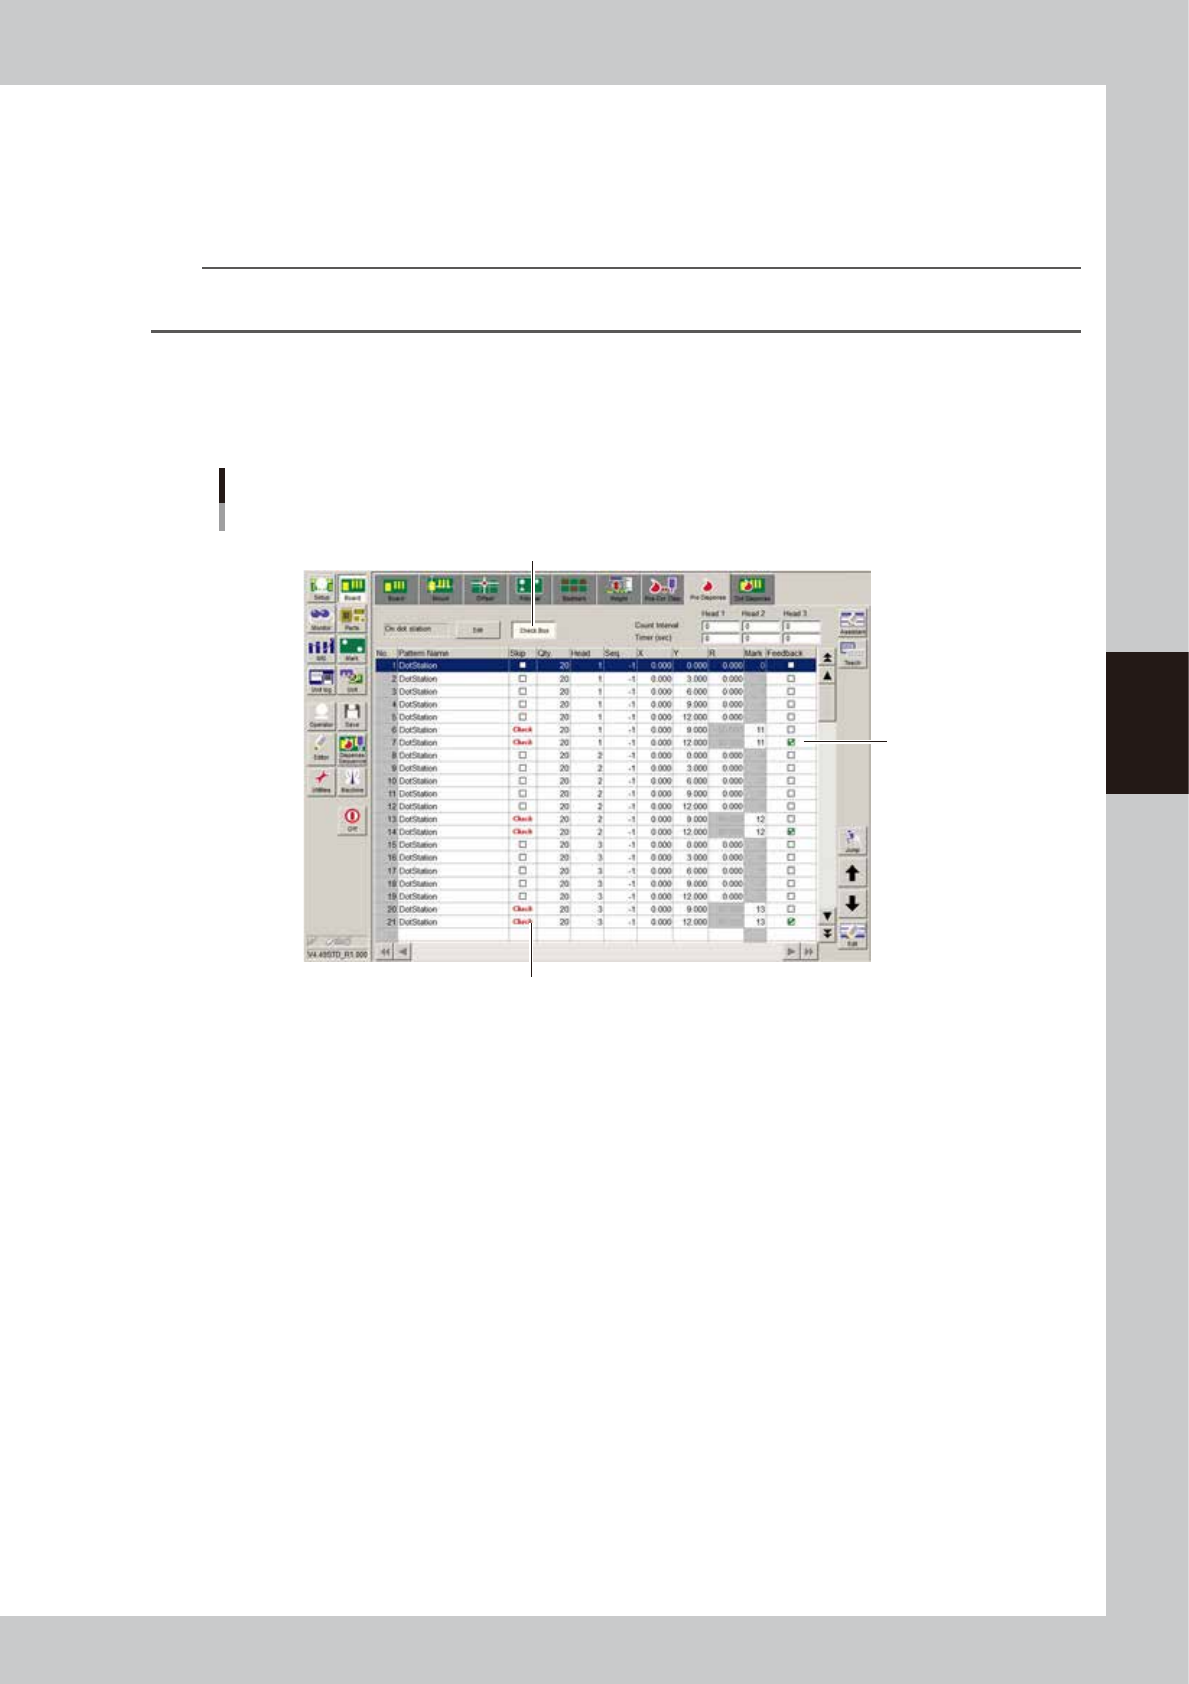
When not using the dispense correction function
Press the [Check Box] button to allow changing the check box setting, and clear the “Feedback” check box. To recognize
a predispensing dot, create the mark data for that dot.
Dispense correction is not used
[Check Box] button
Clear the check box.
Set to “Check” when recognizing the dot
64430-N7-00