YSD_Users_E.pdf - 第210页
5-21 5 Creating the board data 4 Enter the block pitch and the number of blocks. Enter the block pitch and the number of blocks in the X and Y directions, then pr ess the [OK] button. Pitch distribution will start. Offse…
5-20
5
Creating the board data
4.3.1 Pitch distribution function
This function allows you to create block offset data at a specified pitch by entering the block pitch and the
number of blocks.
1
Start the Editor.
1. Press the [Editor] button on the Setup screen.
2. Select “Open Board Data” from the File menu or click the [Open Board Data] button on the toolbar.
The “Board data select” window appears.
3. Select the board data and click the [Select] button.
The selected board will be loaded and the Editor screen will appear.
2
Enter the block offset for block No.1.
Enter the XY coordinates in row No.1, which are used as the reference position for other blocks. You do
not have to enter these coordinates if the reference position is the same as the board origin position.
3
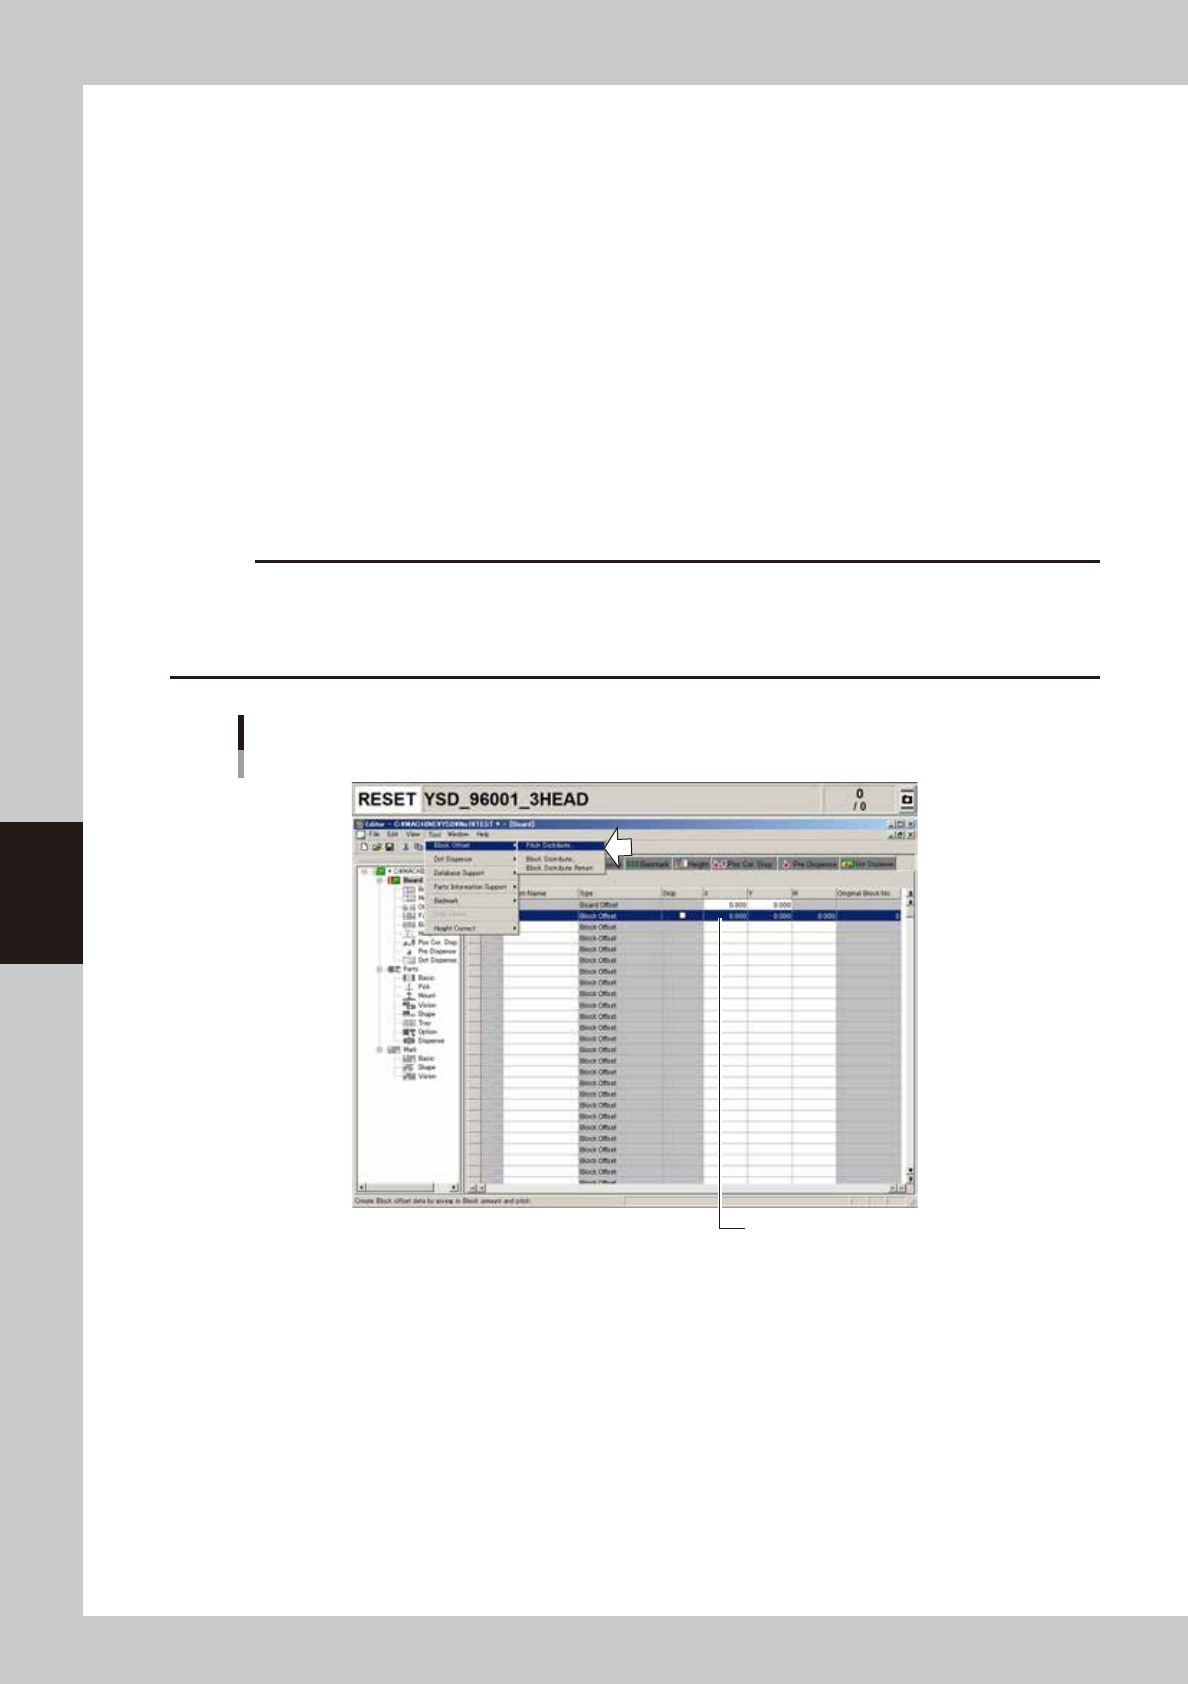
Perform pitch distribution.
Select "Block Offset" – "Pitch Distribute" from the Tool menu.
c
CAUTION
The following conditions must be met to perform pitch distribution.
• No offset data is entered for blocks other than block No.1.
• Offset coordinates after pitch distribution will be set within the range from -999.999 to 999.999.
• The number of blocks after pitch distribution does not exceed 512.
Selecting "Pitch Distribute" command
Offset data for block No.1
64508-N7-00
5-21
5
Creating the board data
4
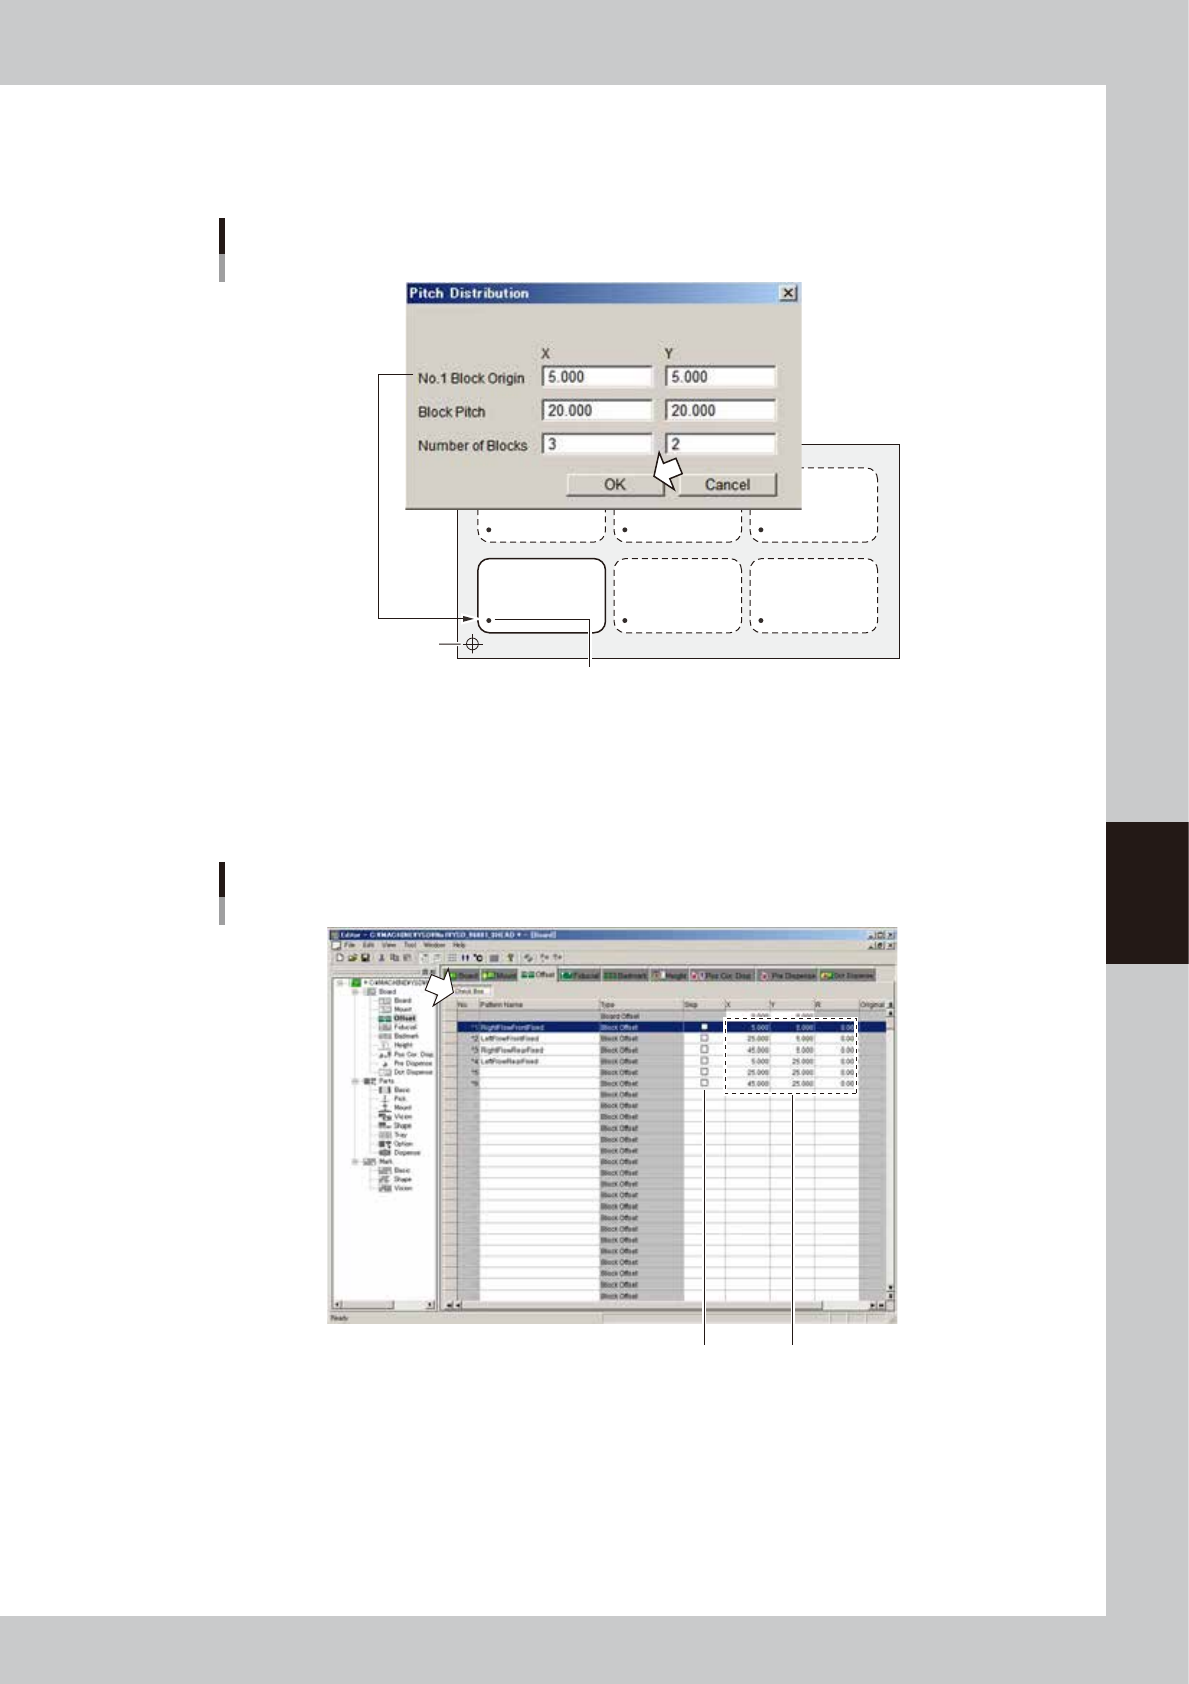
Enter the block pitch and the number of blocks.
Enter the block pitch and the number of blocks in the X and Y directions, then press the [OK] button.
Pitch distribution will start.
Offset data for block No.1
Pitch distribution settings
Board origin
X
Y
64509-N7-00
5
Check the distributed block offset data.
After pitch distribution is complete, the offset data distributed in each block is displayed, so check the
offset data. The "Skip" check boxes are all cleared after pitch distribution. If there are blocks where you
want to skip mounting components, press the [Check Box] button and then mark the "Skip" check box.
Block offset data after pitch distribution
Distributed block offset data
"Skip" check box
64510-N7-00
5-22
5
Creating the board data
4.4 Fiducial parameters
The fiducial function corrects local distortion or warps on a board that may occur from errors in machining the
board outline and locate pin holes, or board clamping mechanism fluctuations, using recognition results of the
fiducial marks provided on the board.
Selecting the [Fiducial] tab opens the screen for setting fiducial mark parameters and their coordinates. Set
these parameters as explained below when using the fiducial function. Two or four fiducial marks are used as a
set, but it is okay if each mark is different in shape. Fiducial mark data must be registered in the mark
information beforehand. (See "5. Creating the mark information" in this chapter.)
4
1
5 6 87 9
2
3
10
Fiducial parameter
64511-N7-00
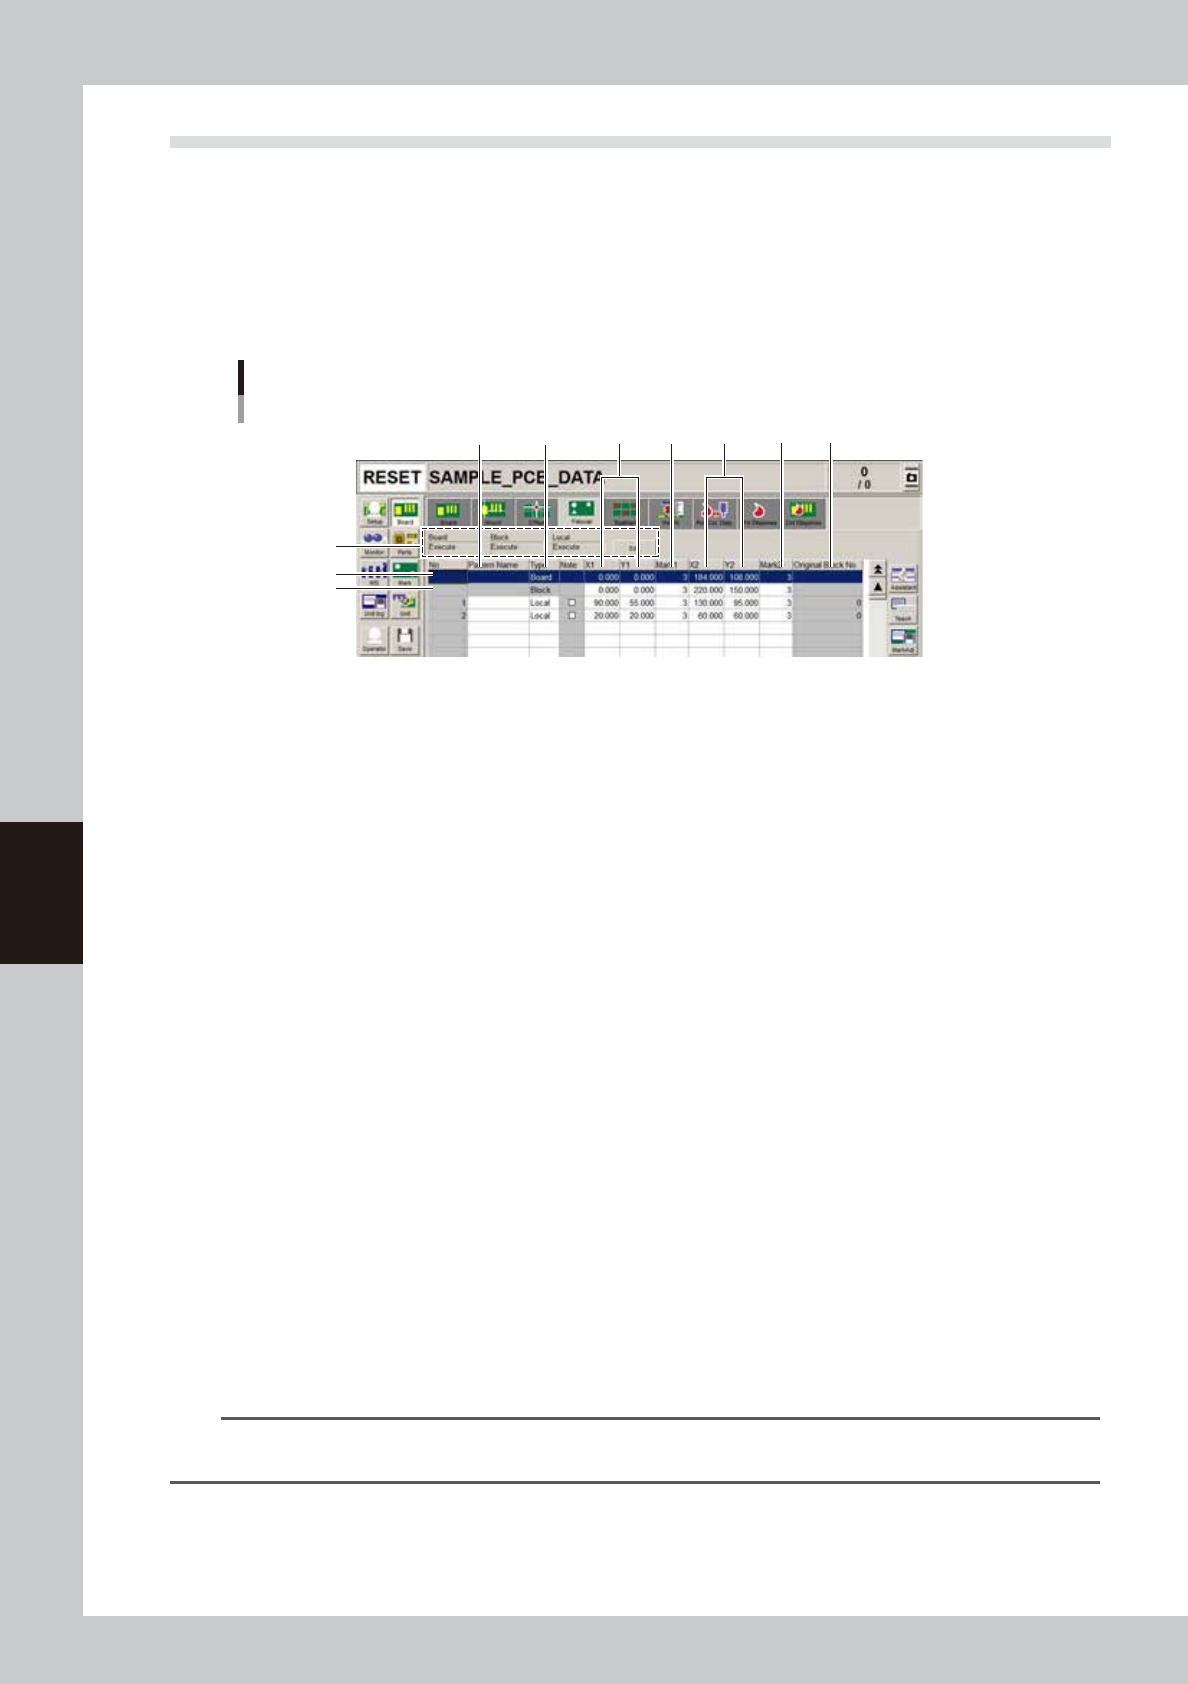
1. Board, Block, Local
Fiducial functions are broadly classified into three types: “Board” fiducial function specified for a board, “Block” fiducial
function specified for each block of a multi-block board, and “Local” fiducial function related to mounting data. The
fiducial function you wan to use should be set to “Execute”. To change the setting, press the [Edit] button on the right end.
2. Board
On the top line of the parameter list, set the board fiducial mark data.
3. Block
On the second line of the parameter grid set the block fiducial mark data.
4. Pattern Name
Enter the fiducial mark name here. (Names cannot be entered on the top and second lines.)
5. Type
On the third or subsequent lines, specify the type of fiducial function you want to use, by selecting from among “”Point”,
“Local”, “4Local-M” and “4Local-S”.
6. X1, Y1
Enter the XY coordinates of Mark 1 relative to the board origin in millimeter. You can perform teaching with the [Teach]
button.
7. Mark 1
Enter the mark No. for Mark 1 (mark No. registered as fiducial mark in the mark information).
8. X2, Y2
Enter the XY coordinates of Mark 2 relative to the board origin in millimeter. You can perform teaching with the [Teach]
button.
9. Mark 2
Enter the mark No. for Mark 2 (mark No. registered as fiducial mark in the mark information). When this mark is identical
with Mark 1, enter “0”.
n
NOTE
Although you can enter the XY coordinates of each mark by teaching, we recommend using the accurate design
data because the fiducial mark settings directly affect the mounting accuracy.
10.
Original Block No.
Shows the block No. that was automatically allocated to each block after block distribution (with note data) was
performed. For details on block distribution (with note data), refer to "2.2.1 Block offset distribution" in Chapter 7.