YSD_Users_E.pdf - 第153页
4-25 4 Making the dispensing stable 5 Check the maximum and minimum liquid amounts. 1. Press the [Auto Input T imer] button and enter the maximum value of the timer . If the maximum value is unknown, set “60” (estimated …
4-24
4
Making the dispensing stable
4
Set the parameters.
For the settings of each nozzle, see “
n
Nozzle settings” in “3.1 Using the dispense correction function” in
this chapter.
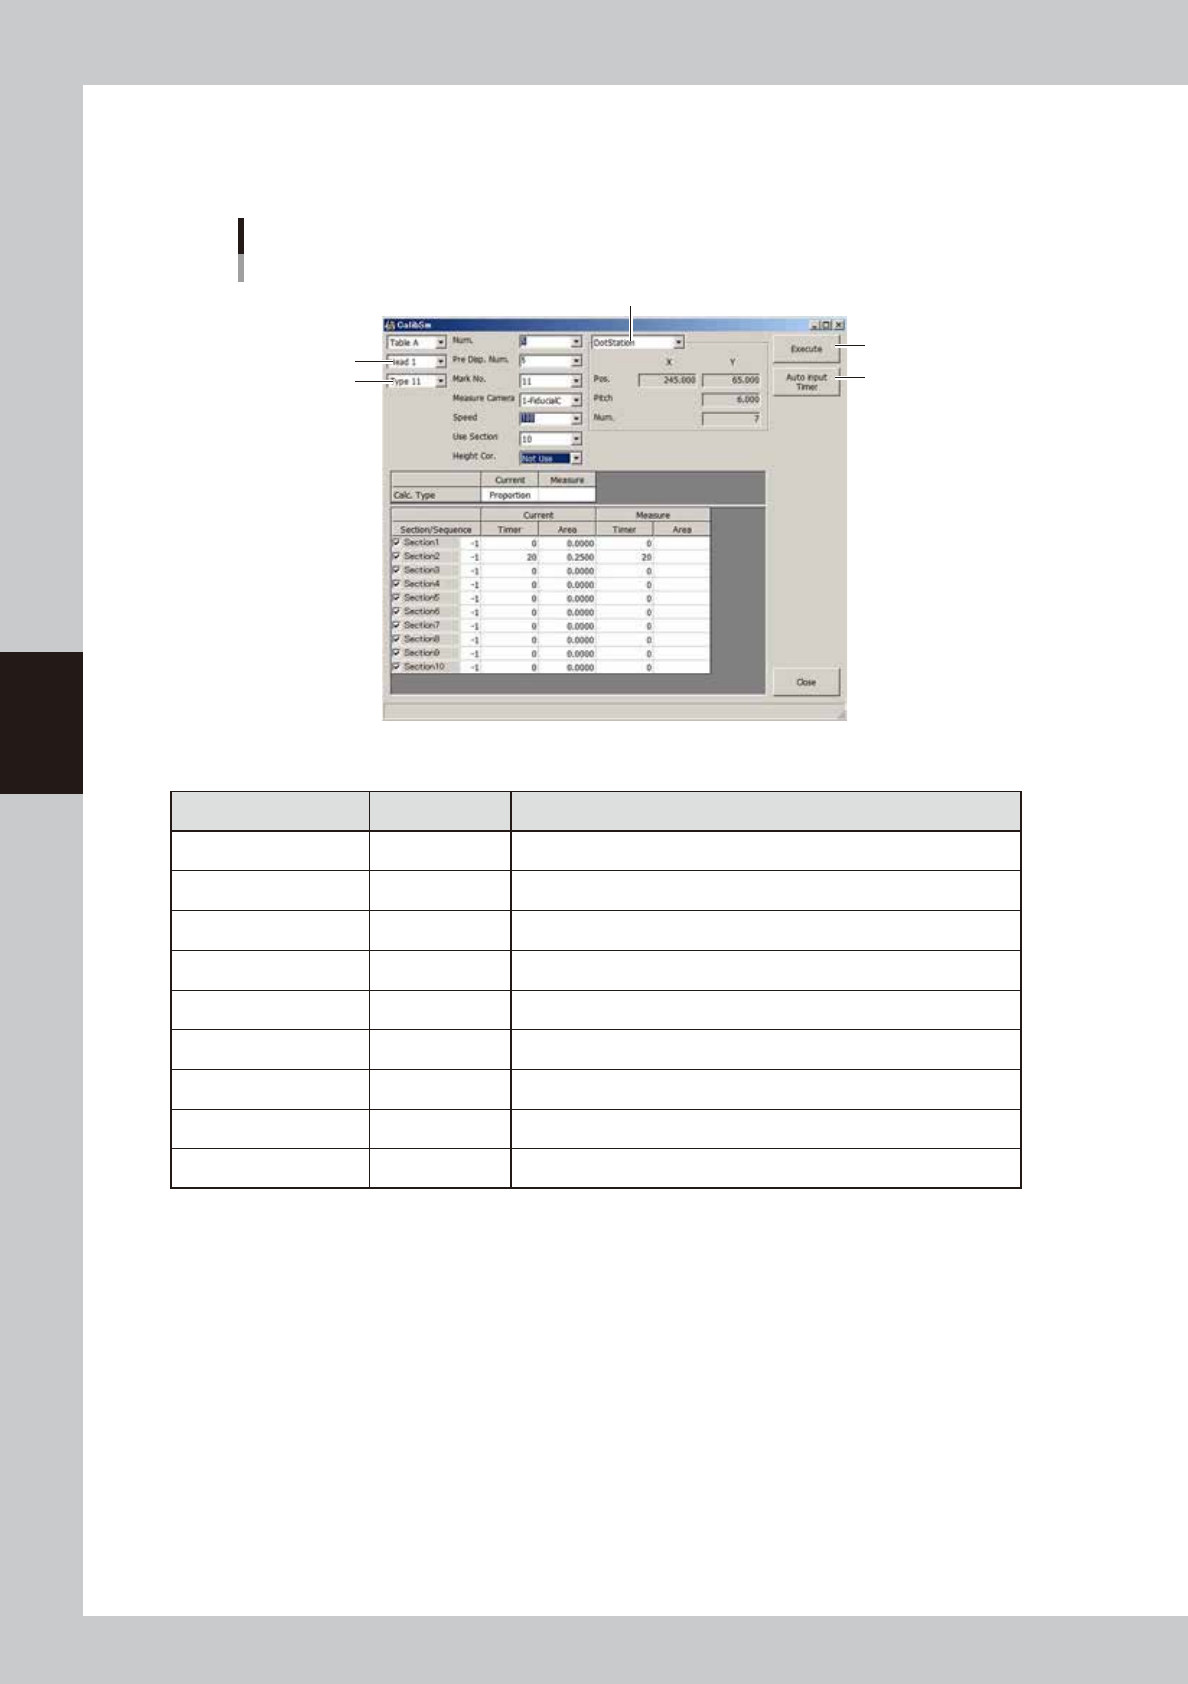
Parameter setting
Example for Type 111 nozzle
Dispensing location
[Auto Input Timer] button
[Execute] button
Type
Head
64441-N7-00
n
Example of settings for Type 111 nozzle
Parameter Setting Description
Head Head 1 Select the head to use for dispensing.
Type Type 11 Select the correction number to make settings.
Num. 5 Set the number of measurement points. (5 or more)
Pre. Disp. Num. 5 Set the number of predispensing points. (3 or more)
Mark No. 11 Set the mark No. used for recognition.
Speed 100 Set the speed to “100”.
Use Section 10 Set the number of sections to be corrected. (10 is recommended)
Height Cor. Not used If a non-contact nozzle is used, set this item to “Use”.
Dispensing location
Dot station.
Set the dispensing location.
4-25
4
Making the dispensing stable
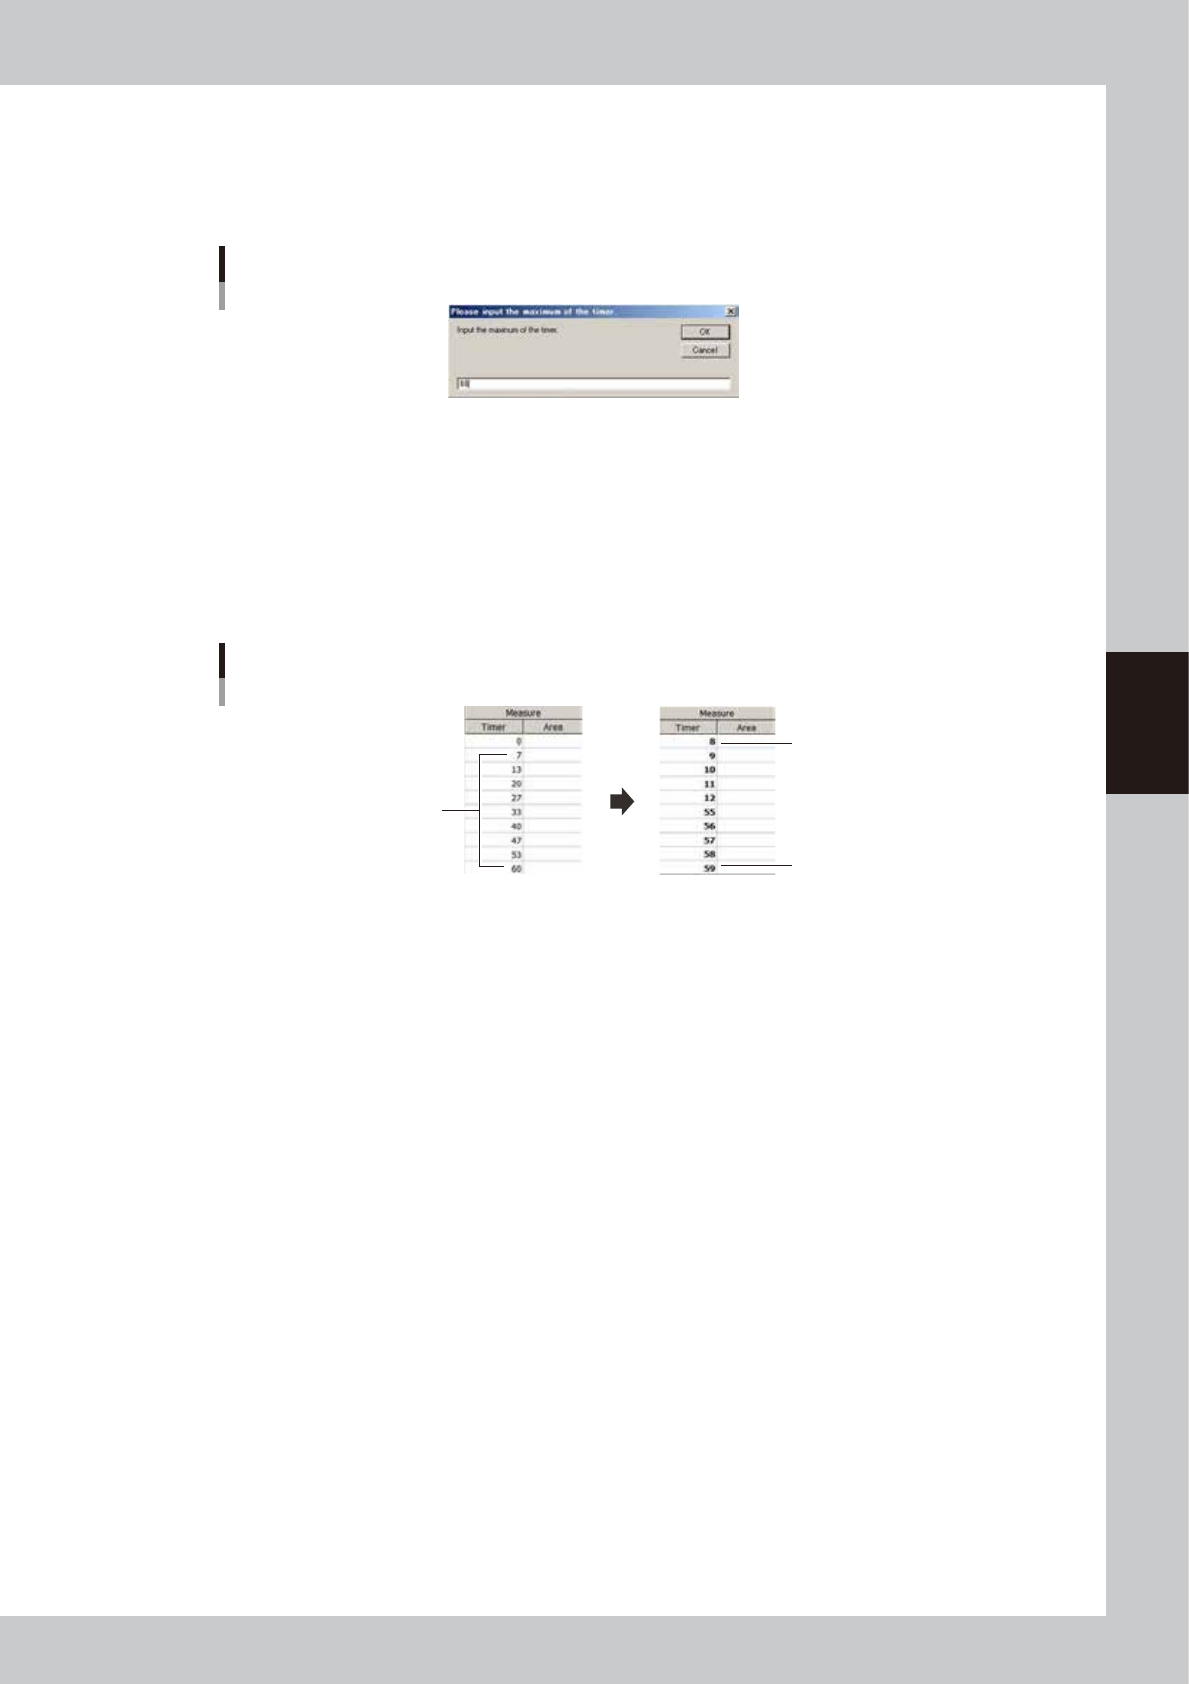
5
Check the maximum and minimum liquid amounts.
1. Press the [Auto Input Timer] button and enter the maximum value of the timer. If the maximum value
is unknown, set “60” (estimated maximum liquid amount), and press the [OK] button. The setting
value will be evenly allocated to each section.
Timer for automatic input
64442-N7-00
2. Press the [Execute] button to measure each section. The paper feed dialog box appears. Check that
no dots remain and press the [OK] button.
3. On the [Monitor]-[Vision] screen, check the recognition results and press the [Yes] button while
saving the measurement data.
4. If there is any timer that could not recognize a dot or caused a dispensing error (for example, dots
are connected), enter the timer values manually and make measurement again. Then check the
minimum and maximum timer values.
Timer value input
Examples
Timers “7” and “60” caused
recognition error or dispensing error.
Enter timer “8” or more.
Enter timer “59” or less.
64443-N7-00
6
Set the timer values.
Enter the minimum and maximum timer values manually so that the liquid amount of each dot becomes
equal. The timer value closest to 20 should be set to “20”.
7
Save the measurement data.
1. The dialog box for paper feed appears. Check that no dots remain and press the [OK] button.
2. When the measurement is complete, the dialog box for saving data appears. Check the
measurement results and press the [Yes] button to save the data.
3. Repeat the measurement several times until the dispensed area of timer “20” becomes stable and
close to the standard area, and then save the data.
8
Press the [Close] button.
When the setting for all section is completed, press the [Close] button.
4-26
4
Making the dispensing stable
9
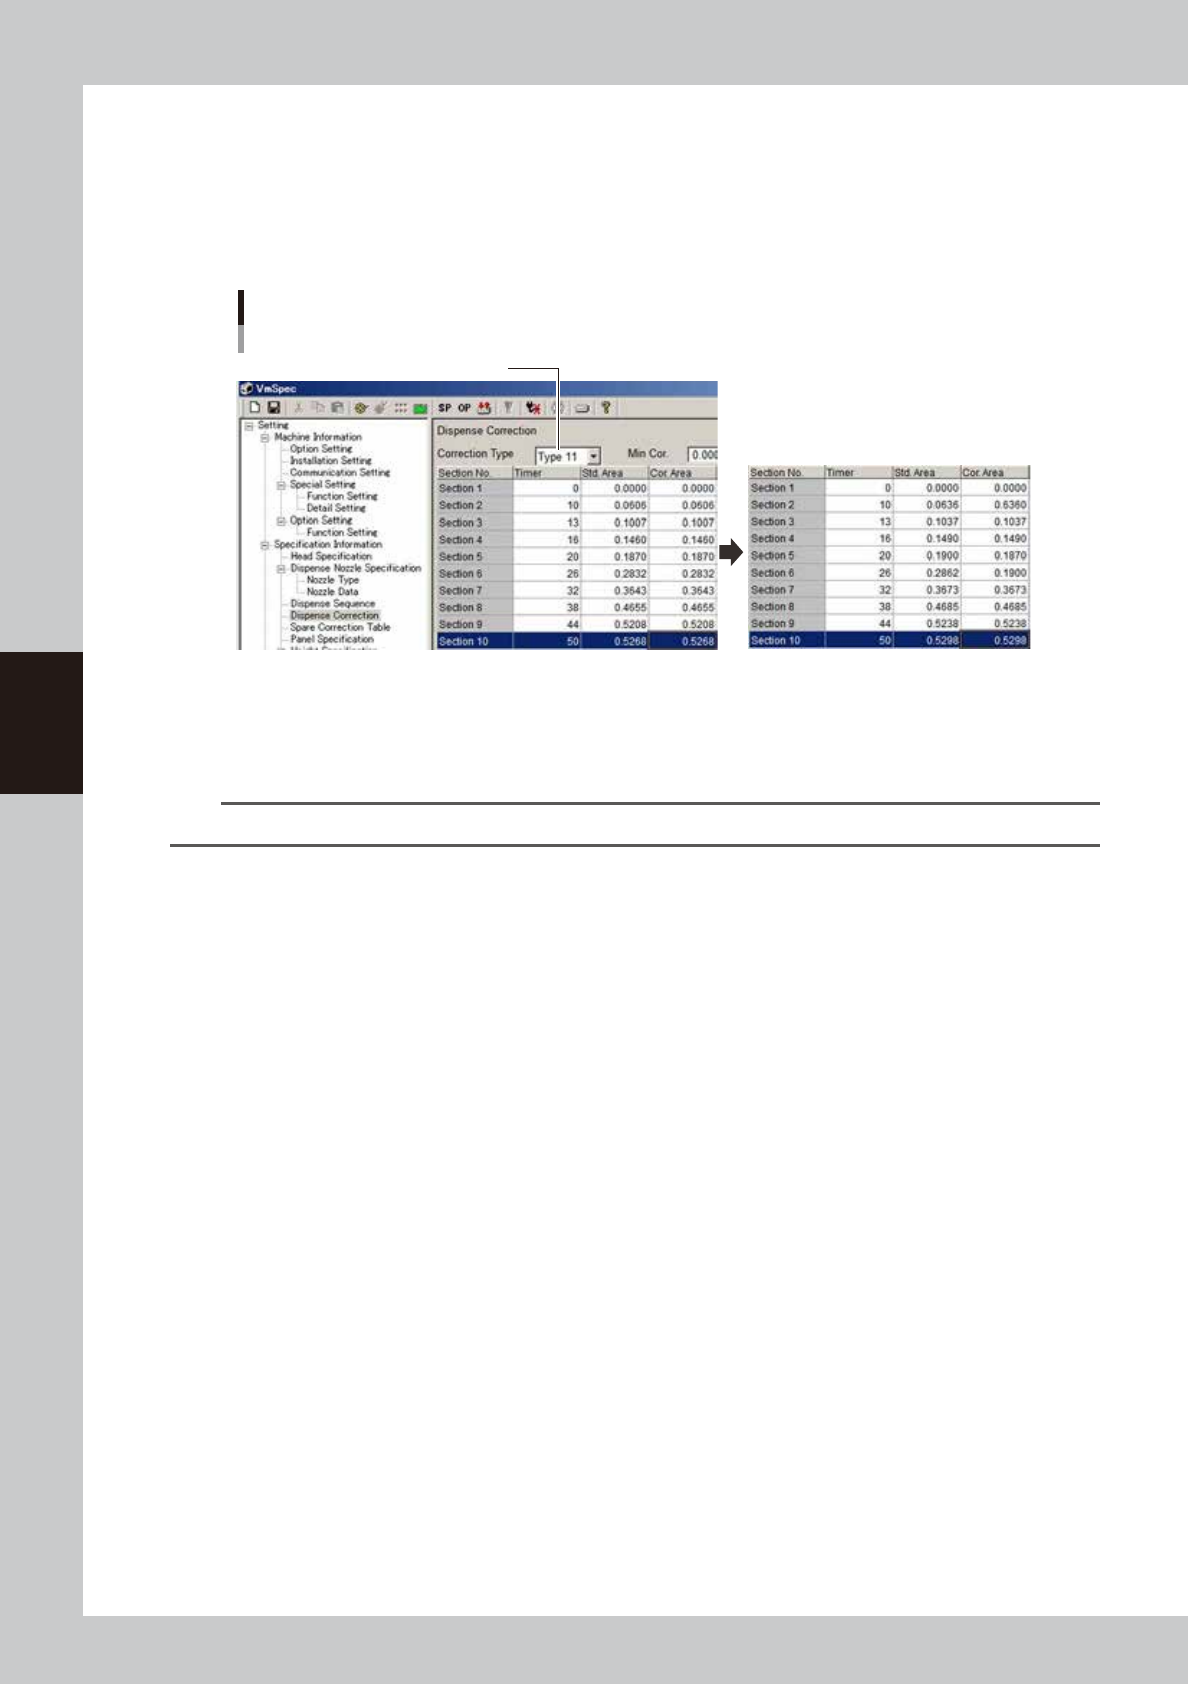
Enter the offset value in each section.
Enter the offset values so that the area at timer “20” matches the standard area. Open the [Machine]
- “Specification Information” - “Dispense Correction” screen, and set the correction type. Enter “0.1900”
for timer “20” and then enter the offset amounts for other sections.
(Example) If the standard area at timer “20” is “0.187”, then add 0.003 to that value to obtain “0.1900”
and also add “0.003” to the other areas.
Offset value setting
Select correction type
64444-N7-00
2
Reload the board data.
Save the machine data setting. Press the [Board] button and then the [Select] button to reload the
board data.
n
NOTE
After changing the machine data setting, the board data must be reloaded to enable the change.