YSD_Users_E.pdf - 第71页
2-11 2 Basic operation Button name Function 16 Nozzle Length This button is enabled only when a laser displacement meter (option) is used. Pressing this button measures the nozzle length with a touch sensor . After a noz…
2-10
2
Basic operation
2.2 Setup screen
This section describes the operation buttons displayed on the Setup screen.
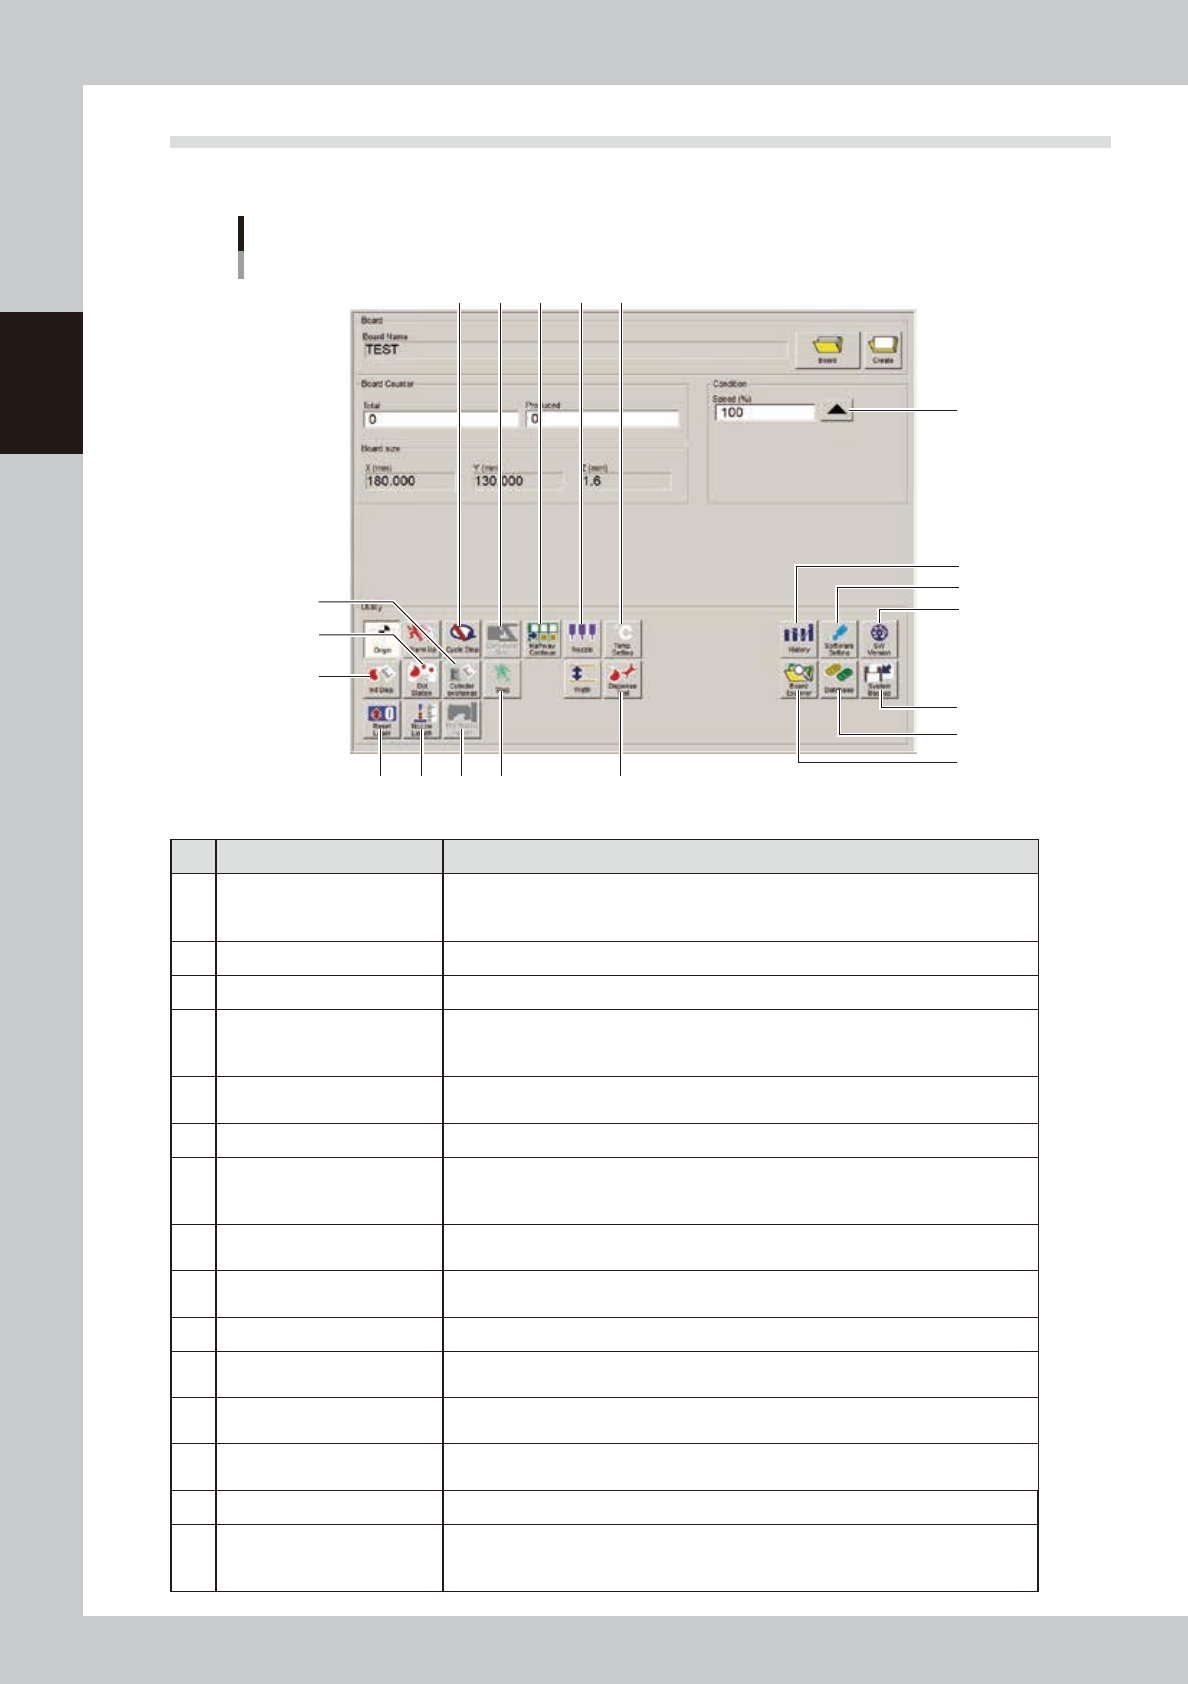
"Setup" screen
1
2
3
4
5
6
7 8
18
9 10 11
12
13
15
14
19
20
16 17
64229-N7-00
Button name Function
1 History
Saves production history data, and saves or clear any desired items of "MIS" and
"Unit log" records. Also use this button when removing a storage medium from the
machine.
2 Software Setting Sets machine screen display items, adds or deletes operators, and sets passwords.
3 Version Shows version information on application software and system.
4 System Backup
Makes a backup of machine coordinates, accuracy information, option device
information and standard coordinates necessary for machine operation or restores
the data using the backup.
5 Database
Makes a backup of parts and mark database necessary for board production or
restores the data using the backup. Also sets the database locations.
6 Board Explorer Moves, backs up, restores or copies board data.
7 Cycle Stop
Stops machine operation just after mounting components on the current board, for
example, to check the mounted results or to prevent the board from flowing to the
downstream machine.
8 Convey-out Stop
Stops machine operation after mounting components on all boards on the conveyor
and transferring them to the downstream machine.
9 Halfway Continue
After stopping the machine for some reason during operation and resetting the data,
pressing this button resumes the operation from the next dispensing position.
10 Nozzle Sets the nozzle type and correction type.
11 Temp. Setting
Specifies whether to use a heater or not and also sets the heater temperature. (Setting
range: From ambient temperature up to 50°C)
12 Cylinder exchange
When replacing a syringe, use this button to move the head to the syringe
replacement position and to perform dispensing.
13 Dot Station
This button is enabled only when a dot station (option) is used. Pressing this button
advances the paper roll of the dot station.
14 Init. Dispense After replacing a syringe, use this button to reset the liquid usage amount to “0” (zero).
15 Reset Laser
This button is enabled only when a laser displacement meter (option) is used.
Pressing this button moves the laser displacement meter to the reference
coordinates and resets the height offset value.

2-11
2
Basic operation
Button name Function
16 Nozzle Length
This button is enabled only when a laser displacement meter (option) is used.
Pressing this button measures the nozzle length with a touch sensor. After a nozzle
is replaced or the machine power is turned off and then turned back on, use this
button first before doing other operations.
17 Dot Station Height
This button is enabled only when a laser displacement meter (option) is used.
Pressing this button measures the dot station height with the laser displacement
meter.
18 Step Temporarily stops the machine at any selected position.
19 Dispense Test
Use this button to check the dispensing state and to adjust the dispensing air
pressure.
20 Speed
Use this button to change the operating speed of the machine. Set the speed to “100”
in normal operation.
2-12
2
Basic operation
2.3 Unit screen
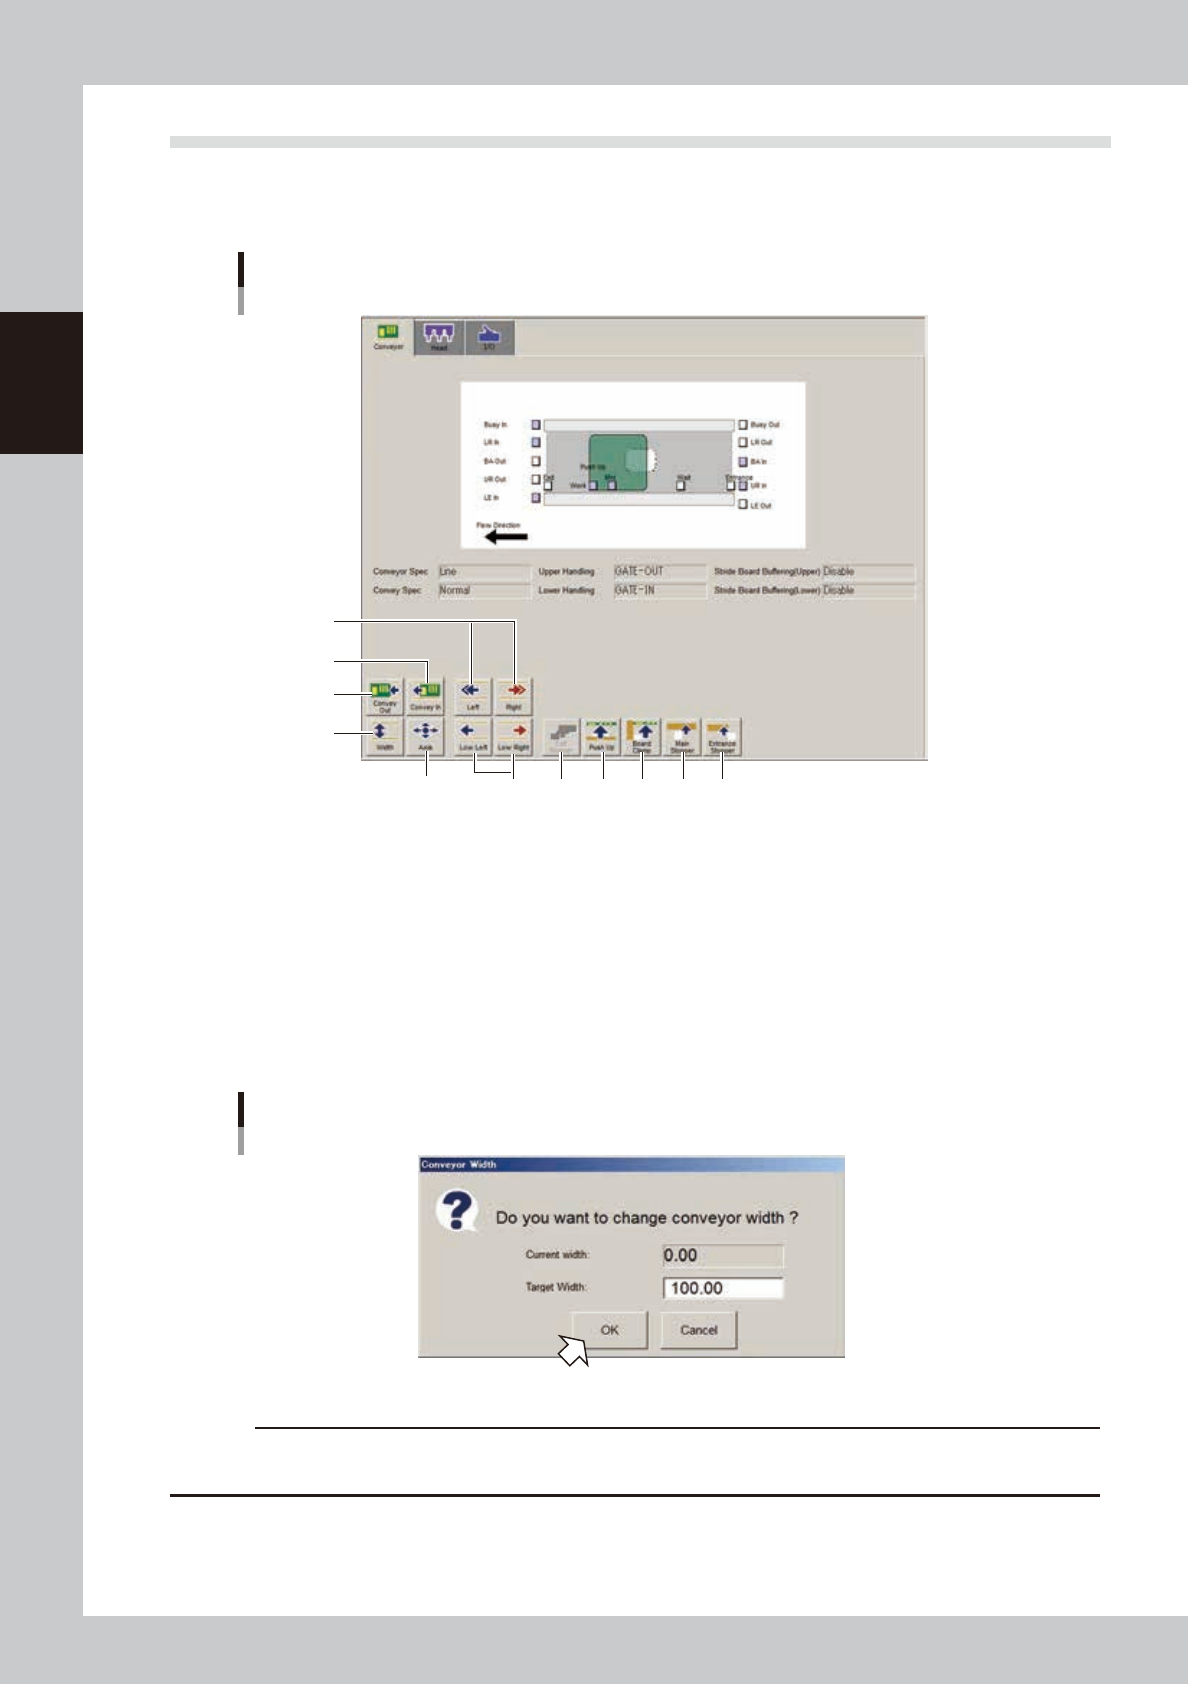
This section describes the manual operation buttons on the Unit screen.
n
Manual conveyor operation
Conveyor manual buttons
3
1
4
2
5
6
7 8 9 10 11
64230-N7-00
1. [Convey Out] button
Releases the board clamp and moves the board to the exit stopper.
2. [Convey In] button
Moves the board from the entrance or standby position and clamps it at the set position.
3. [Width] button
Use this button to adjust the conveyor width to match the width of boards to be produced.
Pressing this button displays the "Conveyor Width" dialog box. Check the conveyor width and press the [OK] button. The
conveyor rail automatically changes to the specified width.
"Conveyor Width" dialog box
62231-N7-00
c
CAUTION
When adjusting the conveyor width, be careful so that the conveyor rails do not touch the push-up pins and other
conveyor units.
4. [Axis] button
Use this button when moving each axis manually.
Pressing this button displays the "Move Axis" screen that allows you to manually move each axis at a specified step stroke
with the arrow buttons or to a specified position with the [PTP] buttons.