YSD_Users_E.pdf - 第294页
Chapter 7 Editing the board data Contents 1. Using the Editor 7-1 1.1 Starting the Editor 7-1 1.2 Editor window 7-2 1.3 Jump 7-5 1.3.1 Specifying the row to jump 7-5 1.3.2 Jump to the first row 7-6 1.3.3 Jump to the last…
6-24
6
Using the advanced functions
6
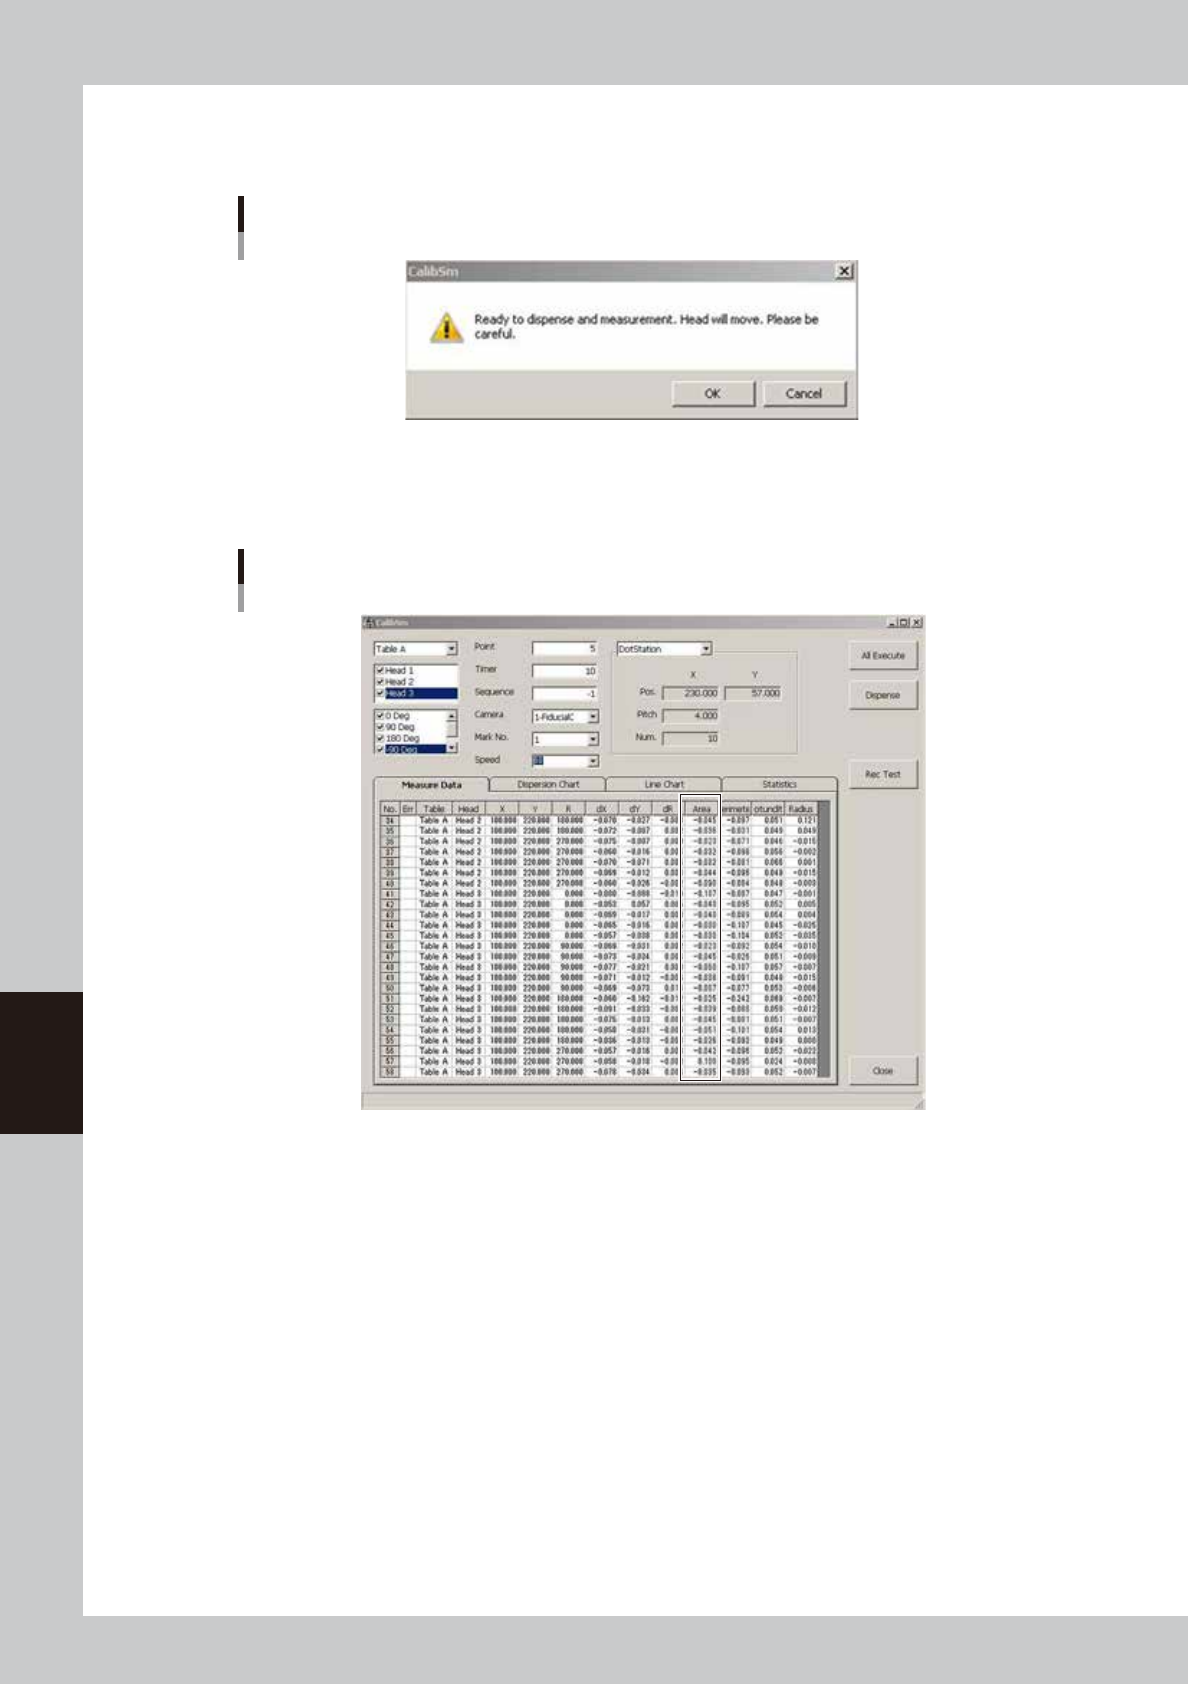
Press the [Dispense] button.
When the following dialog appears, check the safety and press the [OK] button. Dispense test will start.
Dispense test start confirmation
64628-N7-00
7
Check the results.
Check the values shown in the “Area” column. Use these values as the standard area.
Measurement results
64629-N7-00
dx, dy : Shows the positional deviation of each dispensed dot.
This value will be larger if the dispense test is performed on the dot station.
dR : Shows how much each dispensed dot is angled.
This value will be larger if the dispense test is performed on the dot station.
Area : Shows the area of each dispensed dot.
Perimeter : Shows the perimeter of each dispensed dot.
Rotundity : Shows the roundness of each dispensed dot.
Radius : Shows the radius of each dispensed dot.
8
Make adjustment as needed.
If the dispensed dots are outside the standard area, make adjustment using the dispense pressure
adjustment knob while visually checking the dispensed dots.
Repeat steps 6 and 7 until the dispensed dots fall within the standard range.

Chapter 7 Editing the board data
Contents
1. Using the Editor 7-1
1.1 Starting the Editor 7-1
1.2 Editor window 7-2
1.3 Jump 7-5
1.3.1 Specifying the row to jump 7-5
1.3.2 Jump to the first row 7-6
1.3.3 Jump to the last row 7-6
1.3.4 Moving one row up or down 7-6
1.4 Copying and pasting the data 7-7
1.5 Find and replace 7-9
1.5.1 Find 7-9
1.5.2 Replace 7-10
1.6 Renumbering the parts number 7-12
1.7 Sort 7-13
2. Block offset 7-14
2.1 Creating the block offset data 7-14
2.2 Block offset distribution and return 7-17
2.2.1 Block offset distribution 7-17
2.2.2 Returning to the block offset data 7-19
3. Board file format conversion 7-20
3.1 Converting VIOS data into YGX data 7-20
3.2 Converting YGX data into VIOS data 7-22
4. Adding or deleting the dispensing points 7-24
4.1 Adding the dispensing points 7-24
4.2 Deleting the dispensing points 7-25
7-1
7
Editing the board data
1. Using the Editor
The Editor allows you to edit board data or create new board data. This section explains how to use the
Editor available with the YGD operation software.
1.1 Starting the Editor
1
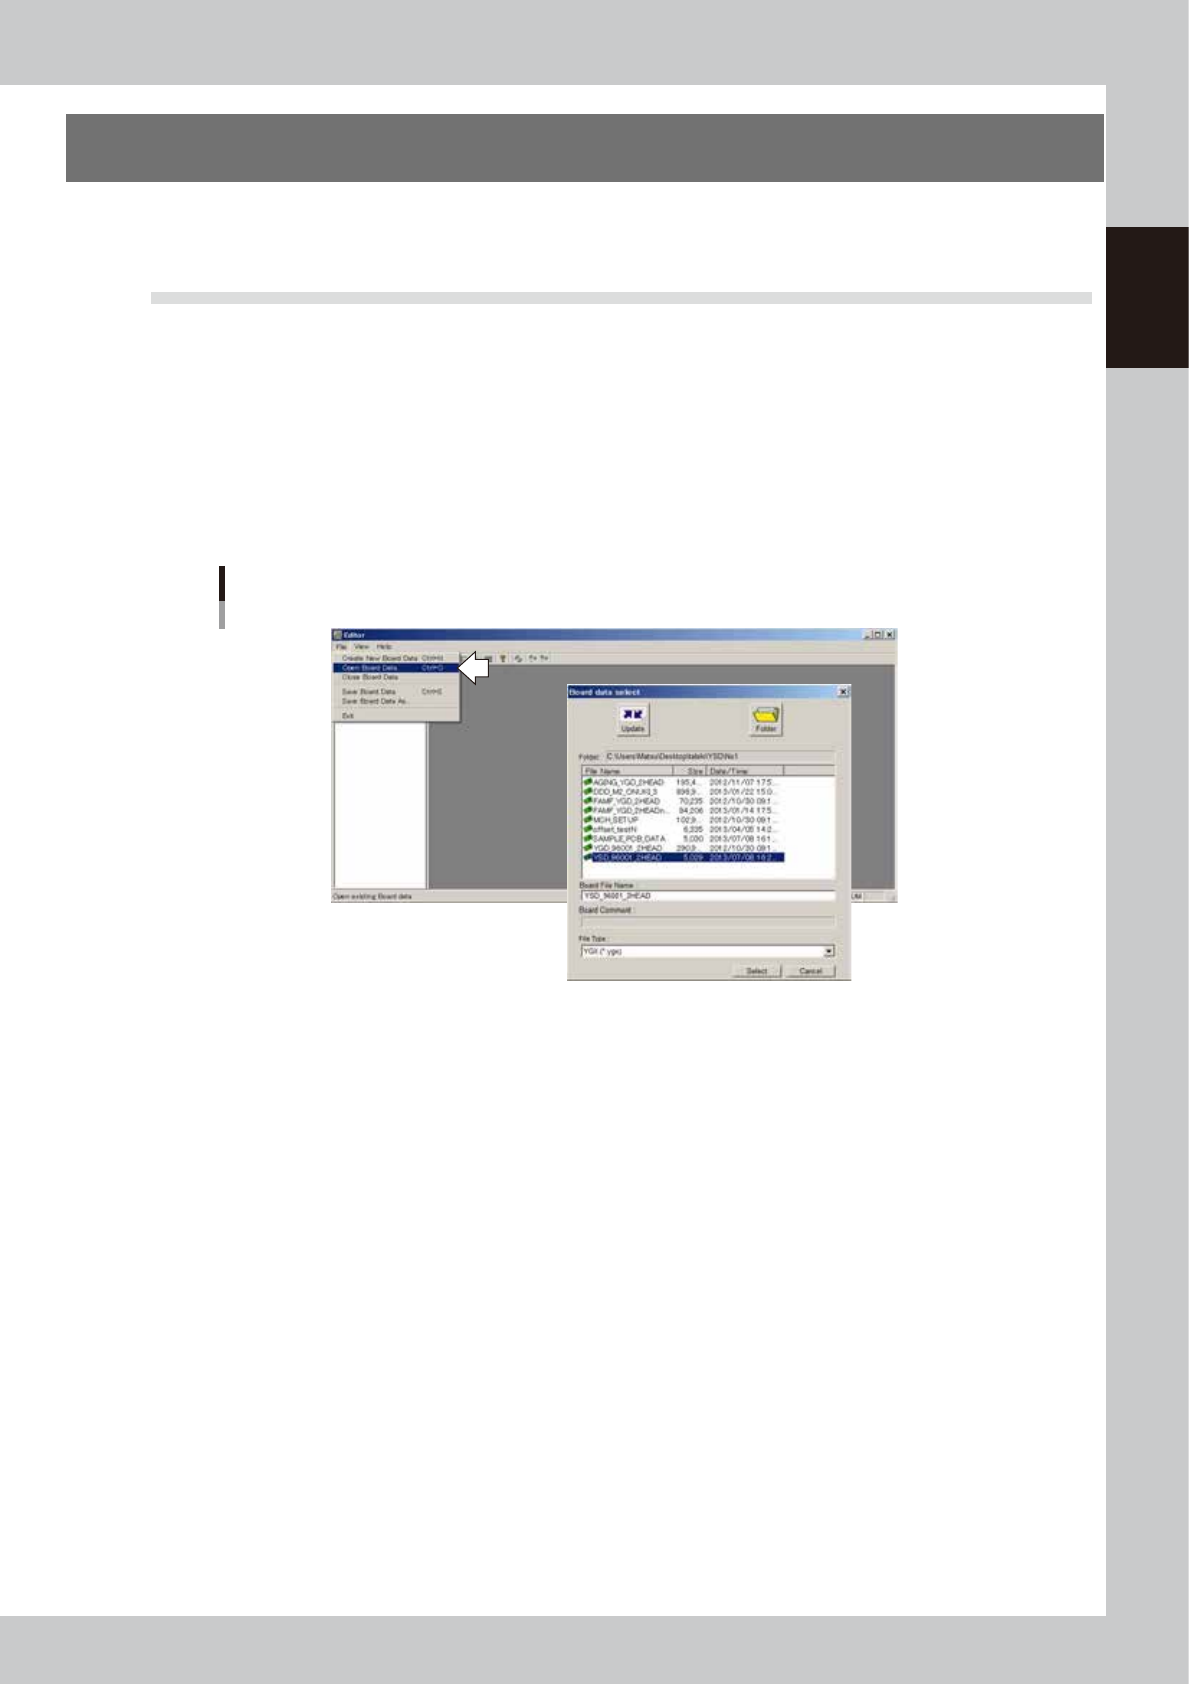
Press the [Editor] button to start the Editor.
The Editor window appears.
2
Select the board data you want to edit.
1. Select "Open Board Data" from the File menu or click the "Open Board Data" button on the toolbar.
The "Board select data" dialog box then appears.
2. Select the board data and click the [Select] button.
The selected board data is loaded and displayed in the Editor window.
Selecting the board data
64700-N7-00