YSD_Users_E.pdf - 第122页
3-9 3 Q & A Possible cause and corrective action The nozzle stopper hits so hard on the board that dent marks are left on the board surface. Cause The lower end position of the head is too low . Action Recheck the he…

3-8
3
Q & A
n
Other dispensing errors
Possible cause and corrective action
Dispensing liquid quantity suddenly increased.
Cause Heater temperature setting is too high.
Action
Set the optimum temperature using the [Temp setting] button on the Setup screen and manually dispense the
liquid from the nozzle, then wait until the temperature drops.
Cause Dispensing air pressure is higher than the optimum level.
Action Return the air pressure to the optimum value.
Cause Liquid quantity setting is too high.
Action Return the liquid quantity setting to the optimum value.
Cause A dispenser nozzle with a large hole was installed.
Action Attach the optimum nozzle.
Cause Liquid temperature in the syringe is below room temperature.
Action Wait until the liquid temperature in the syringe returns to room temperature.
Cause Dispense correction is not used, although predispense check is performed.
Action
Open the "Nozzle Information" dialog box with the [Nozzle] button on the Setup screen and check whether a
proper dispense correction is set for each head. If not, then set the dispense correction or if set to "None",
dispensing liquid quantity may increase suddenly even if predispense check is performed.
Dispensing liquid quantity suddenly decreased or no liquid is discharged.
Cause The liquid in the syringe is used up.
Action
Replace the syringe with a new one filled with liquid and check the low liquid alarm value and sensor setting
("Max Amount" on the Dot Station grid in the VmSpec window that appears with the [Machine] button).
Cause Heater temperature setting is too low.
Action
Set the temperature to the optimum level and wait until the temperature reading on the [Unit]-[Head] tab
reaches the target temperature.
Cause
The syringe was left uncapped, so adhesive at the syringe tip or around the piston in the syringe has dried and
solidified.
Action Replace the syringe.
Cause The board thickness is locally thin, or its copper pattern has become thicker than before.
Action Check the board and change the liquid quantity setting.
Cause The nozzle is clogged with foreign matter which has penetrated inside during installation of the nozzle.
Action Clean the nozzle and blow with air.
Cause
The machine has been left idle for a few days with the syringe and nozzle still installed to the head, so
adhesive at the tip of the nozzle hardened. (Adhesive will solidify if left still installed as well as UV curing
types.)
Action
Remove solid mass in the nozzle and then clean the nozzle. If difficult, replace the nozzle. Then replace the
syringe with another syringe containing adhesive stored in good condition.
Cause The nozzle is not installed securely.
Action
Remove the nozzle and syringe, and clean the nozzle and the nozzle joint completely. Then reinstall the nozzle
and syringe into position securely.
Cause Dispense correction is not used, although predispense check is performed.
Action
Open the "Nozzle Information" dialog box with the [Nozzle] button on the Setup screen and check whether
a proper dispense correction is set for each head. If not properly set or if set to "None", dispensing liquid
quantity may increase suddenly even if predispense check is performed.
Liquid sometimes is not dispensed.
Cause Extremely small air bubbles have entered the syringe.
Action Replace the syringe. Remove the air bubbles sufficiently.
Cause Solidified particles are present in the nozzle or syringe.
Action Replace the nozzle and syringe.
3-9
3
Q & A
Possible cause and corrective action
The nozzle stopper hits so hard on the board that dent marks are left on the board surface.
Cause The lower end position of the head is too low.
Action Recheck the height of the board surface or the target height for the specified dispensing sequence.
Cause The nozzle is not installed correctly.
Action Reinstall the nozzle correctly.
Adhesive forms strands.
Cause Incorrect dispense data (larger than the nozzle's dispensing capacity) was entered.
Action Check the data or exchange the nozzle with a nozzle having greater dispensing capacity.
Cause The heater temperature setting is too low.
Action Set the optimum temperature.
Cause The head ascent speed is too fast.
Action
Open the VmSpec window with the [Machine] button, select "Dispense Sequence" to display the Dispense
Sequence grid, and reduce the "UP Speed" settings.
Cause An object is adhering to the nozzle tip.
Action Remove it by using a soft brush.
Adhesive is splashing around the dispensing point
Cause The head ascent speed is too fast.
Action
Open the VmSpec window with the [Machine] button, select "Dispense Sequence" to display the Dispense
Sequence grid, and reduce the "UP Speed" settings.
Cause Object is adhering to the nozzle tip.
Action Remove by using a soft brush.
The dispensing point shifts.
Cause Incorrect dispense data was entered.
Action Correct the dispense data.
Cause The nozzle is not installed securely.
Action Reinstall the nozzle securely.
The dispensing angle of a two-shot nozzle varies.
Cause The board is warped excessively.
Action Readjust the push-up pin positions.
Cause The nozzle is not installed correctly.
Action Reinstall the nozzle correctly.
Cycle time becomes longer as the remaining amount of syringe barrel becomes low.
Cause
As the liquid amount of a syringe barrel becomes low, the dispensing amount also bellows low and so the
offset timer increases.
Action
Make setting for the dispensing correction limit check. (For more details, see “5.3 Dispensing correction limit
check” in Chapter 4.)
Dispensing state excessively varies between each machine or between each head.
Cause Valves have deteriorated.
Action
Replace the deteriorated valve or clean the air path to find and eliminate the cause.
As a temporary measures, make overall adjustment by changing the “Nozzle Data” - “Coefficient” value in the
VmSpec window.
Default value: 1
→
Dispensing amount after changing the coefficient value: 0.9 (small) < 1 < 1.1 (large)
XYR fluctuates between each nozzle.
Cause Each nozzle has individual difference.
Action
Use the position correction dispensing function. (For more details, see “4. Position correction dispensing” in
Chapter 4.)
3-10
3
Q & A
3. Reducing paper consumption
This section describes the function for reducing consumption of paper in the dot station.
3.1 Predispensing interval setting
This function specifies the intervals in the predispensing operation by number of boards or by time. Specifying
the predispensing interval reduces the dispensing count (number of dispensing operations) onto the paper in
the dot station and allows reducing the paper consumption quantity. (This is settable for each head.)
n
Setting range
• Board count interval : 0 to 999 boards
• Time interval (sec) : 0 to 30000 seconds
Either the time interval or board interval can set to run predisposing.
n
Example of operation by board interval
The table below shows an example where the setting for Head 1 is “2” and the setting for Head 2 is “4” as the number of
boards.
Head No. / Number of boards First board Second board Third board Fourth board Fifth board
Head 1 Run - Run - Run
Head 2 Run - - - Run
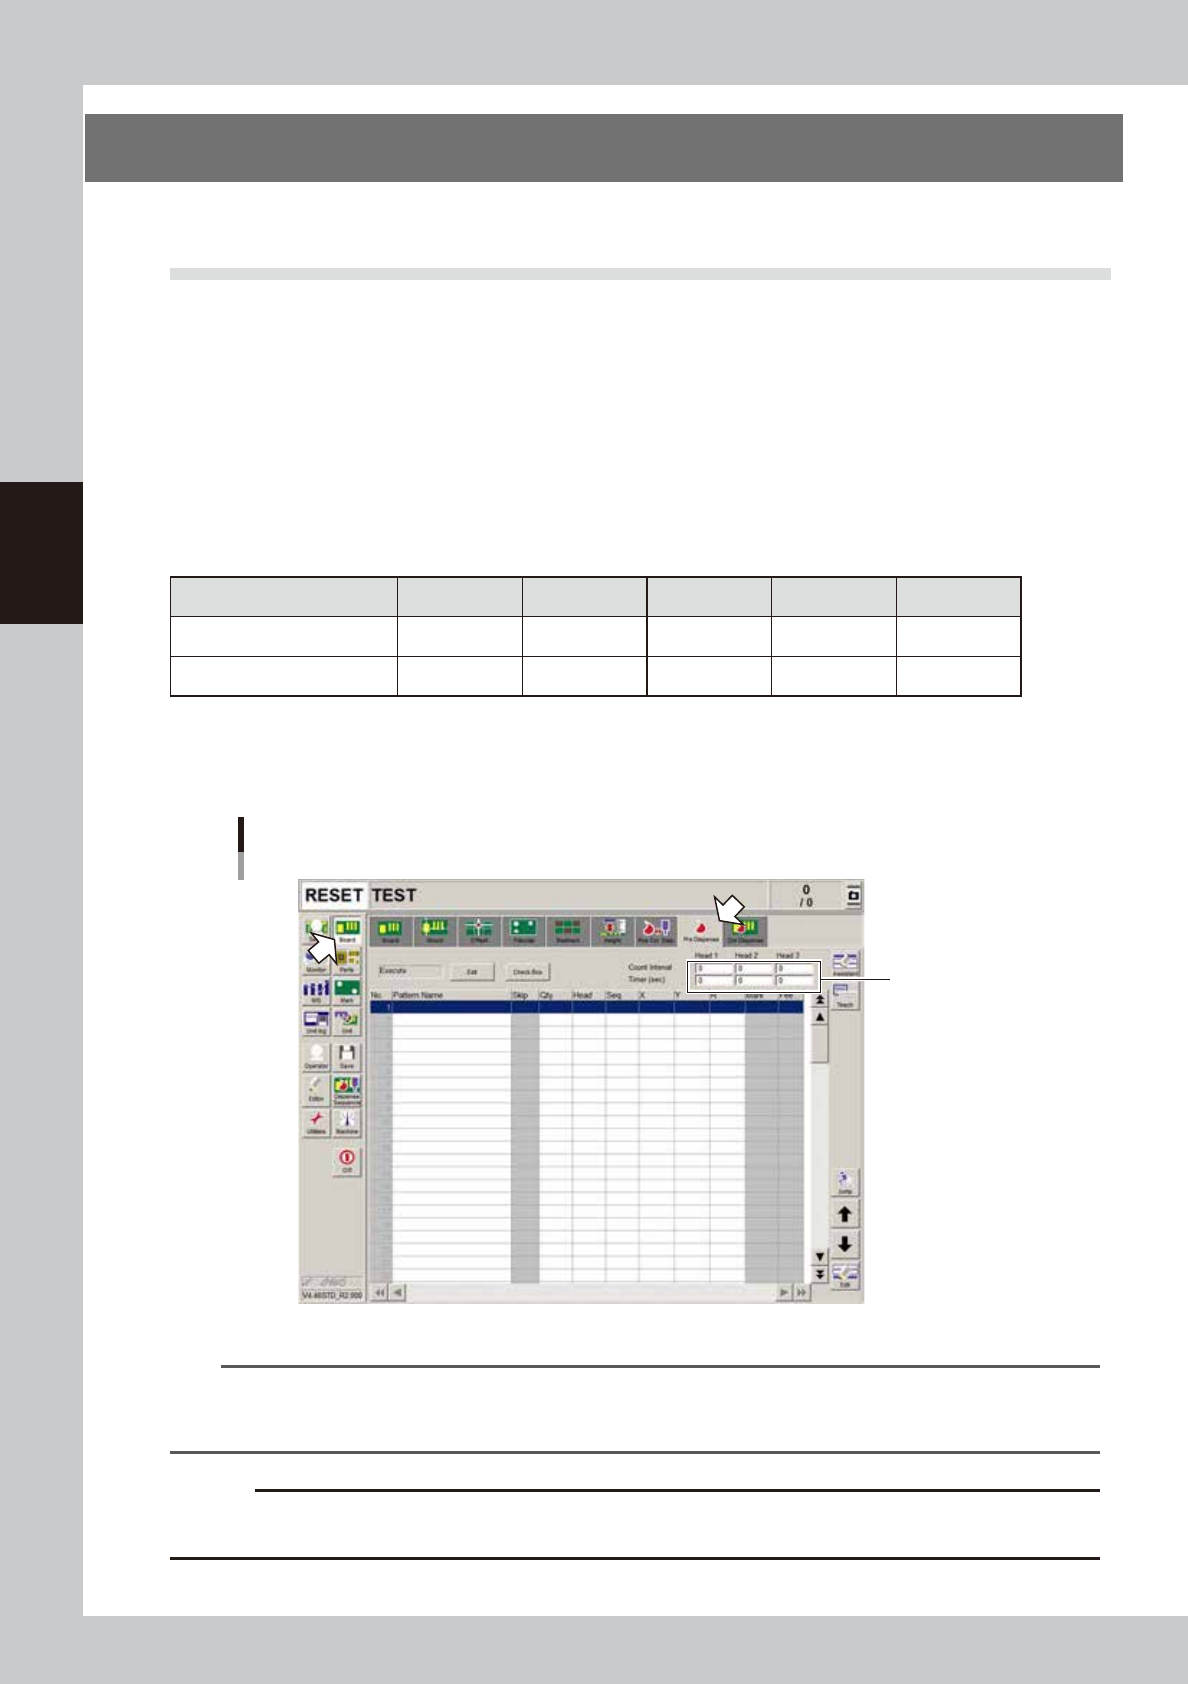
Set the interval.
1. Open the [Board] – [Pre-dispense] screen
2. Enter the board count interval and time interval (sec.).
Predispensing interval setting
Enter the interval settings.
64300-N7-00
n
NOTE
In continuous production, first set an interval of every 2 boards as shown below.
• Board count interval : 2 boards
• Time interval : Cycle time + about 10 seconds
c
CAUTION
If the interval is set too large, then the initial number of dots from will be extremely little. Increase the interval gradually
so that no problem occurs with the dispensing operation.